
Valentino Rossi's Yamaha YZR M1 in 1:4 von DeAgostini
Der lustige Modellbauer :: Fahrzeuge :: Etappenbausätze / Partworks / Sammelserien :: Fertige Bauberichte
Seite 1 von 5 • 1, 2, 3, 4, 5 

 Valentino Rossi's Yamaha YZR M1 in 1:4 von DeAgostini
![]() von Maddin Fr 15 Okt 2021, 12:37
von Maddin Fr 15 Okt 2021, 12:37
Fängt an wie ein Krimi. Hoffentlich gibt es ein Happy End ...
Ich habe im März diesen Jahres wohl als Einer der Letzten bei DeAgostini das Abo der Monster-Yamaha von Valentino Rossi
mit den ersten beiden Lieferungen für 17,99 Euro abgeschlossen. Nachdem ich nie eine Bestätigungsmail erhalten hatte,
war mir das schon aus dem Kopp gelöscht gewesen.
Nun habe ich doch tatsächlich, nachdem das Abo mittlerweile ausverkauft ist, einen Karton mit den ersten Lieferungen erhalten.
Auf telefonische Anfrage wurde mir zugesichert, dass ich wirklich Einer der Letzten bin,
die das komplette Abo noch geliefert bekommen und das sogar mit dem Ständer, den man lustigerweise noch extra kaufen konnte.
Da bin ich aber mal riesig gespannt auf die nächste Lieferung ...
Ich sammel erst mal ein paar und wenn das funktioniert werde ich hier den Bau dokumentieren.
Wünscht mir Glück.
Zuletzt von Jörg am Mi 16 März 2022, 19:42 bearbeitet; insgesamt 2-mal bearbeitet (Grund : Titel des Bauberichtes geändert auf Wunsch von Maddin. Frank/Admin)

Maddin- Schneidmatten-Virtuose

laiva-ukko mag diesen Beitrag

Re: Valentino Rossi's Yamaha YZR M1 in 1:4 von DeAgostini
![]() von Maddin So 17 Okt 2021, 12:00
von Maddin So 17 Okt 2021, 12:00
Hier mal Bilder der ersten Lieferung. Wird ein Mordsding...
 " />
" /> " />
" /> " />
" /> " />
" /> " />
" /> " />
" />Das war (nach Aboabschluß im April) die erste Lieferung im September für 17,90 Euro. Macht erst einmal einen guten Eindruck. Mal schauen, wann die Nächste kommt.
Maddin- Schneidmatten-Virtuose
John-H. und Six-Seven mögen diesen Beitrag
Re: Valentino Rossi's Yamaha YZR M1 in 1:4 von DeAgostini
![]() von Maddin Fr 03 Dez 2021, 11:49
von Maddin Fr 03 Dez 2021, 11:49
Ist auf alle Fälle bis jetzt kein langweiliges Projekt:
Nachdem ich als zweite Lieferung die Lieferung 3 mit Pack 5 und 6 bekommen war, bekam ich die Entschuldigungsmail, dass sich die Lieferungen 3 und 4 wegen Produktionsverzögerungen nach hinten verschieben. Da ich aber Lieferung drei schon hatte hab ich da angerufen und das geklärt. Kurze Zeit später wurde der nächste Monatsbetrag von 80,91 Euro abgezogen und ich bekam die Versandbestätigung für Lieferung zwei. Die ging aber ca. anderthalb Wochen bei der DHL Sendungverfolgung nicht aus dem "elektronisch angekündigt"-Status hinaus. Wieder angerufen und nachgefragt. Daraufhin ging es plötzlich bei DHL weiter mit dieser Lieferung. Am Montag konnte ich dann überglücklich die Lieferung 2 in Händen halten. Am gleichen Tag bekam ich plötzlich eine Mail, dass die Ersatzlieferung 2 in den Versand ginge. Also wieder schnell versucht, anzurufen -nicht durchgekommen- und ne Mail geschrieben, um den Versand noch zu stoppen. Dafür wurde mir jetzt schon wieder der Monatsbetrag von 80,91 Euro abgezogen. Ich hatte ja kurz gehofft, aber es war natürlich ein Fehler und nicht doch schon die Lieferung 4. Kriege das Geld nun wieder und muss die zweite Lieferung 2 abwehren. Es bleibt also echt spannend...
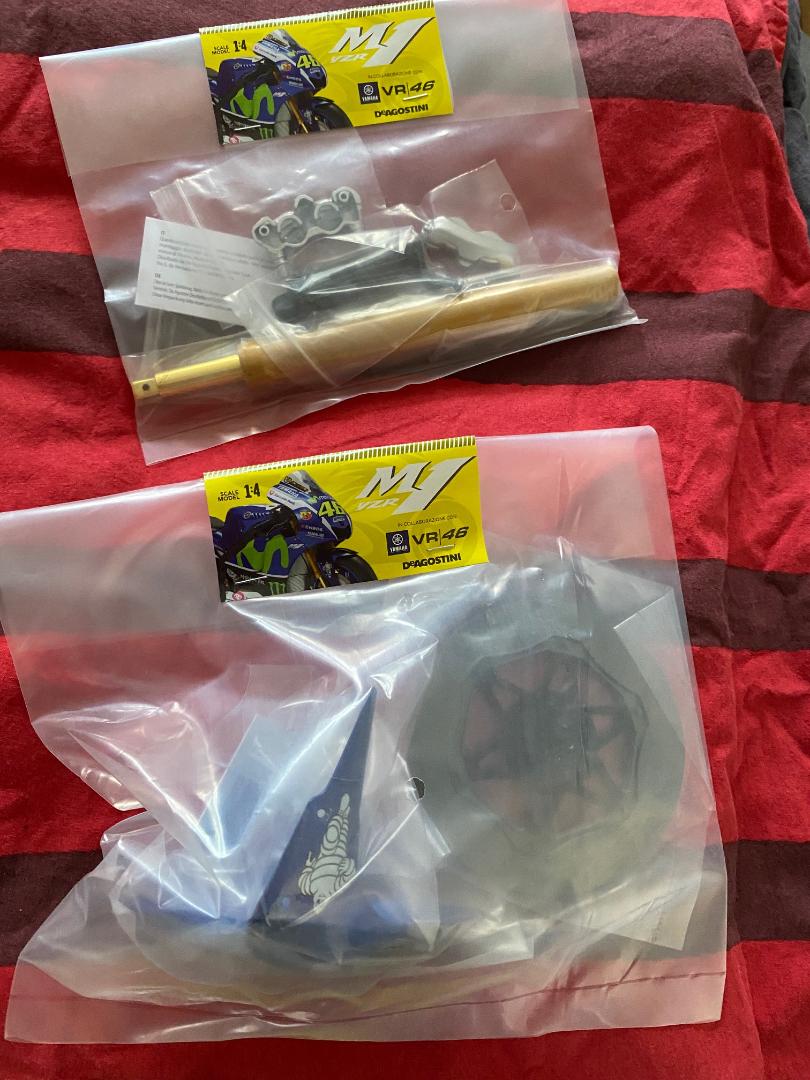
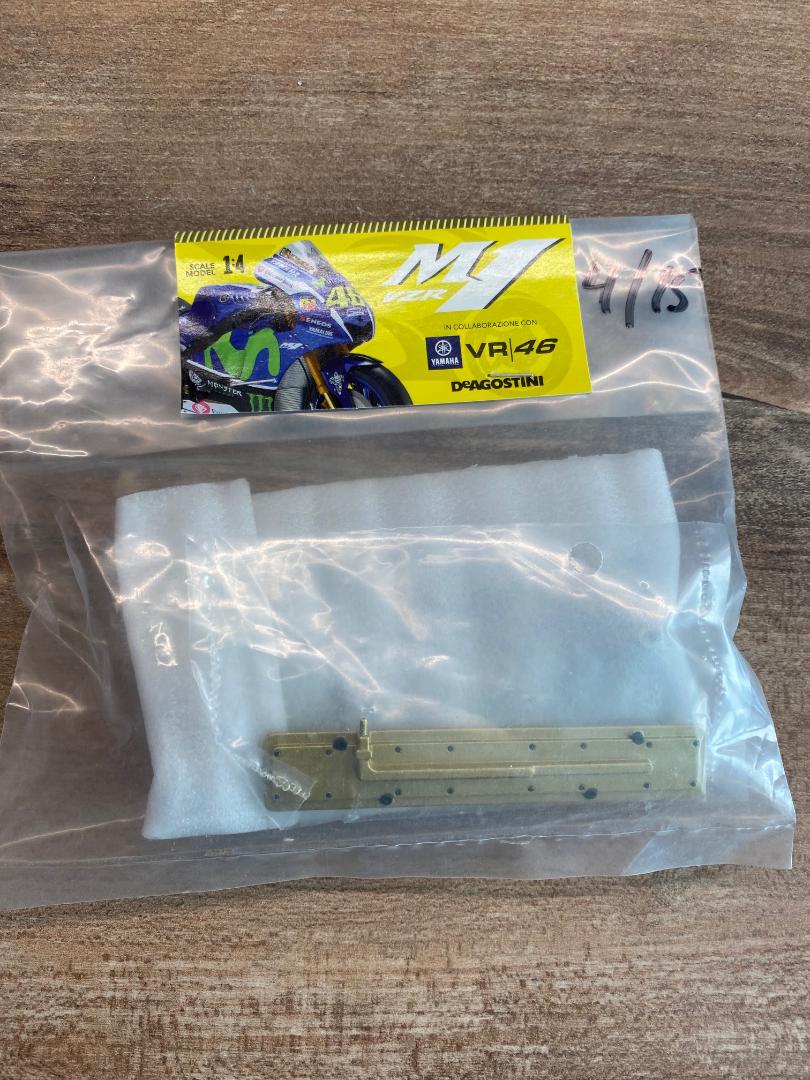
Aber hier erst einmal die Bilder der nachgelieferten Lieferung 2 (Pack 3 und 4):
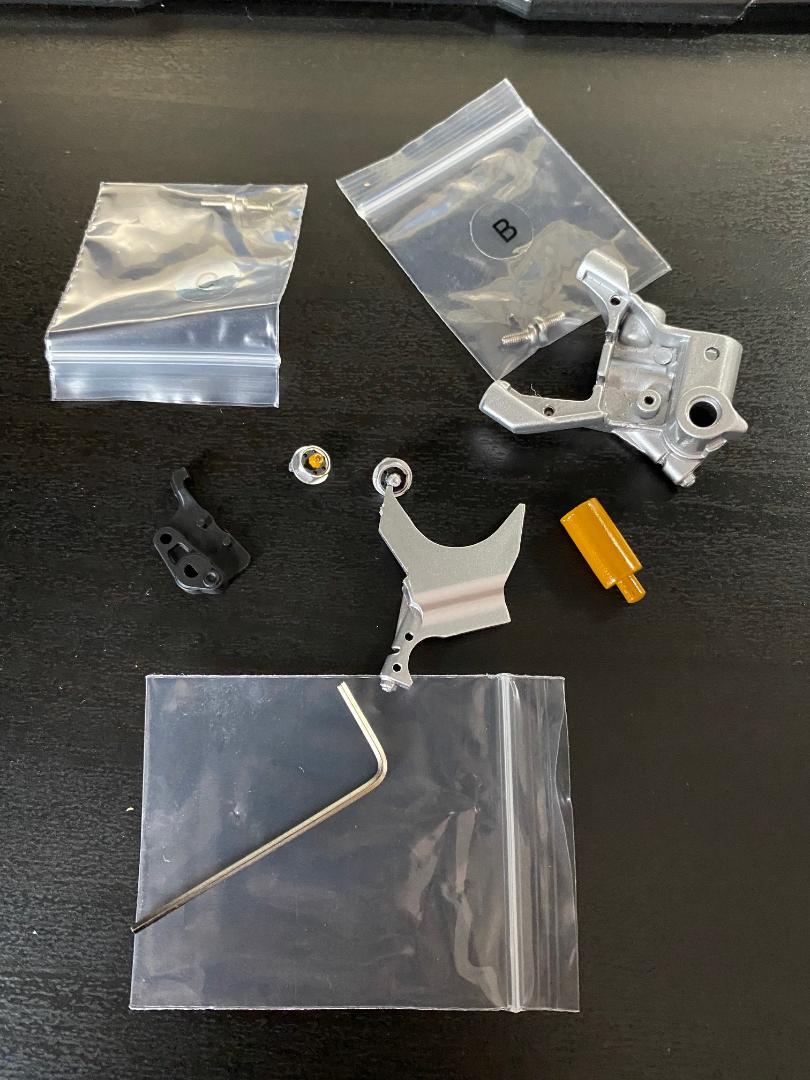
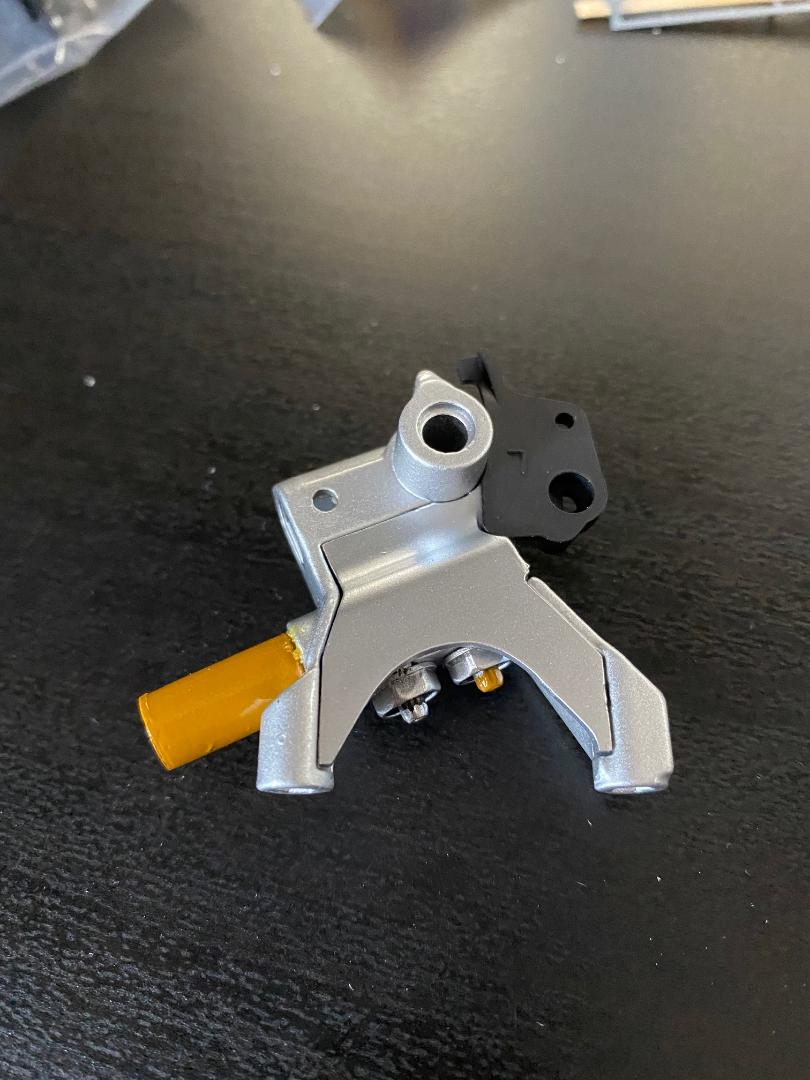
ELEMENTE DER BREMSSATTELHALTERUNG
 " />
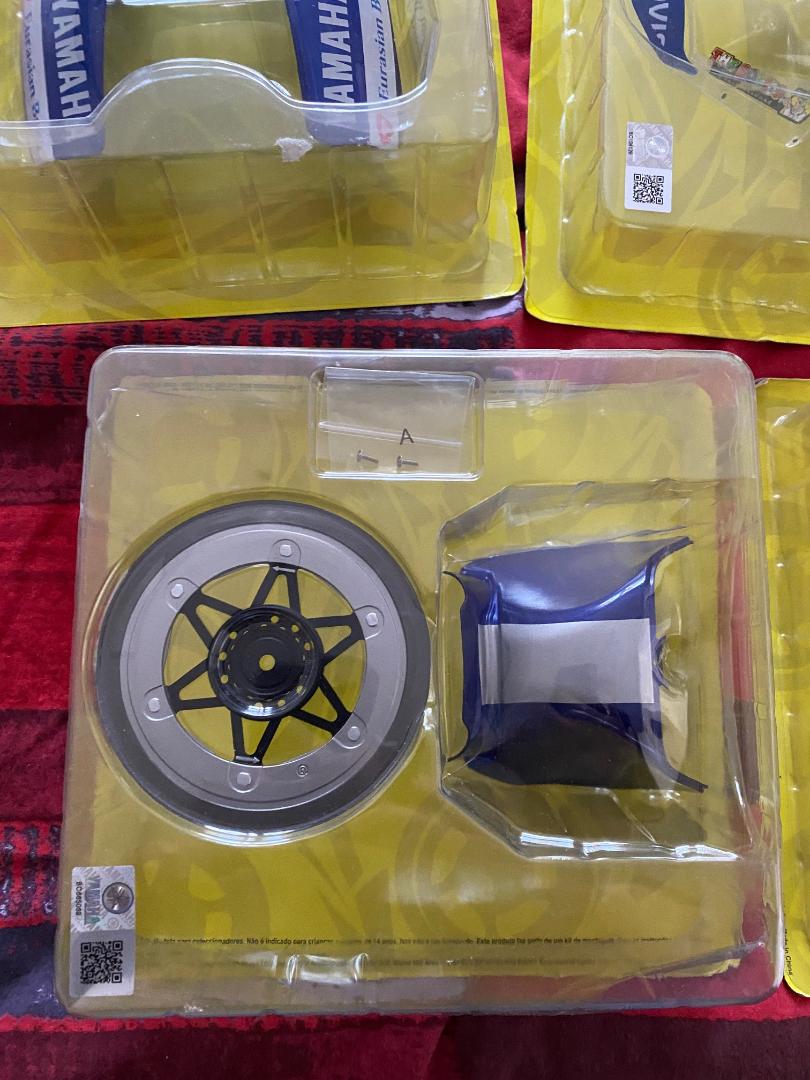
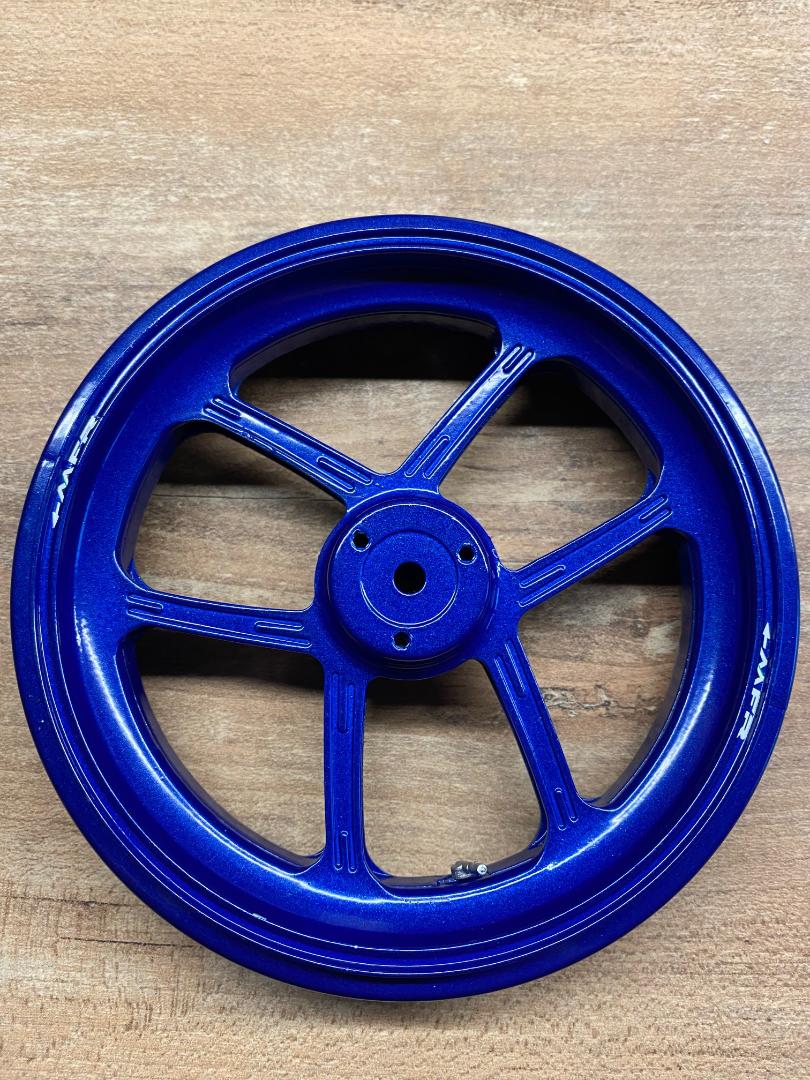
" />DIE VORDERE FELGE
 " />
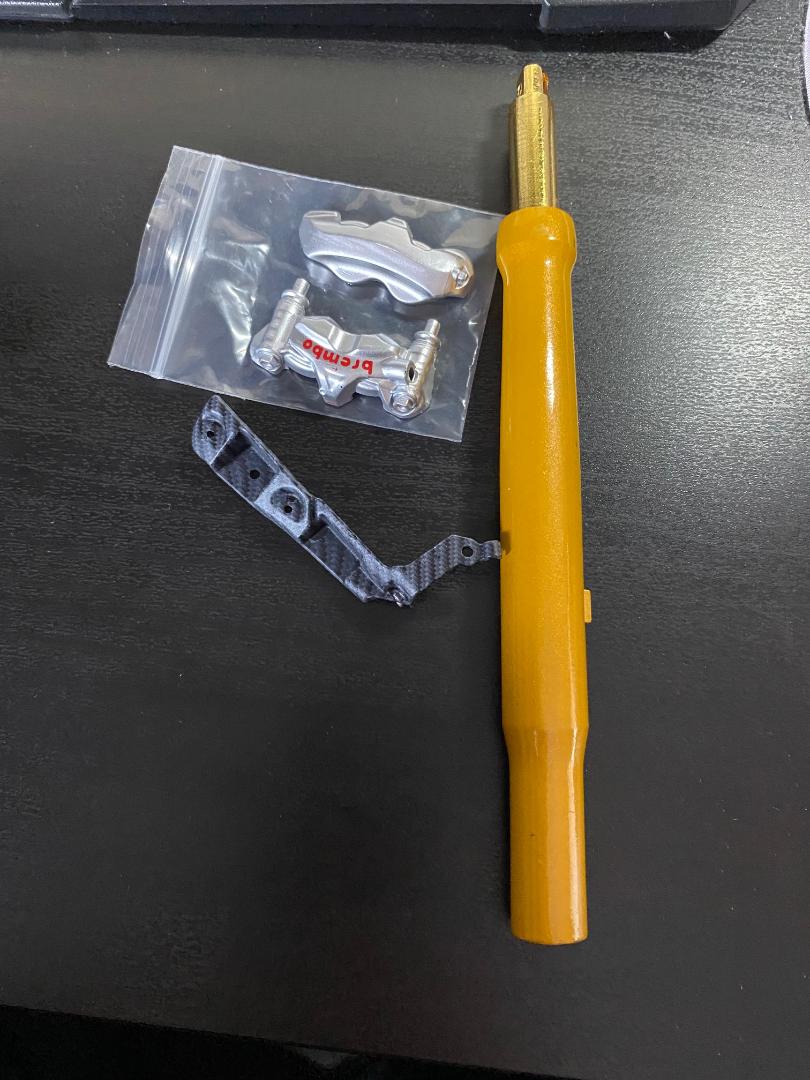
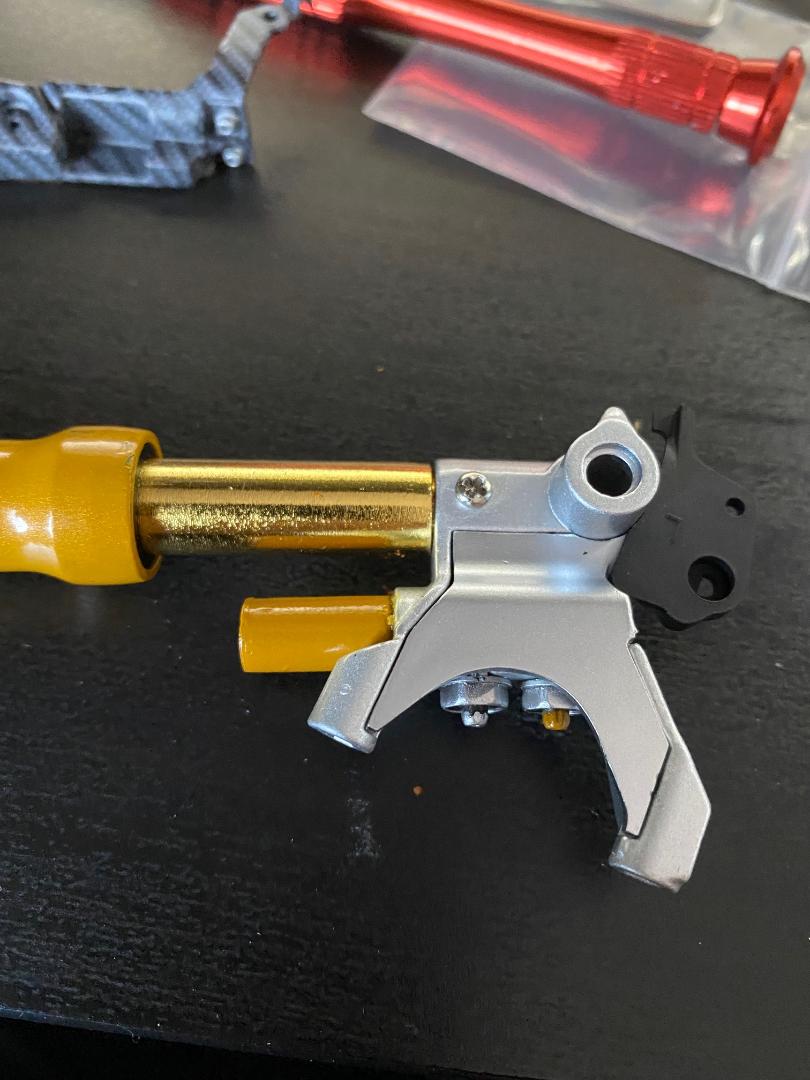
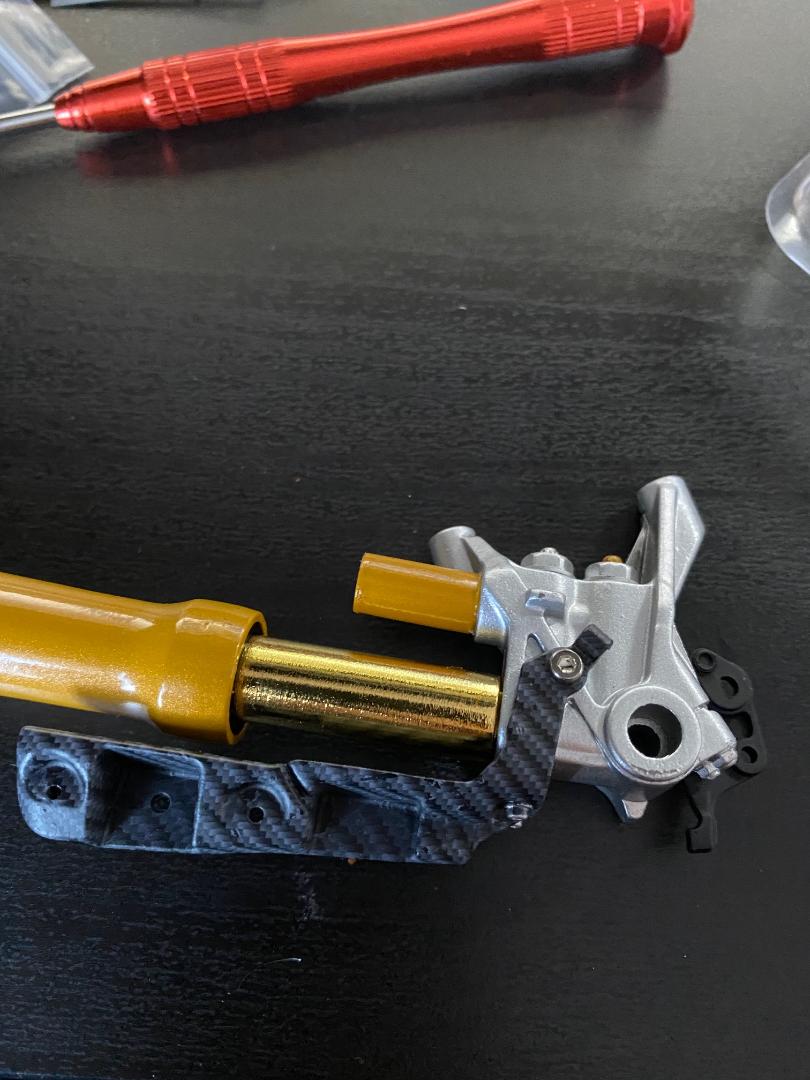
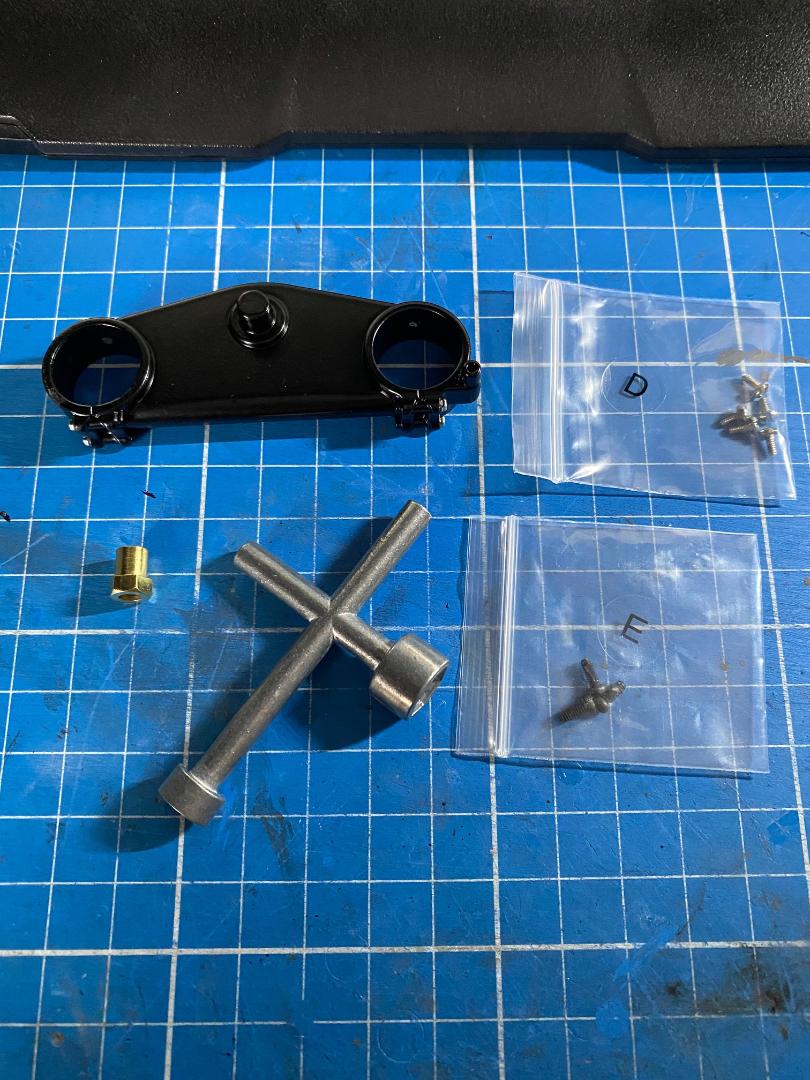
" />DIE UNTERE GABELPLATTE UND DER KREUZSCHLÜSSEL,
DIE ERSTEN ELEMENTE DES AUSPUFFS
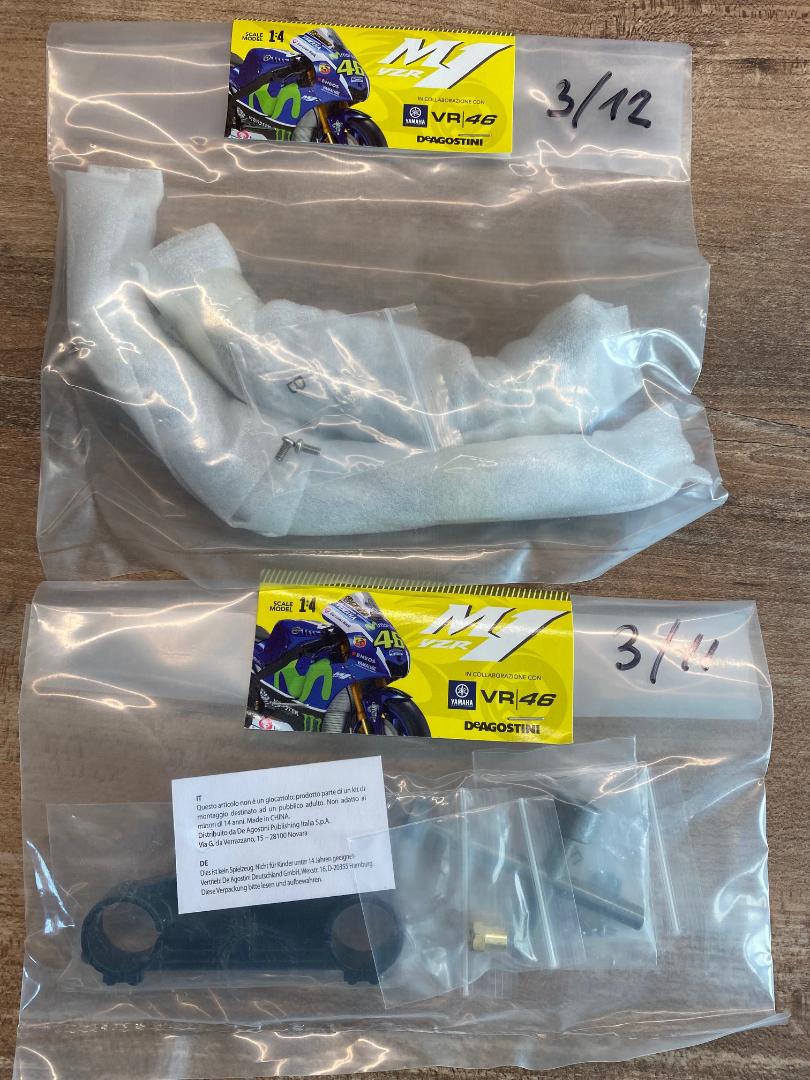 " />
" />DIE BEIDEN RECHTEN AUSPUFFKRÜMMER
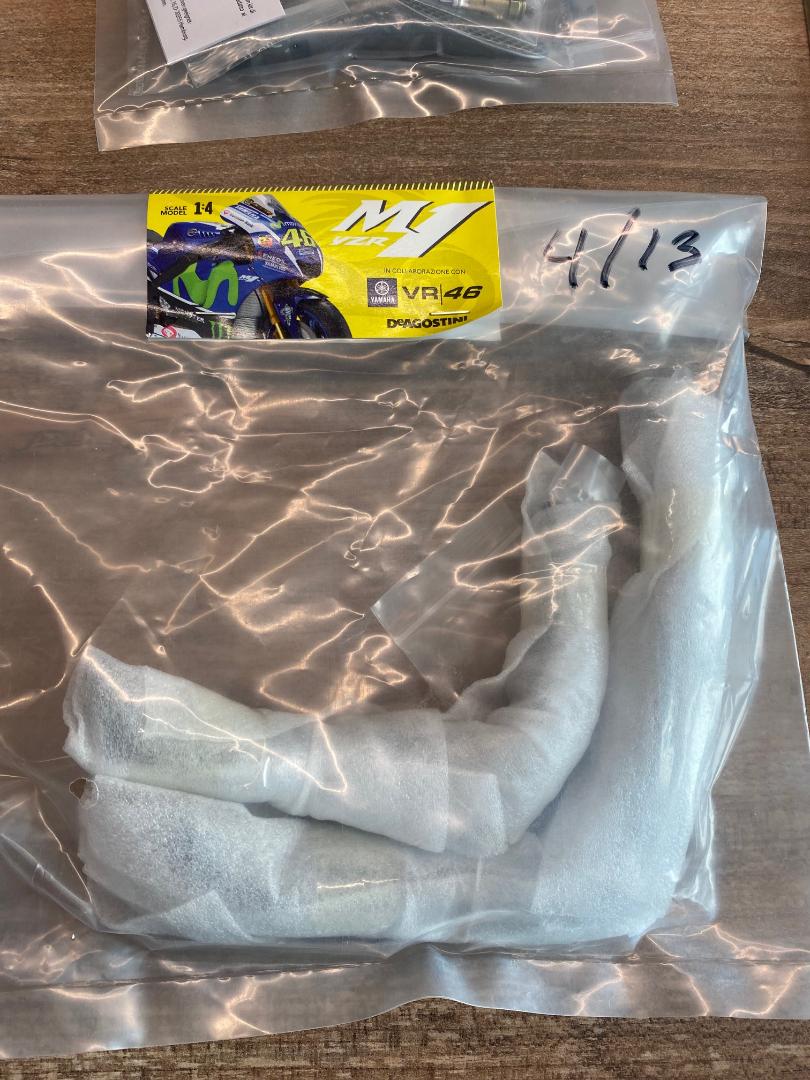 " />
" />DER AUSPUFFANSCHLUSS, DIE LAMBDASONDEN UND DIE ZUGSTANGEN
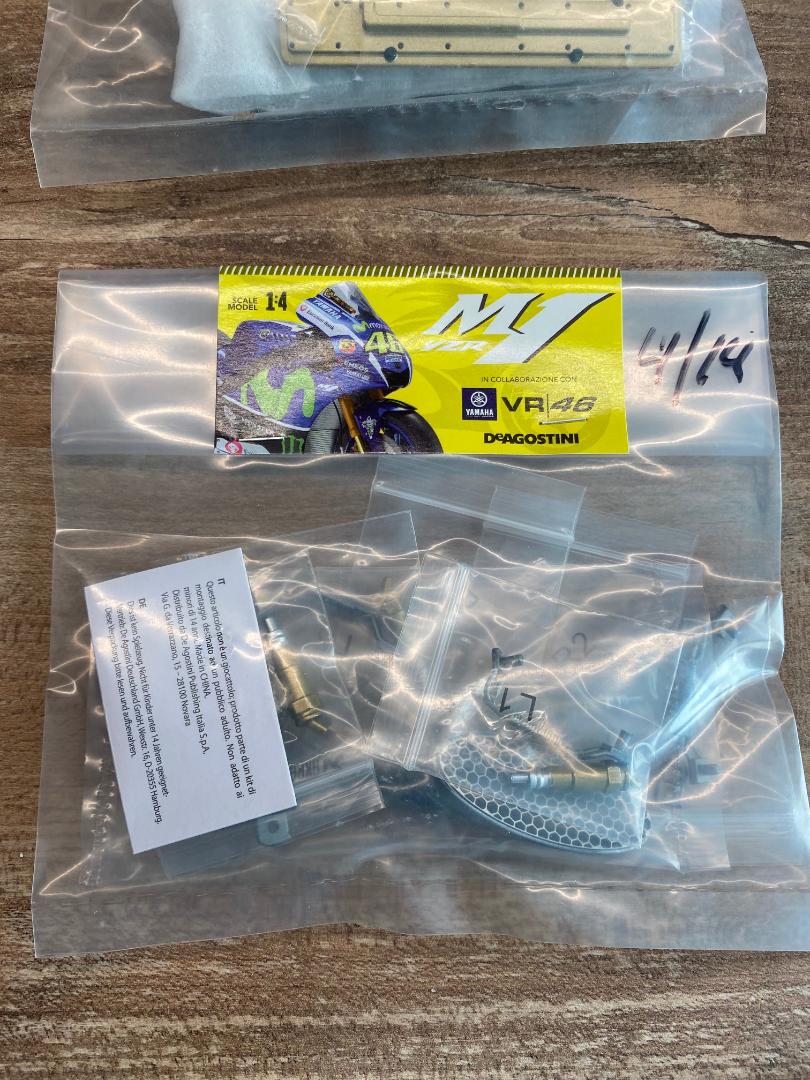 " />
" />DIE ZYLINDERKOPFHAUBE UND DAS ARMATURENBRETT UND DIE INSTRUMENTIERUNG
 " />
" />DAS ARMATURENBRETT UND DIE INSTRUMENTIERUNG
 " />
" />Und nun habe ich doch ein wenig angefangen und Lieferung 1 bearbeitet:
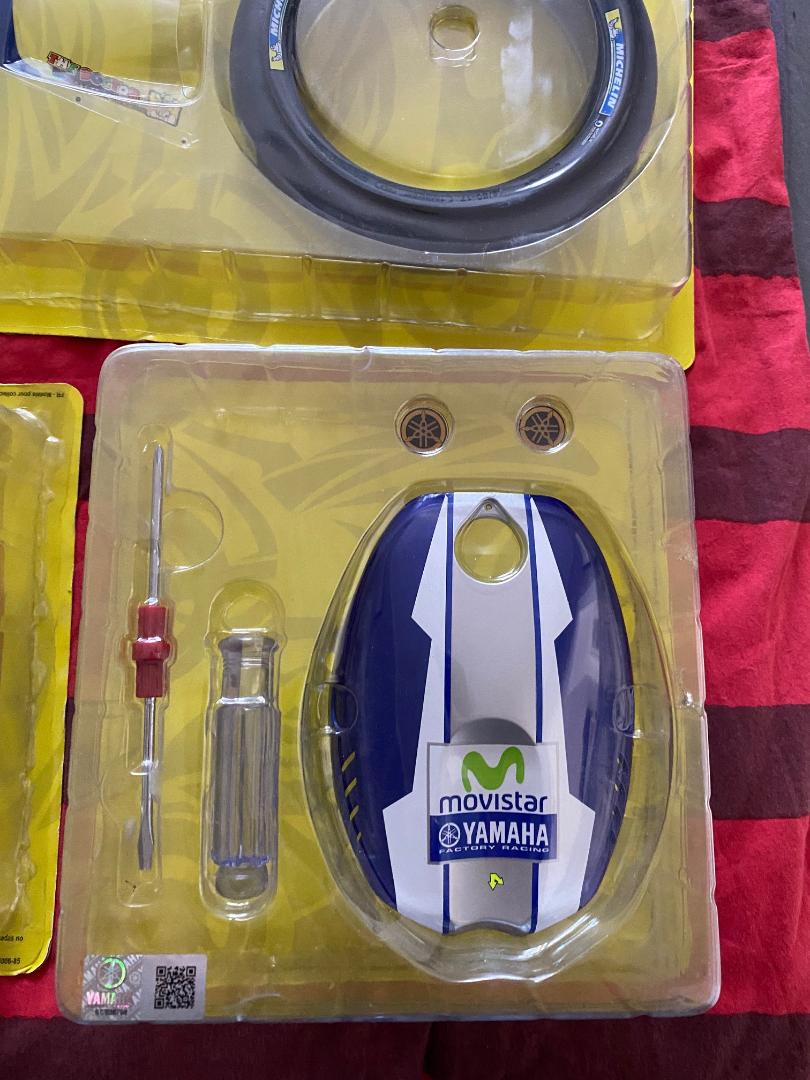
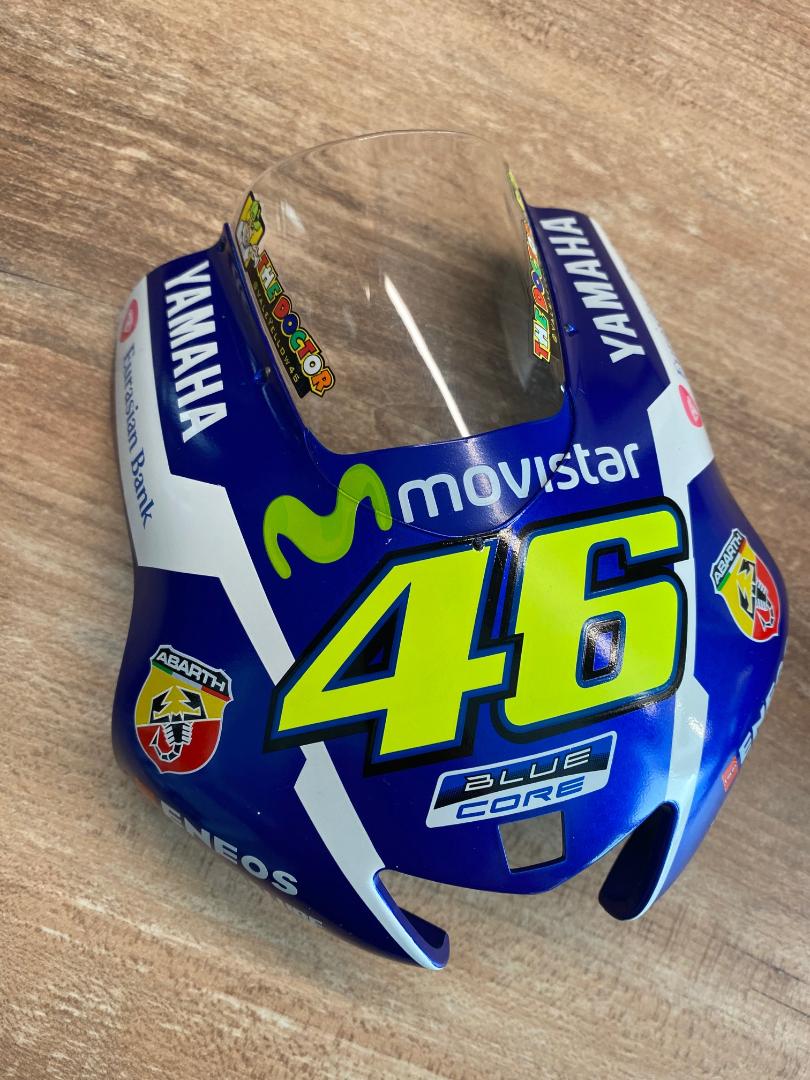
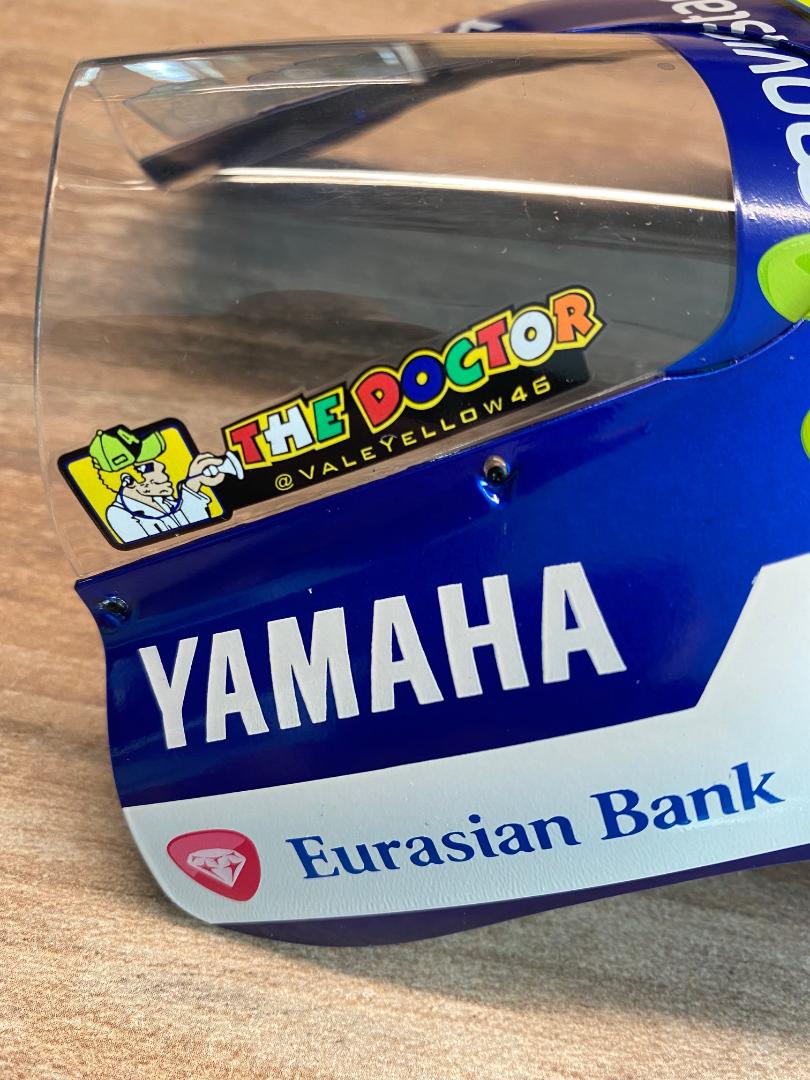
Die Cockpitscheibe wird einfach von innen mit 5 kleinen, in das Haubenteil eingegossenen Kunststoffstiften in das Oberteil der Verkleidung hineingedrückt.
 " />
" /> " />
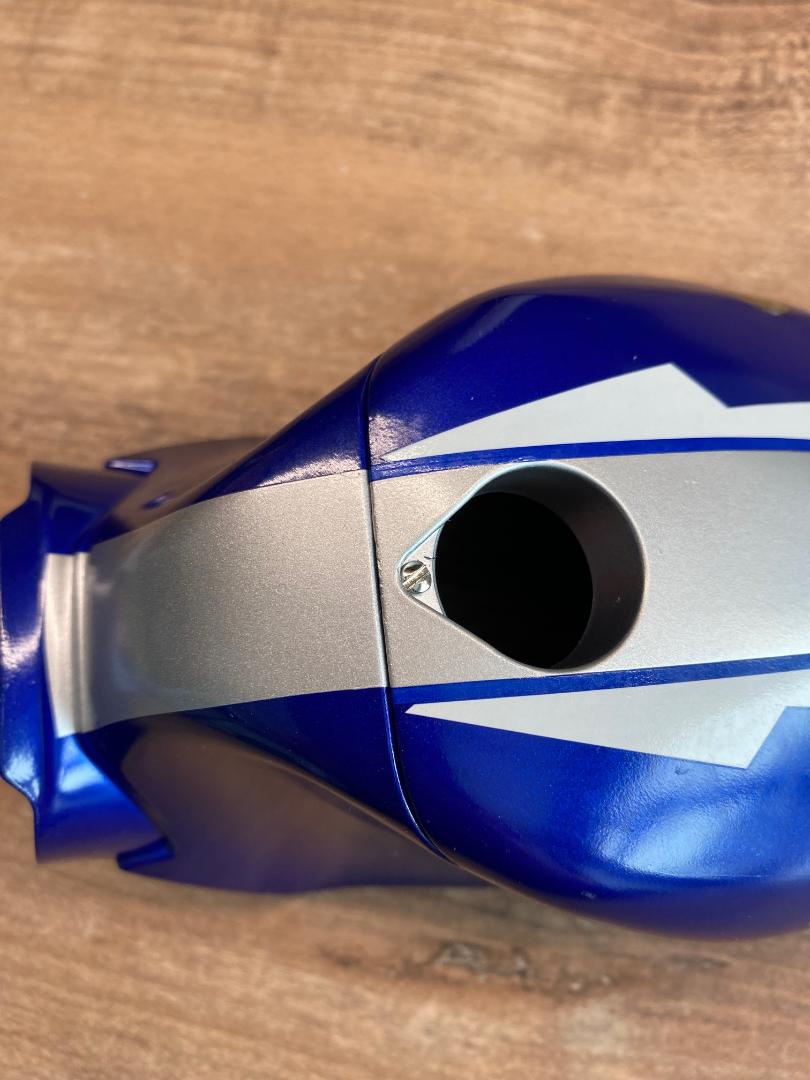
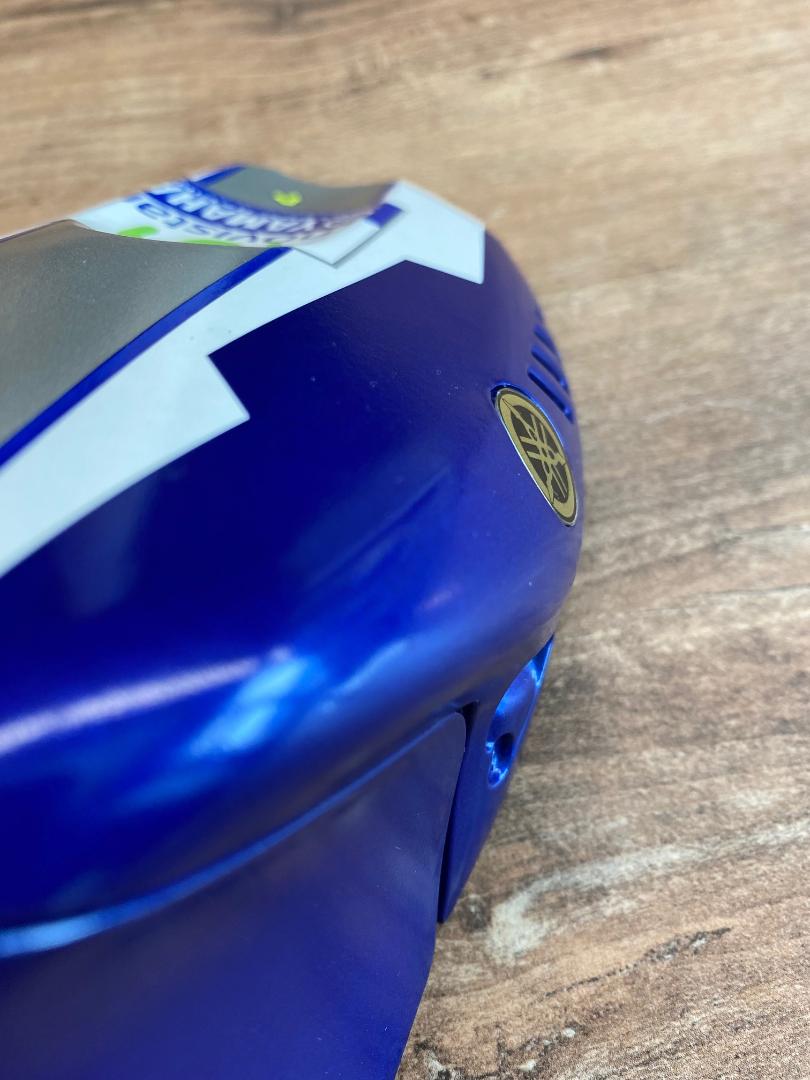
" />Die beiden Tankteile werden vorerst nur mit einer zentralen Schrauber verbunden. Lustigerweise habe ich ein blanke Längsschlitzschraube dafür bekommen, obwohl in der -nur online verfügbaren- Anleitung da eine schwarze Kreuzschlitzschraube vorgesehen ist. Beim Einkleben der Yamaha-Embleme muss man genau hinsehen. Siesind derTankform entsprechend vorgerundet und müssen exakt ausgerichtet werden, bevor man sie auflegt und festdrückt.
 " />
" /> " />
" /> " />
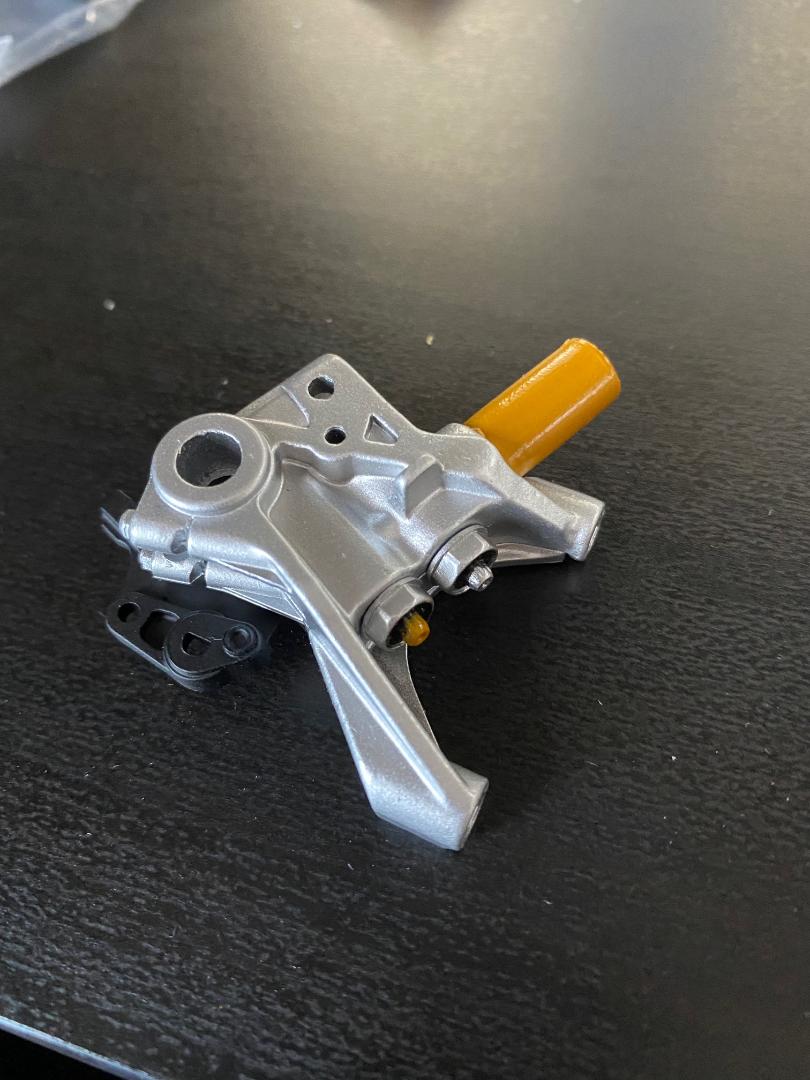
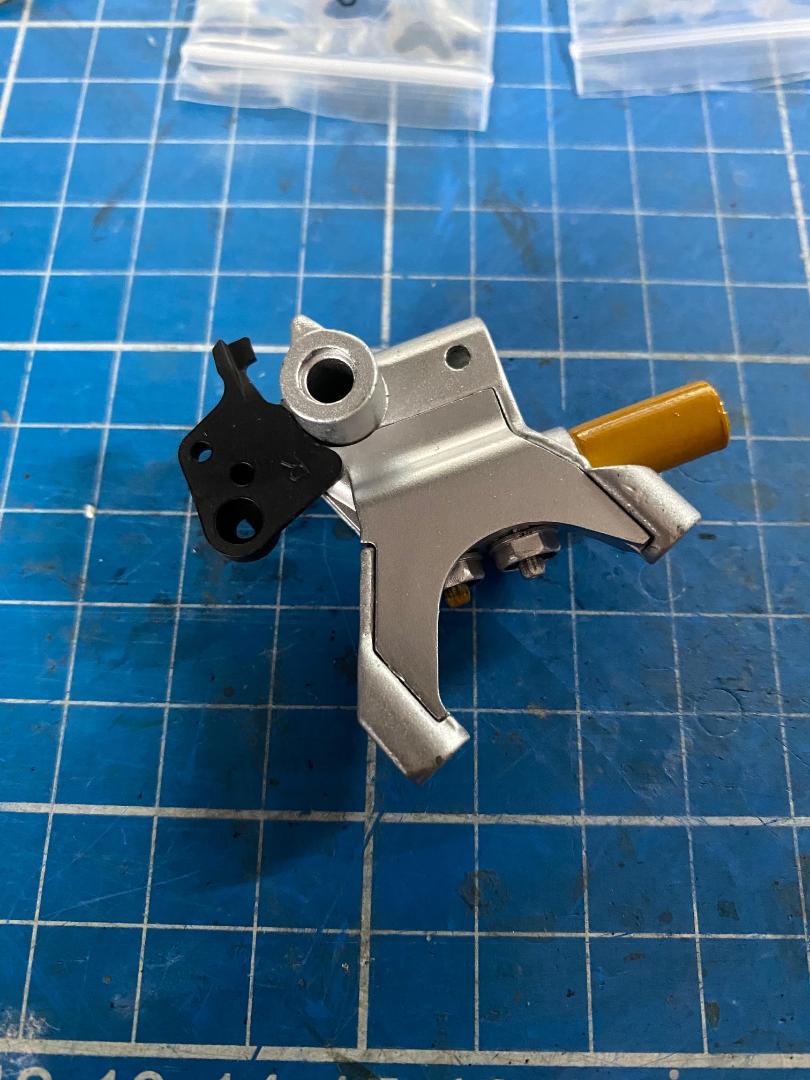
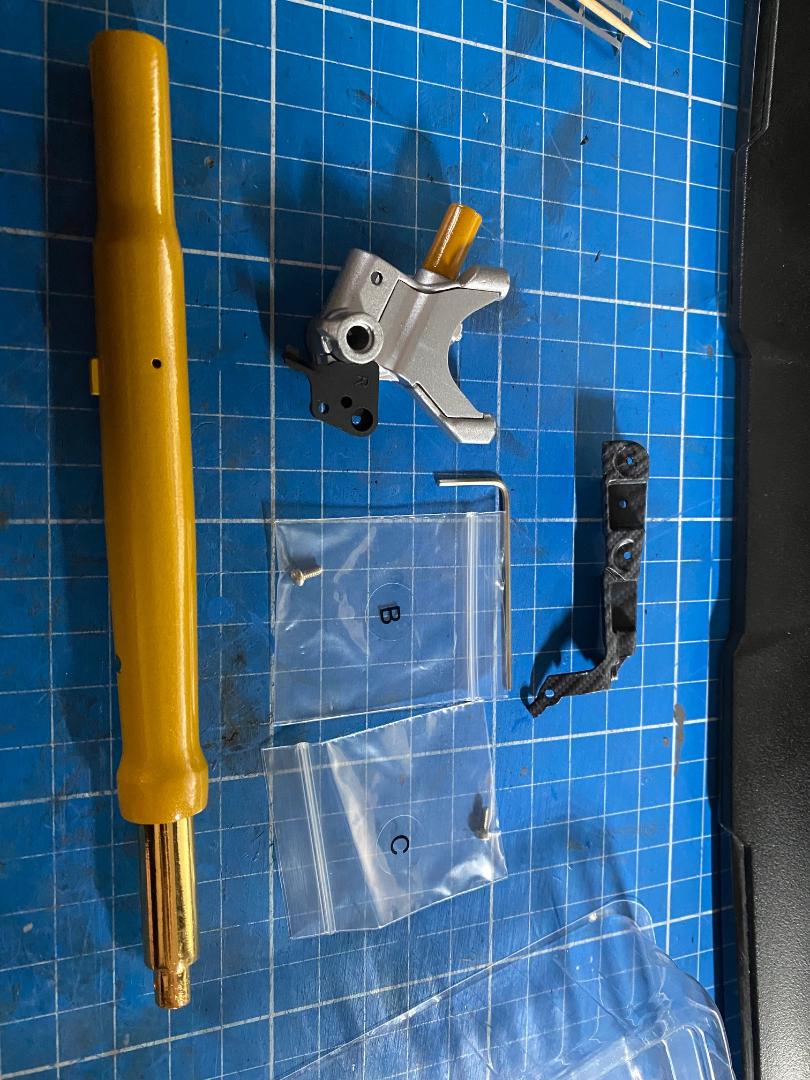
" />Linkes Tauchrohr und Kleinteile
 " />
" />Weitere Teile
 " />
" />Rechtes Tauchrohr und Kleinteile
 " />
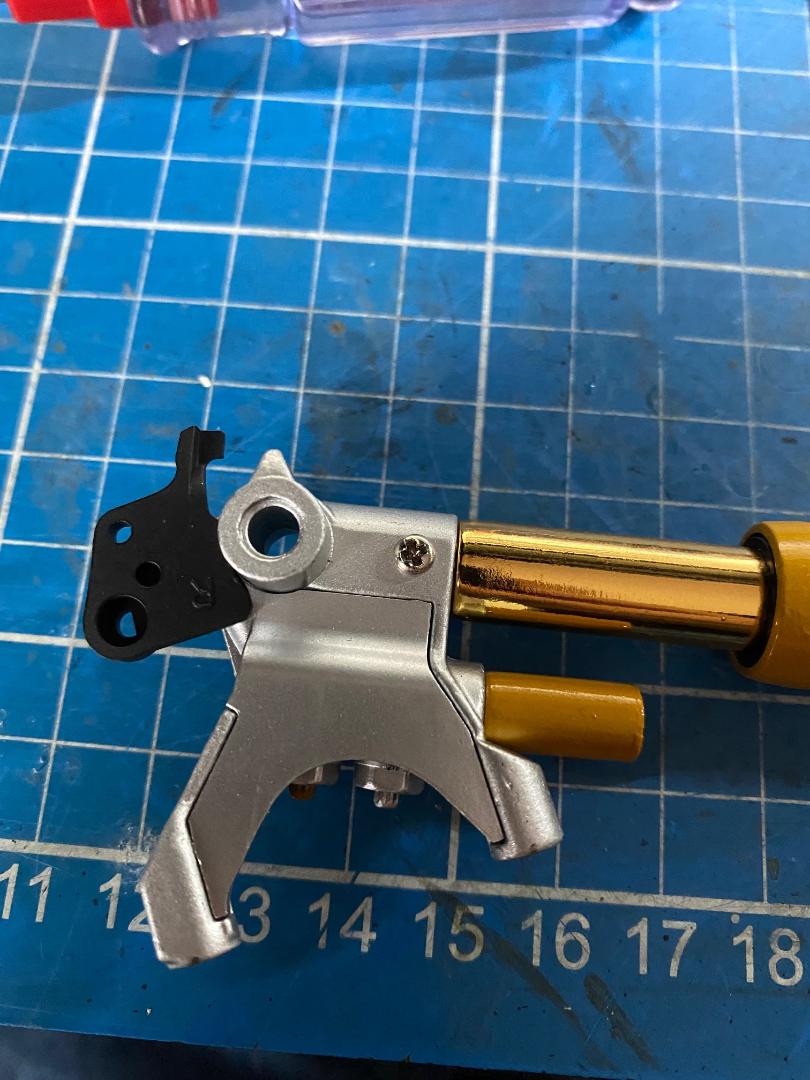
" />Erste Baugruppe (Metall/Konststoff) zusammengesetzt und mit Sekundenkleber fixiert
 " />
" />Von der anderen Seite
 " />
" />Mit dem Tauchrohr verschraubt
 " />
" />Bremssattelhalter (Metallteil) angeschraubt
 " />
" />So, das war`s erstmal bis hierhin. Wird auf alle Fälle ein Mords-Trümmer von beachtlichem Gewicht. Der Lack der Verkleidungsteile ist leider nicht hochglänzend, aber sonst soweit gut.
Maddin- Schneidmatten-Virtuose
John-H., doc_raven1000 und maxl mögen diesen Beitrag
Re: Valentino Rossi's Yamaha YZR M1 in 1:4 von DeAgostini
![]() von John-H. Fr 03 Dez 2021, 17:36
von John-H. Fr 03 Dez 2021, 17:36


John-H.- Co - Admin

Re: Valentino Rossi's Yamaha YZR M1 in 1:4 von DeAgostini
![]() von Maddin Fr 03 Dez 2021, 18:06
von Maddin Fr 03 Dez 2021, 18:06
Aber wo bleibt denn sonst die Spannung?
Maddin- Schneidmatten-Virtuose
John-H. mag diesen Beitrag
Re: Valentino Rossi's Yamaha YZR M1 in 1:4 von DeAgostini
![]() von Maddin Sa 04 Dez 2021, 14:31
von Maddin Sa 04 Dez 2021, 14:31
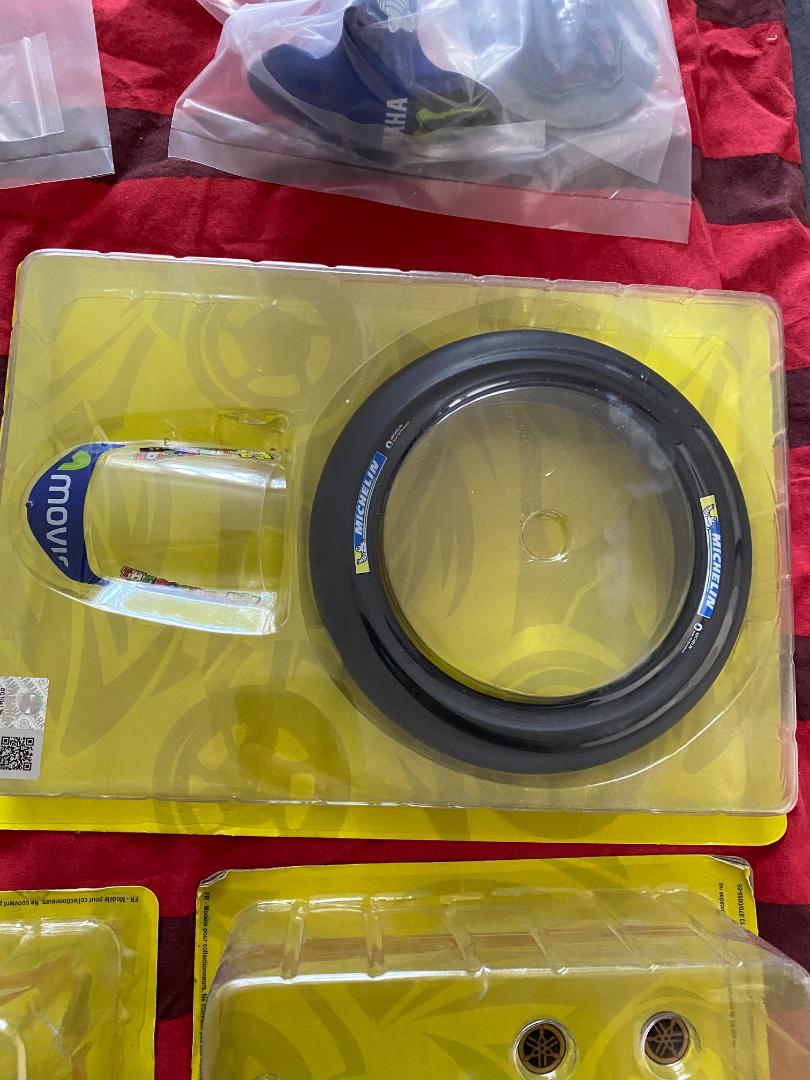
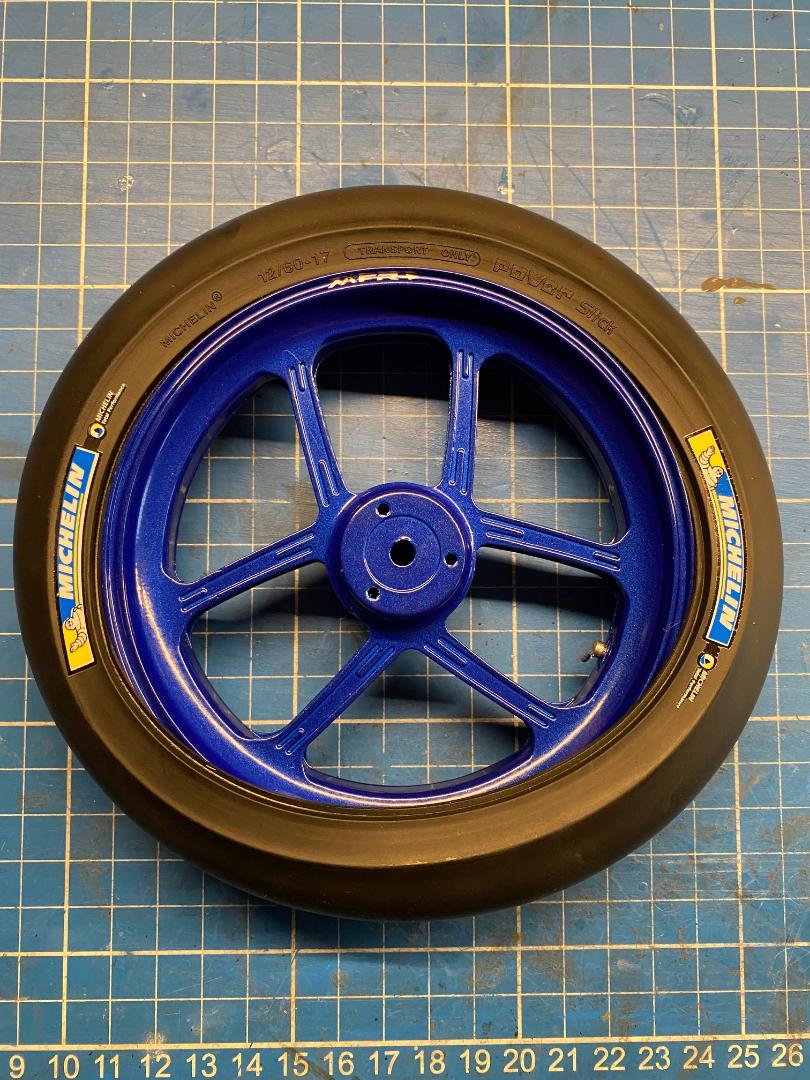
Um die Spannung nicht ins Unendliche zu treiben habe ich mich mal des Vorderrades angenommen. Ein Mordstrümmer von 30 x 155mm mit sehr schön lackierter Metallfelge und einem schön weichen 120/60-17er Slick. Die sehr deutliche Reifenprägung und das Ventil sind wirklich gut gelungen. Zum Aufziehen muss man den Reifen so weit aufklappen, dass die Felge erst komplett hineingesteckt werden kann. Sonst bekommnt man den Pneu nicht drüber. Wenn er richtig sitzt ist dann aber alles schön gerade und hat nicht einmal einen nennswerten Schlag.
 " />
" /> " />
" /> " />
" /> " />
" />
Maddin- Schneidmatten-Virtuose
John-H., doc_raven1000 und Six-Seven mögen diesen Beitrag
Re: Valentino Rossi's Yamaha YZR M1 in 1:4 von DeAgostini
![]() von Maddin Mo 06 Dez 2021, 12:19
von Maddin Mo 06 Dez 2021, 12:19
Und weiter geht`s:
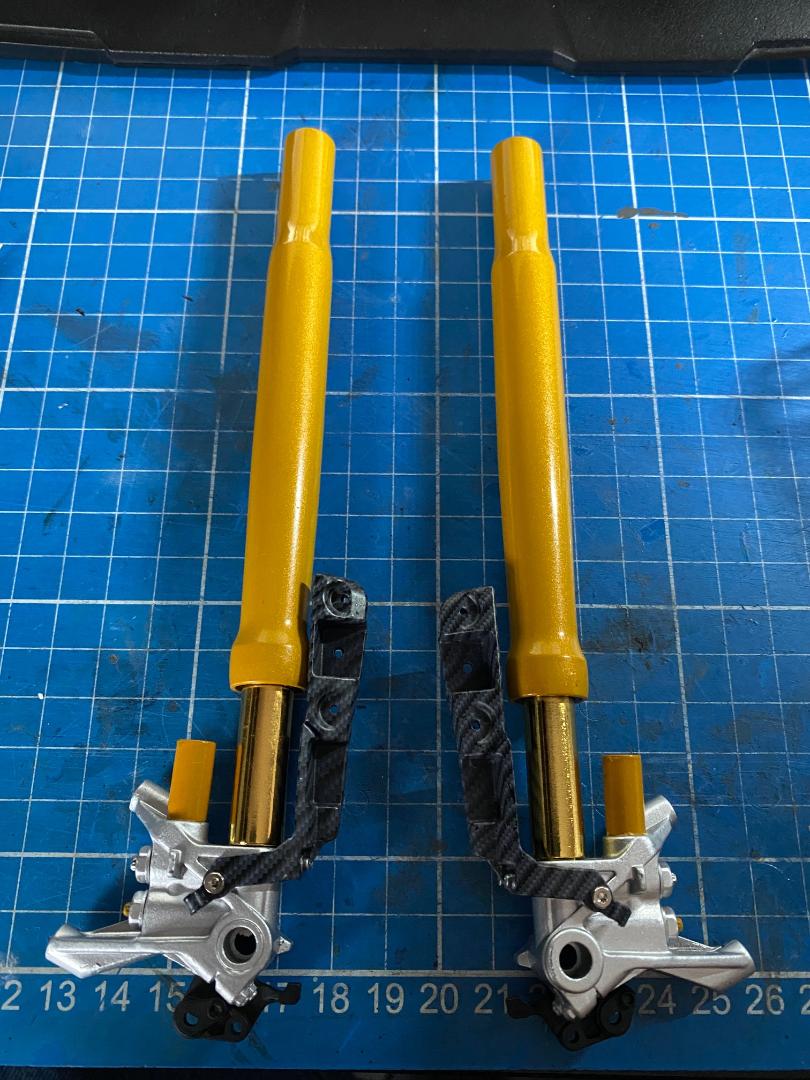
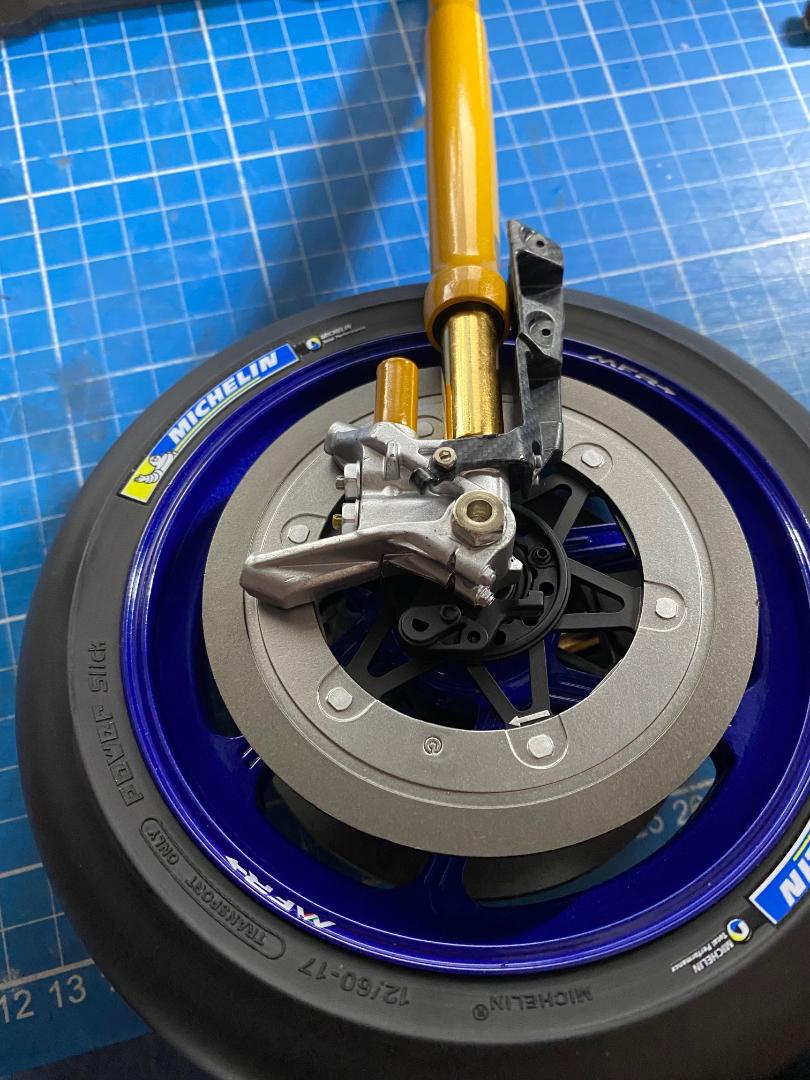
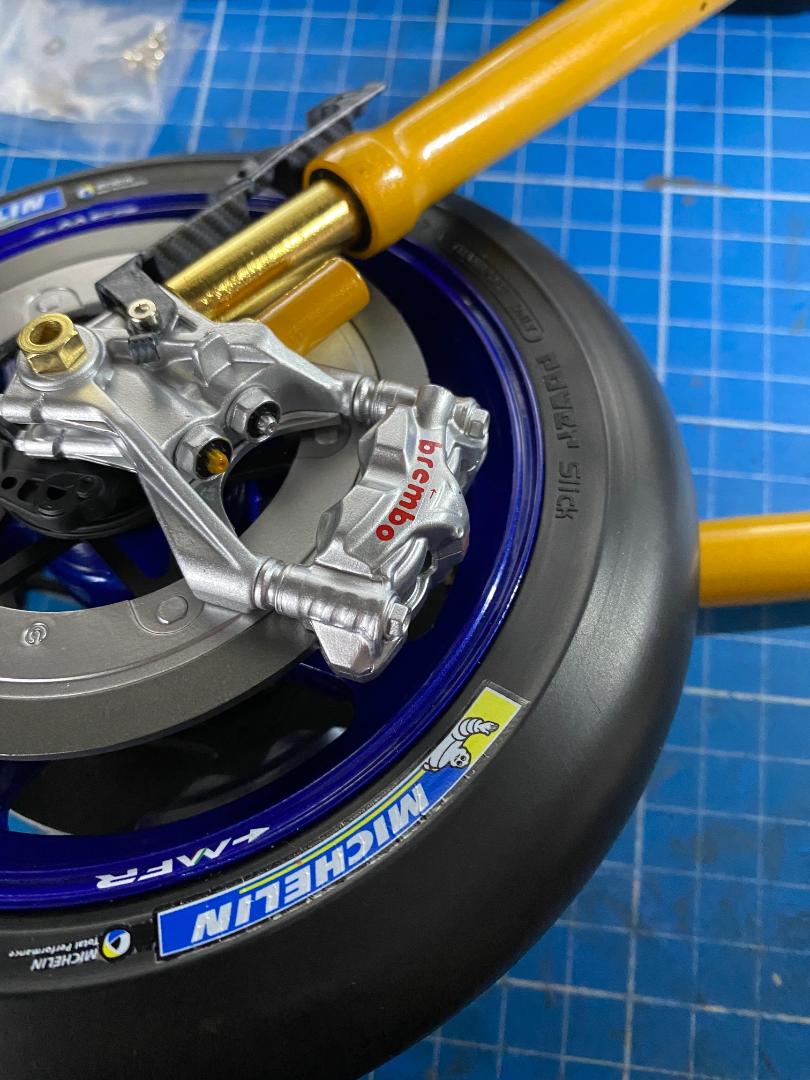
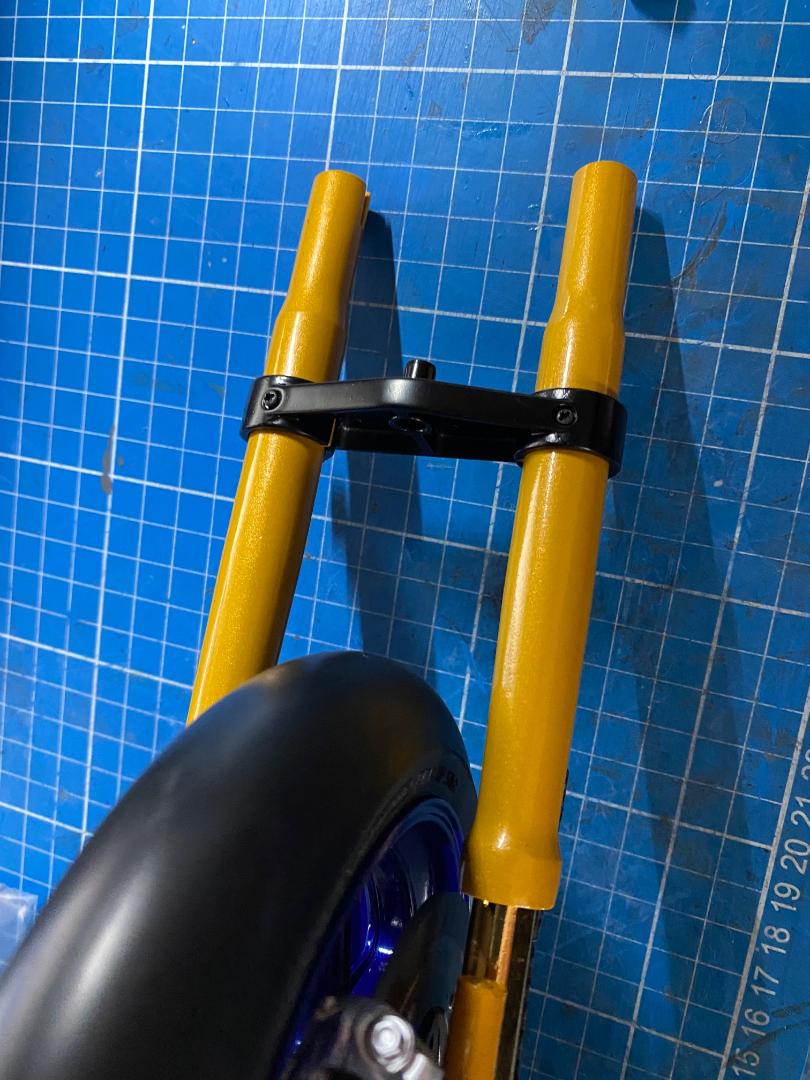
Ich habe mir das zweite Tauchrohr vorgenommen, die Bremmscheiben eingebaut, die Achse montiert, die untere Gabelbrücke eingebaut und zuletzt den vorderen Kotflügel installiert.
Beim zweiten Tauchrohr ist natürlich Alles wie beim Ersten, nur seitenverkehrt.
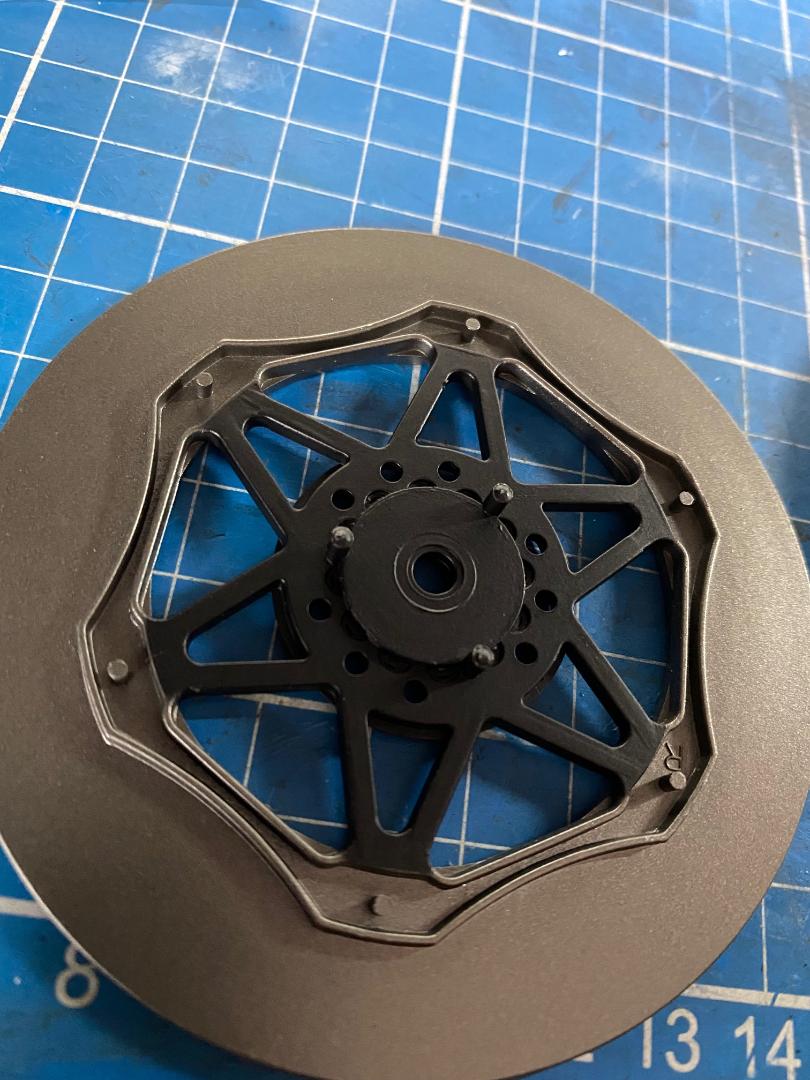
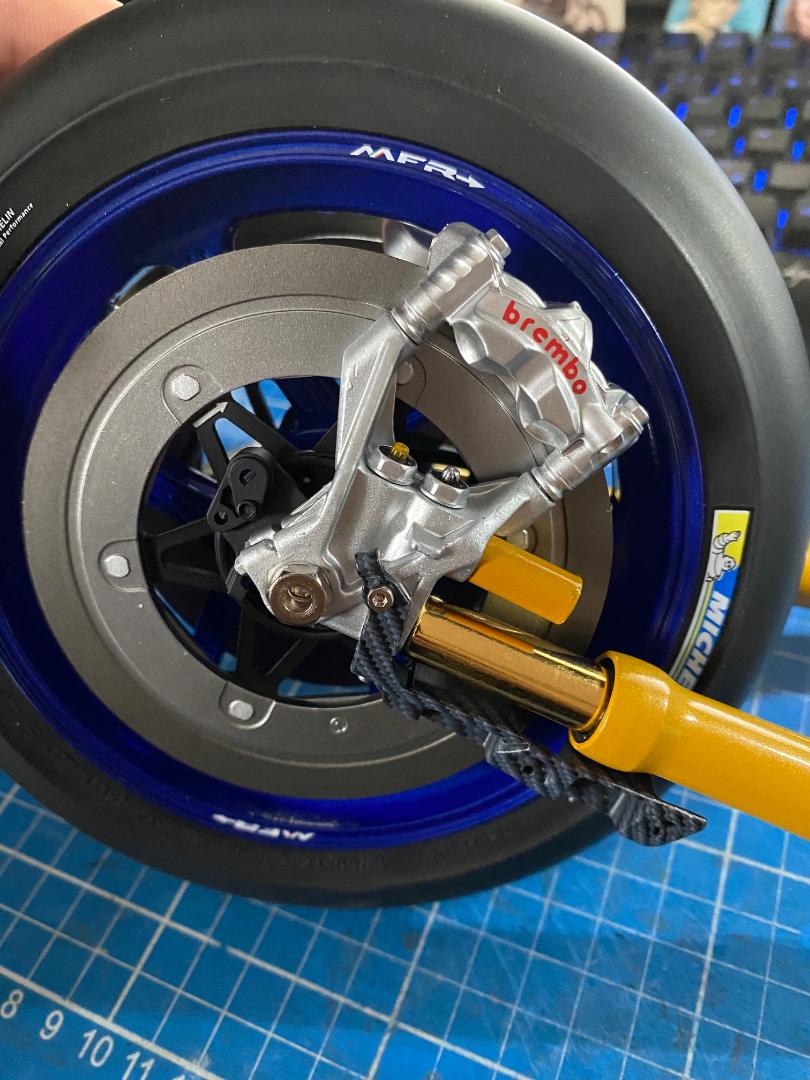
Die Bremsscheiben sind mit Pfeilen versehen und müssen den Pfeilen auf der Felge entsprechend eingebaut werden. Man soll sie nur mit drei Stiften hineindrücken, aber das ist ein wenig leichtgängig. Also habe ich sie mit Sekundenkleber fixiert. Die Achse wird einfach durchgesteckt und mit der Kontermutter verschraubt. Sie dreht sich sehr leicht in ihrer Durchführung. Also ist der gelieferte Kreuschlüssel zwar nett, aber ein Zweiter zum Gegenhalten wäre hier hilfreich gewesen. Aber man hat ja auch eigenes Werkzeug zuhause... Das Gewinde ist zuende, bevor da etwas klemmen könnte, was neben dem leichten Drehen des Vorderrades allerdings leider auch ein recht großes "Lagerspiel" bedeutet. Dadurch schleifen die Kunststoff-Bremsscheiben leicht in den Bremssätteln. Ich habe diese erst einmal nur zusammen- und aufgesteckt, um sie evtl. später nochmal entfernen und vielleicht innen etwas bearbeiten zu können, falls durch den Einbau der oberen Gabelbrücke das Ganze so steif wird, dass eine Nacharbeit Erfolg verspricht.
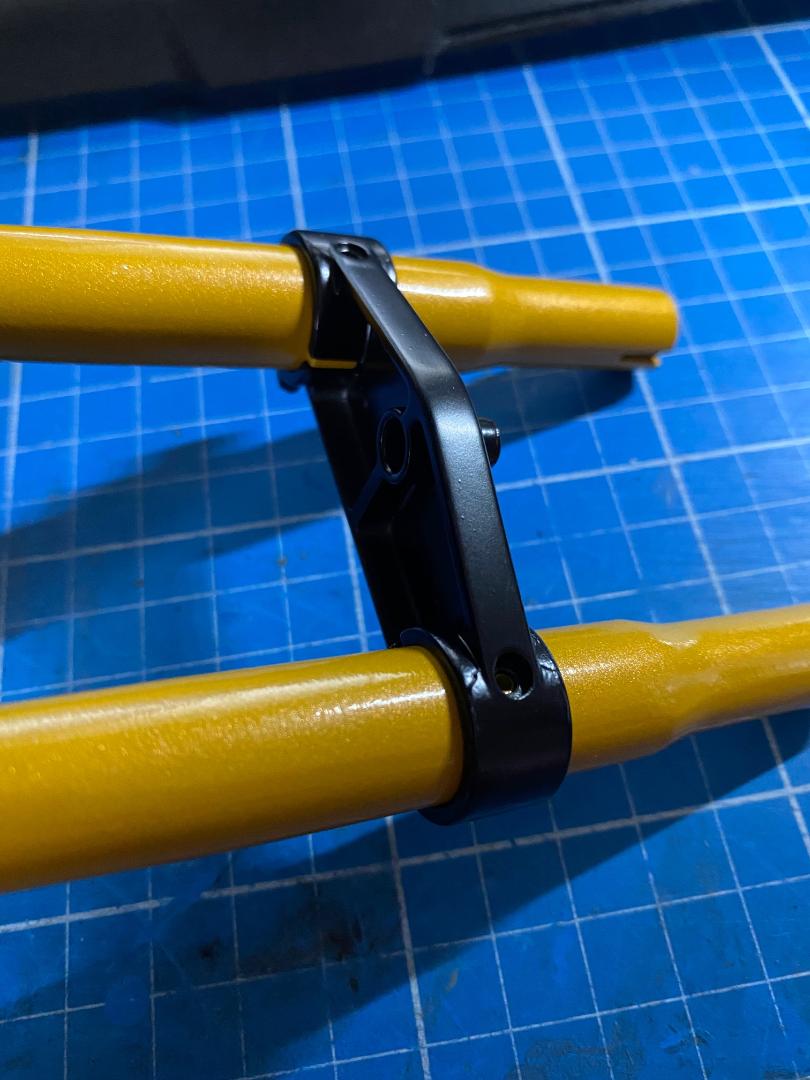
Die Gabelbrücke wird einfach über die Tauchrohre geschoben, rastet in zwei Stegen ein und wird mit zwei Schrauben von hinten fixiert. Festschrauben möchte ich das nicht nennen, denn wenn ich auch die Schrauben so fest angezogen habe, wie es irgendwie ging, haben die Tauchrohre in der Metallgabelbrücke immer noch ein klein wenig Bewegungsmöglichkeit. Es ist halt leider keine Klemmung, was hier echt besser gewesen wäre.
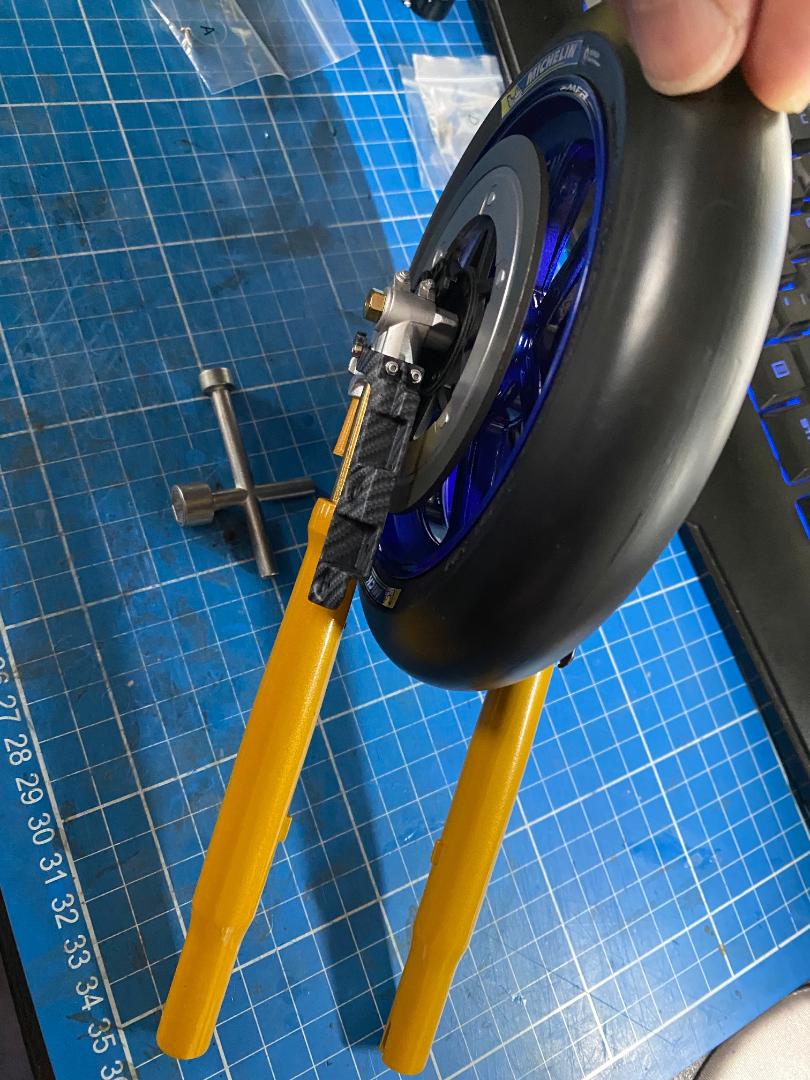
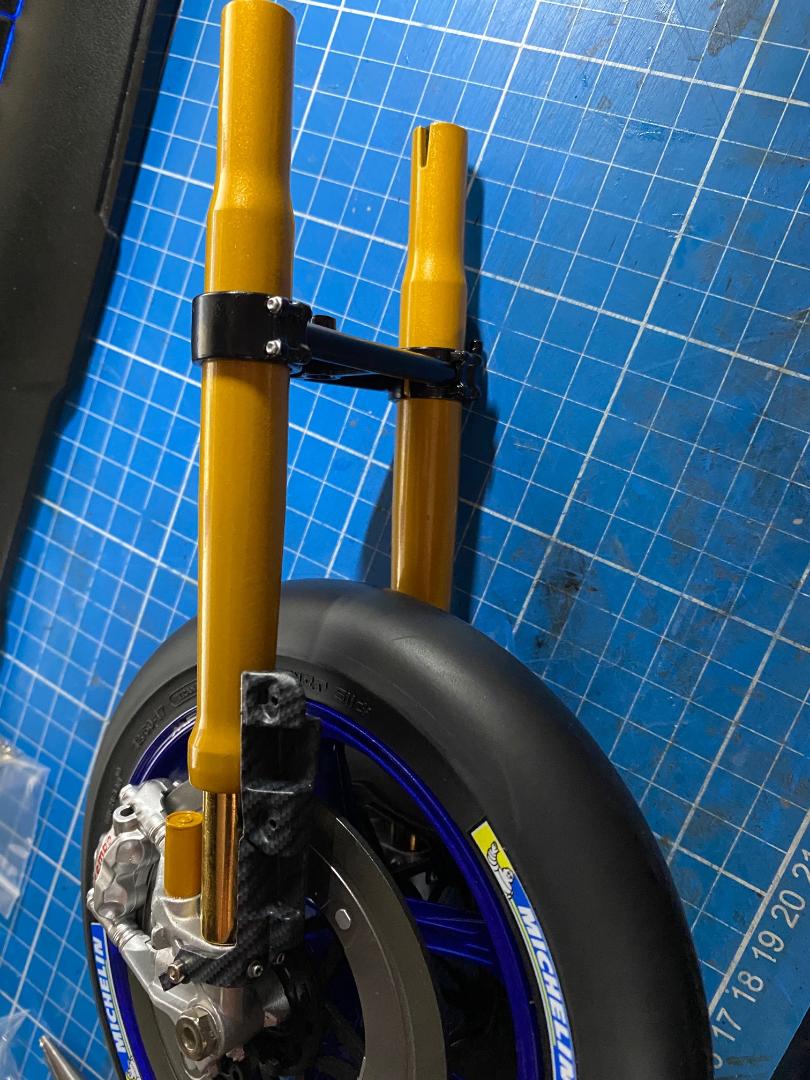
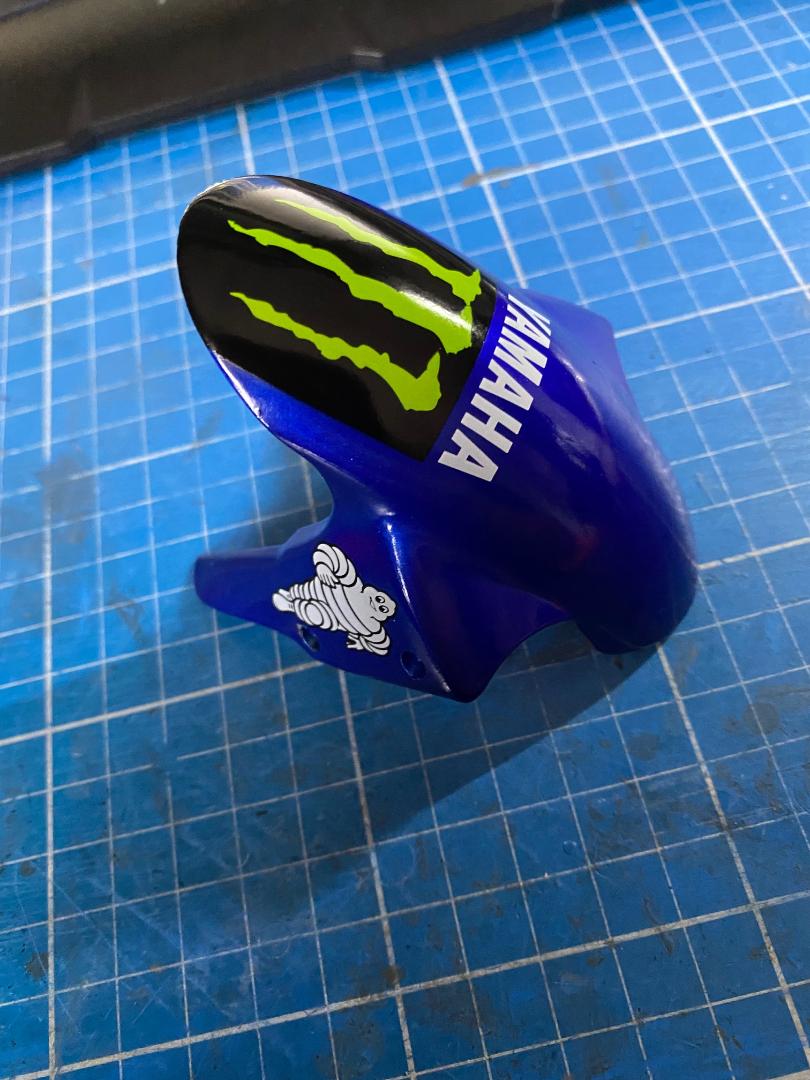
Beim Einbau der Kotflügels ist echt Fingerspitzgefühl angesagt. Man ärgert ziemlich sich über die Längsschlitzschrauben. Die Metallhalter des Kotflügels federn ziemlich und man muss nicht nur ständig höllisch aufpassen, dass man nicht aus dem Schlitz rutscht und womöglich den Lack beschädigt, sondern man kriegt das Ganze so gerade eben zusammengeschraubt, ohne dass man die Halter verbiegt.
Mit dem Kotflügel ist das Ganze schon echt imposant, aber nur leidlich stabil. Ich hoffe, dass die obere Gabelbrücke später noch ordentlich hilft. Aber hier erstmal ein paar Fotos:
 " />
" /> " />
" /> " />
" /> " />
" /> " />
" /> " />
" /> " />
" /> " />
" /> " />
" /> " />
" /> " />
" /> " />
" /> " />
" /> " />
" /> " />
" /> " />
" /> " />
" /> " />
" /> " />
" /> " />
" /> " />
" /> " />
" /> " />
" /> " />
" /> " />
" />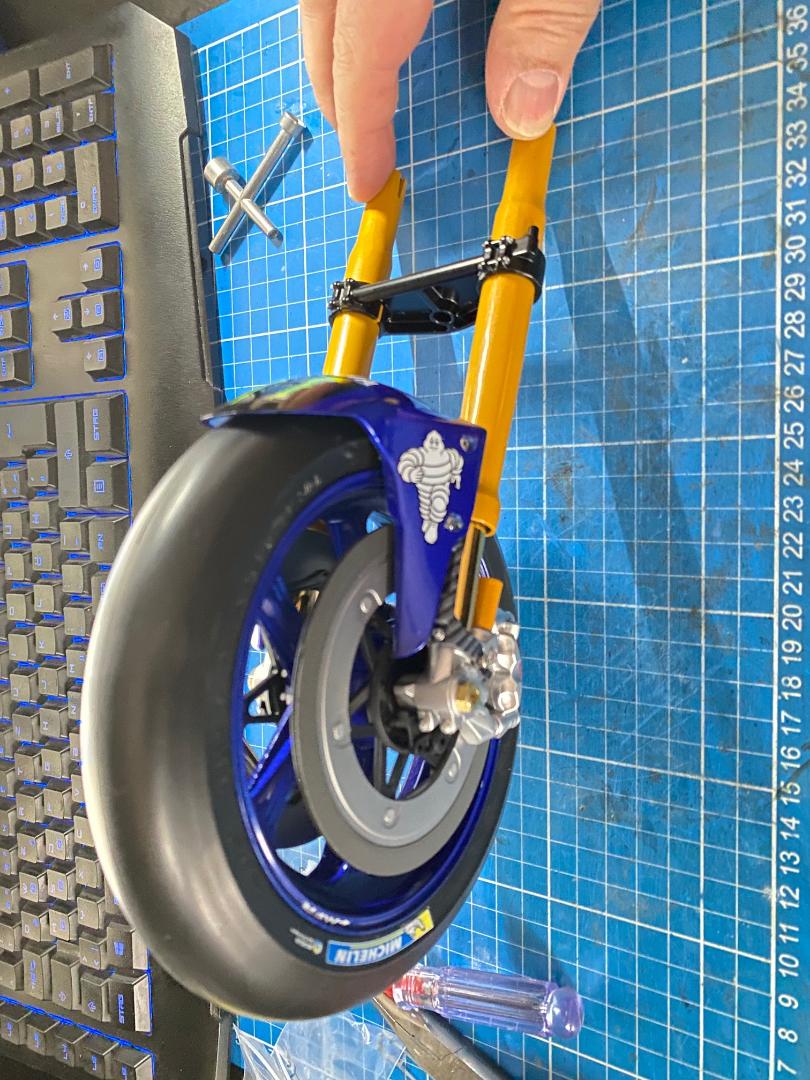 " />
" />Soweit erst einmal zum Vorderrad. Das werde ich jetzt sorgsam wegpacken und dann geht es mit den Krümmern, usw. weiter.
Maddin- Schneidmatten-Virtuose
maxl und Six-Seven mögen diesen Beitrag
Re: Valentino Rossi's Yamaha YZR M1 in 1:4 von DeAgostini
![]() von Maddin Mo 06 Dez 2021, 14:14
von Maddin Mo 06 Dez 2021, 14:14
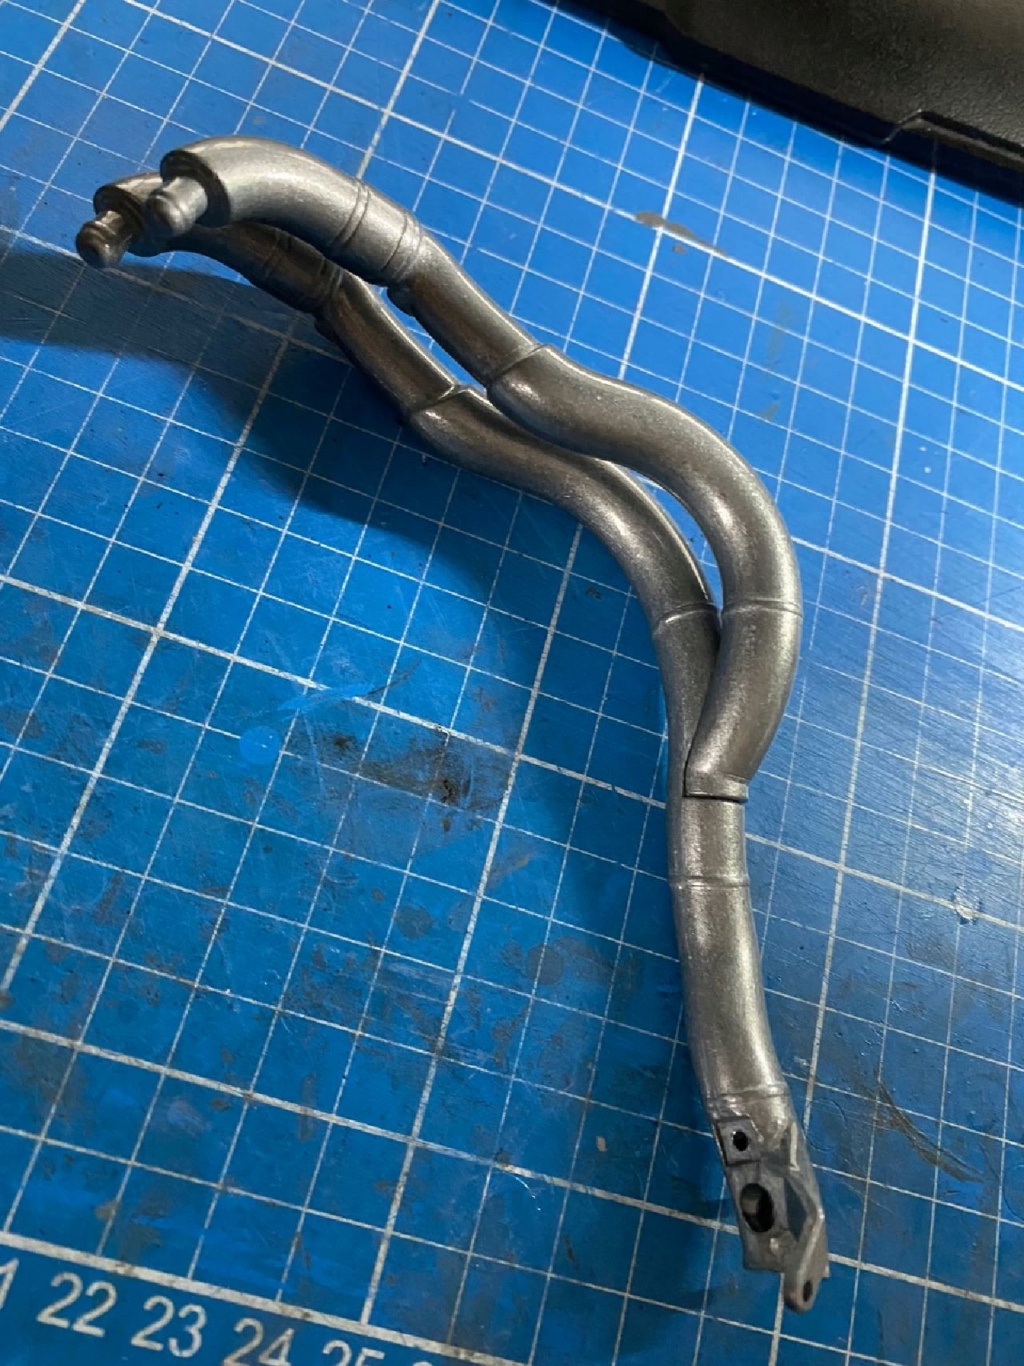
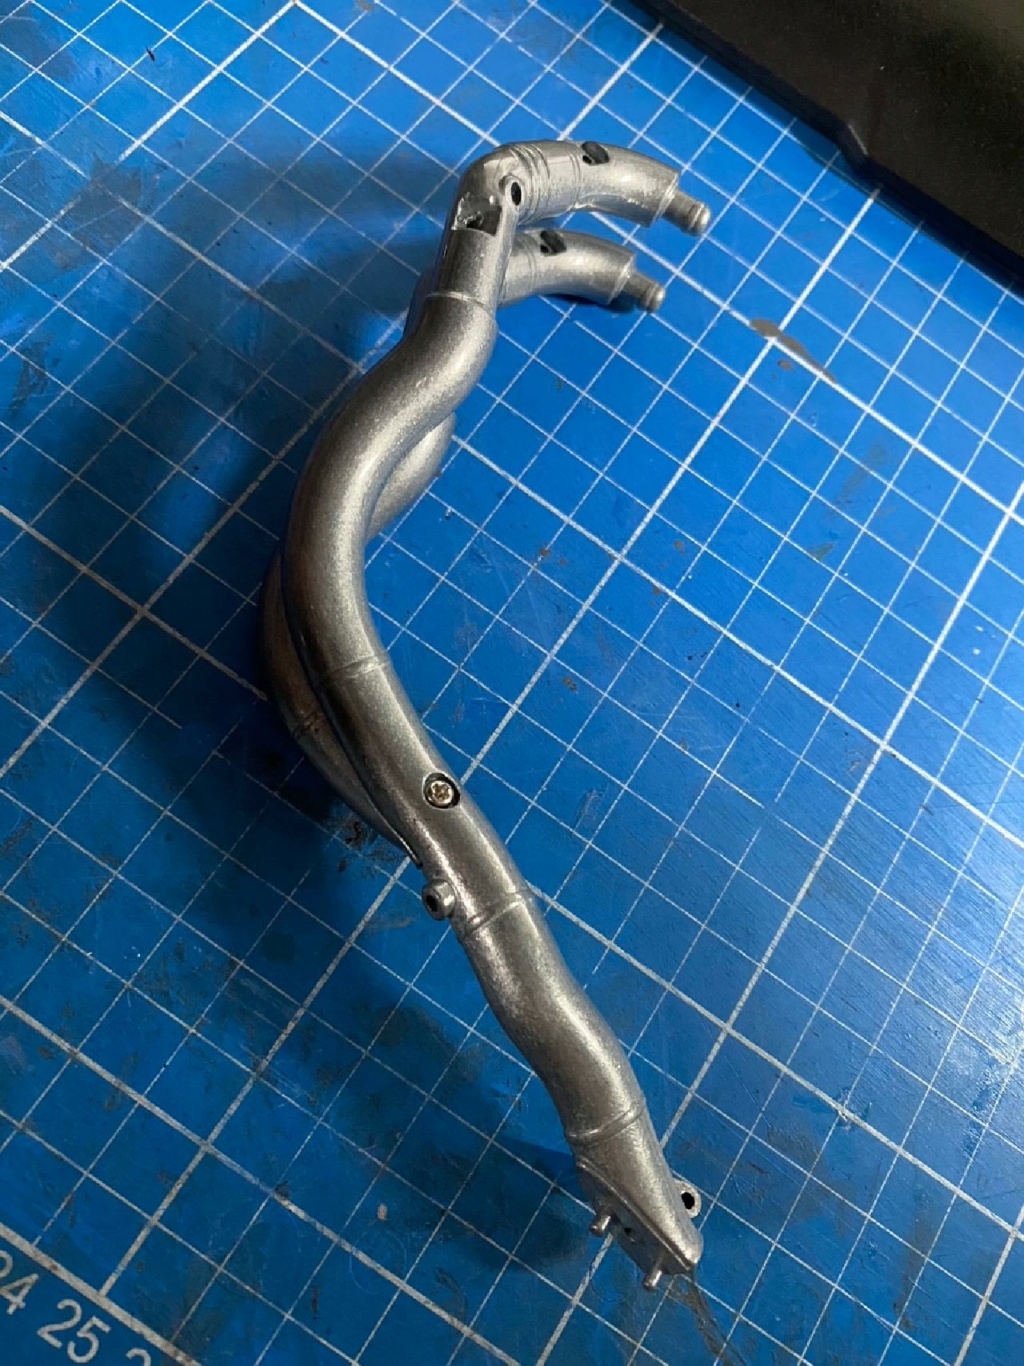
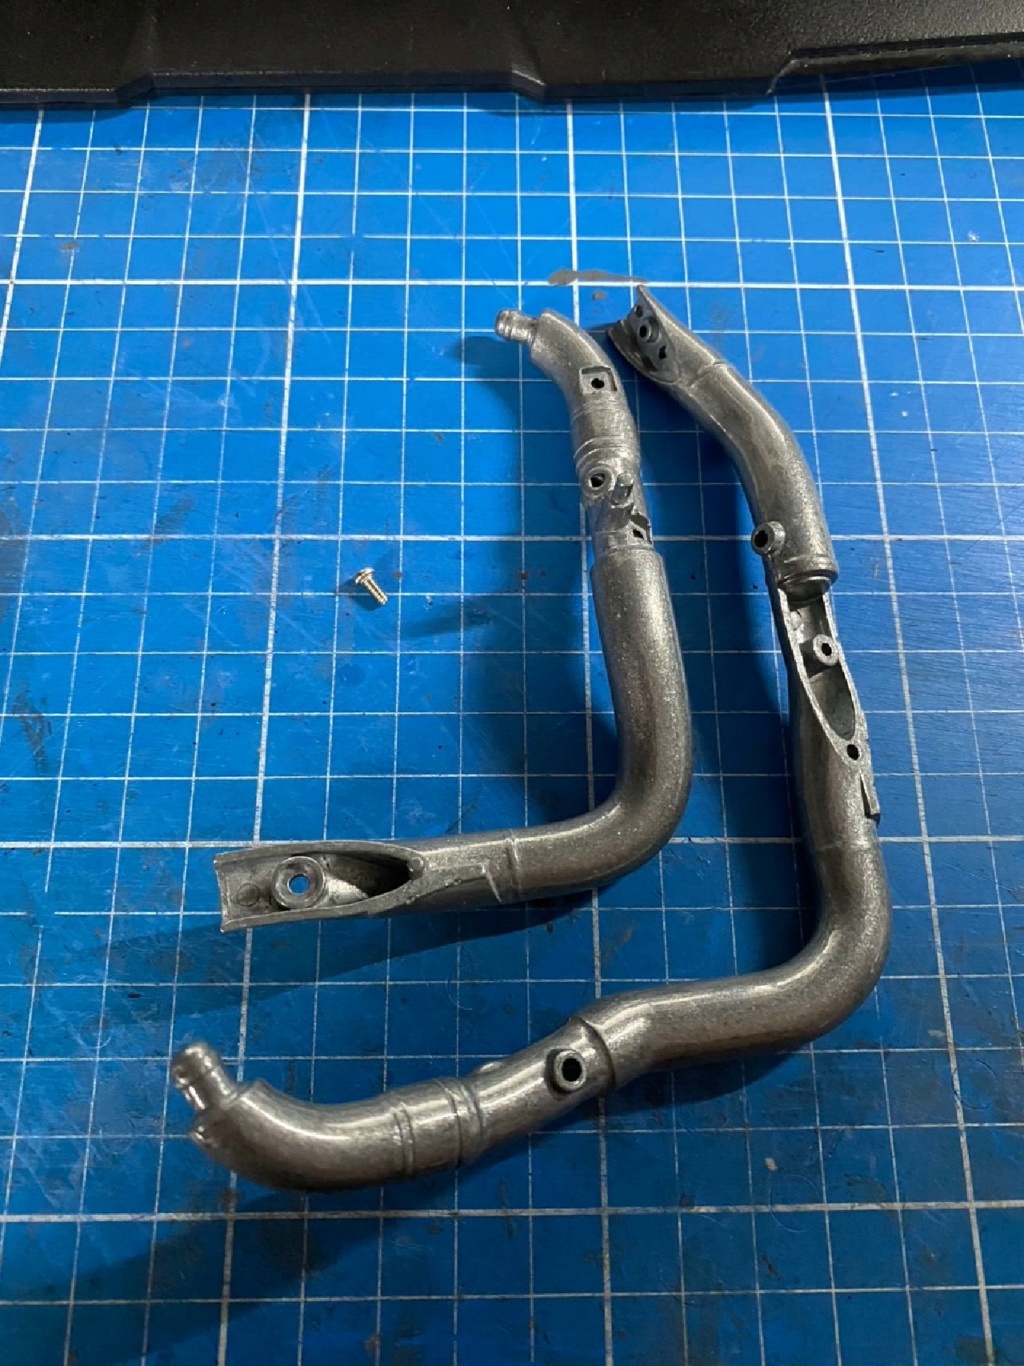
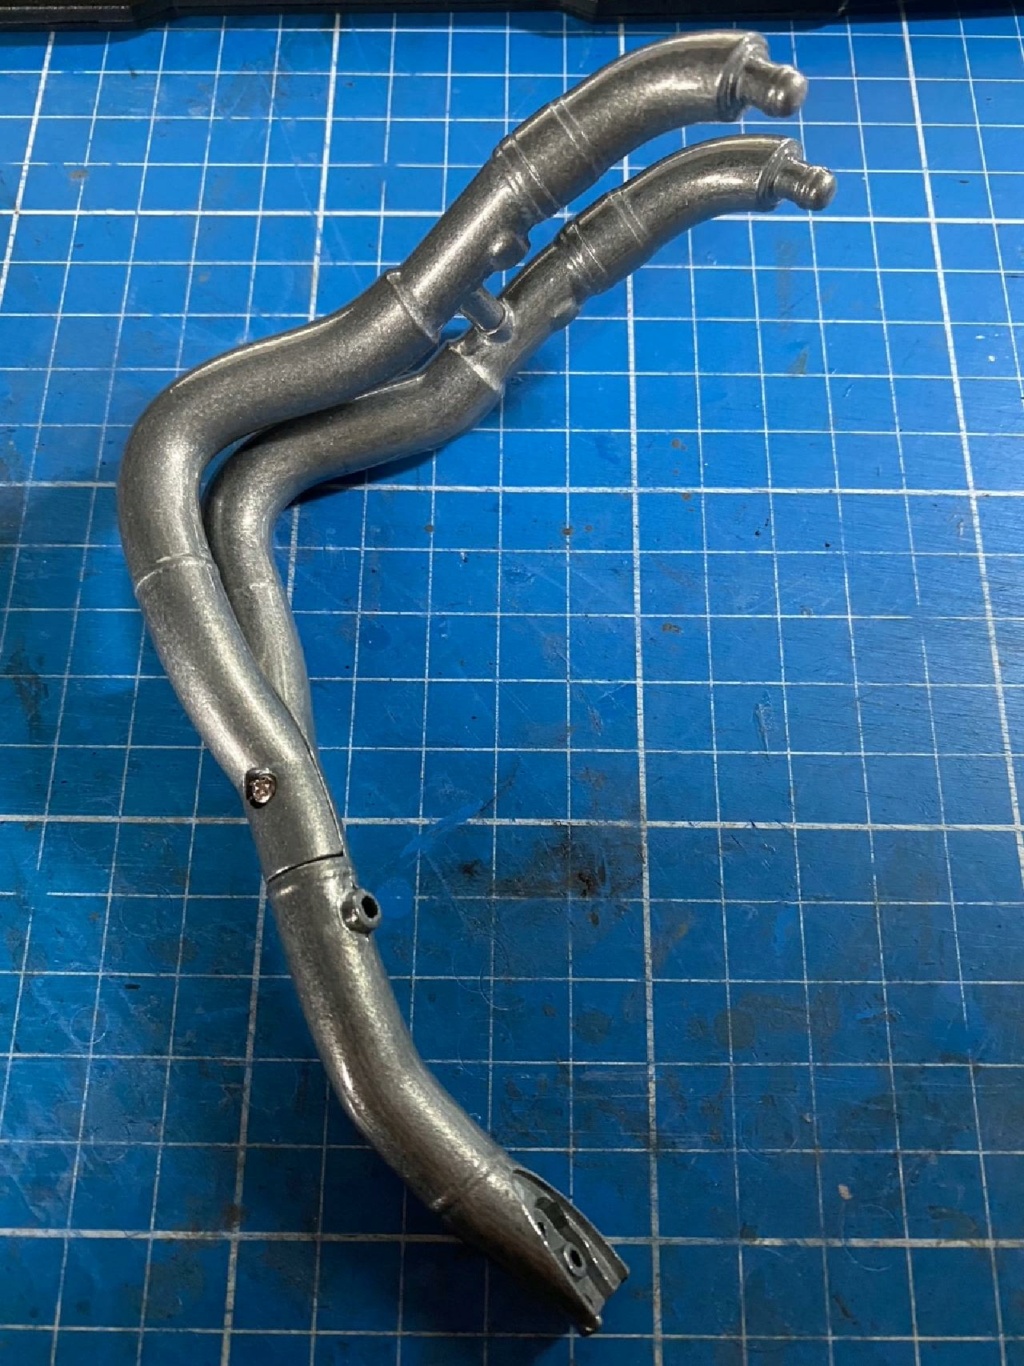
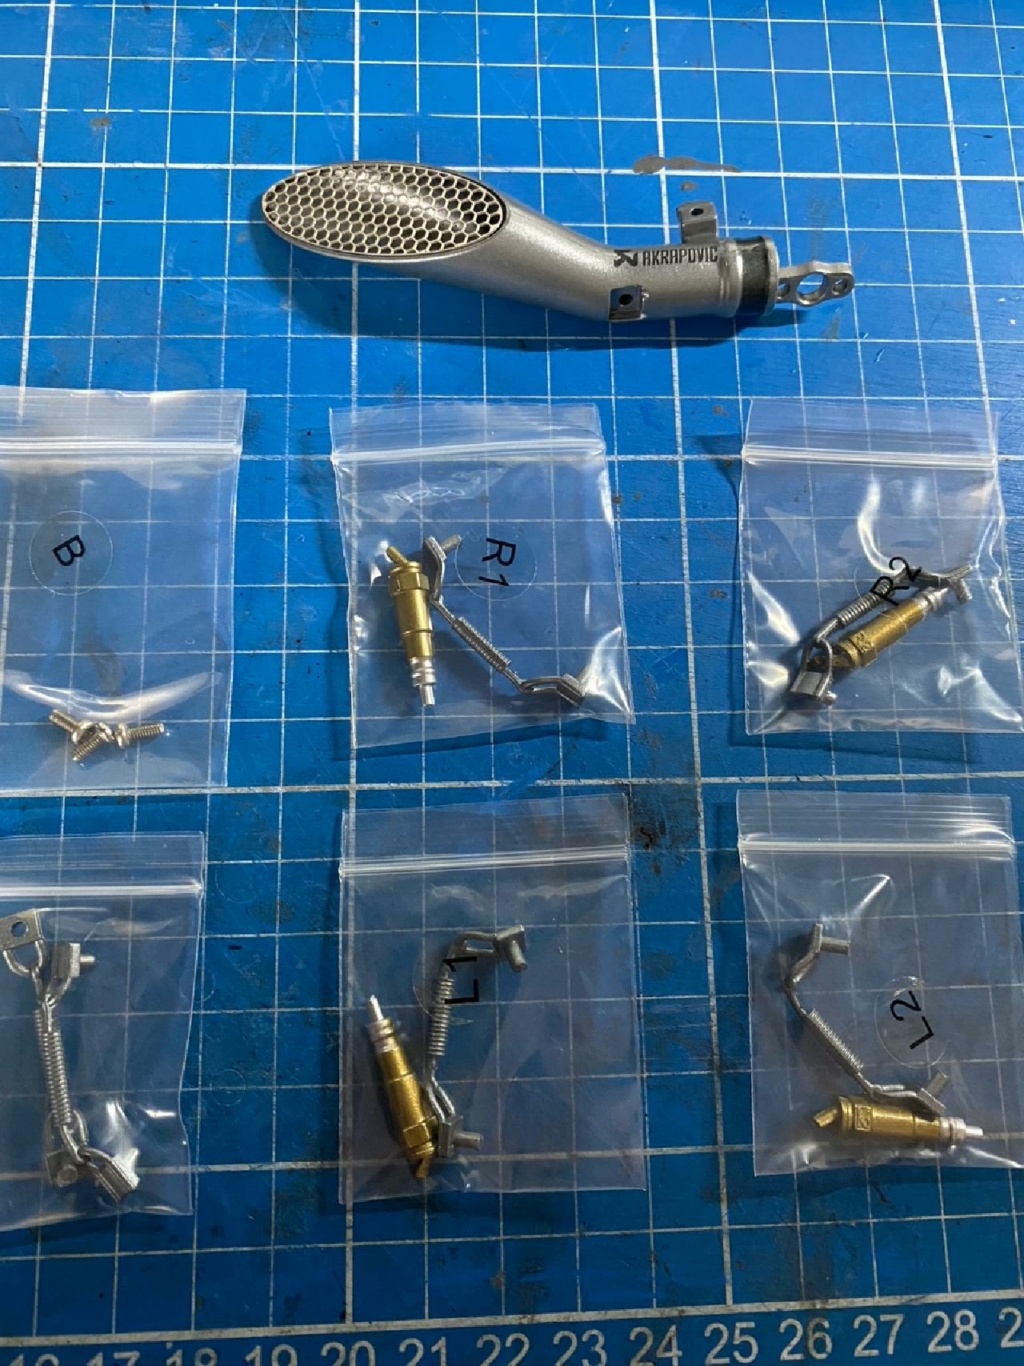
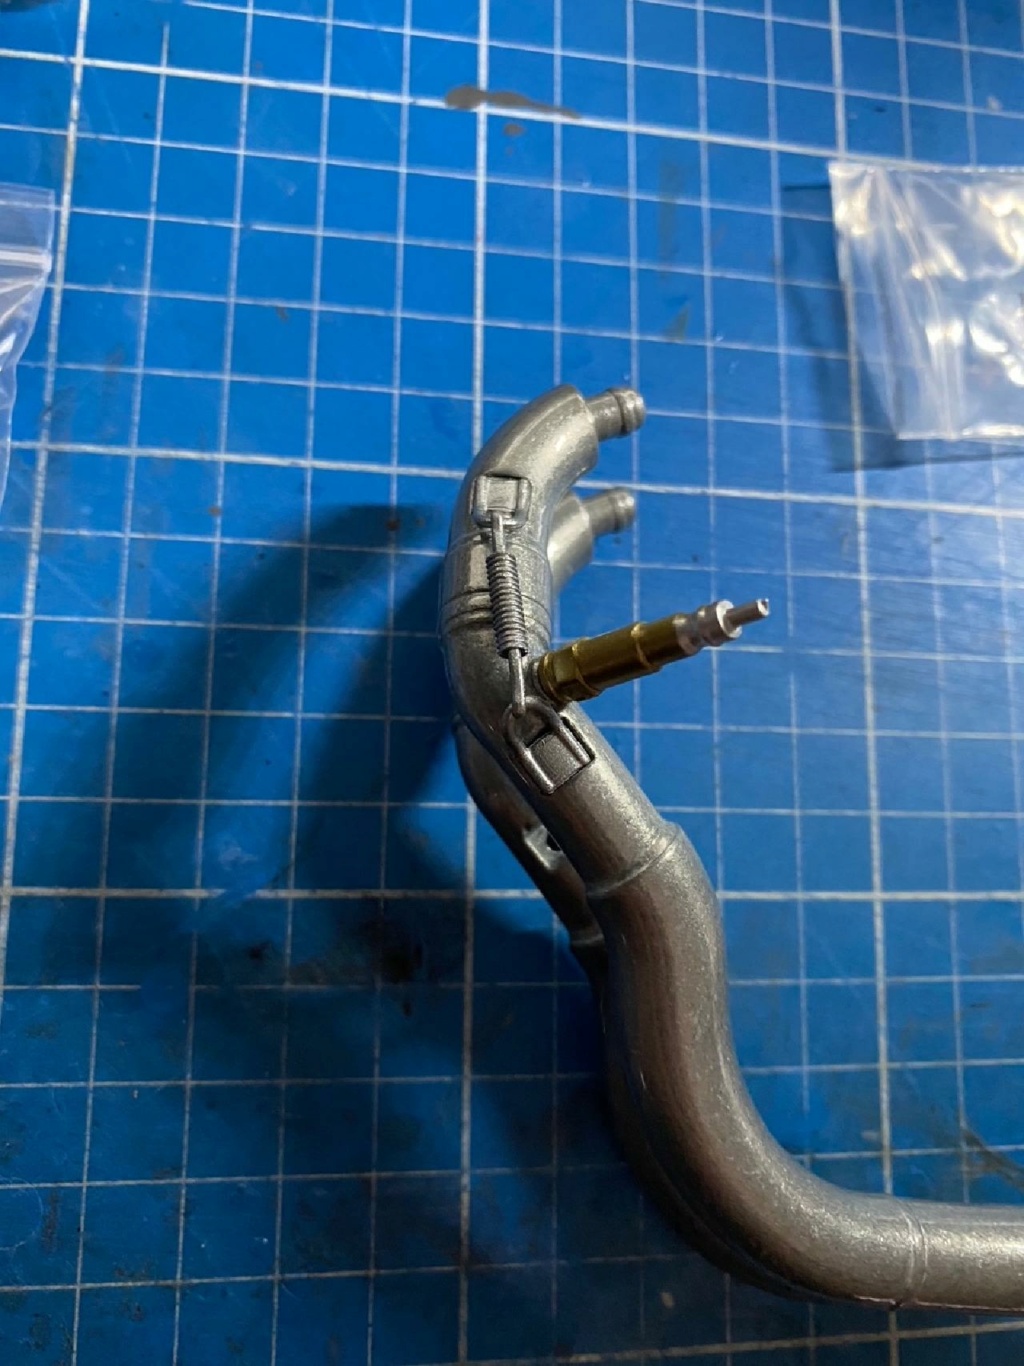
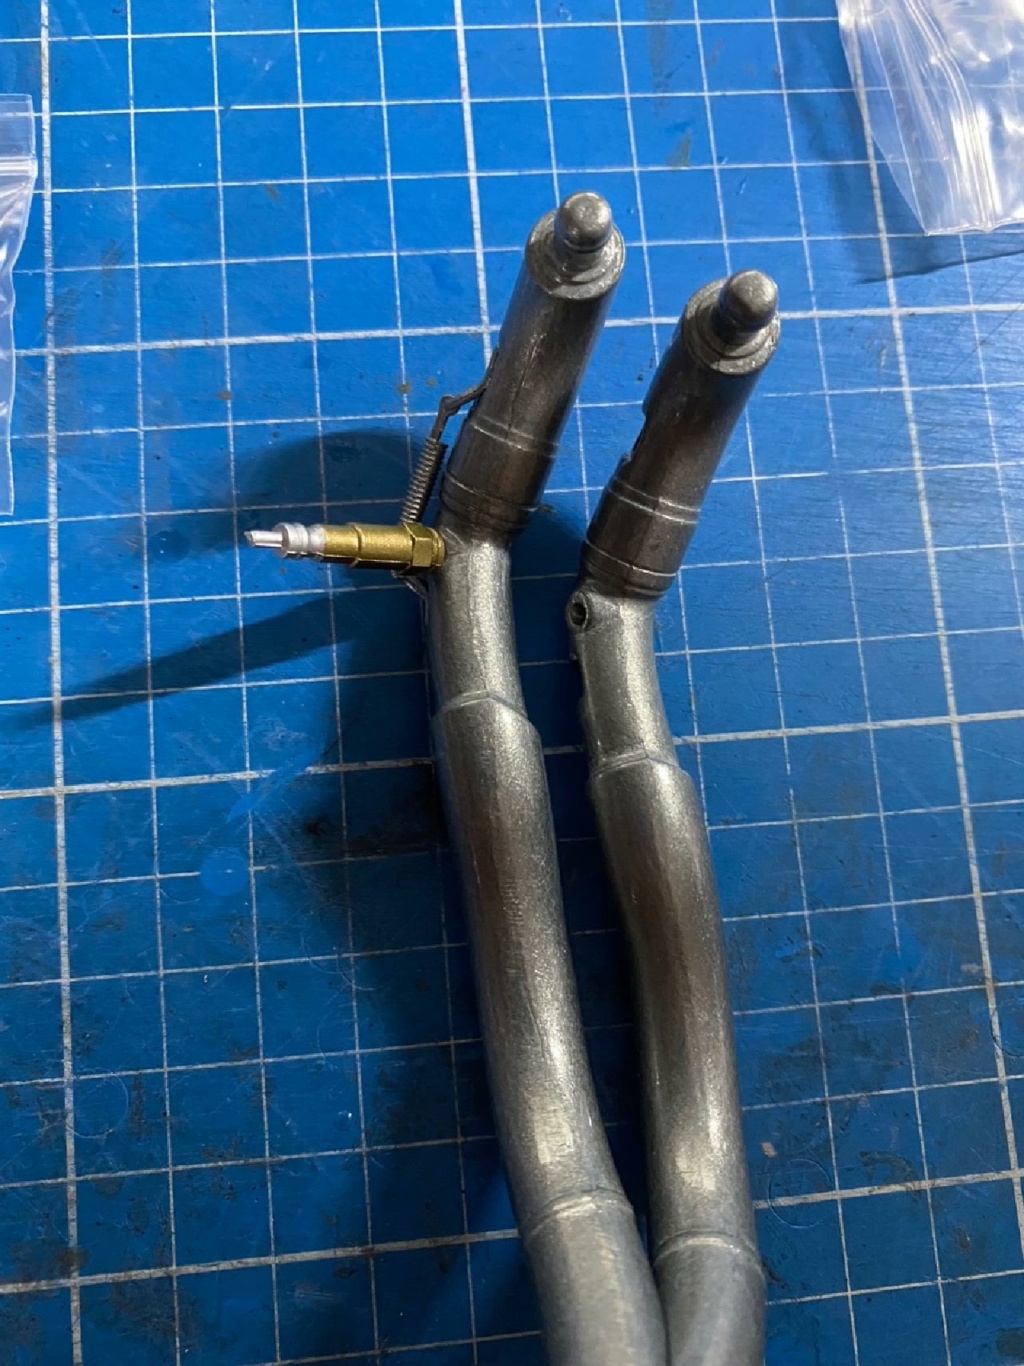
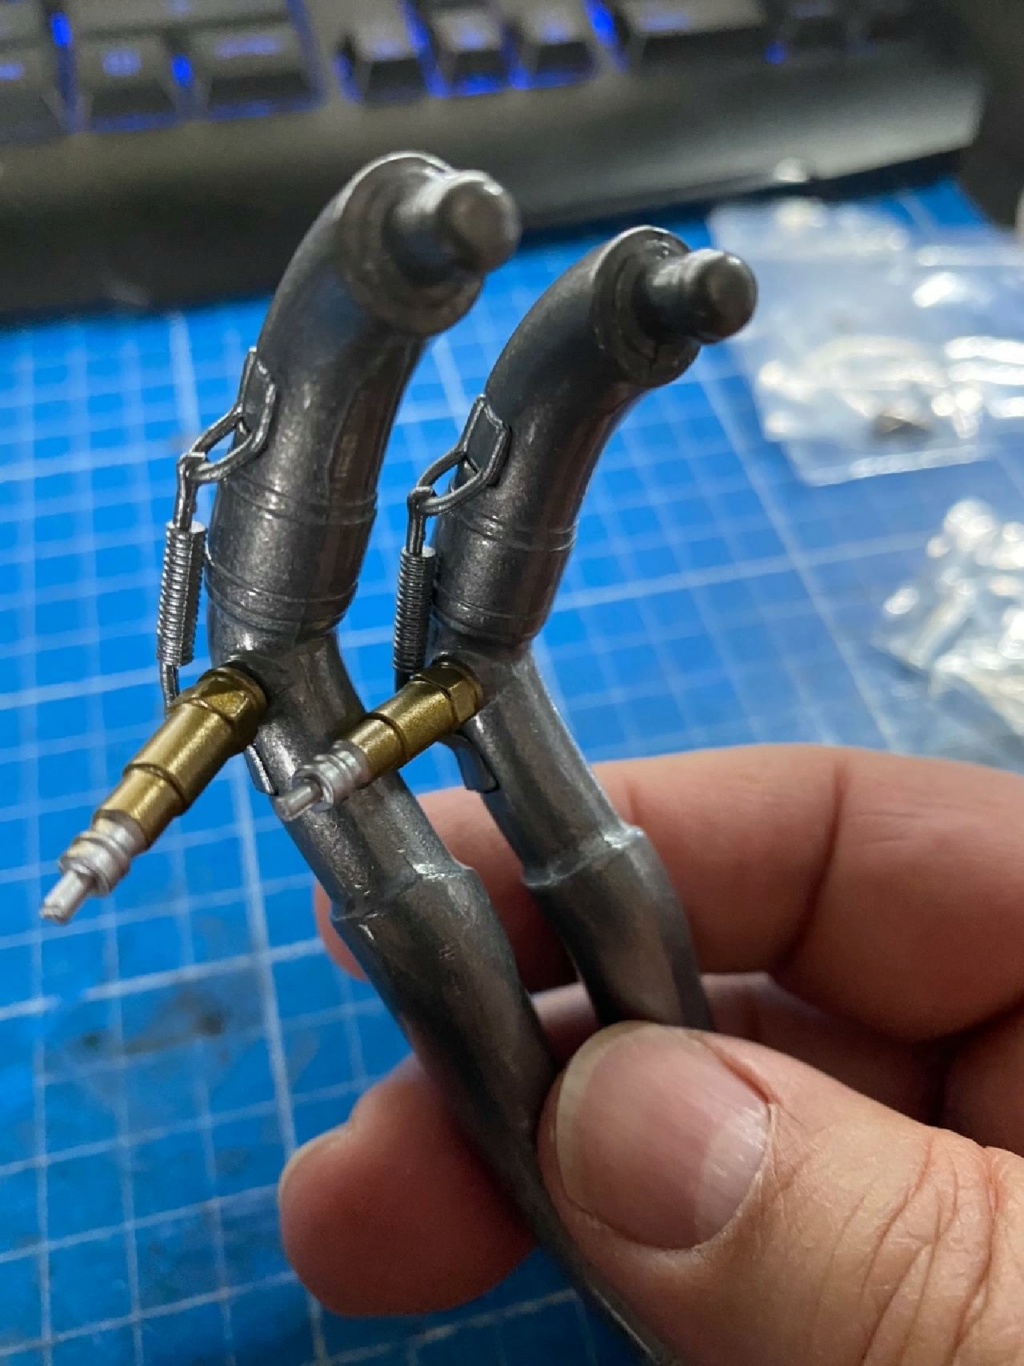
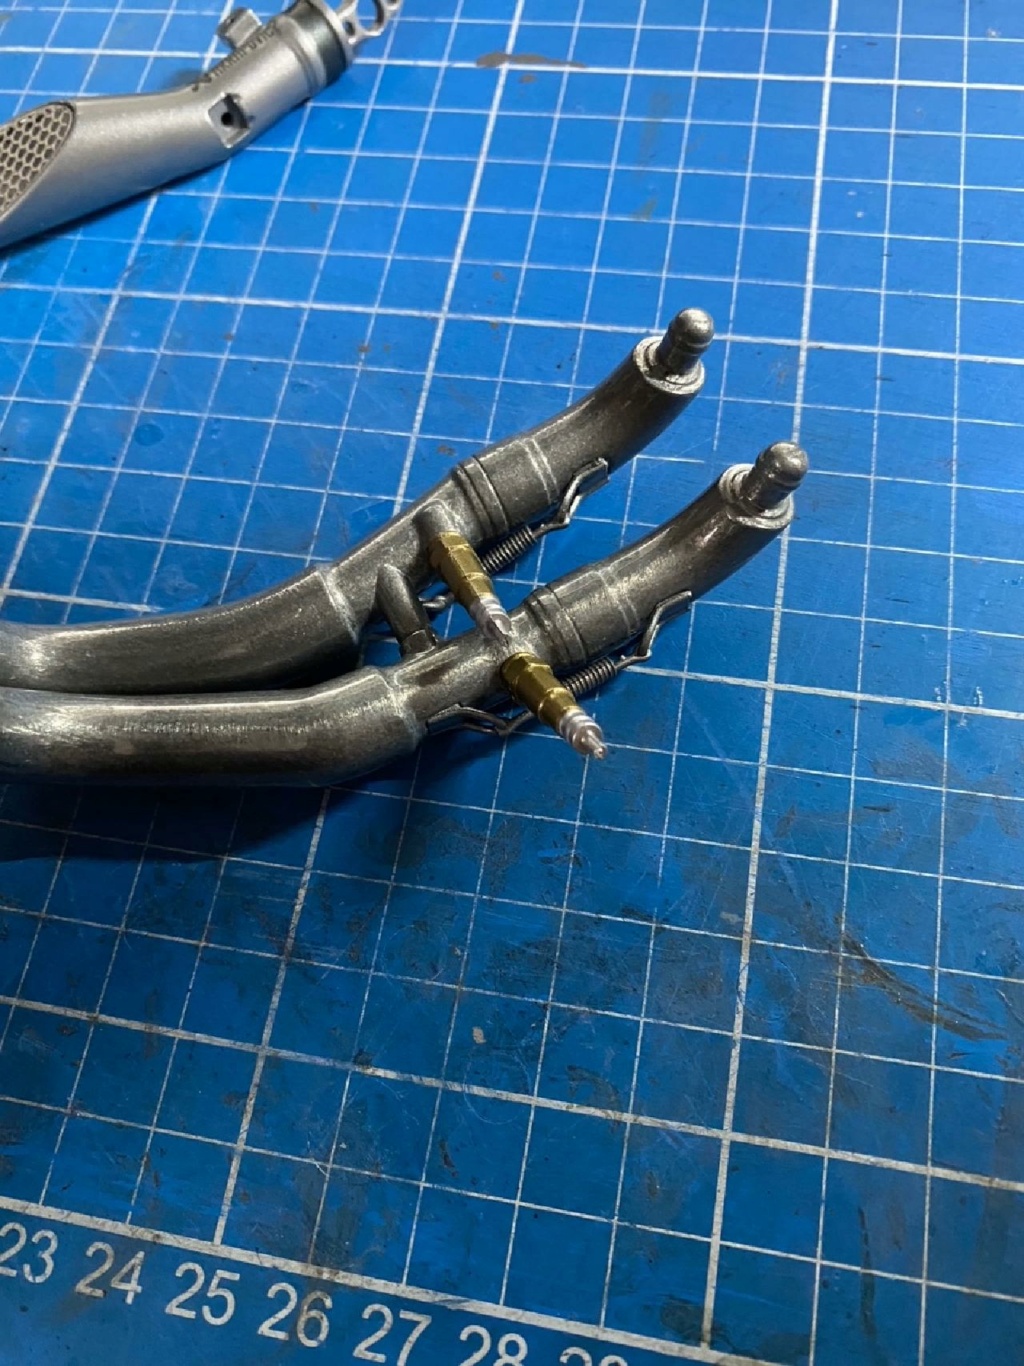
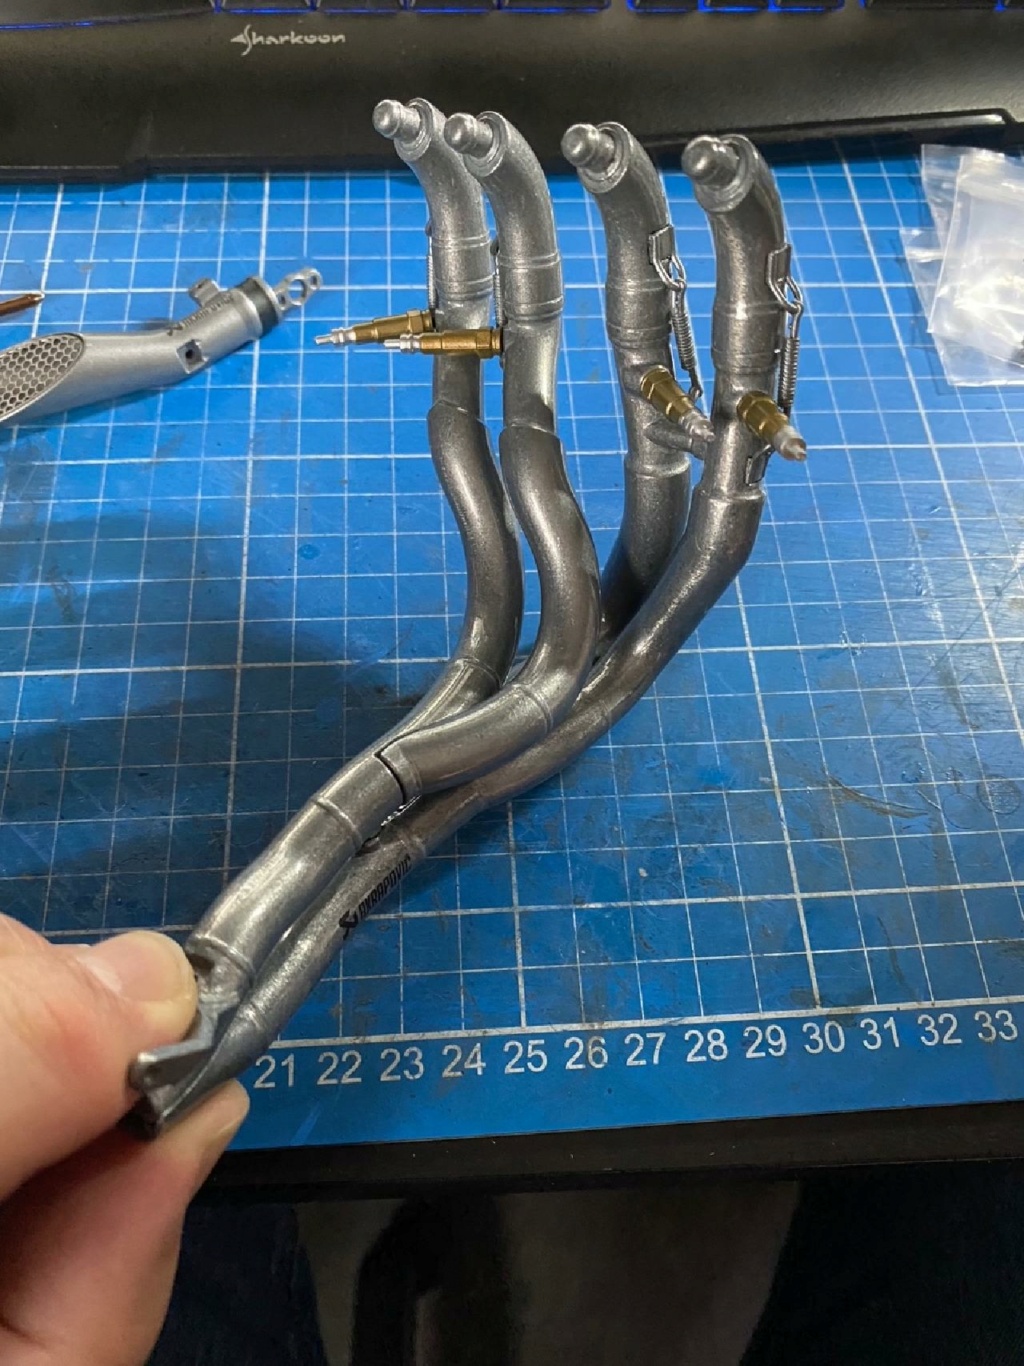
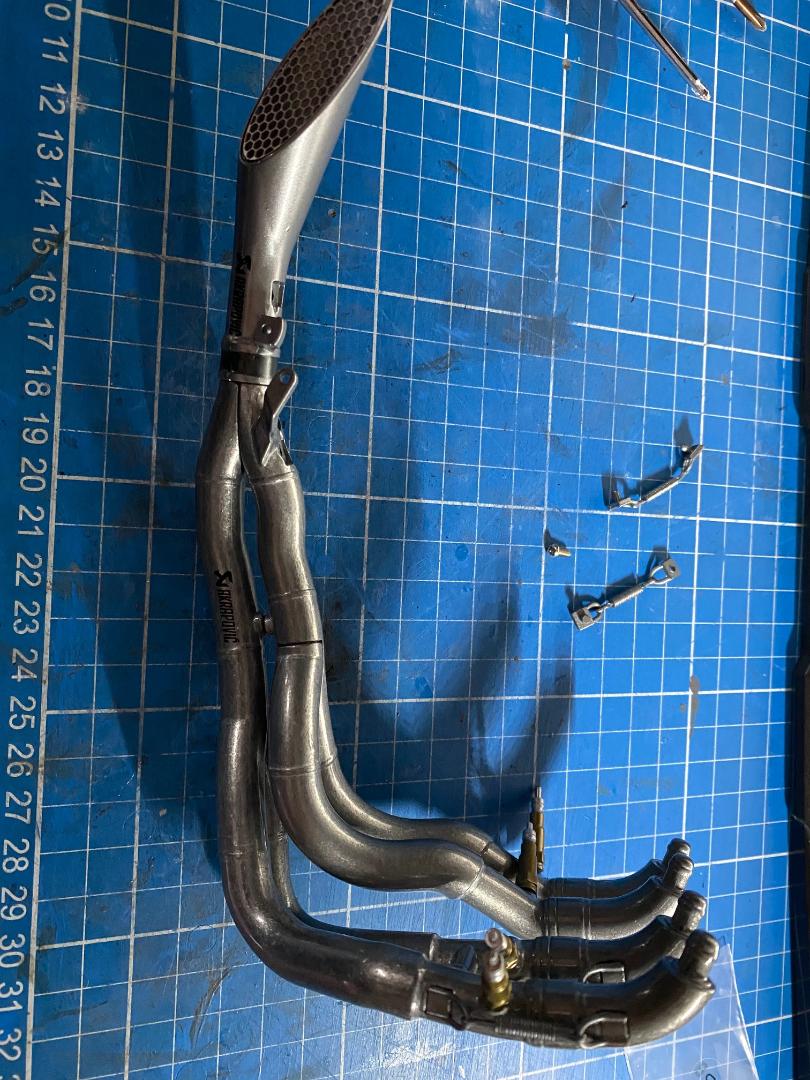
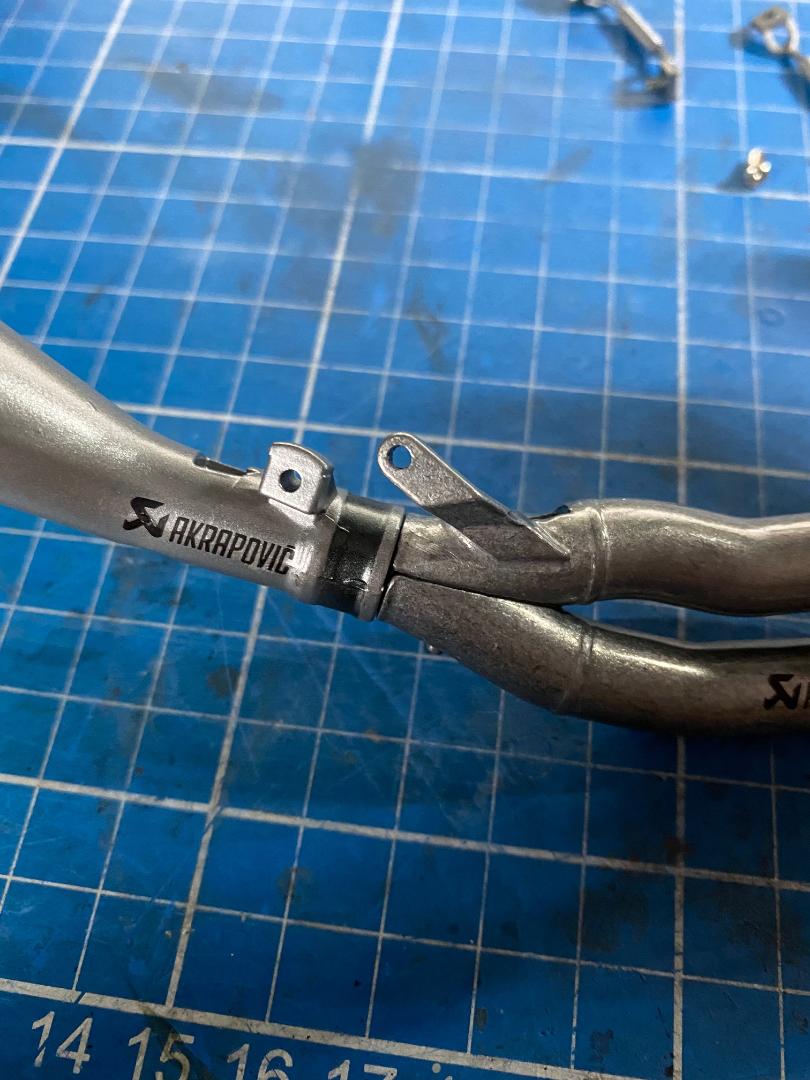
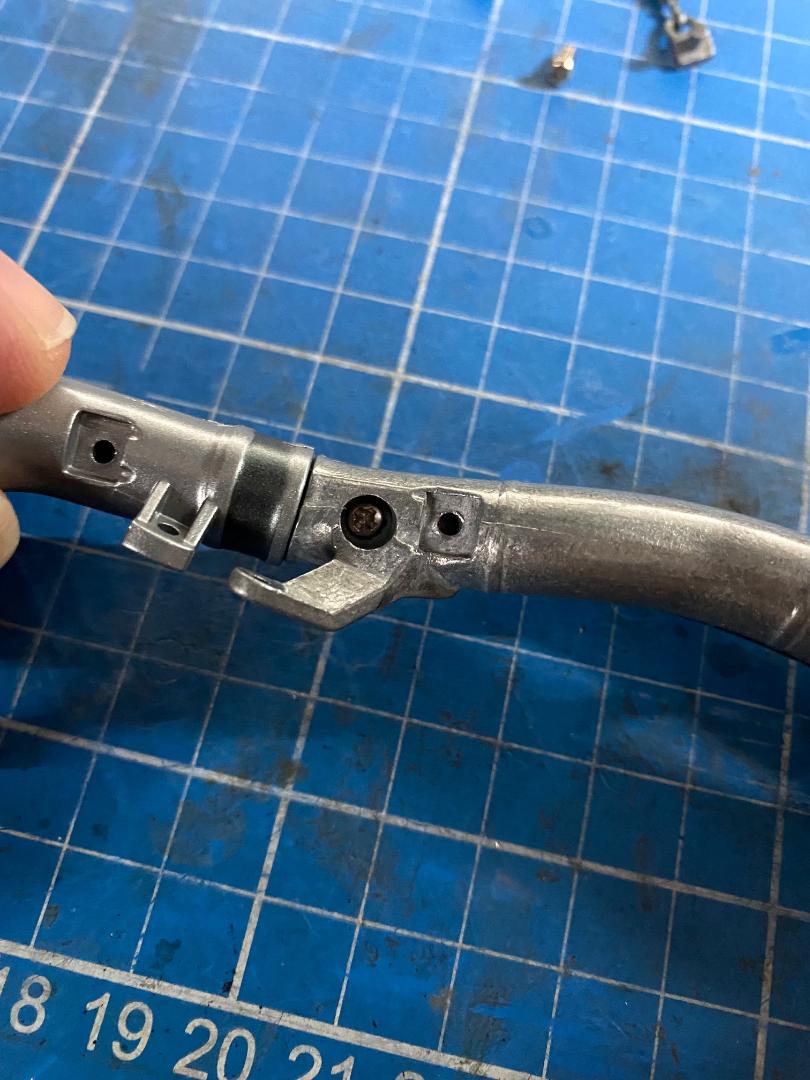
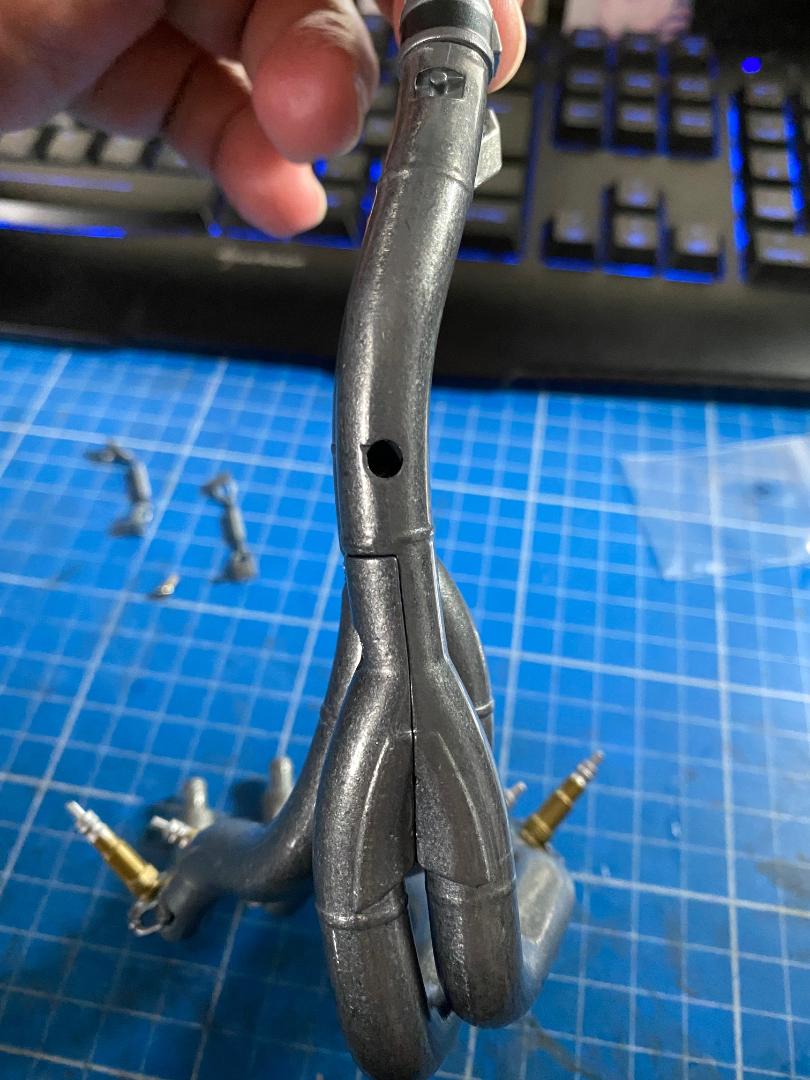
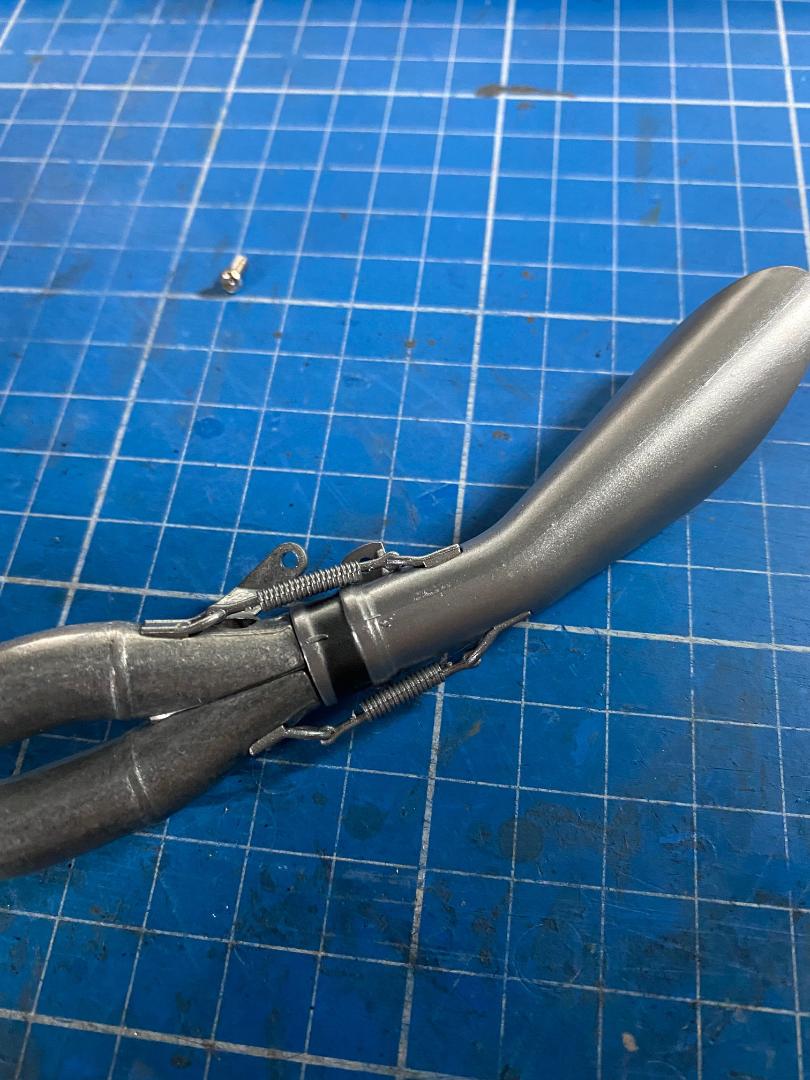
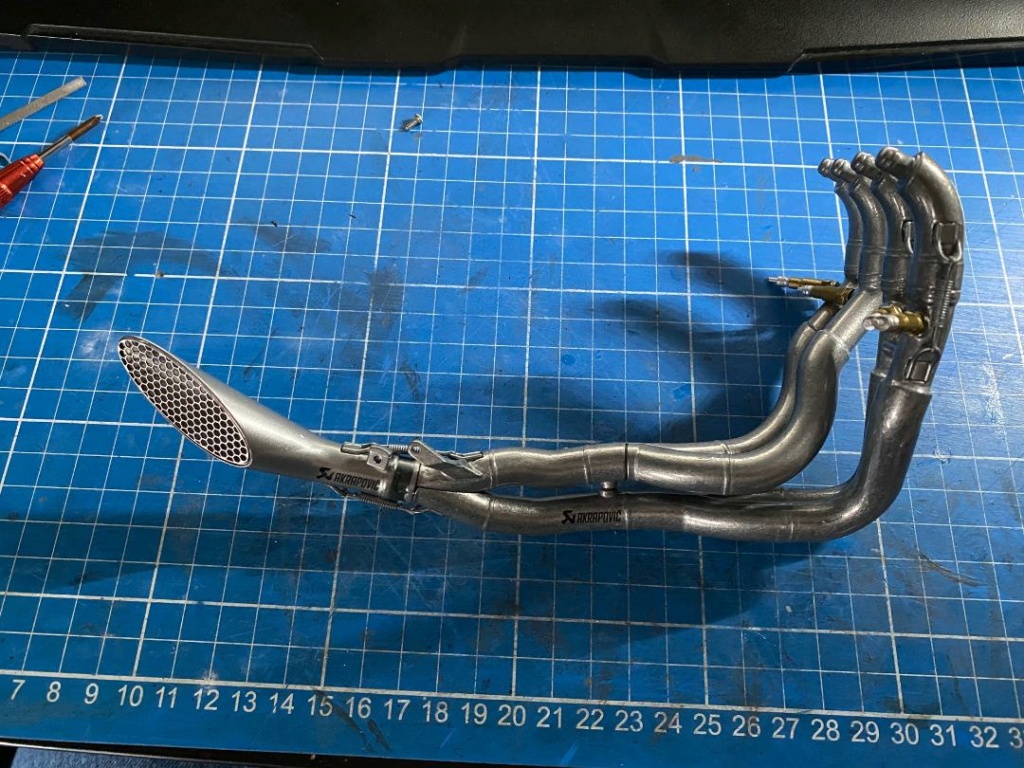
Die Metallkrümmer sind ganz gut verarbeitet und passen auch gut zusammen. Es werden erst die rechten Beiden und dann die linken Beiden verschraubt und mit Federzugstangen (lackiertes Gummi) und den Lambdasonden versehen. Sie werden einfach eingesteckt. Dafür sollte man aber die Löcher in den Metallkrümmern etwas entgraten, um die relativ weichen Teile gut hineindrücken zu können. Auch sollte man entgegen der Bauanleitung erst die Sonden und die Federverbinder einbauen. Das Zusammenschrauben hätte ich auch mal erst danach machen sollen, aber ich wollte die Krümmer nicht nochmal auseinander schrauben. Zum Verbinden der gesamten Auspuffanlage muss das Kunststoffendrohr (mit einem echt coolen Gitter davor) zwischen die beiden Krümmerbaugruppen gesteckt werden. Dann das Ganze mit zwei Schrauben zusammengeschraubt und fertig.
Der Zylinderkopfdeckel und der goldene Deckel werden einfach mit zwei Schrauben verbunden. Dabei auf die richtige Position des Nuppies am goldenen Deckel achten.
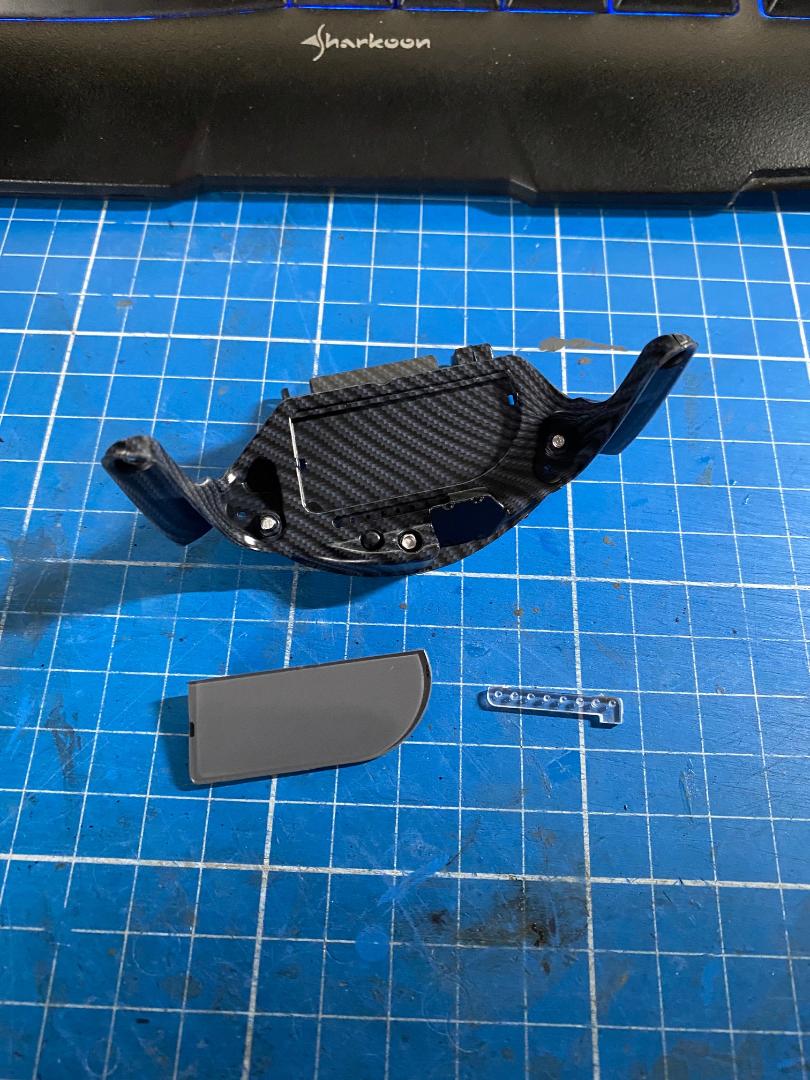
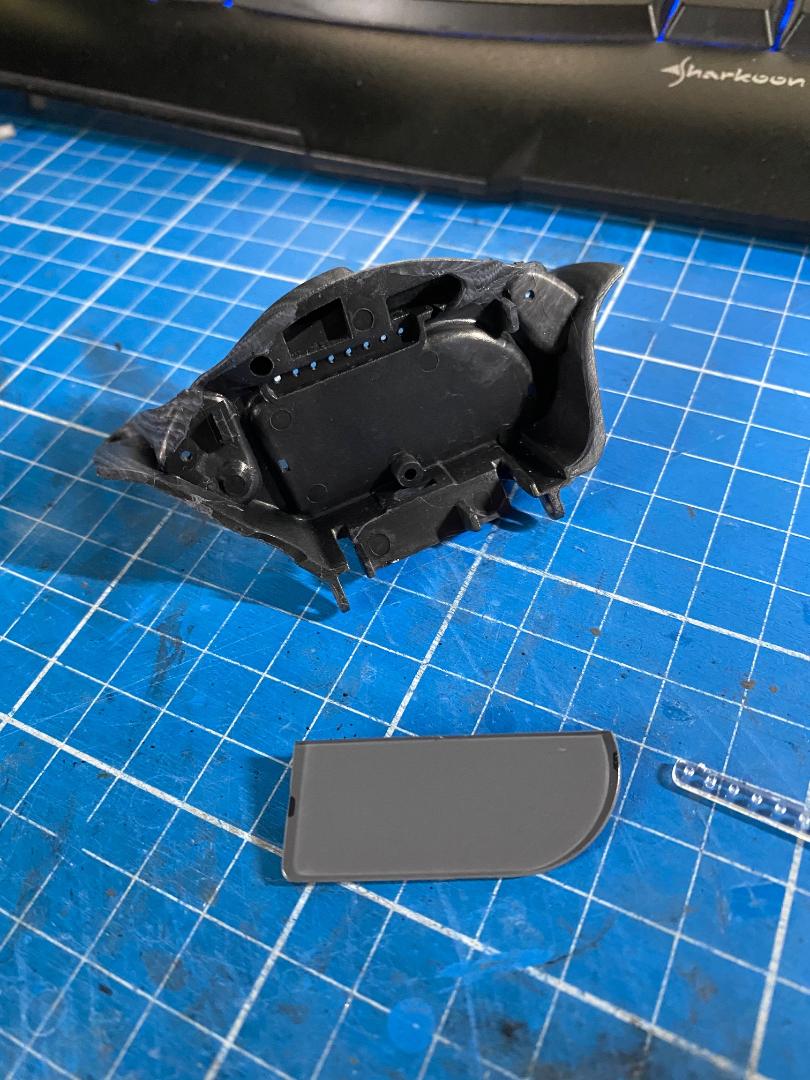
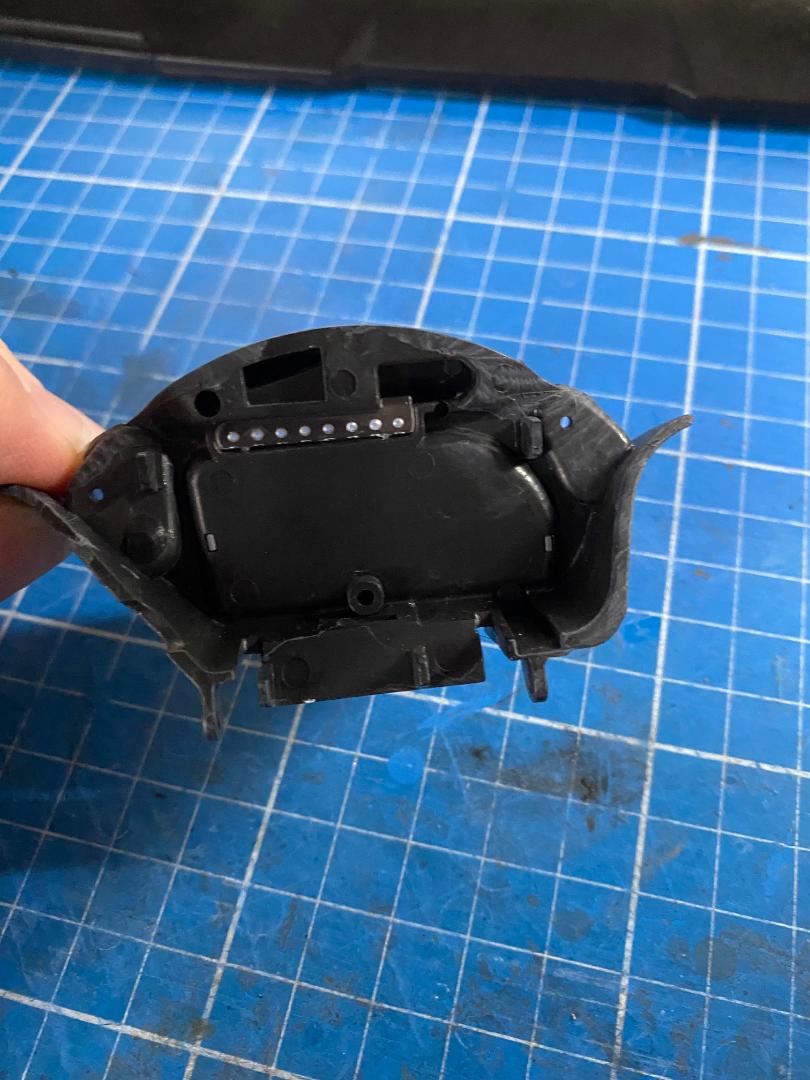
Das Armaturenbrett wird einfach aus den gezeigten drei Teilen zusammengesteckt. Das Klarsichtteil rastet von hinten hinter den Kontrolleuchten ein und das graue Display von vorn. Das Motorrad scheint leider mit Zündung aus dargestellt zu werden...
 " />
" /> " />
" /> " />
" /> " />
" /> " />
" /> " />
" /> " />
" /> " />
" /> " />
" /> " />
" /> " />
" /> " />
" /> " />
" /> " />
" /> " />
" /> " />
" /> " />
" /> " />
" /> " />
" /> " />
" /> " />
" /> " />
" /> " />
" /> " />
" /> " />
" />
Maddin- Schneidmatten-Virtuose
John-H. und Six-Seven mögen diesen Beitrag
Re: Valentino Rossi's Yamaha YZR M1 in 1:4 von DeAgostini
![]() von Thoto Mo 06 Dez 2021, 17:11
von Thoto Mo 06 Dez 2021, 17:11


Thoto- Modellbau-Experte

Re: Valentino Rossi's Yamaha YZR M1 in 1:4 von DeAgostini
![]() von Maddin Di 07 Dez 2021, 14:20
von Maddin Di 07 Dez 2021, 14:20
 Ist ja bis jetzt nur stecken, kleben und schrauben.
Und damit geht´s gleich weiter mit Lieferung 3, Pack 5:
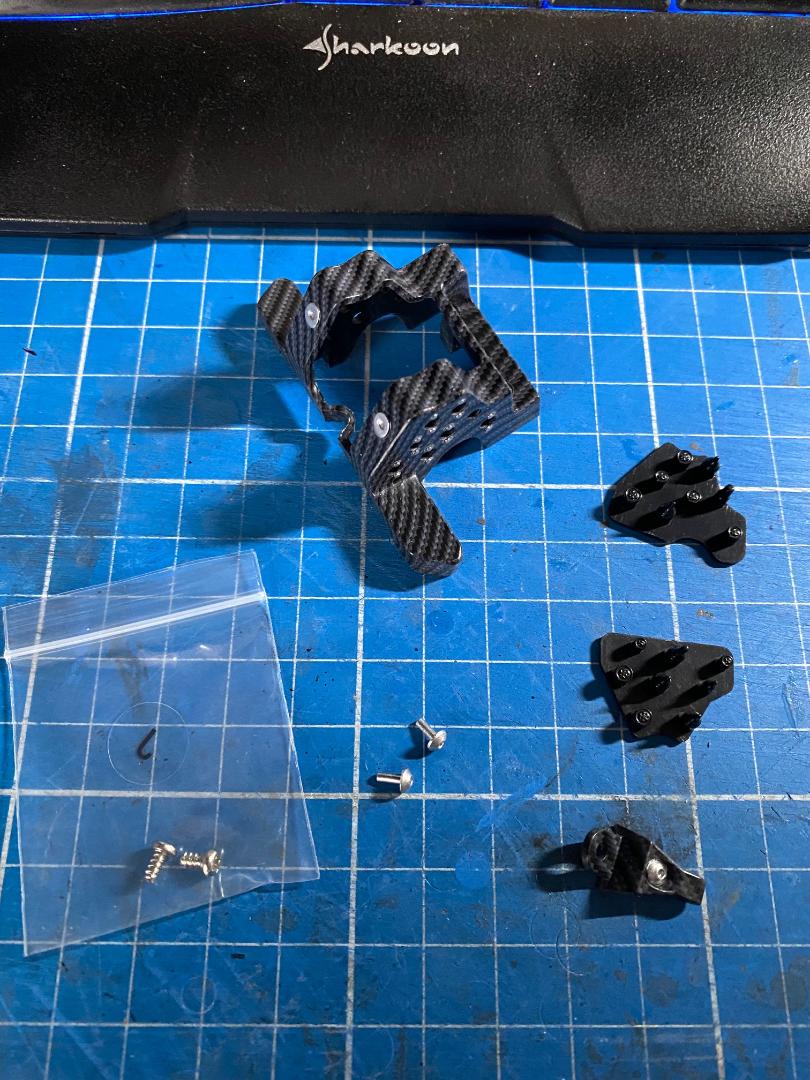
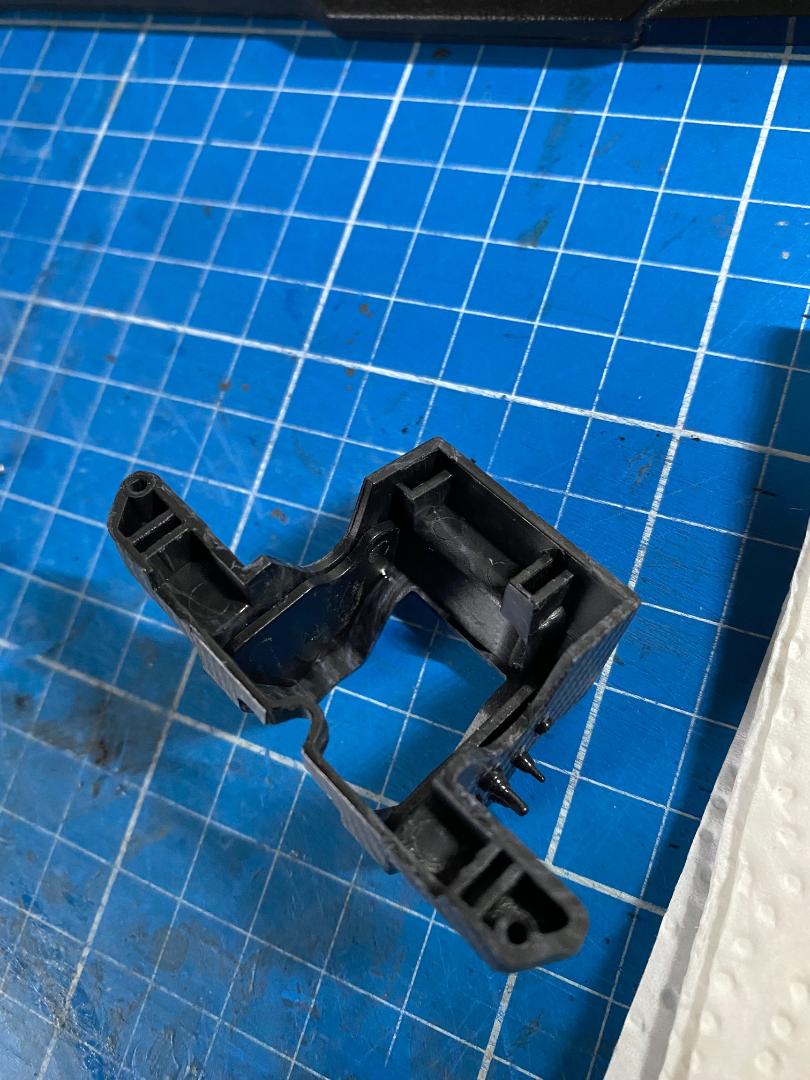
Armaturenbretthalter, COCKPIT
Die Teile mit den Schaltern und Knöpfen werden einfach von innen durch die Löcher in den Seiten des Armaturenbretthalters gedrückt und fertig.
 " />
" /> " />
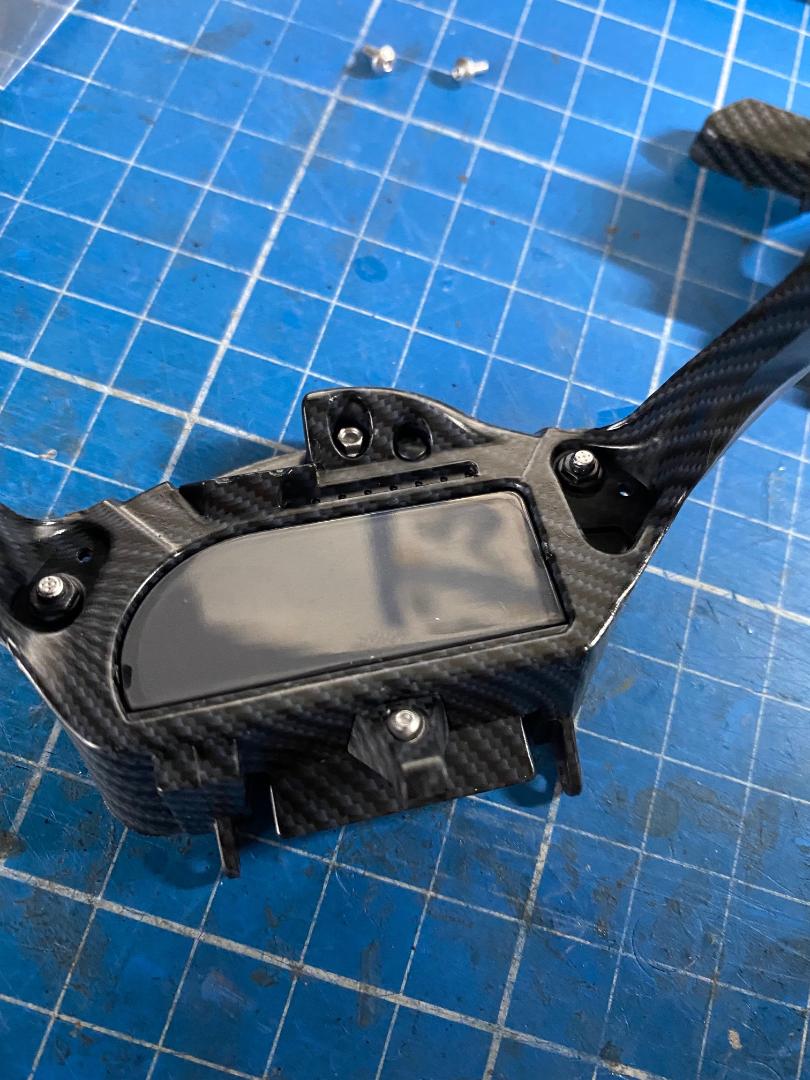
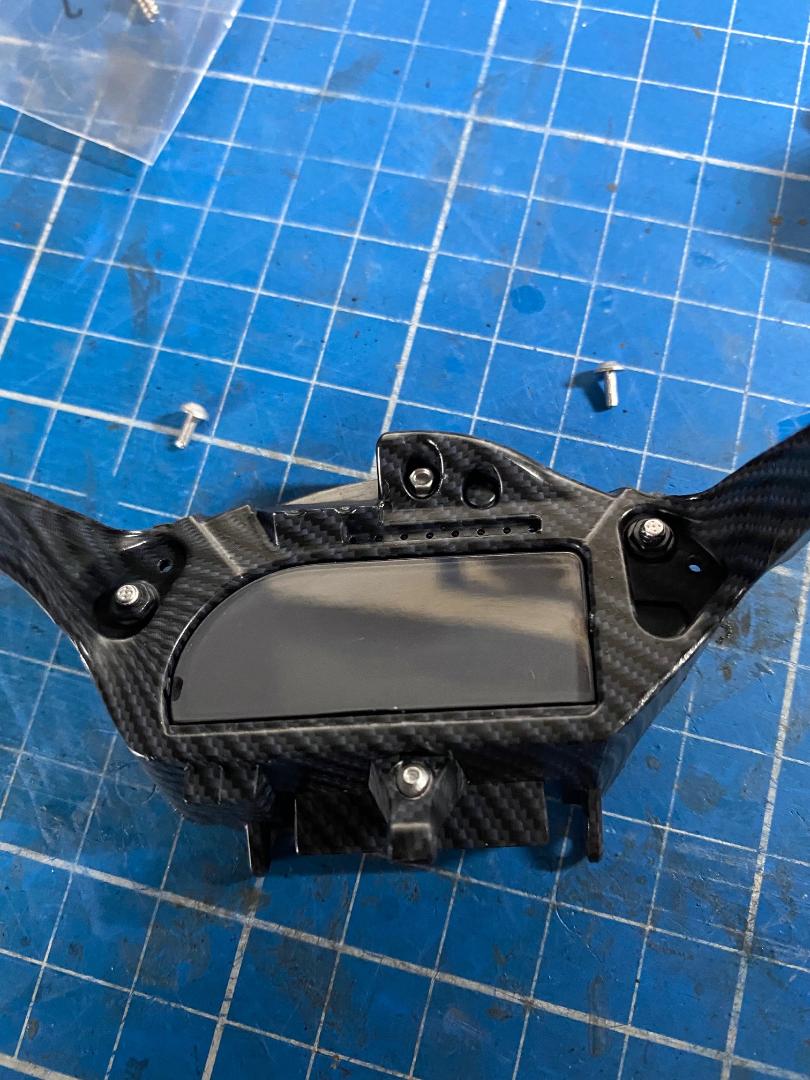
" />Die kleine Halterung wird durch das Armaturenbrett hindurchgesteckt und von hinten verschraubt.
 " />
" /> " />
" /> " />
" />Die beiden kleinen "Inbus-Schrauben" werden in die kleinen Löcher im Cockpit gesteckt und ich habe sie, bevor ich den Armaturenbretthalter von hinten auf die Beiden gedrückt habe, sie von hinten mit Plastikkleber fixiert und dann gleich den Halter draufgedrückt. So ist alles gesichert.
 " />
" /> " />
" /> " />
" /> " />
" /> " />
" /> " />
" /> " />
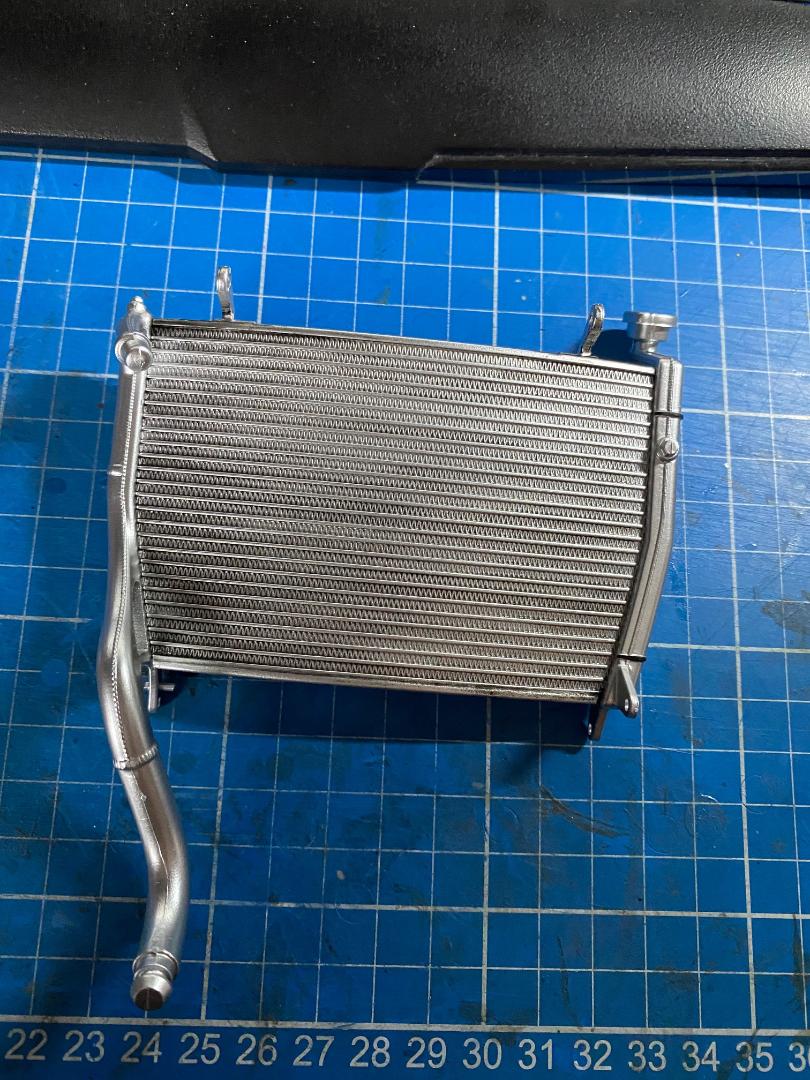
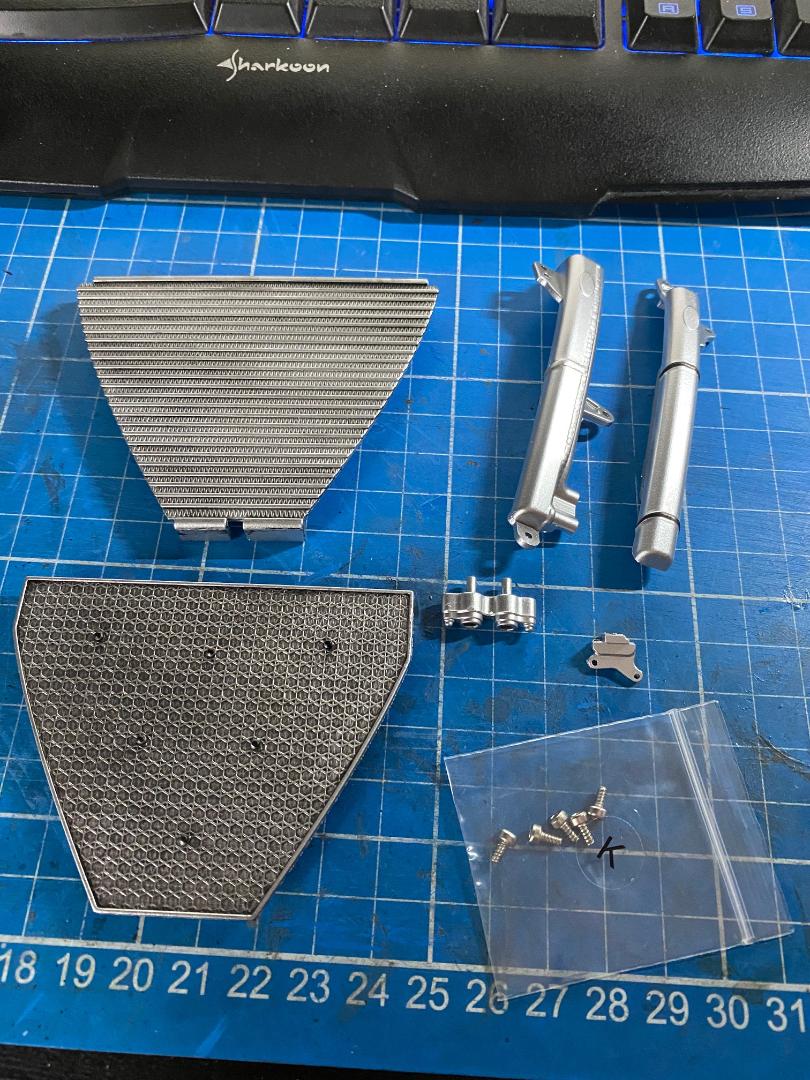
" />KÜHLERTEILE:
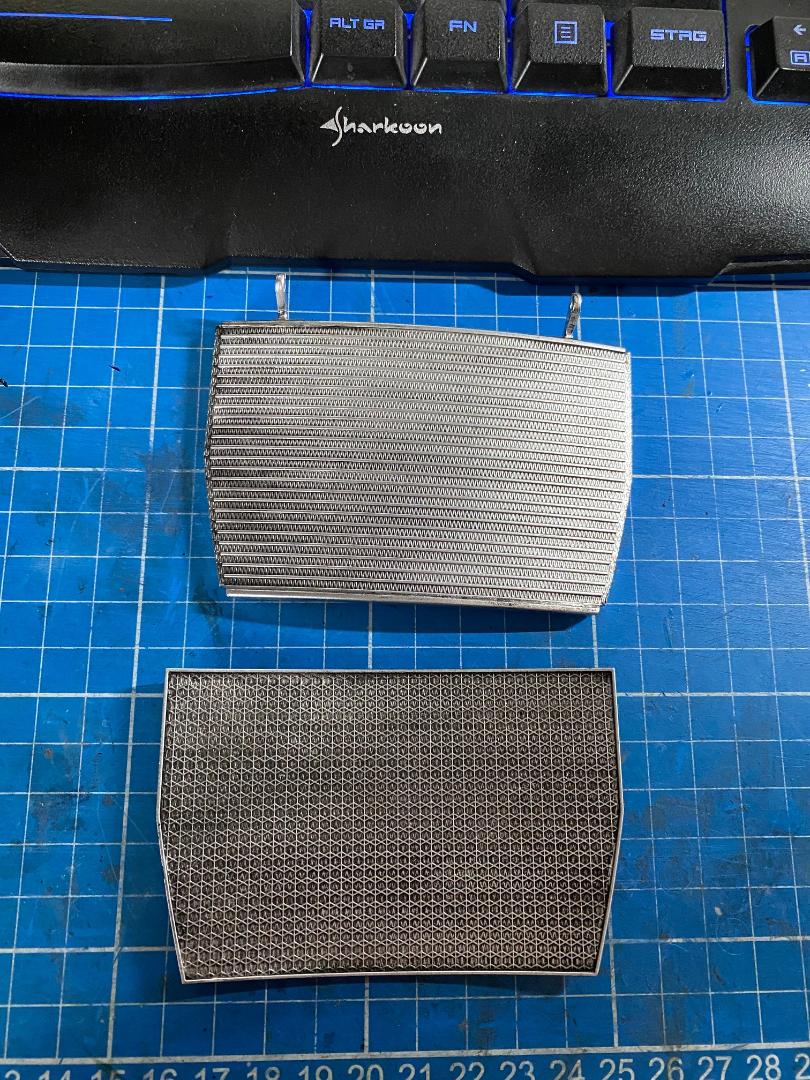
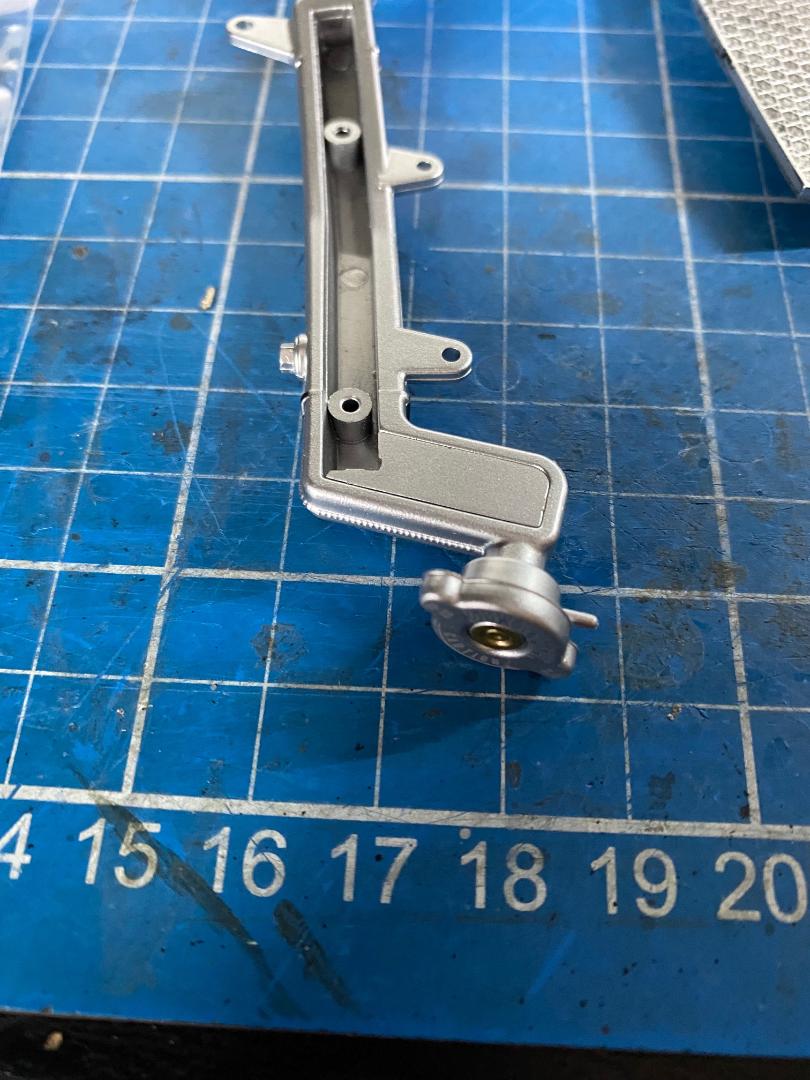
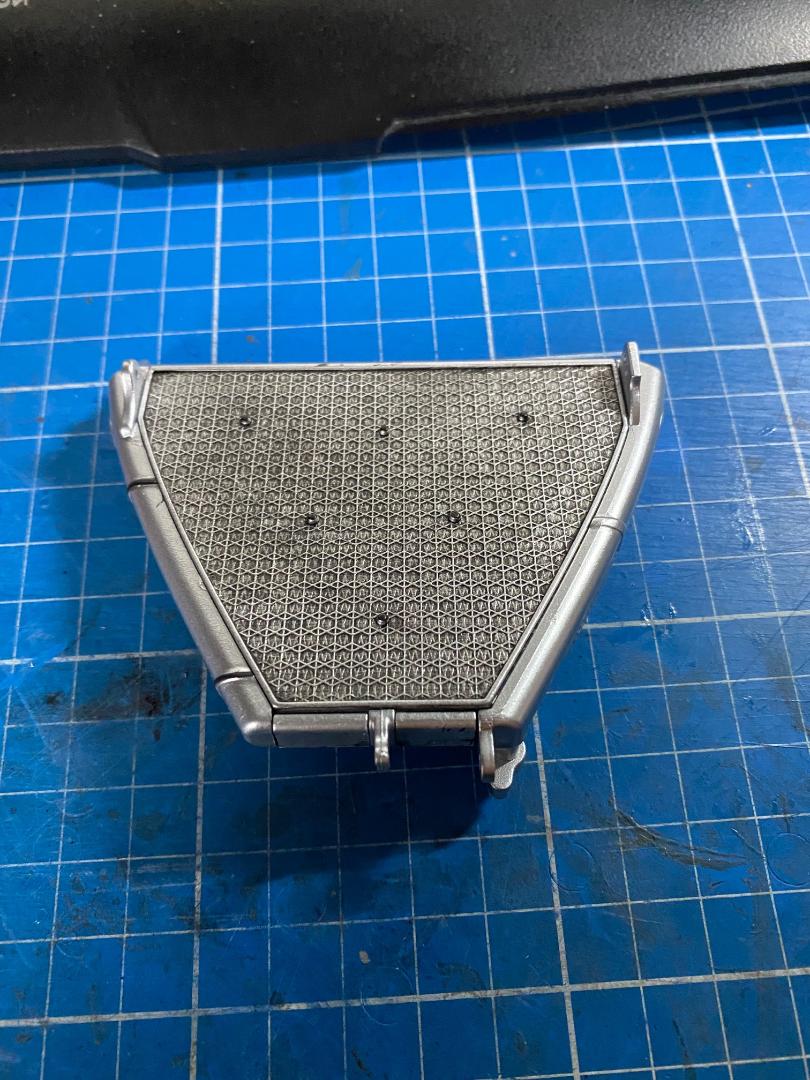
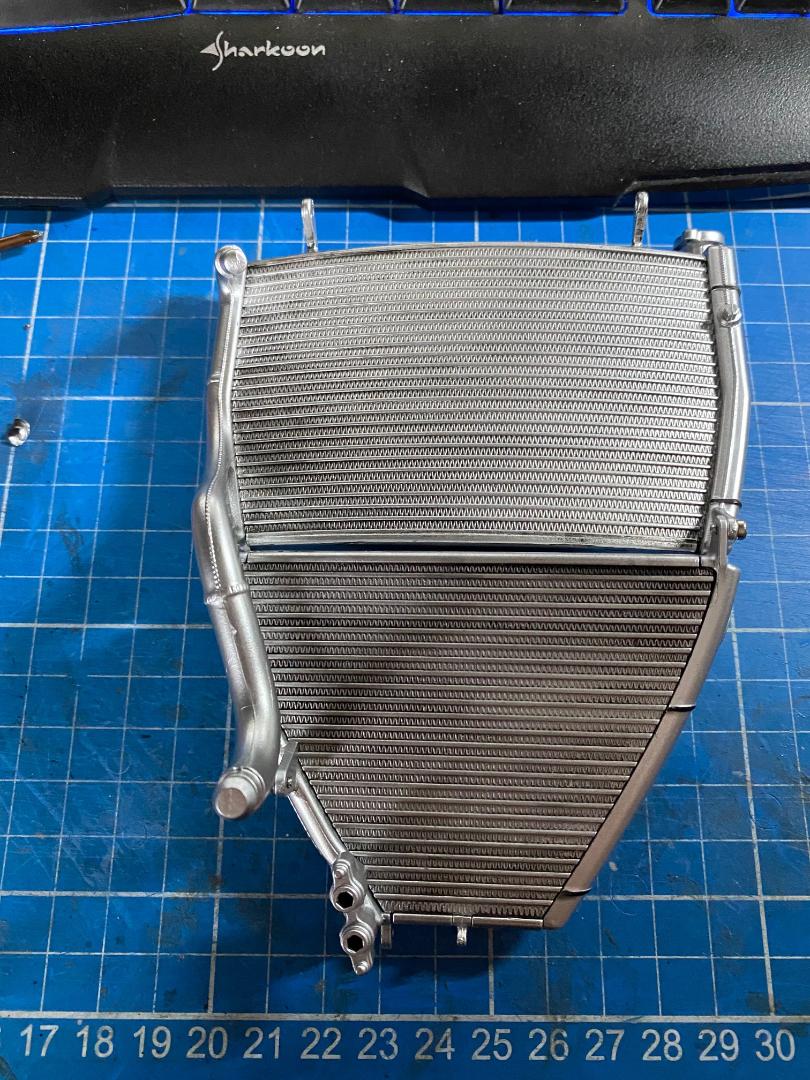
Die Kunststoffteile für den Wasserkühler sind ganz schön silber und da Kühlrippen nie richtig silber sind habe ich mir schwarzen Primer genommen, die Kühlrippen satt damit eingepinselt und mit viel feuchtem Zewa wieder abgewischt, bis es so aussieht, als wenn es Zwischenräume zwischen den Kühlrippen gibt und alles schon etwas benutzt aussieht. Den Rest habe ich so gelassen. Dir seitlichen Leitungen werden mit jeweils zwei Schrauben an den Kühlerkörper angeschraubt, die beiden Kleinteile angeklebt und dann das Innenteil des Kühlers mit vier Stiften festgedrückt. Hier habe ich wieder mit etwas Kleber fixiert. Die Schweißnaht an dem seitlichen "Aluminiumrohr" ist echt gut dargestellt.
 " />
" /> " />
" /> " />
" /> " />
" /> " />
" /> " />
" /> " />
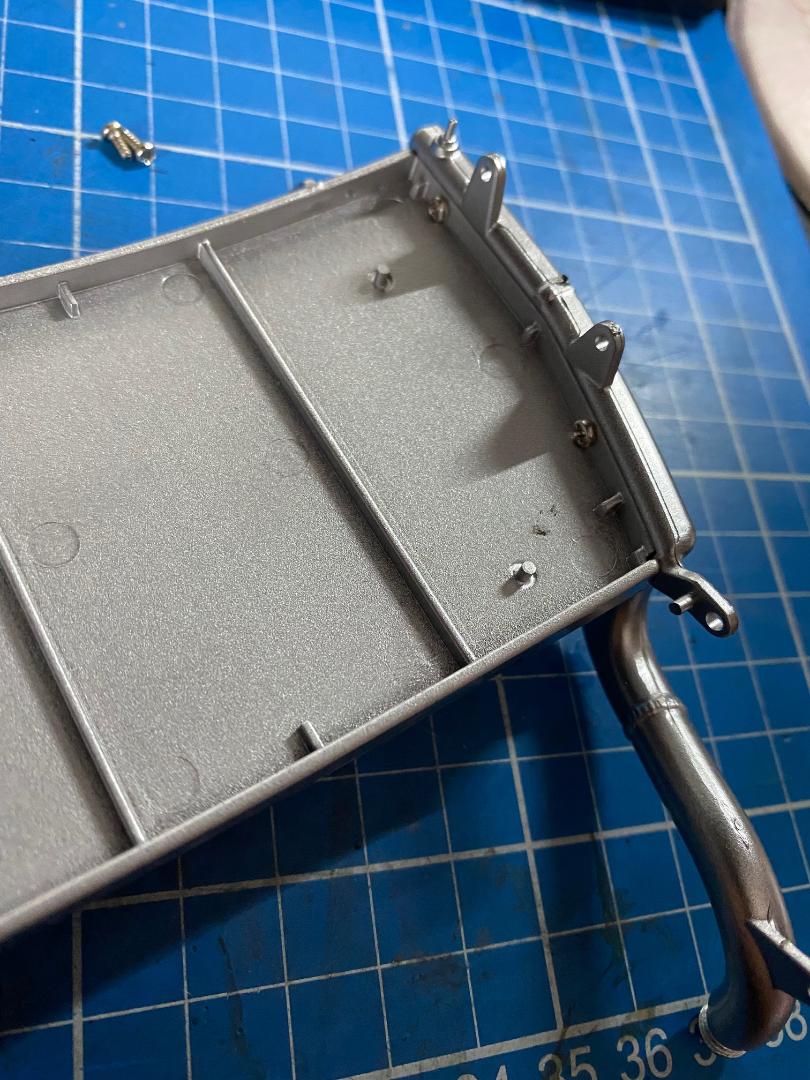
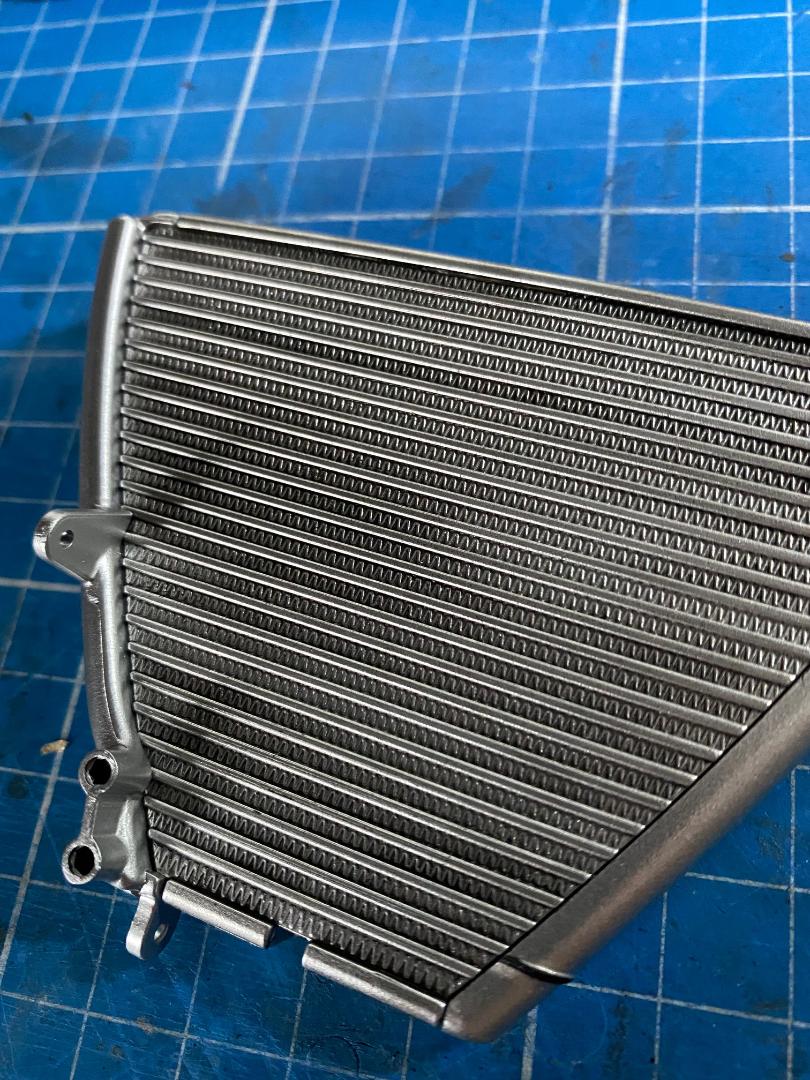
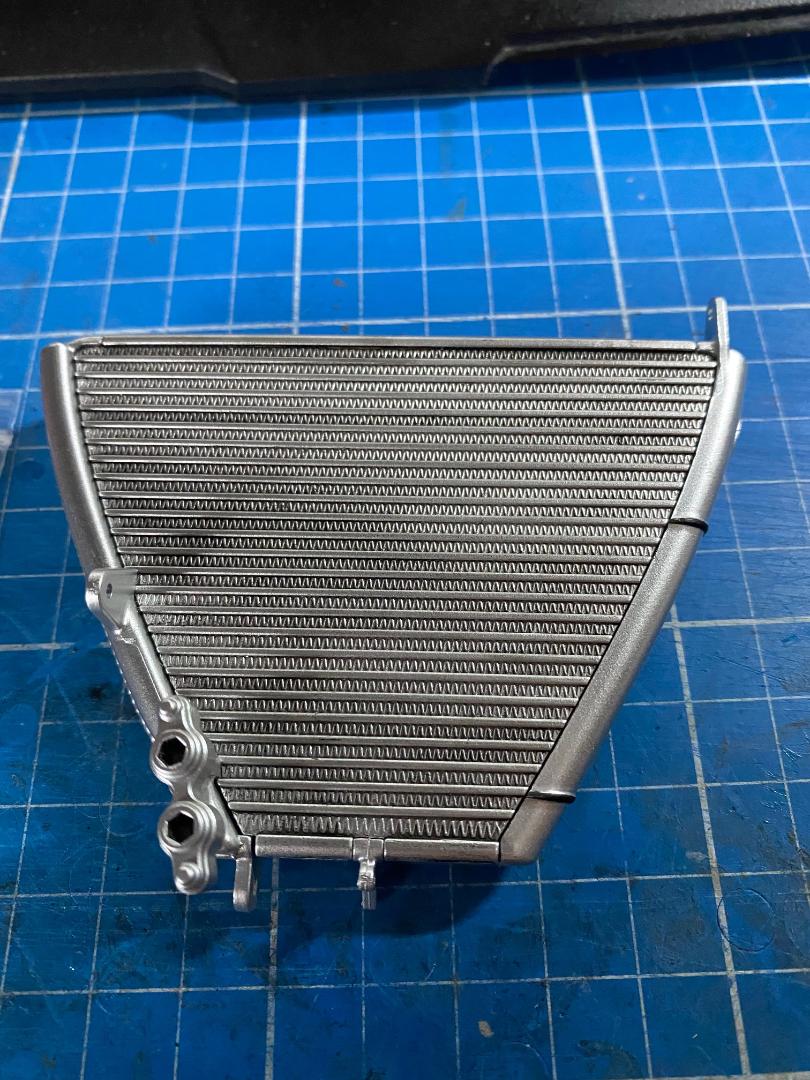
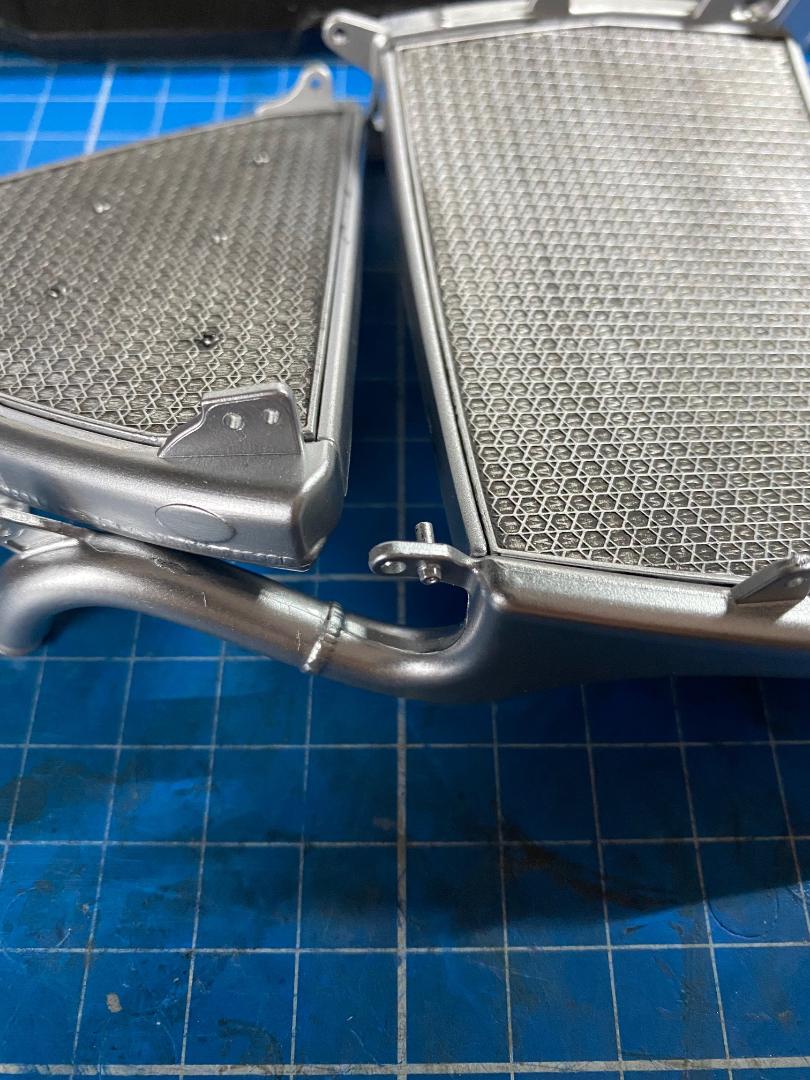
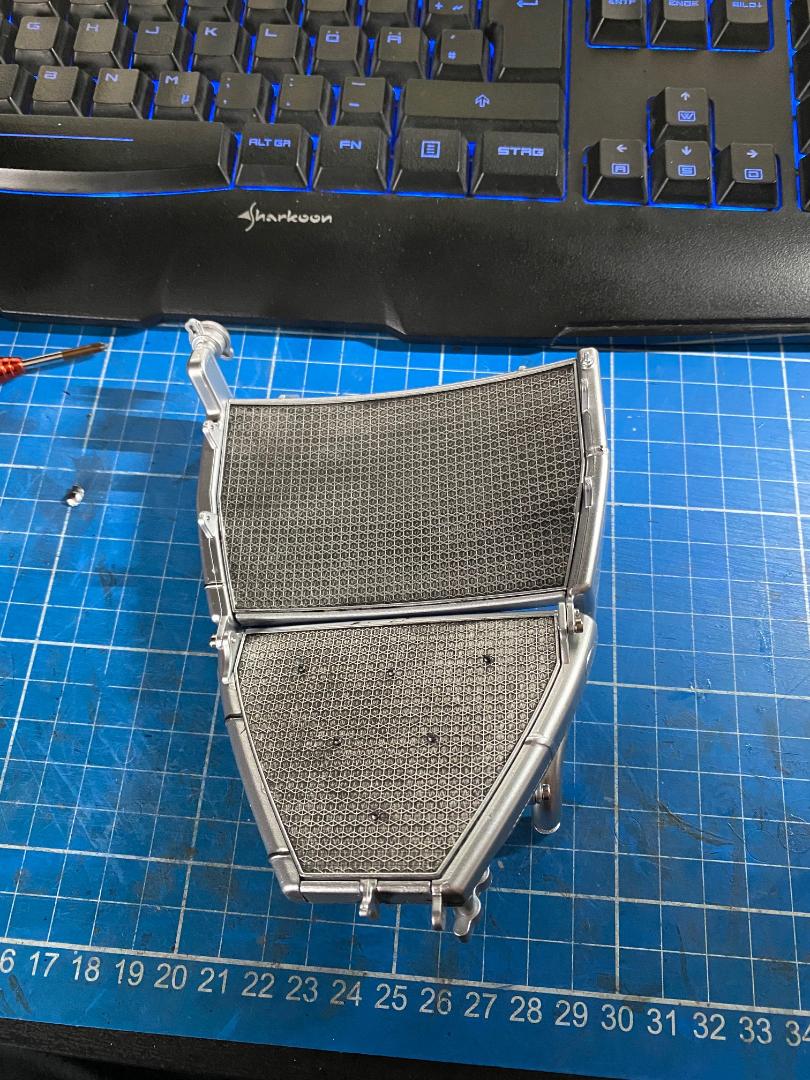
" />Der untere Teil des Kühlers wurde ähnlich montiert.
 " />
" /> " />
" /> " />
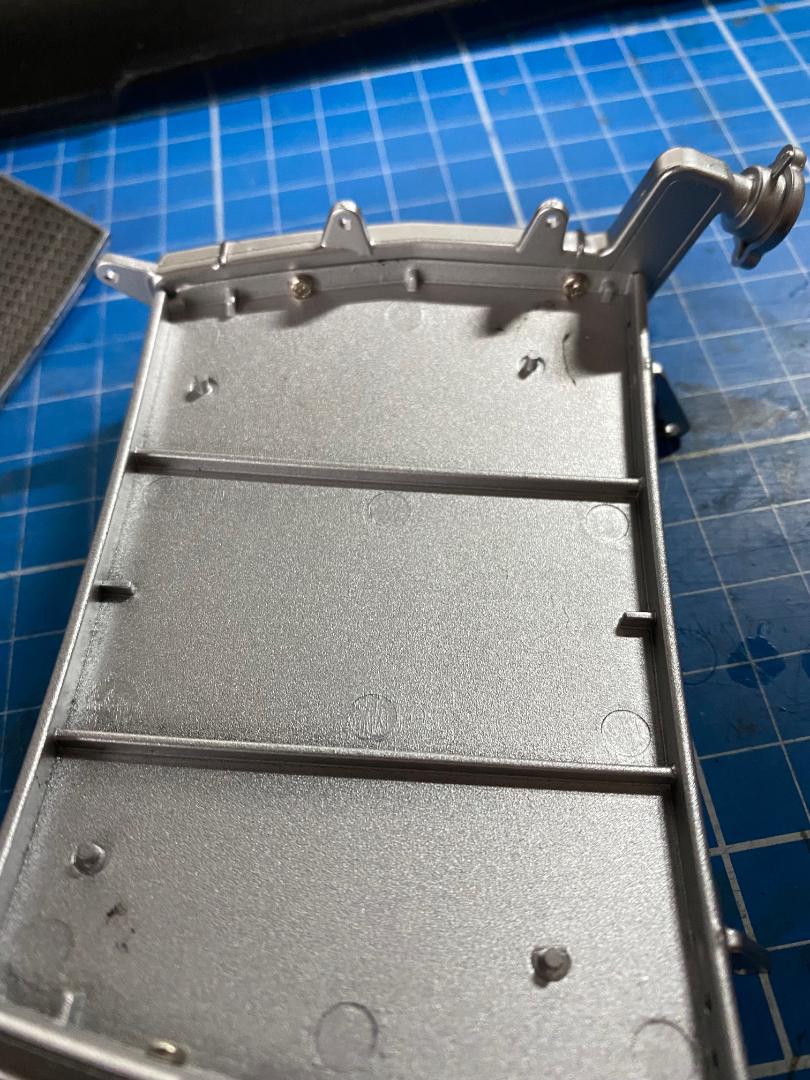
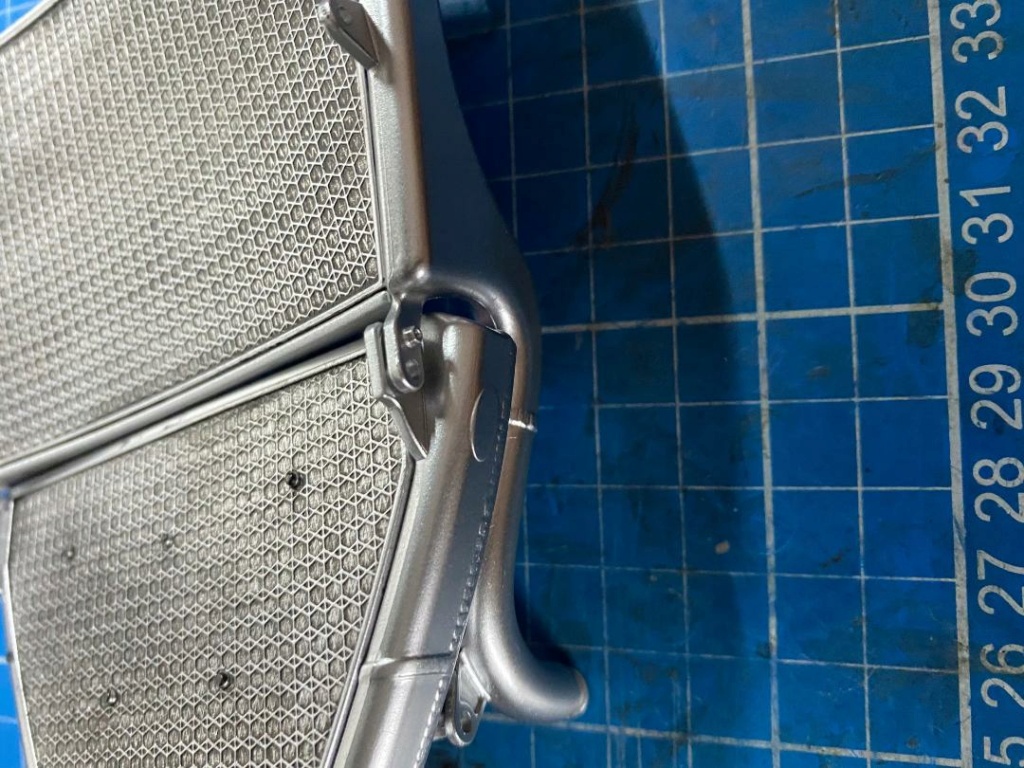
" />Das Seitenteil der rechten Leitung muss man wegen der überstehenden Details an der Vorderseite des Kühlers etwas schräg einsetzen und aufpassen, dass man die Stifte beim Anpressen in die so etwas schräge Platte nicht beschädigt.
 " />
" /> " />
" /> " />
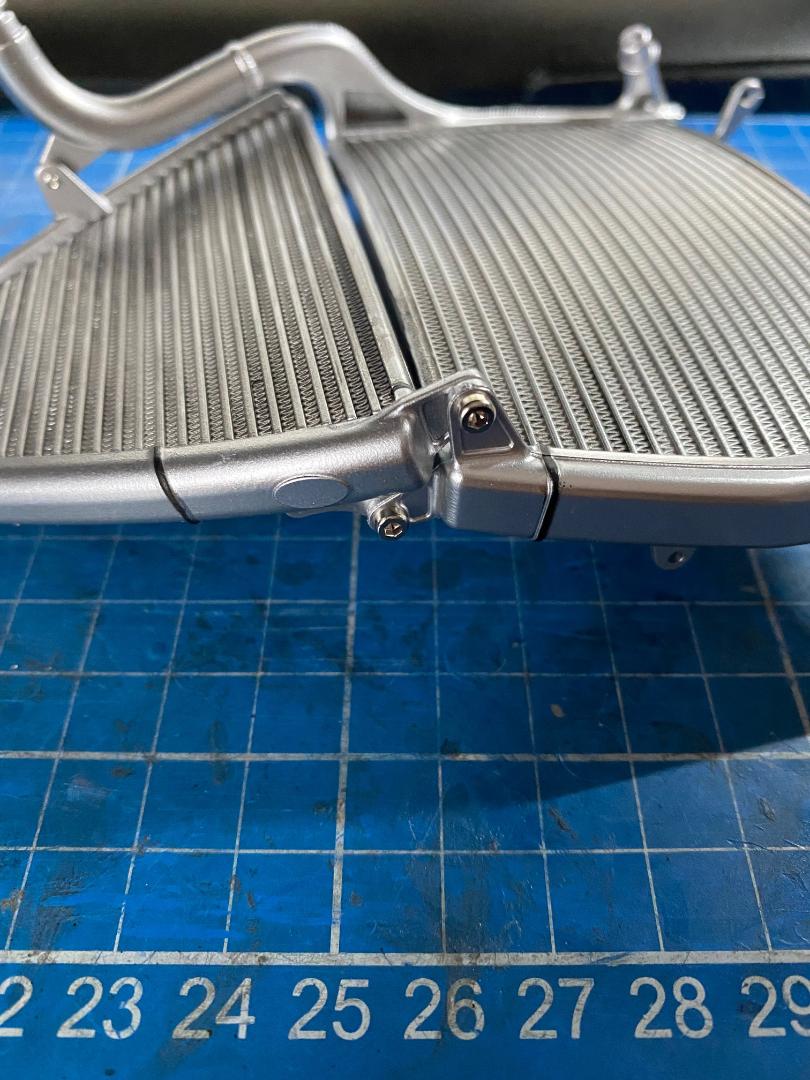
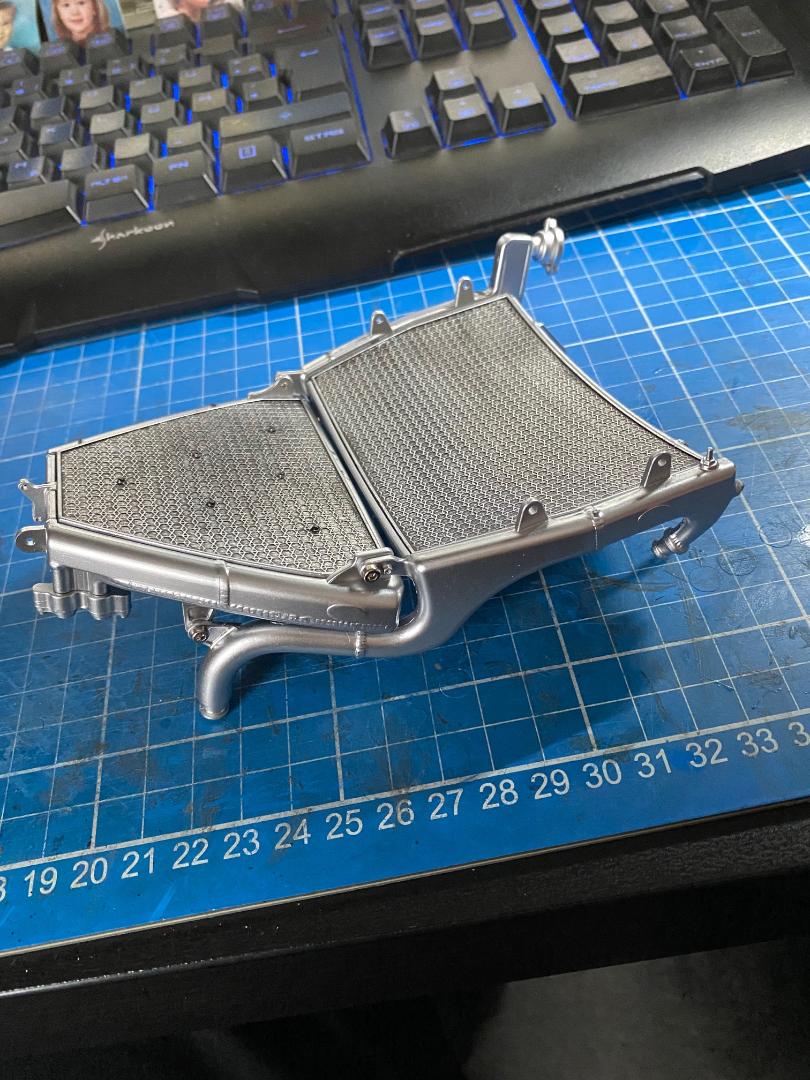
" />Danach wurden beide Kühler mit Inbusschrauben verschraubt. Sehr schöne Hilfe dabei ist der eine kleine Stift, der als Führung dient und zum Ansetzen der ersten Schraube sehr hilfreich ist. Sieht echt cool aus, wenn Alles zusammengeschraubt ist.
 " />
" /> " />
" /> " />
" /> " />
" /> " />
" /> " />
" /> " />
" />Weiter mit Pack 6:
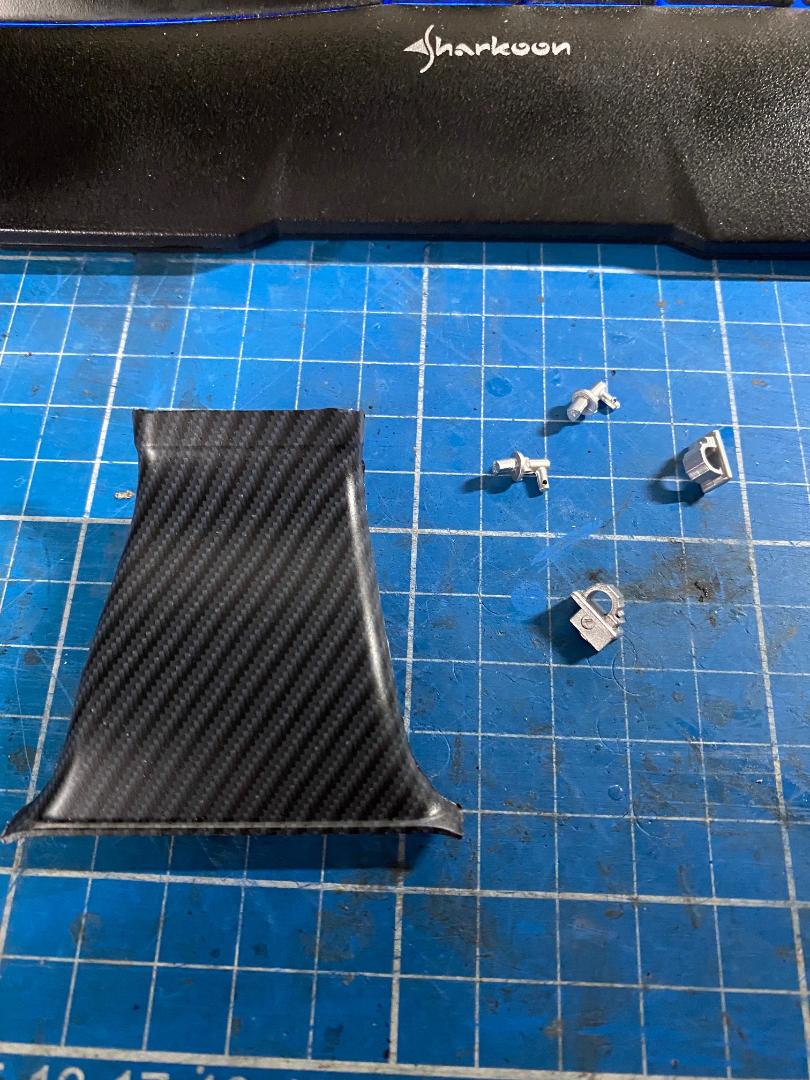
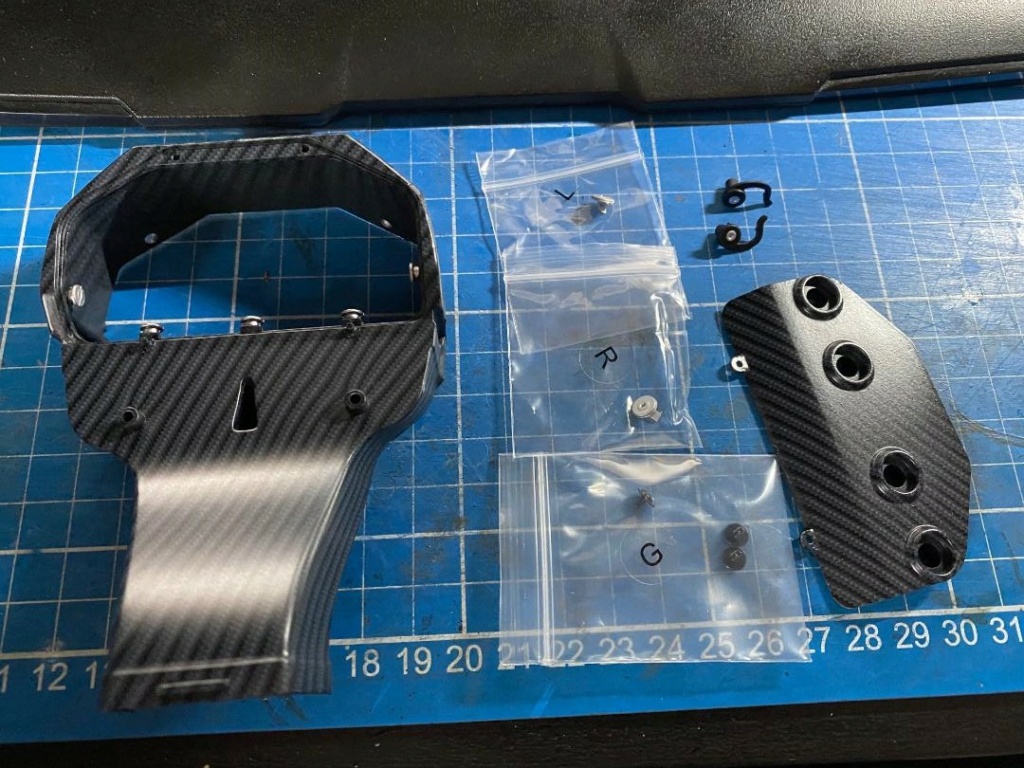
Die vier silbernen Konststoffteile aus Bauphase 20 und 21 werden in ihre Löcher im Oberteil der Airbox gedrückt und ich hab sie wieder von innen verklebt.
 " />
" />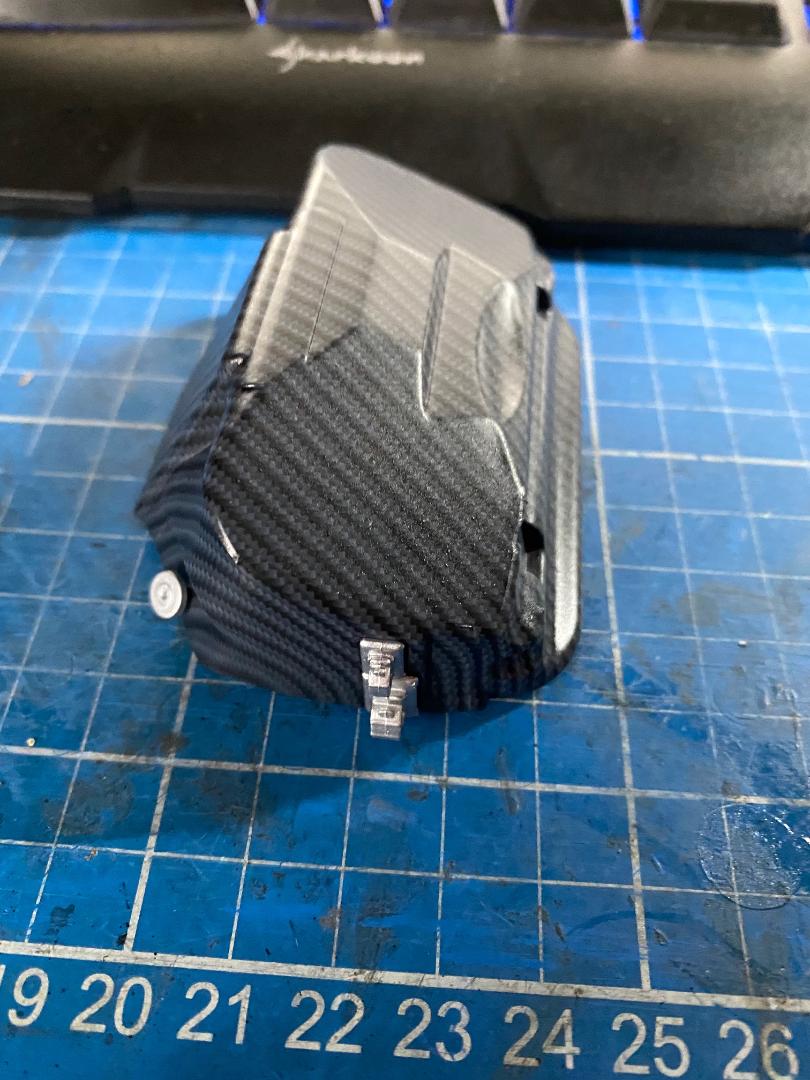 " />
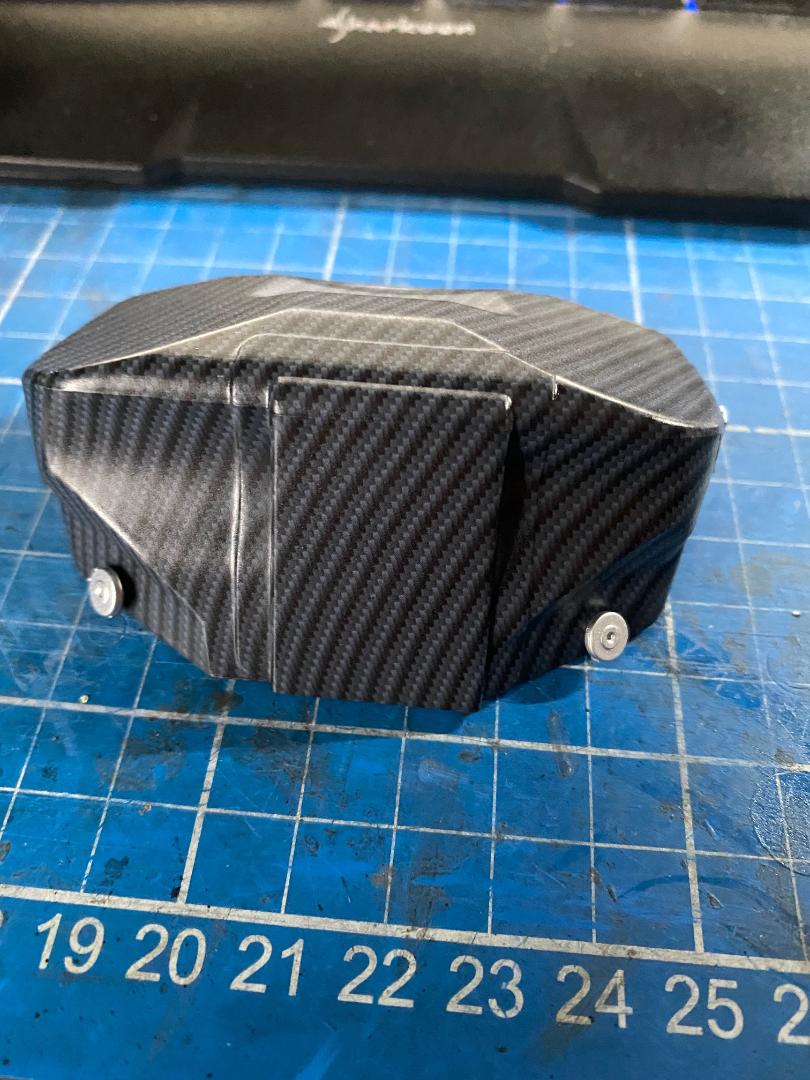
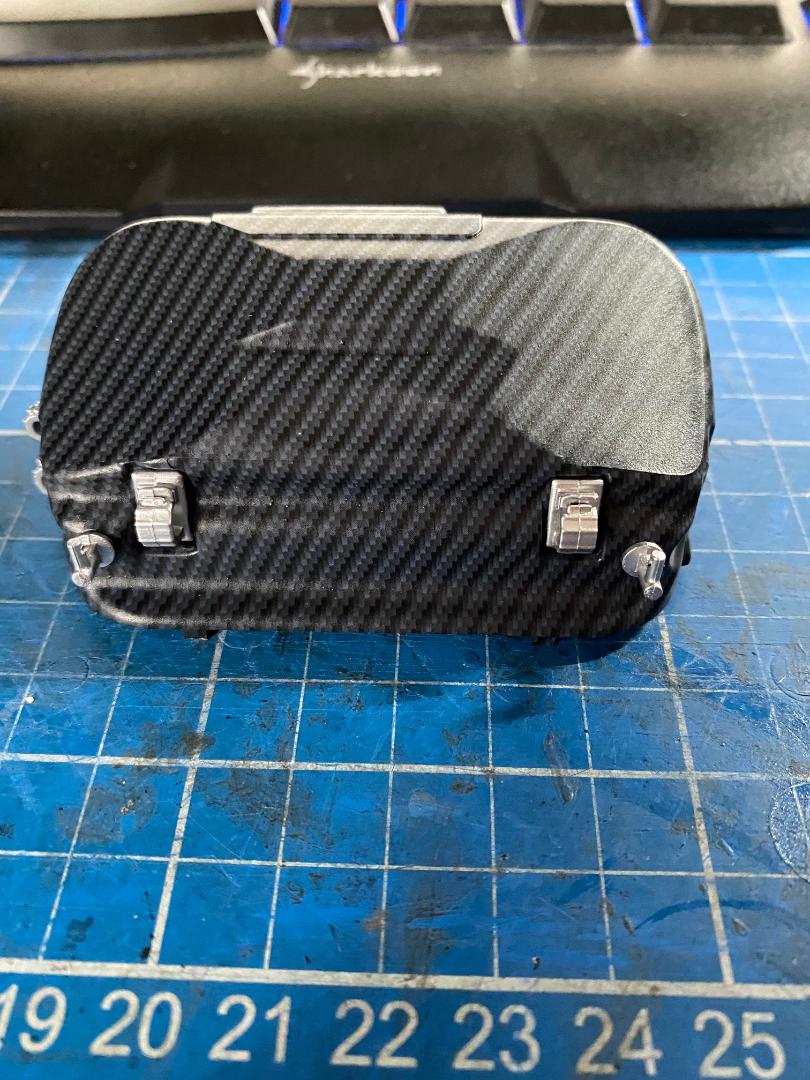
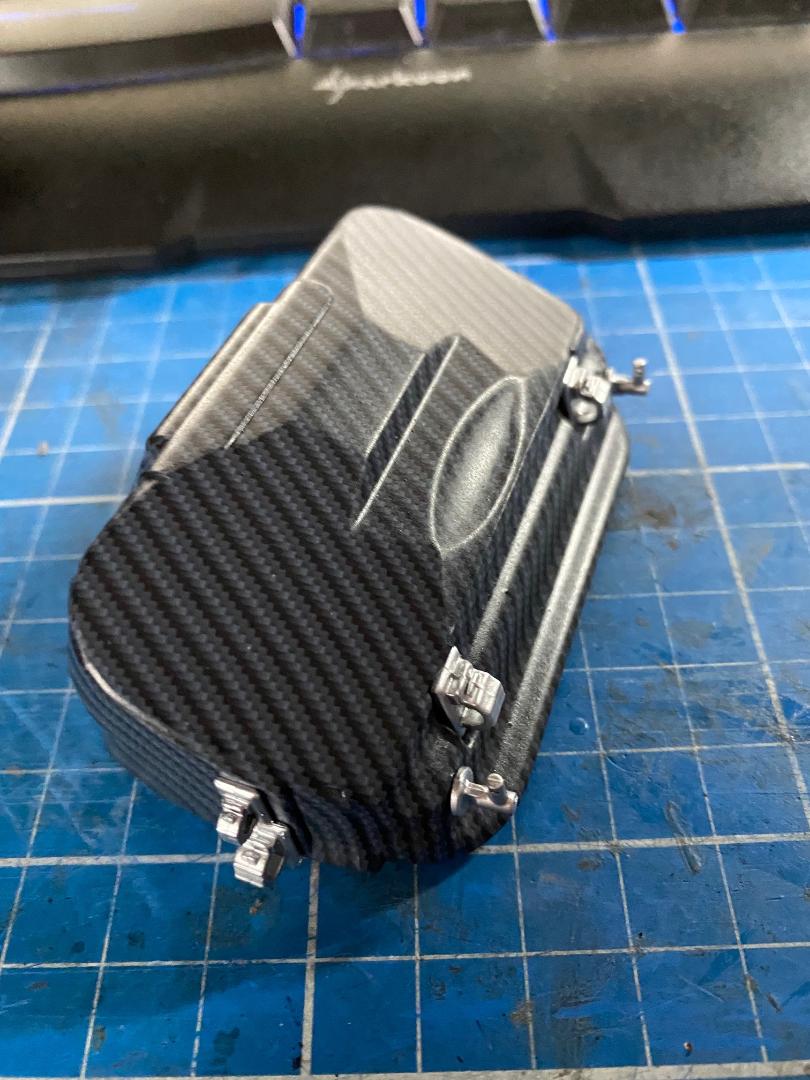
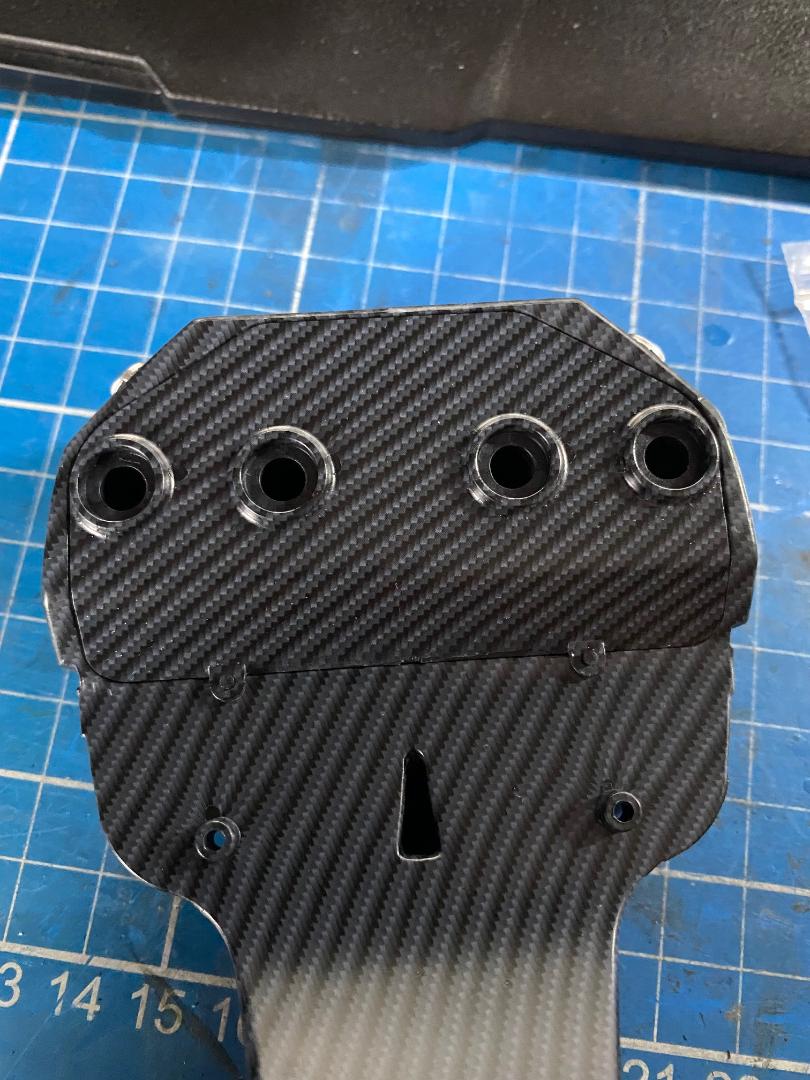
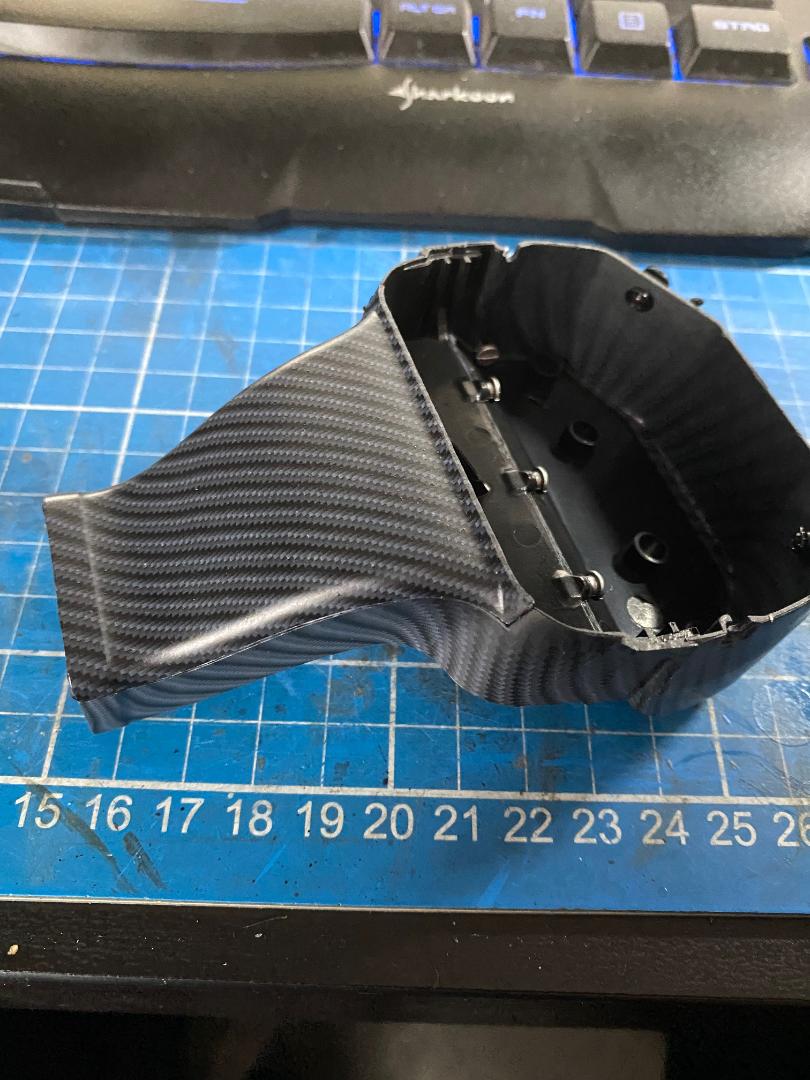
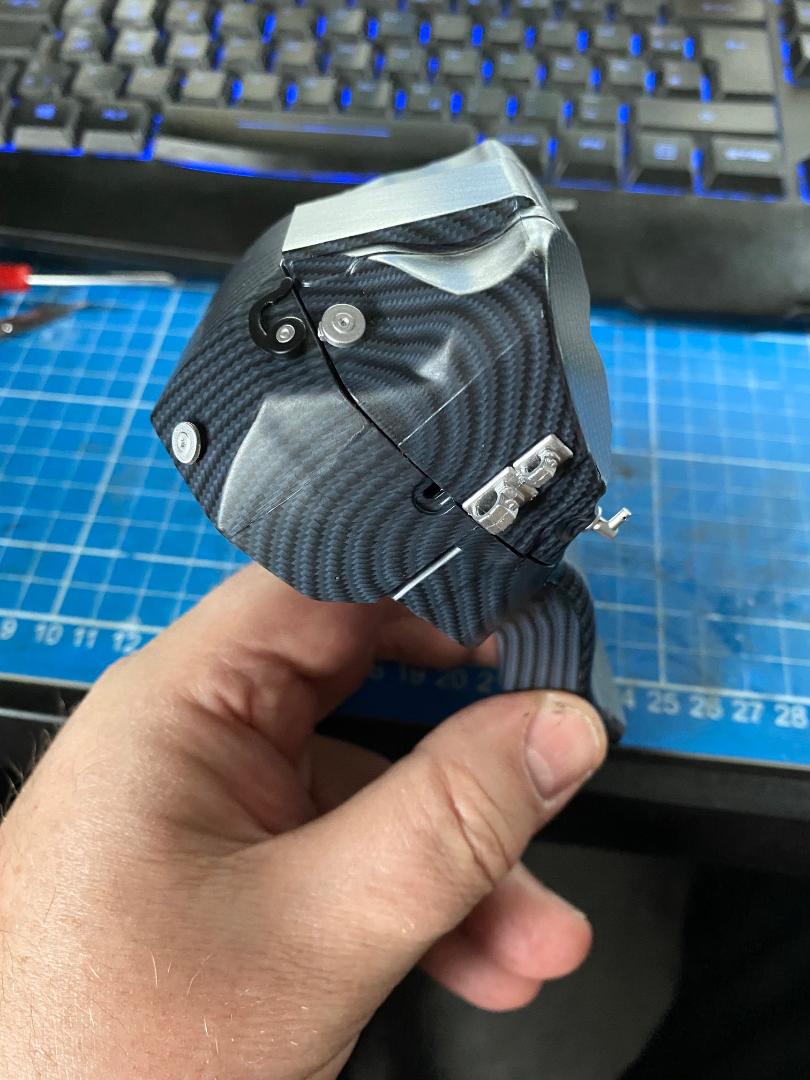
" />Dann geht es weiter mit Bauphase 22 und der Fertigstellung der Airbox. Die Gehäuseteile sind sehr schön im Carbonlook dargestellt. Es werden wieder einige Kunststoffteile angebracht, aber cool ist, dass der Verriegelungsmechanismus des oberen Airboxdeckels (die beiden Haken) drehbar ausgelegt sind und man also später theoretisch den Deckel abnehmen könnte, wenn man denn noch dran kommt.
 " />
" /> " />
" /> " />
" /> " />
" />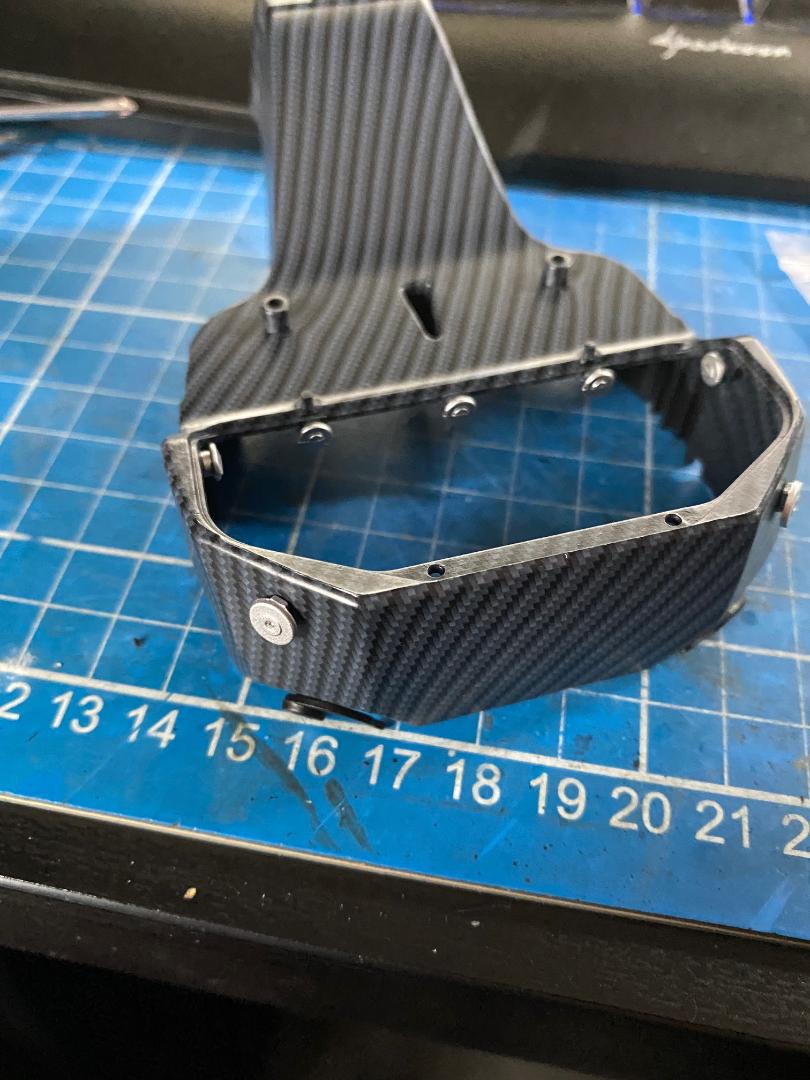 " />
" /> " />
" /> " />
" /> " />
" /> " />
" /> " />
" /> " />
" />Letzte Bauphase der dritten Lieferung:
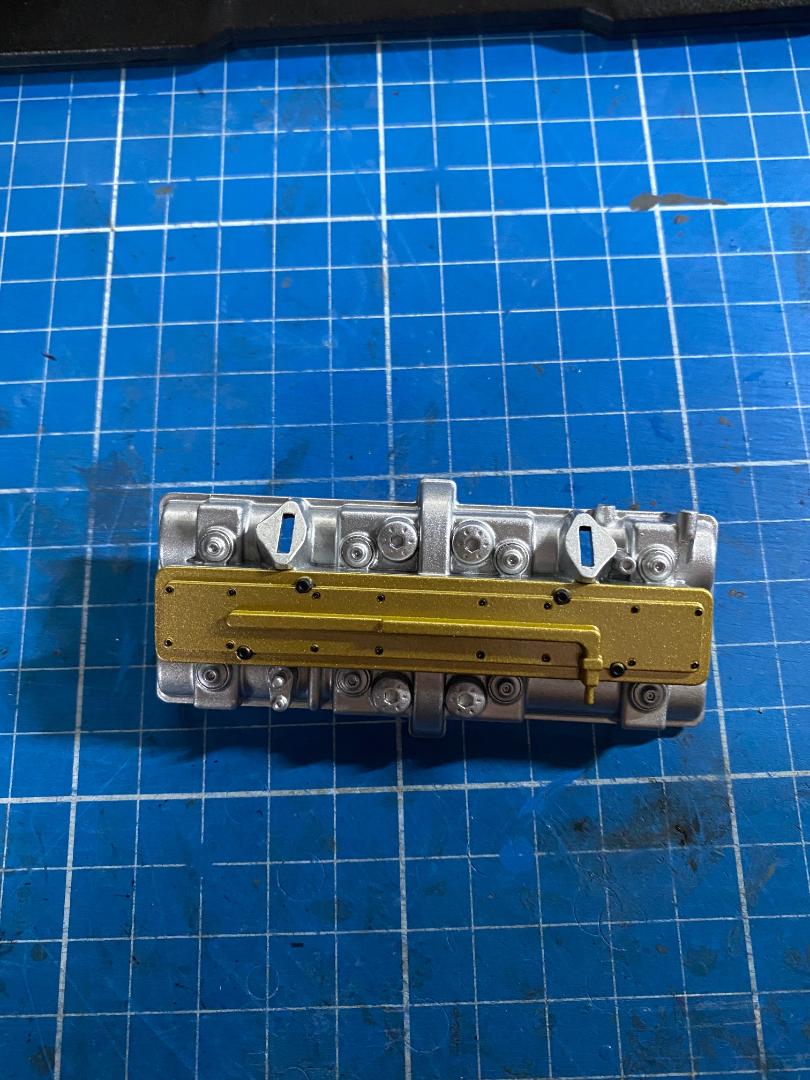
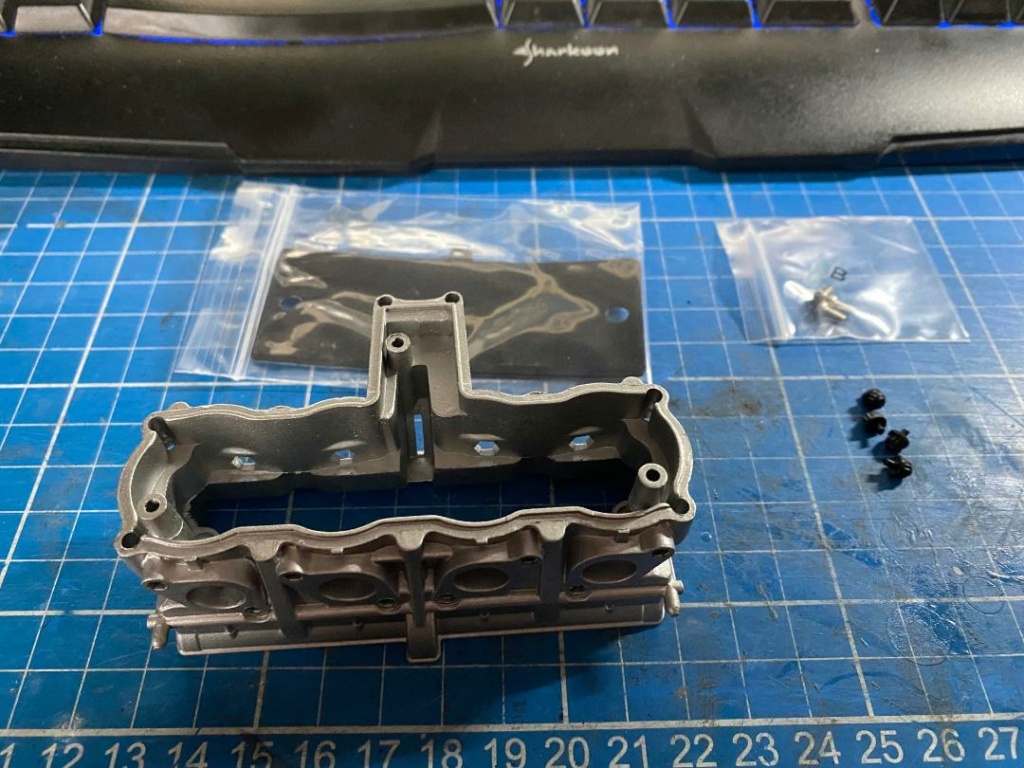
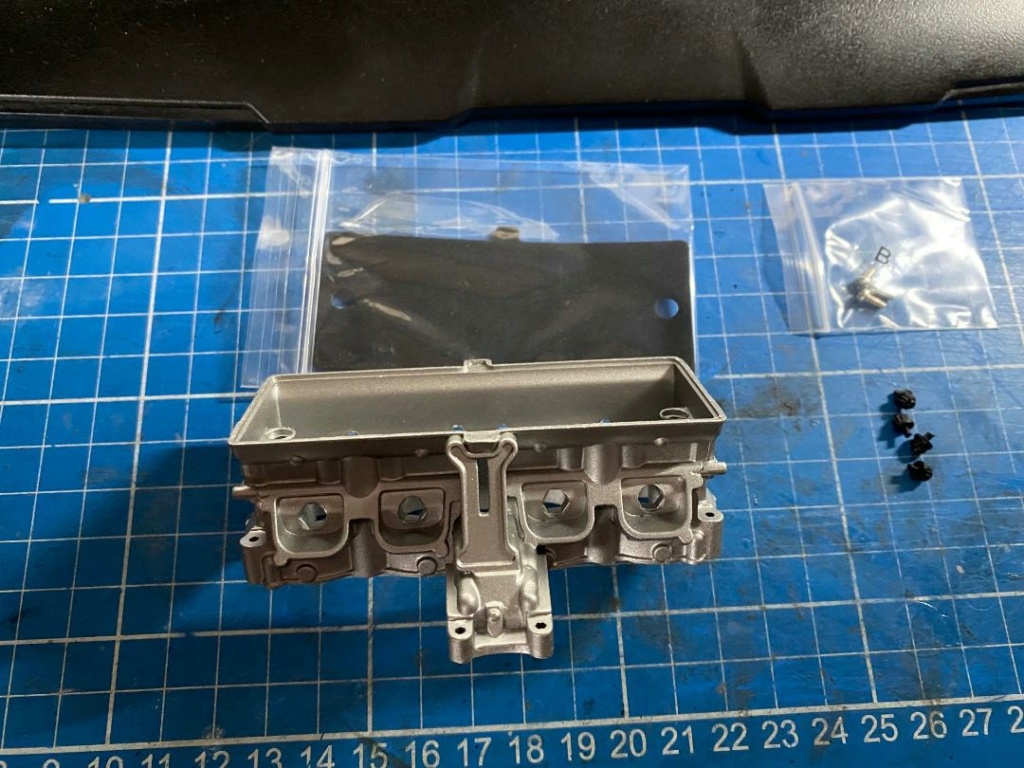
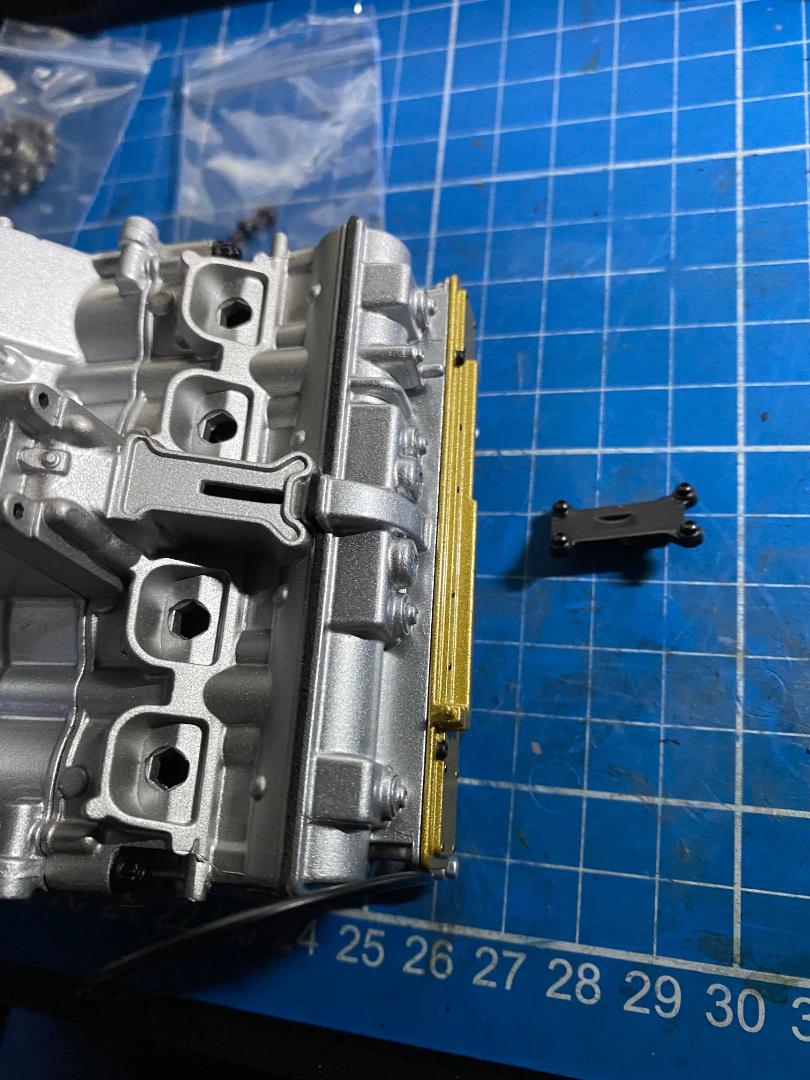
Zylinderblock mit (echter Schaumtoff-)Dichtung. Also, ich muss ja mal laut denken: Ist der Zylinderblock des Originals echt nur ca. 34cm breit, oder wird hier mächtig mit dem Maßstab 1:4 angegeben... Bei meiner Bandit ist der Motor deutlich breiter, aber die hat auch keine Wasserkühlung. Na, egal...
 " />
" /> " />
" />Da in der Bauanleitung nur die Teile angezeigt wurden, aber weiter nichts, habe ich mal in die Anleitung der Lieferung 4 gelinst und siehe da: Sie werden verklebt und verschraubt
 " />
" />Die schwarzen Schraubenkopfattrappen müssen in die Löcher gedrückt und von innen am besten mit Sekundenkleber verklebt werden.
 " />
" /> " />
" />[img]
 [/img]
[img]
 [/img]
[img]
 [/img]
Bei der Mossgummidichtung habe ich die Schrauben nur soweit angezogen, dass Alles gut fest sitzt, aber die Dichtung auch nur bis zum optisch guten Gesamtbild gequetscht wird. Sonst könnte sich etwas verziehen oder sogar das Mossgummi an den Ecken zerquetscht werden. Die Dichtung hat eine Klebeseite und wird damit, über die beiden Schraubenkanäle geführt, leicht unter den Ventildeckel geklebt.
So, das war`s erstmal an dieser Stelle. Ich hab alles verbaut, was bis dato geliefert wurde. Aber ich habe schon wieder Geld abgezogen bekommen, doppelt natürlich... Bei meinem mittlerweile schon traditionellen Anruf wurde mir -neben der Zusicherung, dass ich eine Rückerstattung bekomme- mitgeteilt, dass der eine Betrag für die doch schon jetzt in den Versand gehende Lieferung 4 ist. Na Mensch, wird doch nie langweilig. Geht also evtl. schon Ende der Woche hier weiter. Aber ich werde wohl jetzt endlich die Bezahlart auf Rechnung umstellen. Mit Abbuchung über Paypal ist mir das echt zu anstrengend. Bis dahin werde ich mich erstmal wieder meinem Gefummel mit den Ätzteilen bei meiner Bismarck zuwenden.
Also bis demnächst.
Maddin- Schneidmatten-Virtuose
John-H., doc_raven1000 und rmo mögen diesen Beitrag
Re: Valentino Rossi's Yamaha YZR M1 in 1:4 von DeAgostini
![]() von Glufamichel Di 07 Dez 2021, 15:32
von Glufamichel Di 07 Dez 2021, 15:32

https://www.der-lustige-modellbauer.com/t27799-bilder-einstellen-bilder-hosten?highlight=bilder+einatellen

Glufamichel- Moderator

Re: Valentino Rossi's Yamaha YZR M1 in 1:4 von DeAgostini
![]() von Maddin Di 07 Dez 2021, 15:33
von Maddin Di 07 Dez 2021, 15:33
Maddin- Schneidmatten-Virtuose
Re: Valentino Rossi's Yamaha YZR M1 in 1:4 von DeAgostini
![]() von John-H. Mi 08 Dez 2021, 17:32
von John-H. Mi 08 Dez 2021, 17:32
ich verfolge den Bericht ja nun von Anfang an,
ja und er gefällt mir sehr!
Wollen wir die Überschrift nicht mal ändern,
des das gewagte Glücksspiel ist doch vorbei.

John-H.- Co - Admin
Re: Valentino Rossi's Yamaha YZR M1 in 1:4 von DeAgostini
![]() von Maddin Mi 08 Dez 2021, 17:40
von Maddin Mi 08 Dez 2021, 17:40
Naja. Läuft alles andere, als stabil mit Lieferungen und Lastschriften. In der ersten Lieferung waren Blister, die anscheinend von Pappen abgerissen wurden, also wohl aus Retouren stammen. Und ich bin ja mal gespannt, ob ich tatsächlich den Ständer auch dazubekomme. Ich finde die Überschrift bis jetzt ziemlich passend.
Viele Grüße Martin
Maddin- Schneidmatten-Virtuose
Re: Valentino Rossi's Yamaha YZR M1 in 1:4 von DeAgostini
![]() von John-H. Do 09 Dez 2021, 13:42
von John-H. Do 09 Dez 2021, 13:42

Ich dachte nur.....
John-H.- Co - Admin
Re: Valentino Rossi's Yamaha YZR M1 in 1:4 von DeAgostini
![]() von Maddin Di 14 Dez 2021, 14:22
von Maddin Di 14 Dez 2021, 14:22
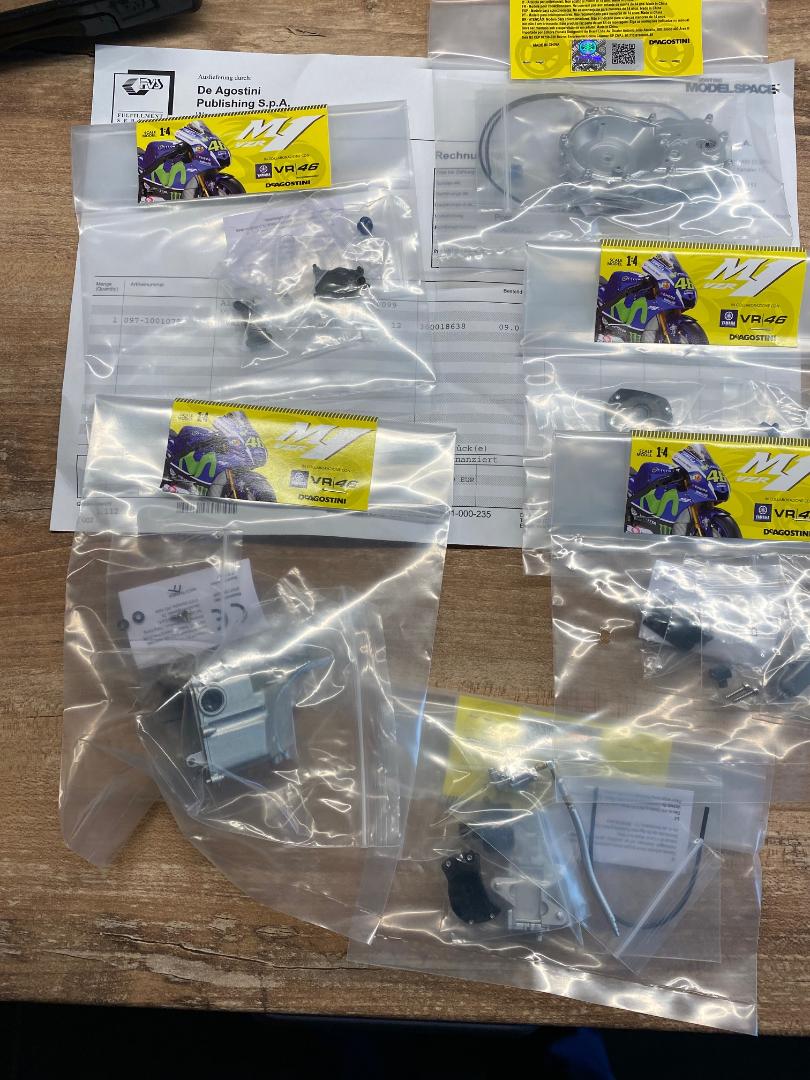
Kaum zu glauben, aber ich halte jetzt doch schon die Lieferung 4 in meinen vor Glück zitternden Händen. Dafür warte ich immer noch auf die Erstattung der nun nur noch einmal zuviel abgezogenen 80,91 Euro. Habe das Abo jetzt auf Rechnungszahlung umgestellt...
 " />
" />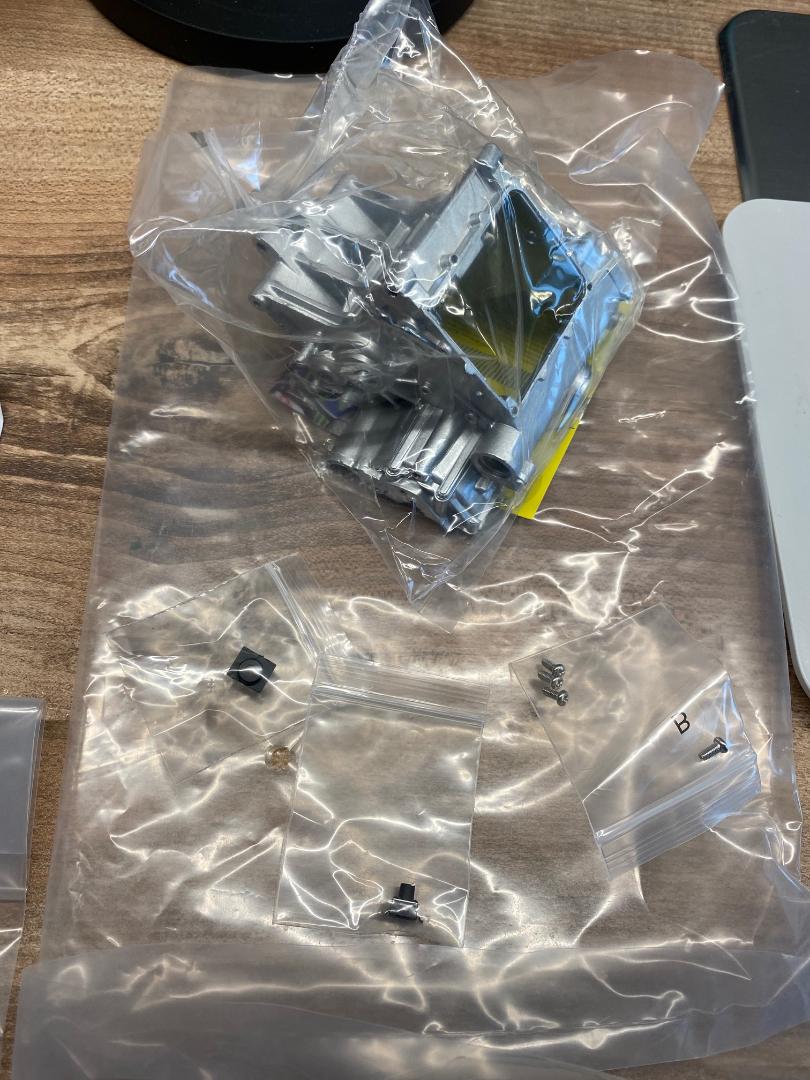 " />
" /> " />
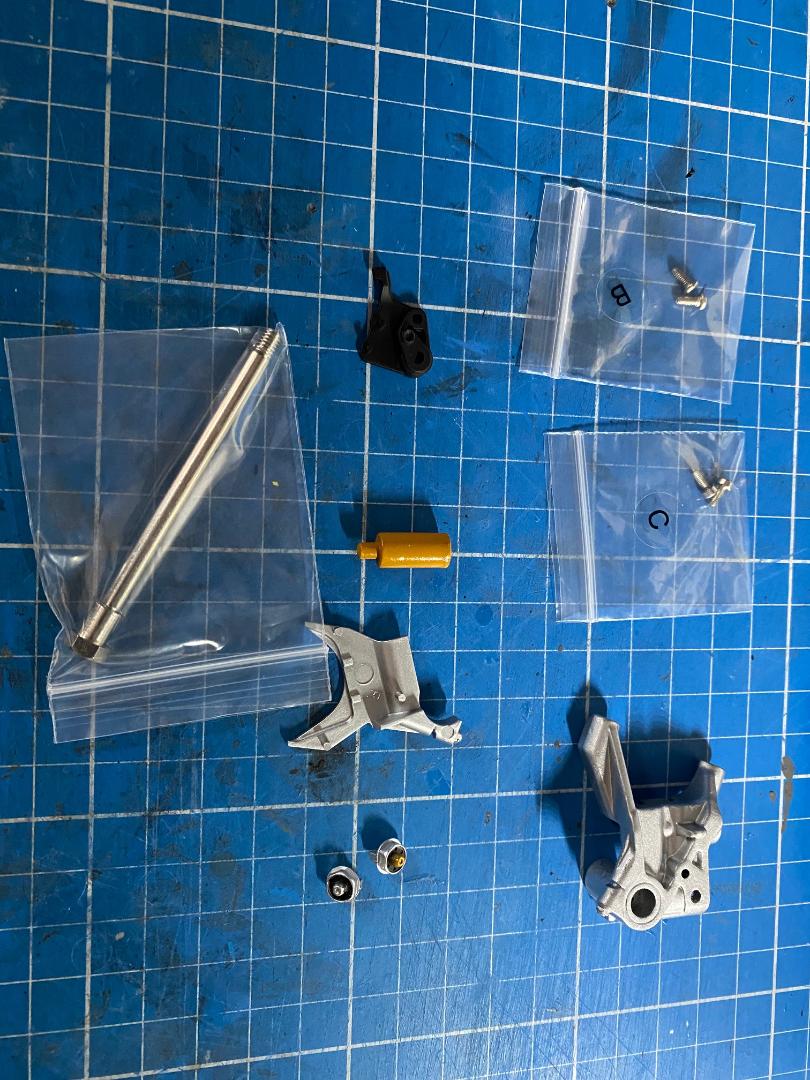
" />Aber nun geht es erst einmal wieder ein paar Schritte weiter:
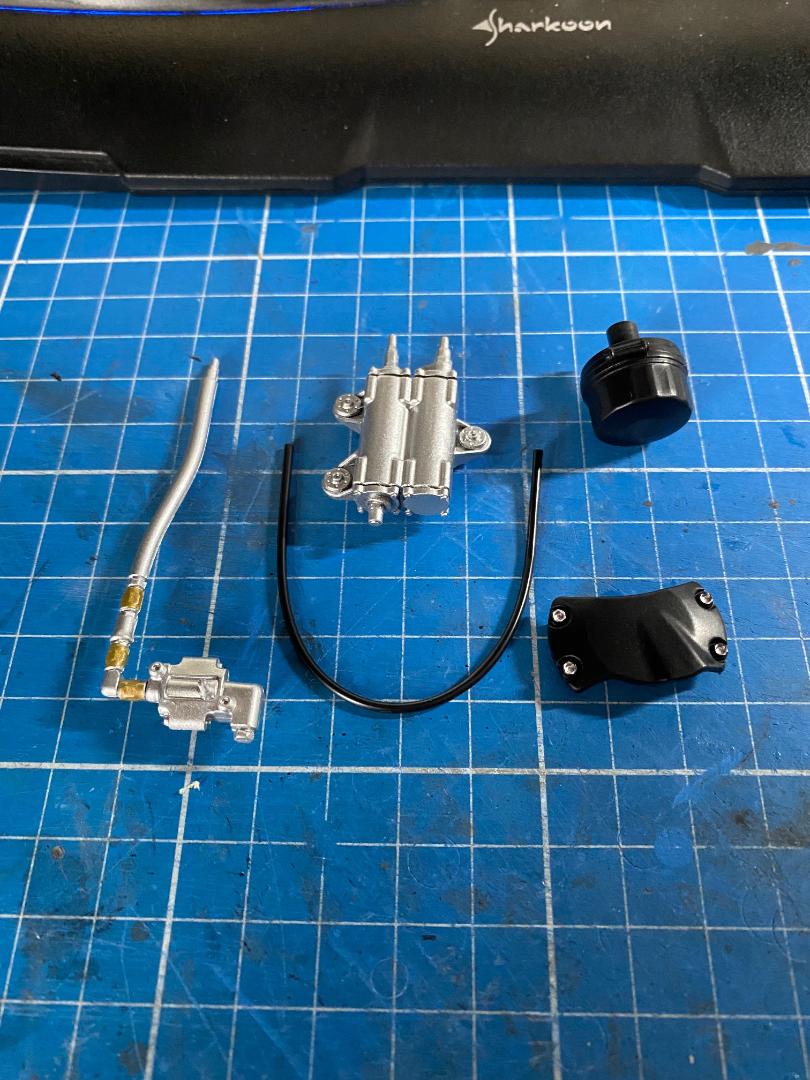
Die ersten Teile: Hier wird nur der kleine Schlauch auf einen Pin des Kunststoffteiles mit dem starren Rohr gesteckt. Dann wird erstmal das Ganze zur Seite gelegt.
 " />
" /> " />
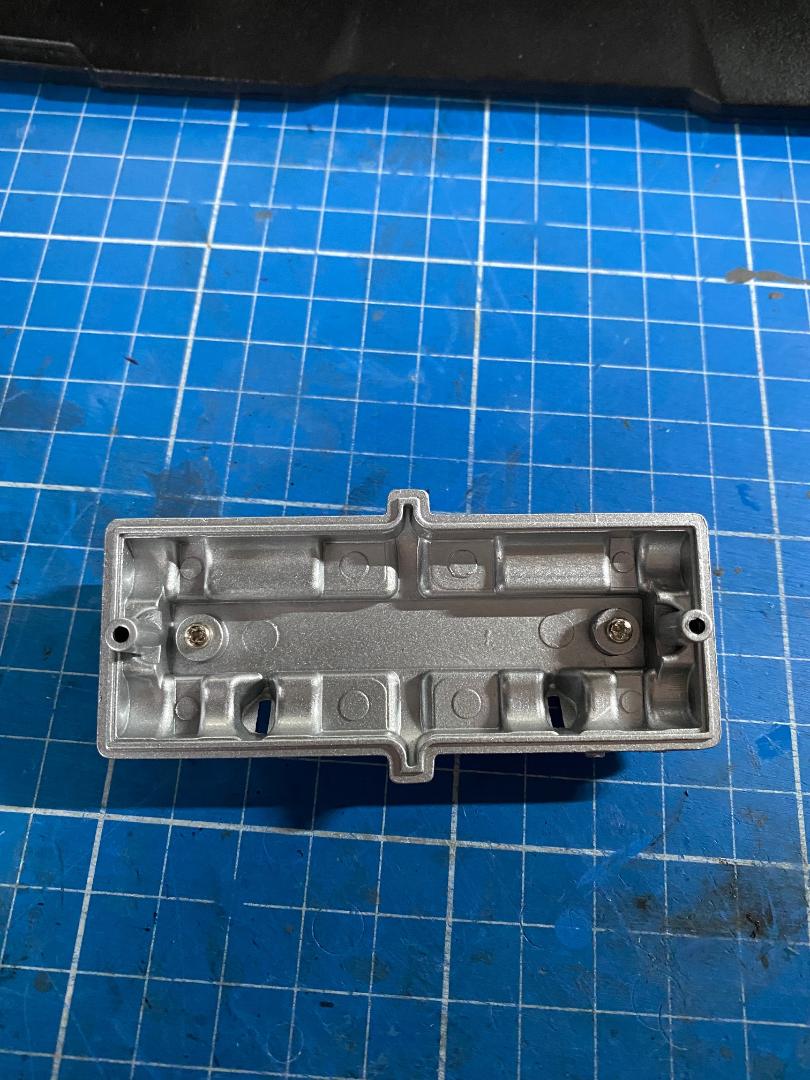
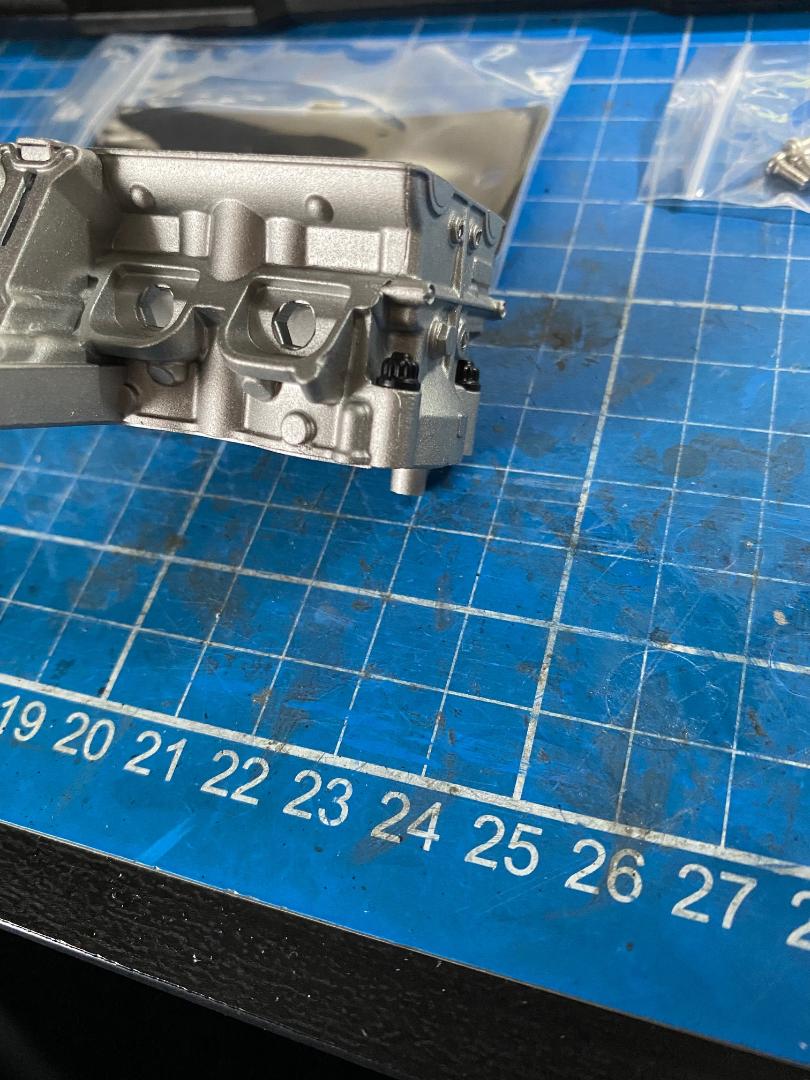
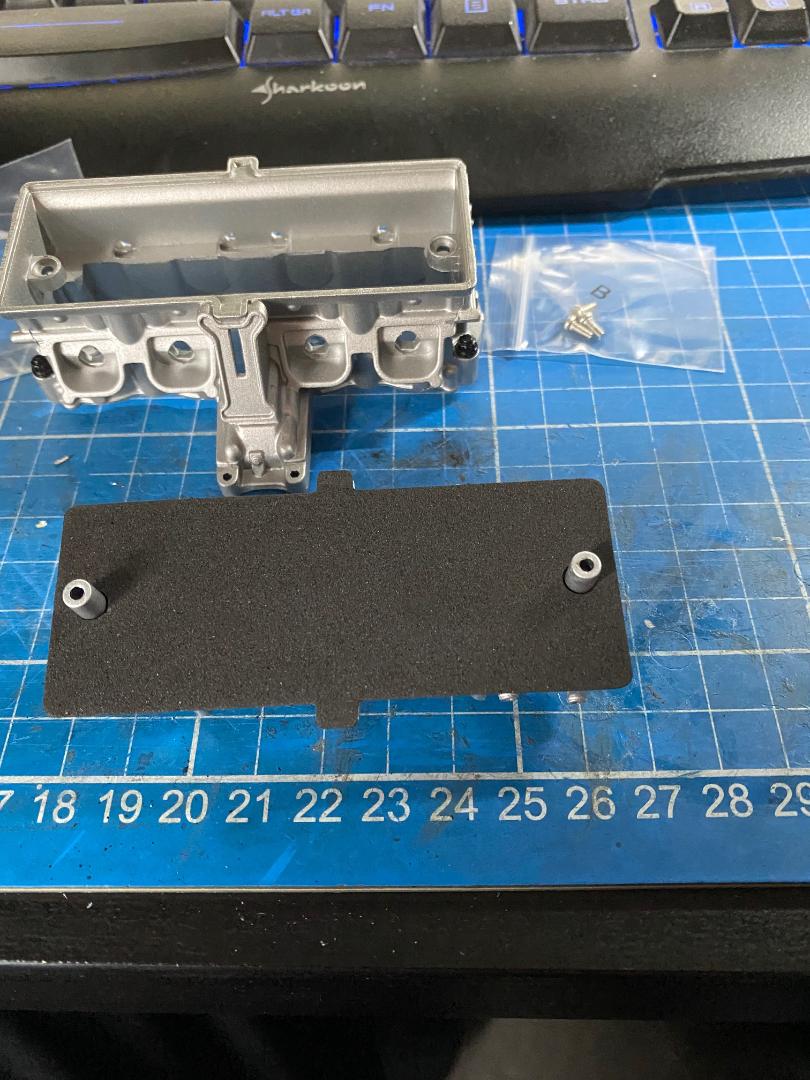
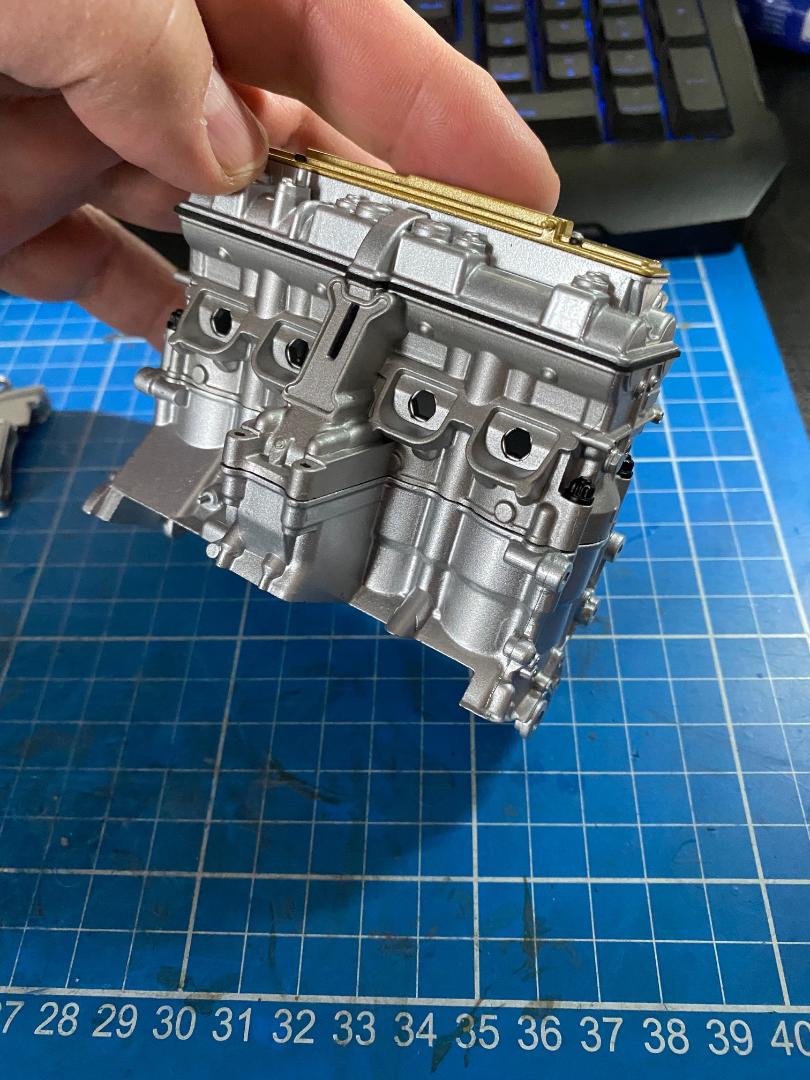
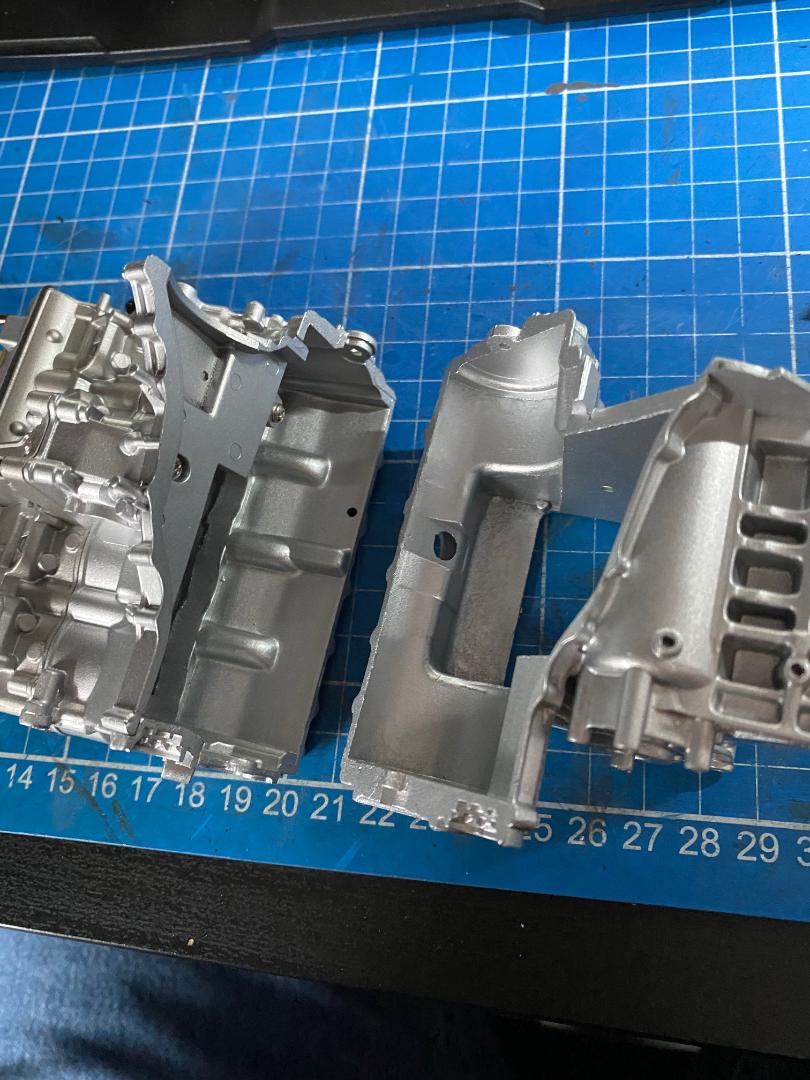
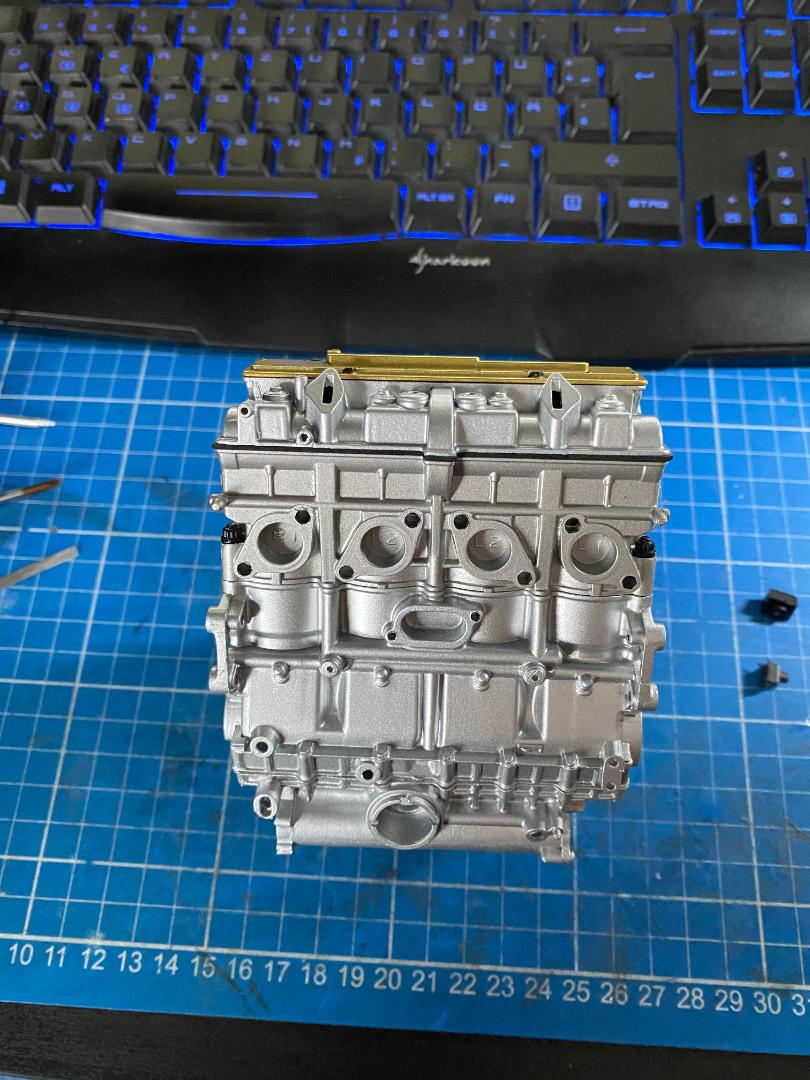
" />Dann kommt der Metall-Zylinderfuß und die Kunstzstoffplatte. Zuerst wird der Fuß mit drei Schrauben mit dem Zylinderkopf verschraubt. Danach wird Gehäuseplatte mit zwei Schrauben unter das Ganze geschraubt.
 " />
" /> " />
" /> " />
" />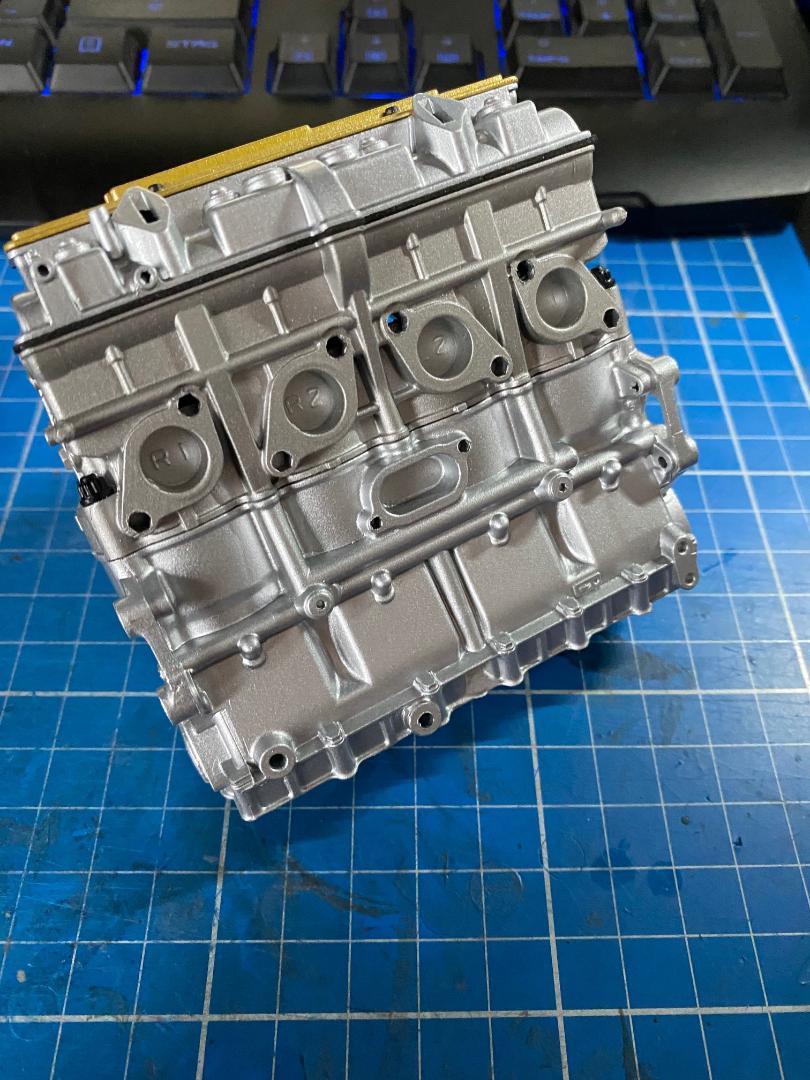 " />
" />Und so sieht das Ganze dann aus:
 " />
" /> " />
" /> " />
" />
Maddin- Schneidmatten-Virtuose
John-H. mag diesen Beitrag
Re: Valentino Rossi's Yamaha YZR M1 in 1:4 von DeAgostini
![]() von Maddin Di 14 Dez 2021, 14:40
von Maddin Di 14 Dez 2021, 14:40
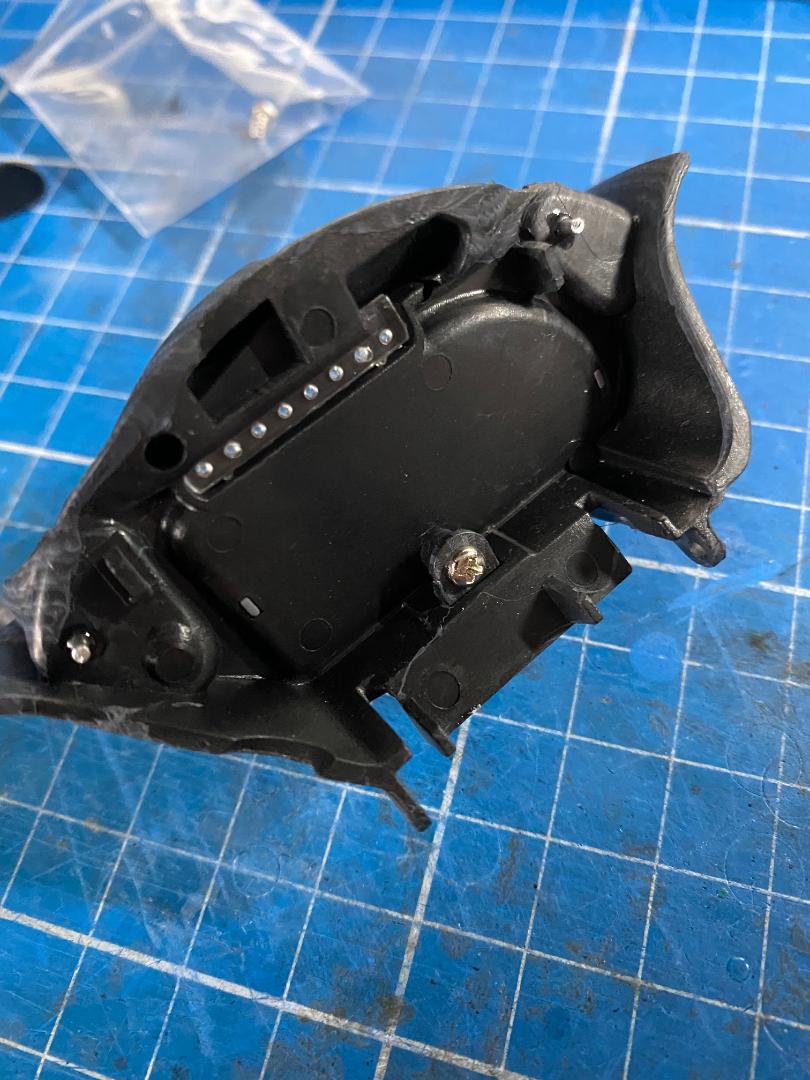
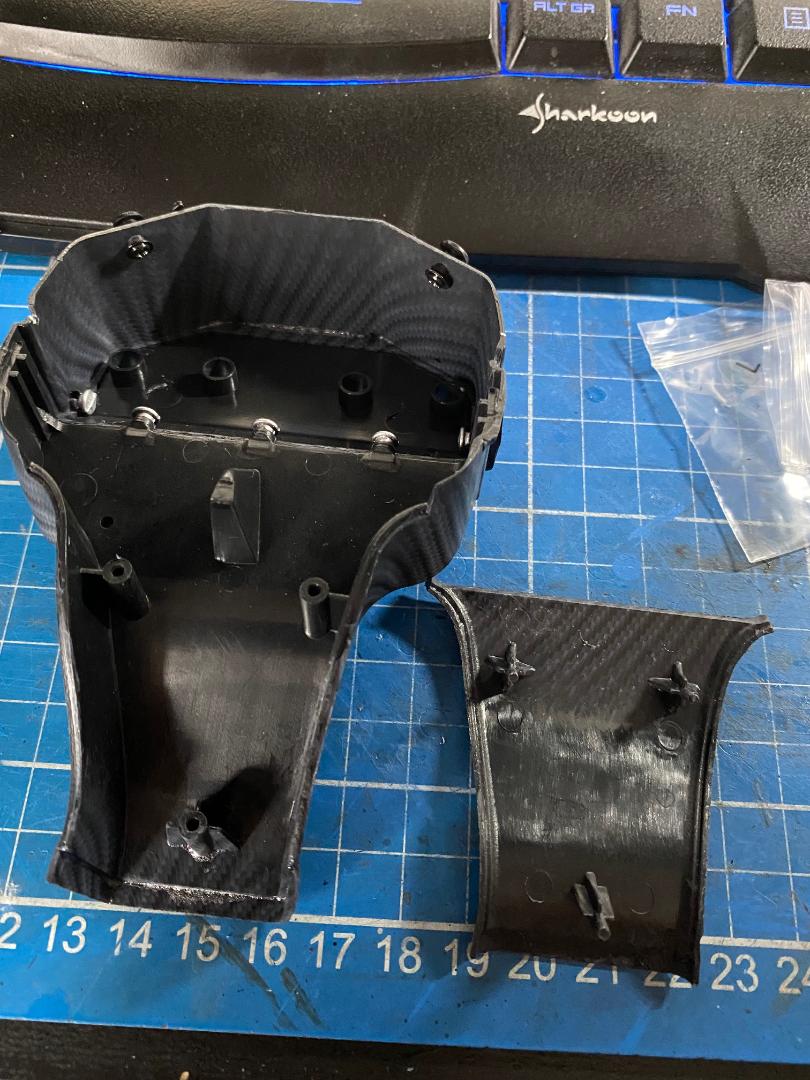
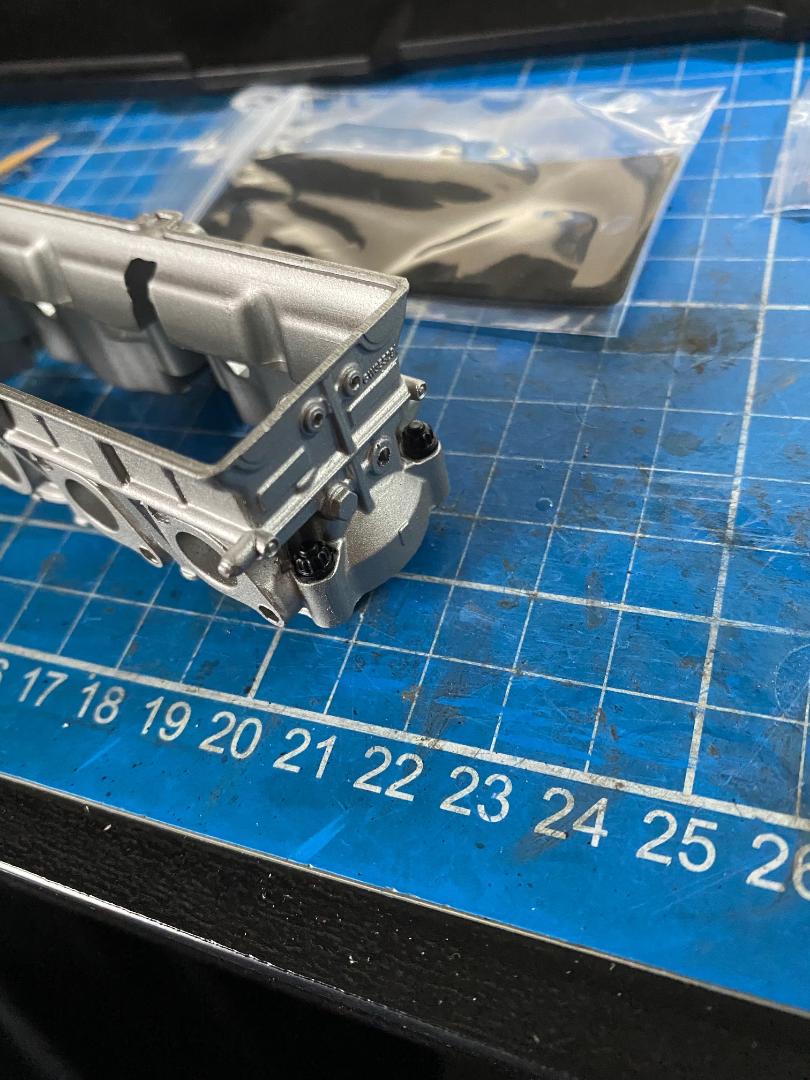
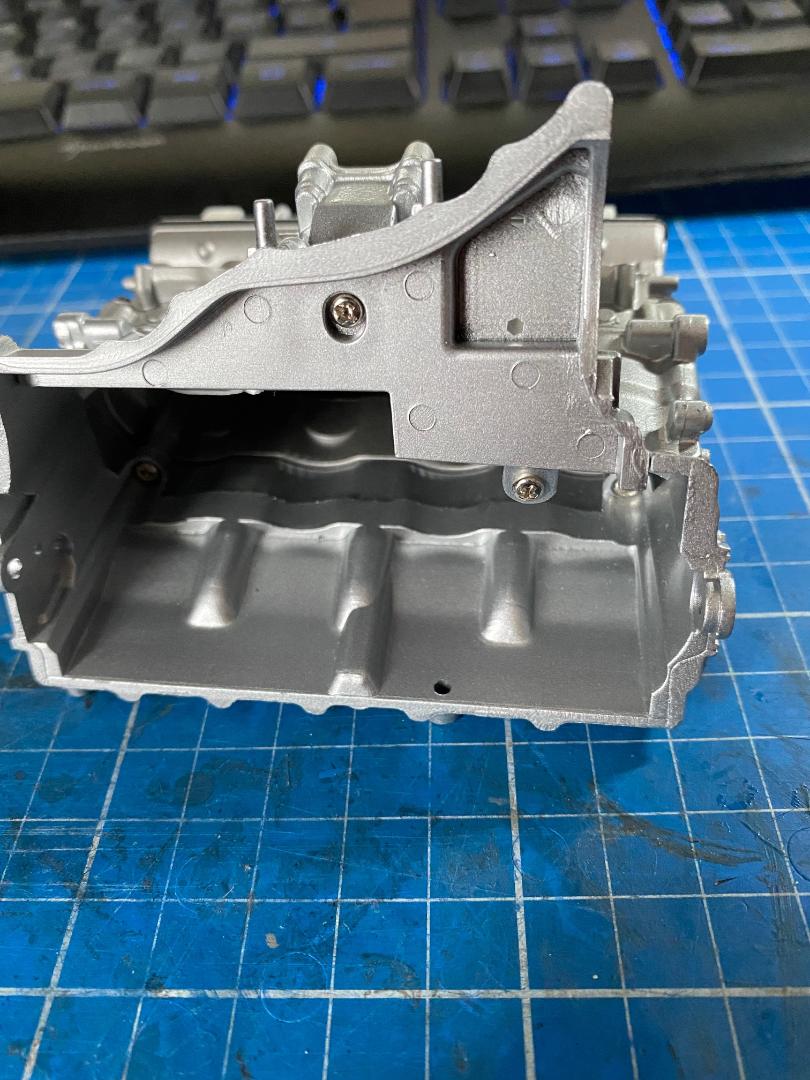
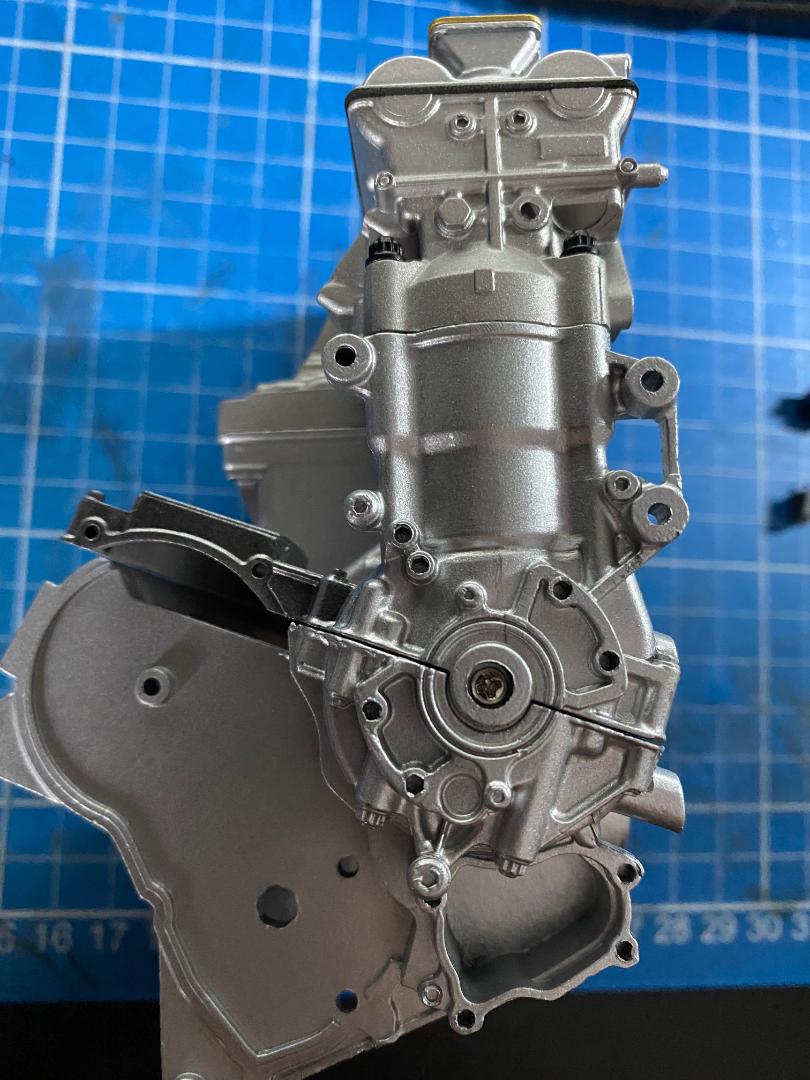
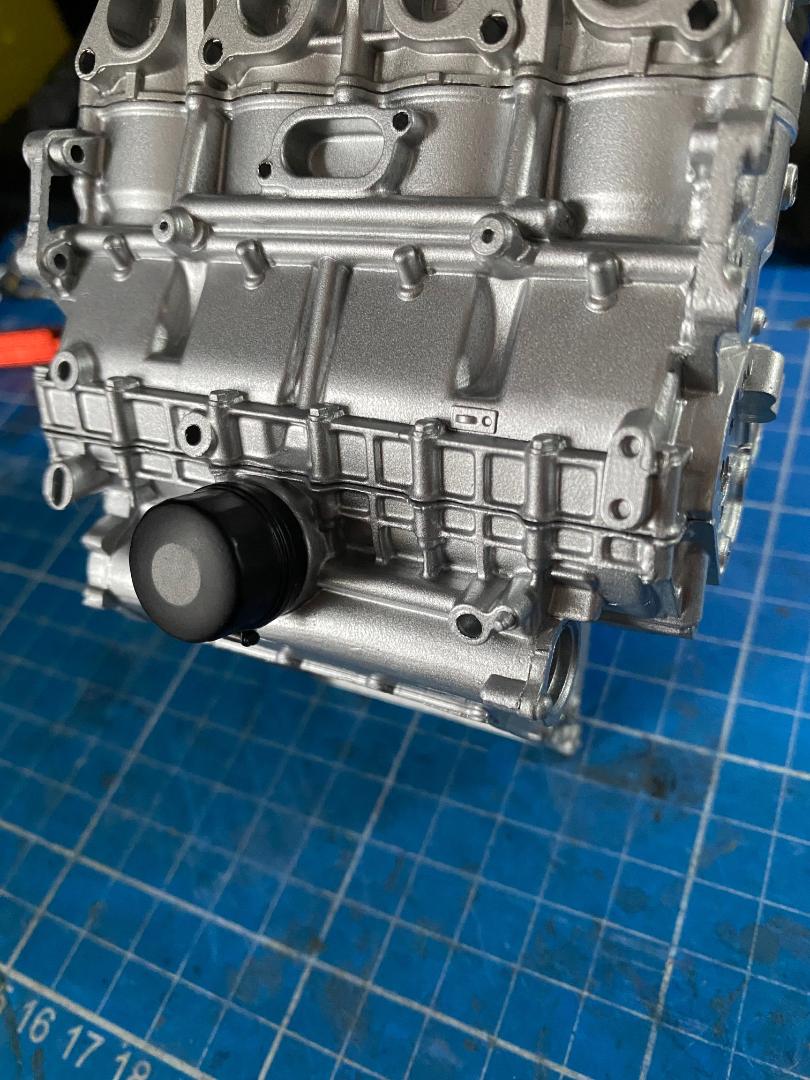
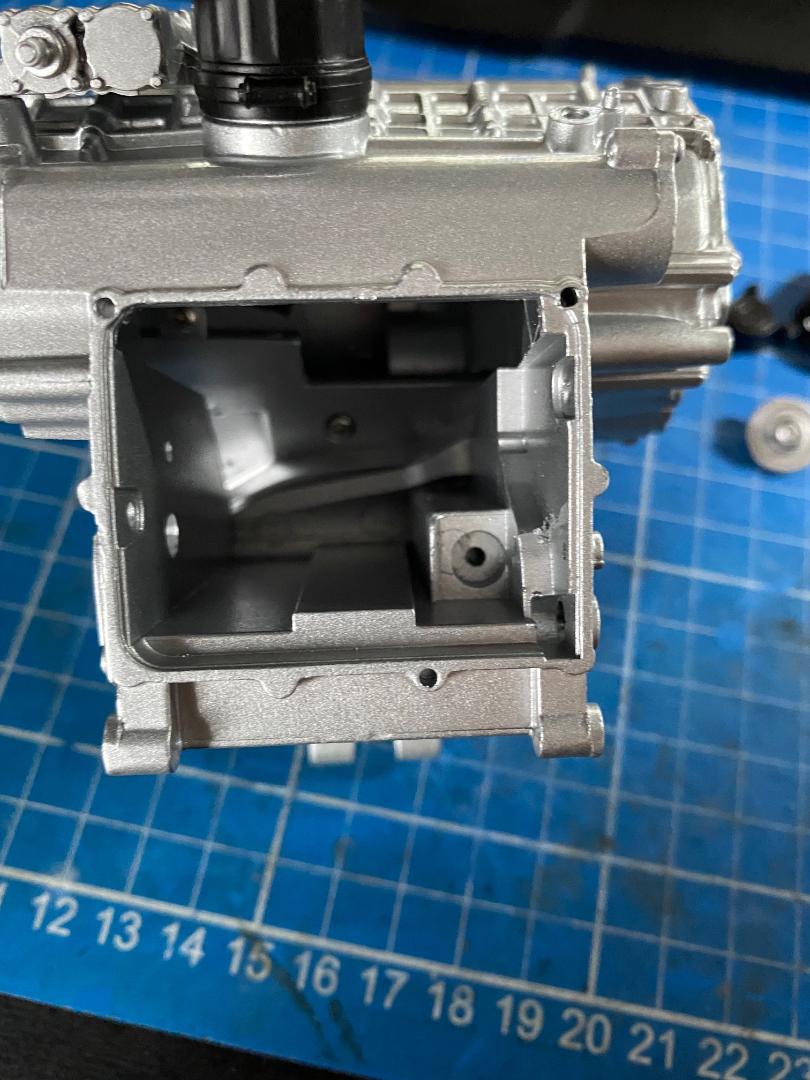
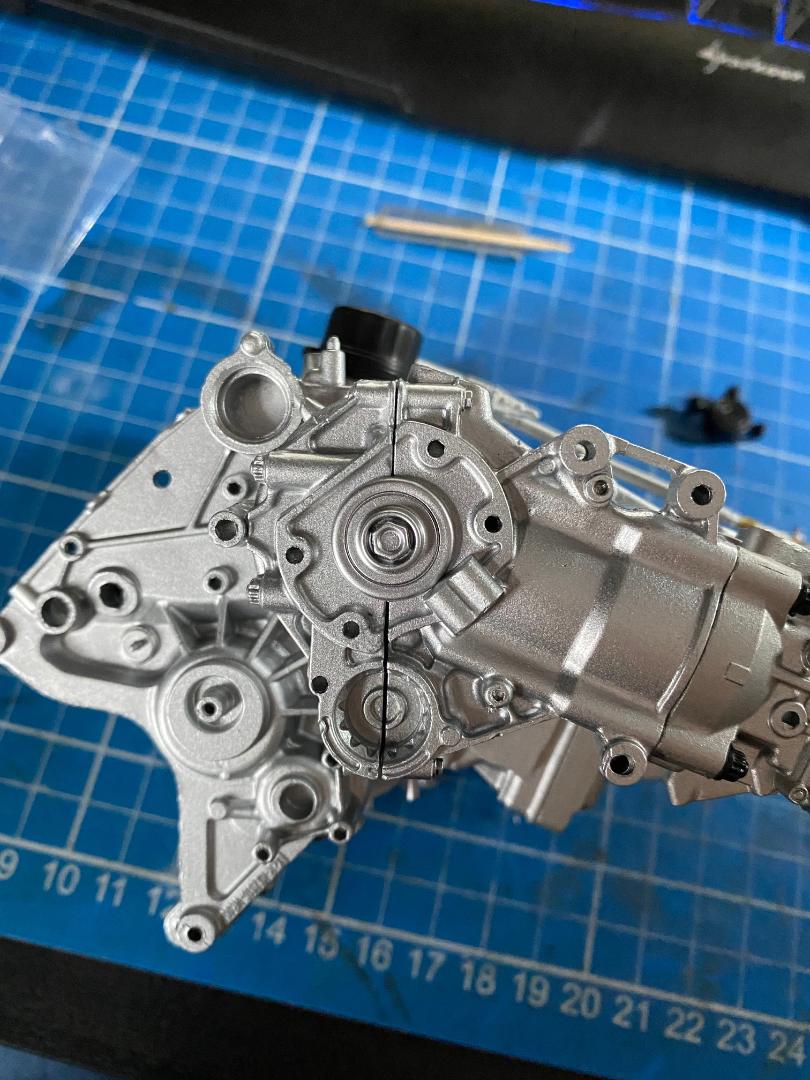
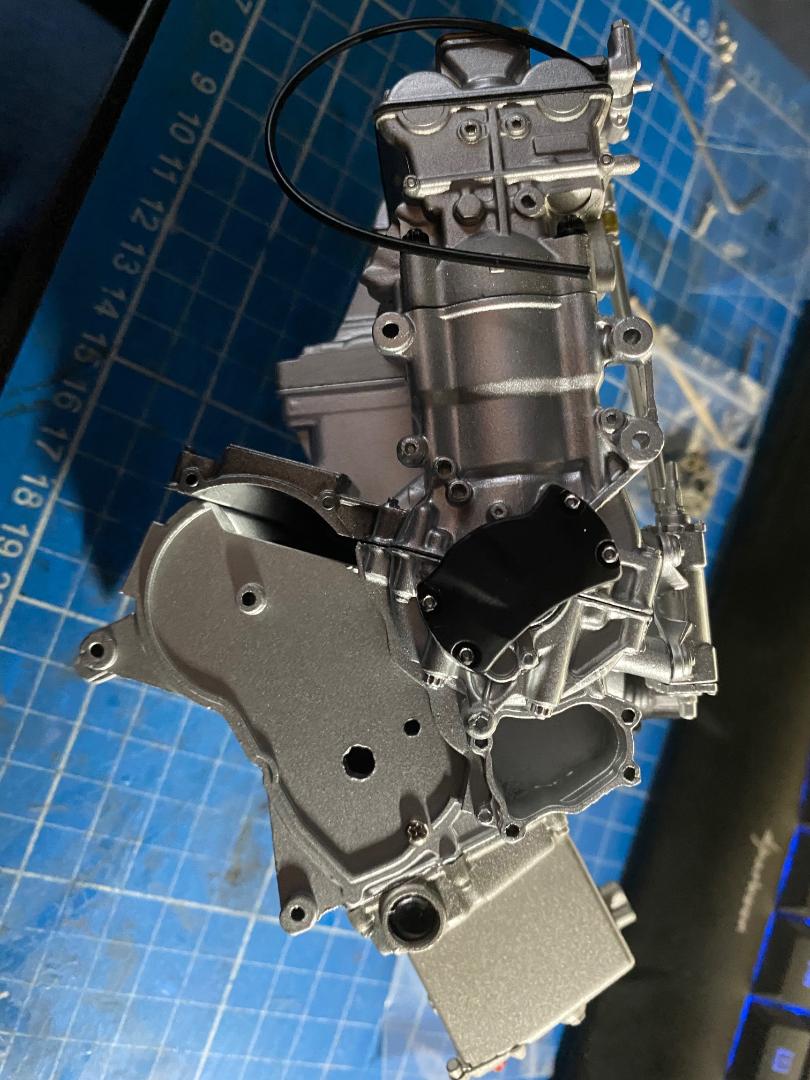
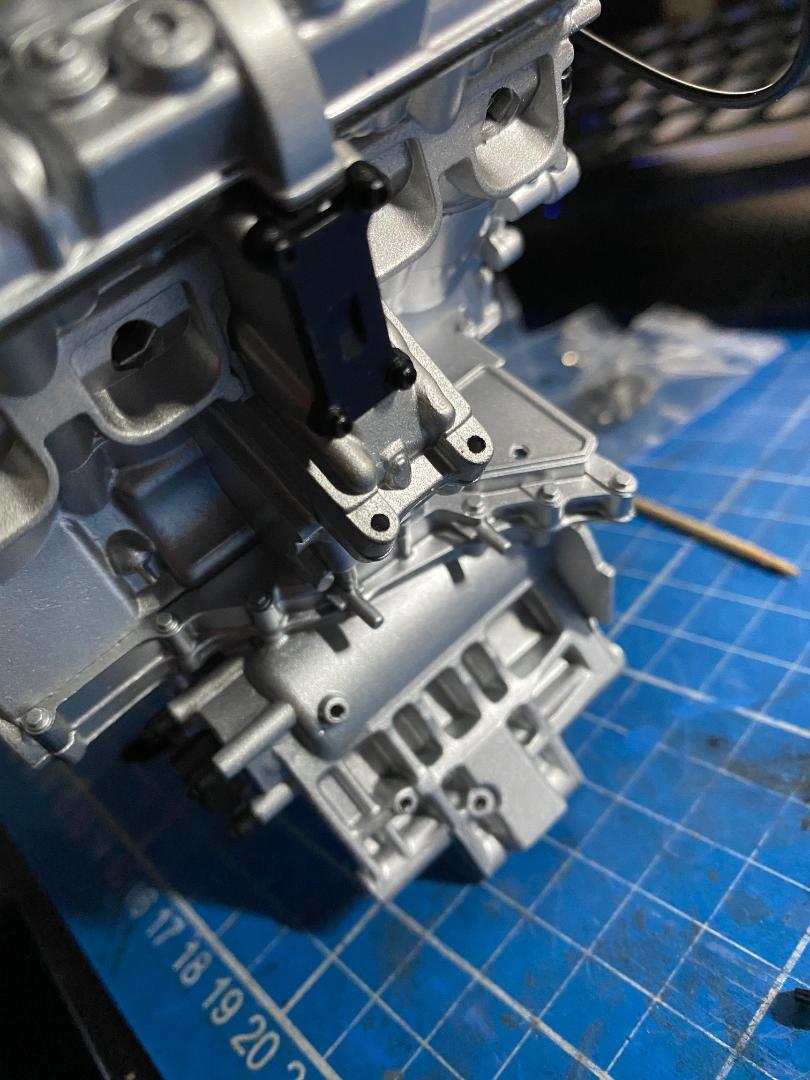
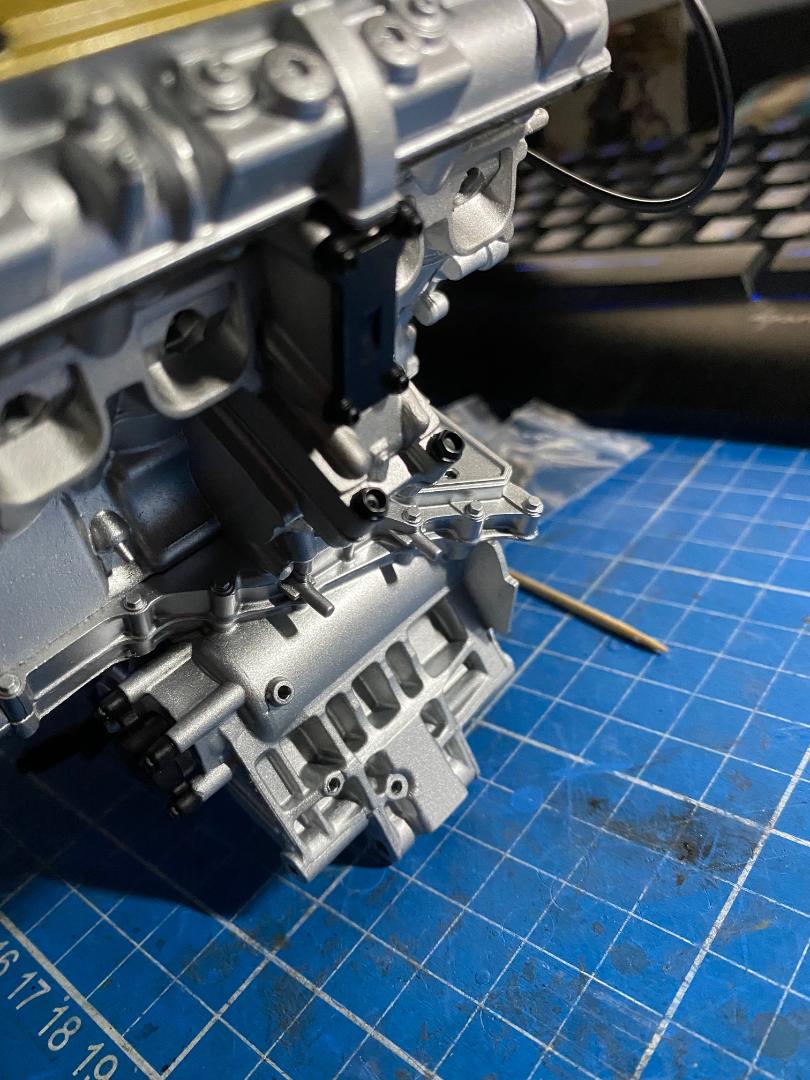
Das Gehäuse wird von unten in den Zylinderfuß geschoben und seitwärts mit zwei Schrauben verschraubt, da sich hier zwei Laschen übereinander schieben.
 " />
" /> " />
" /> " />
" /> " />
" /> " />
" /> " />
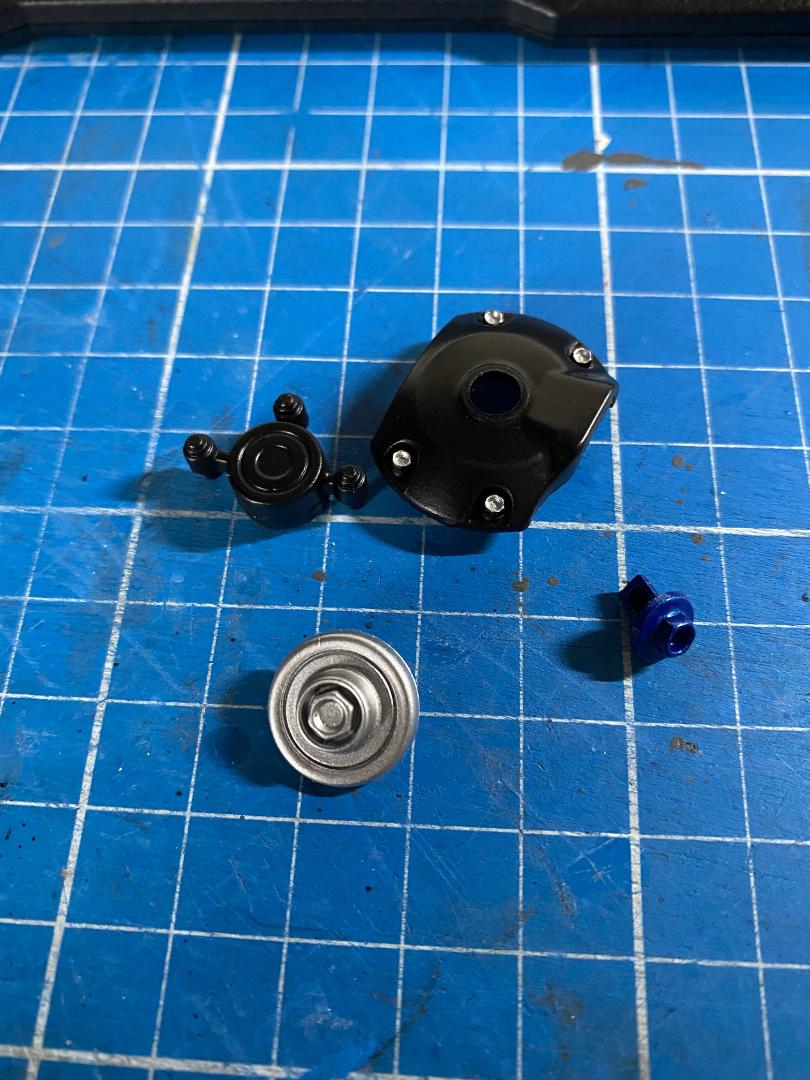
" />Ölfilter:
 " />
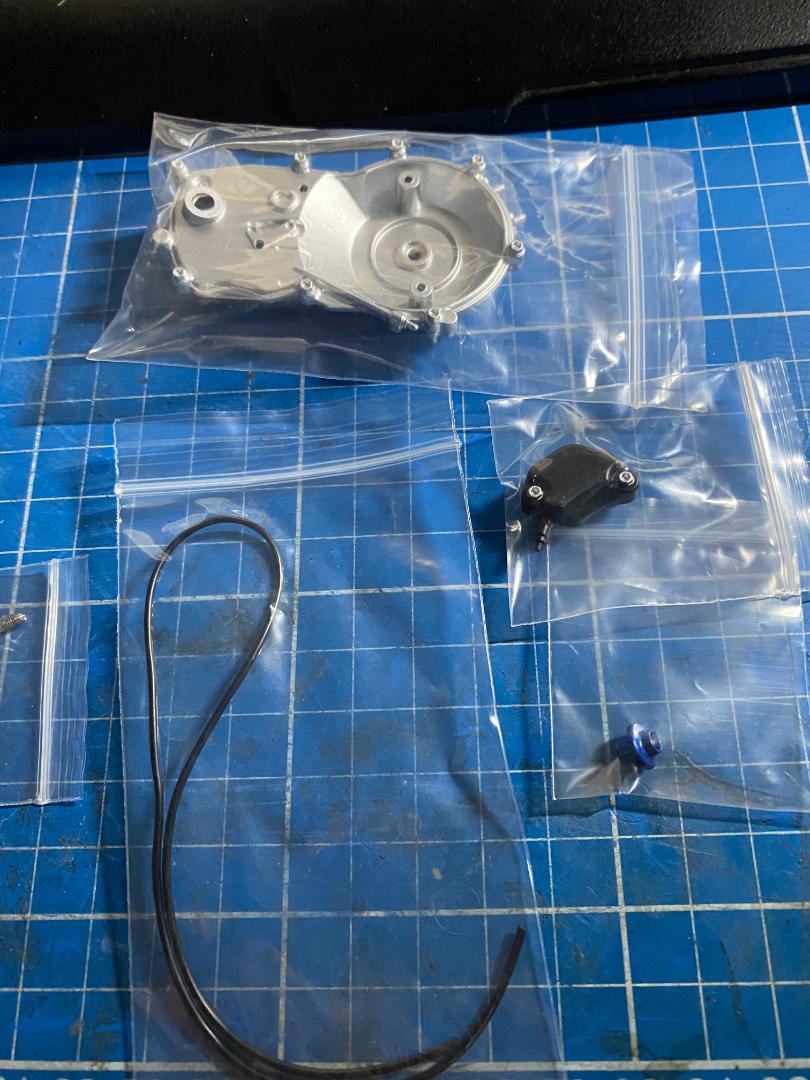
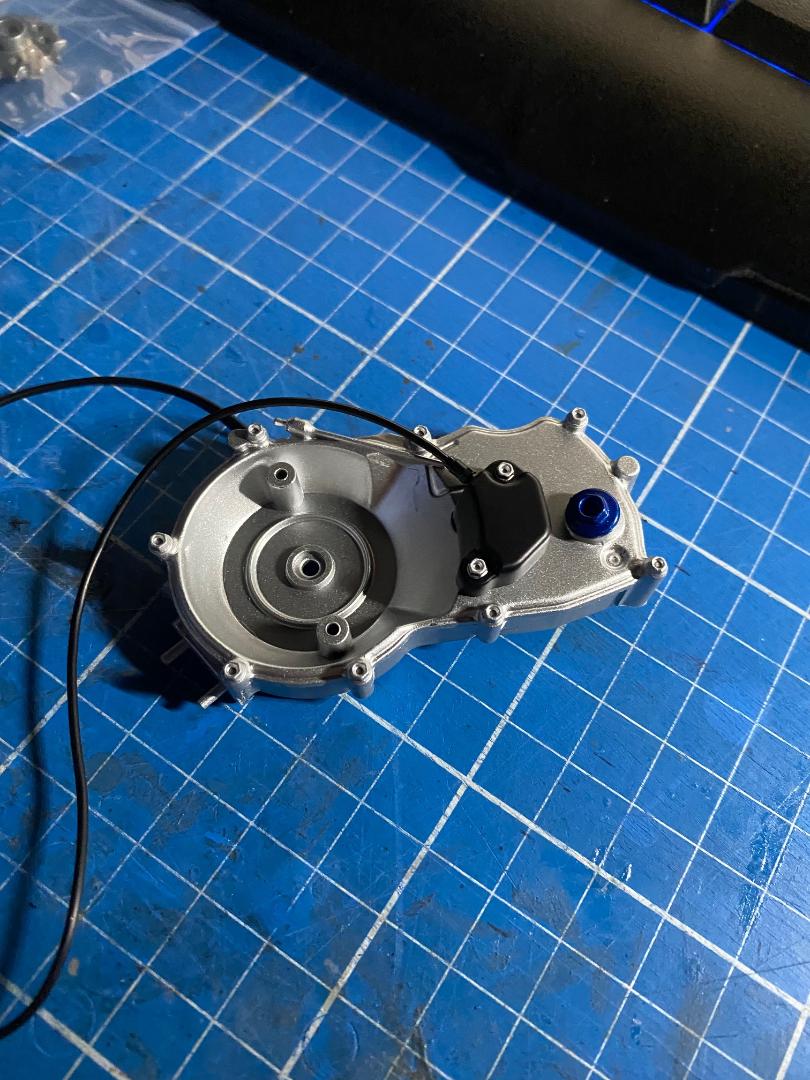
" />Seitenabdeckung, die auch gleich die Verbindungsschraube abdeckt:
 " />
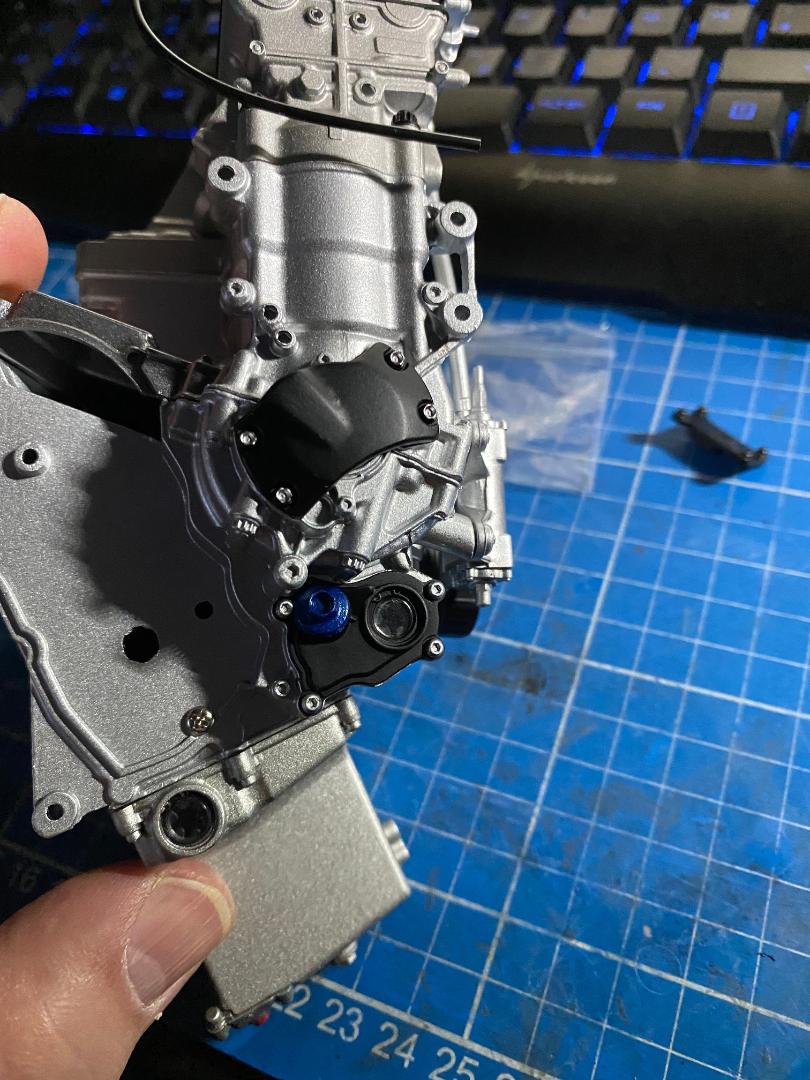
" />Kunststoff-Anbauteil:
 " />
" />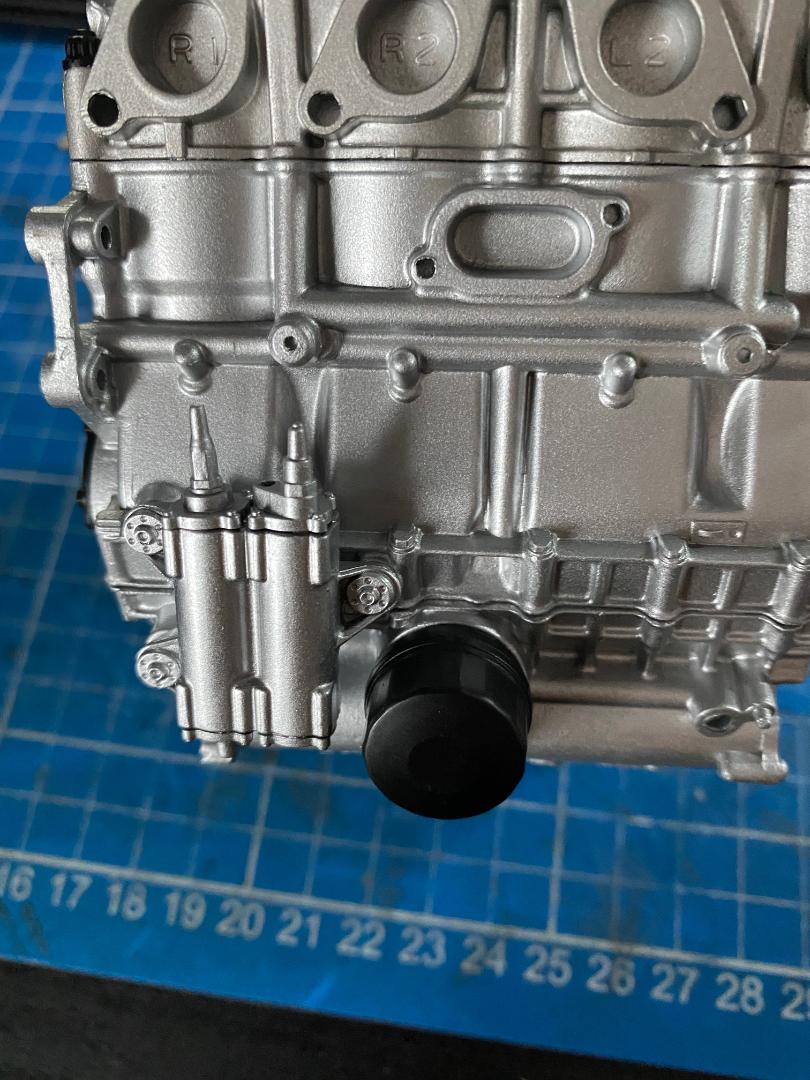 " />
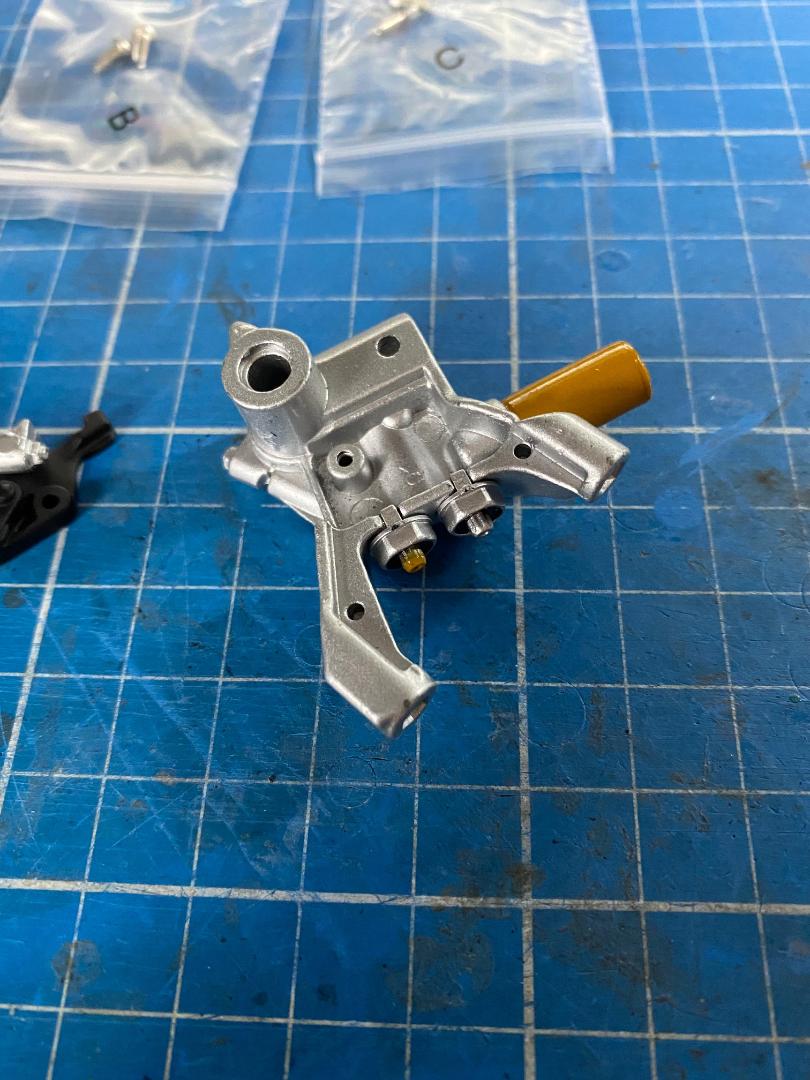
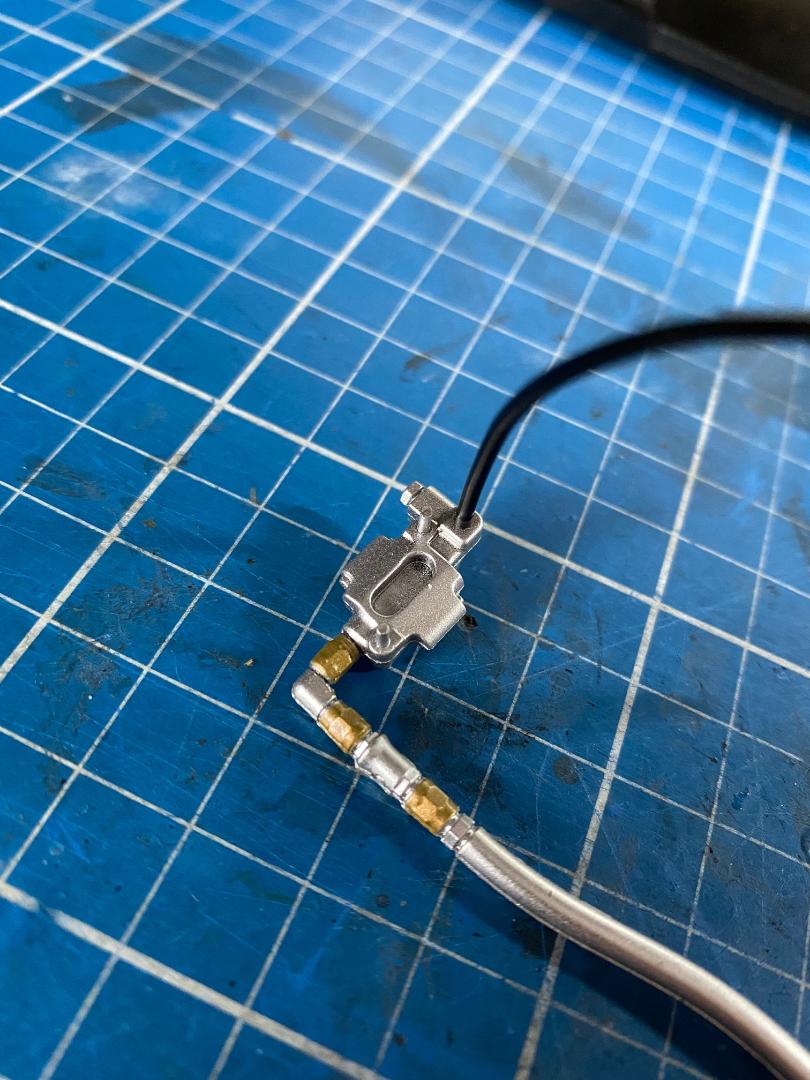
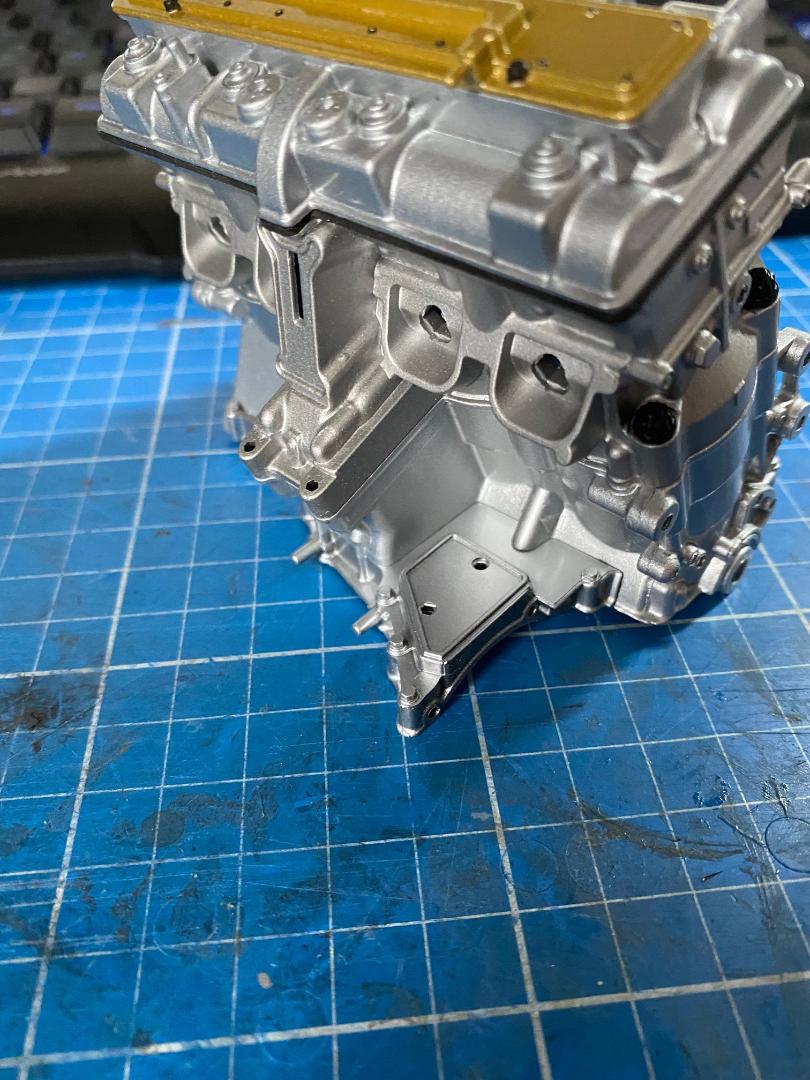
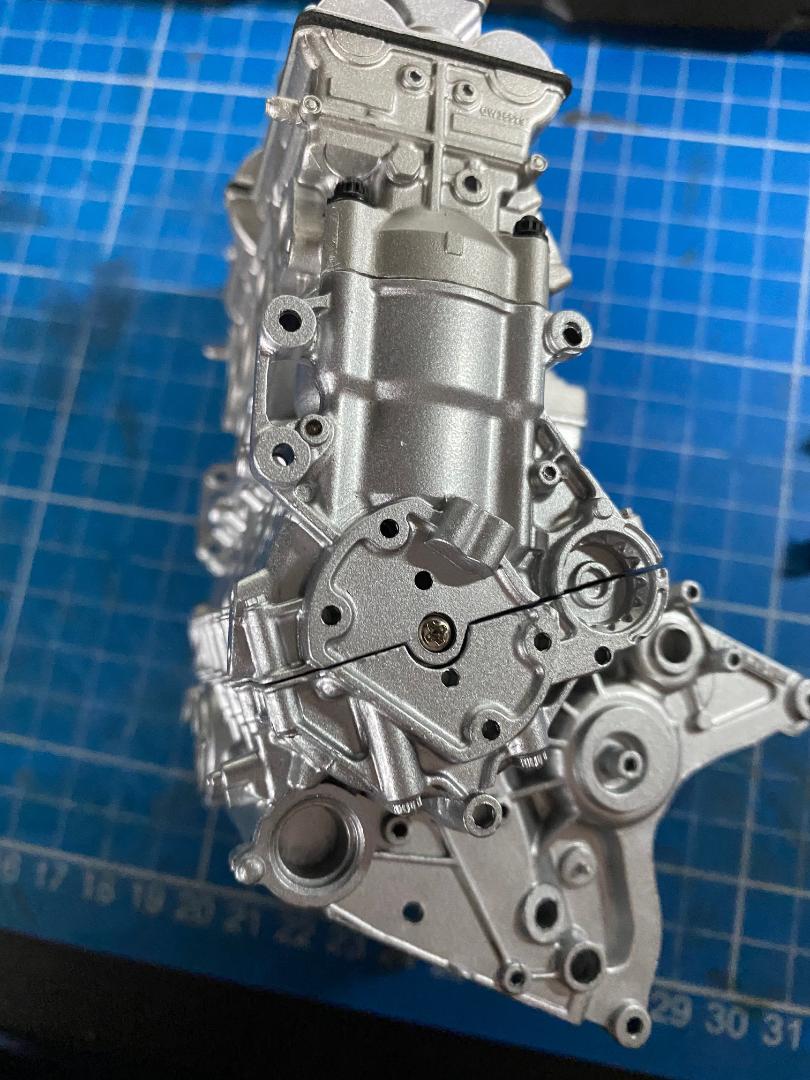
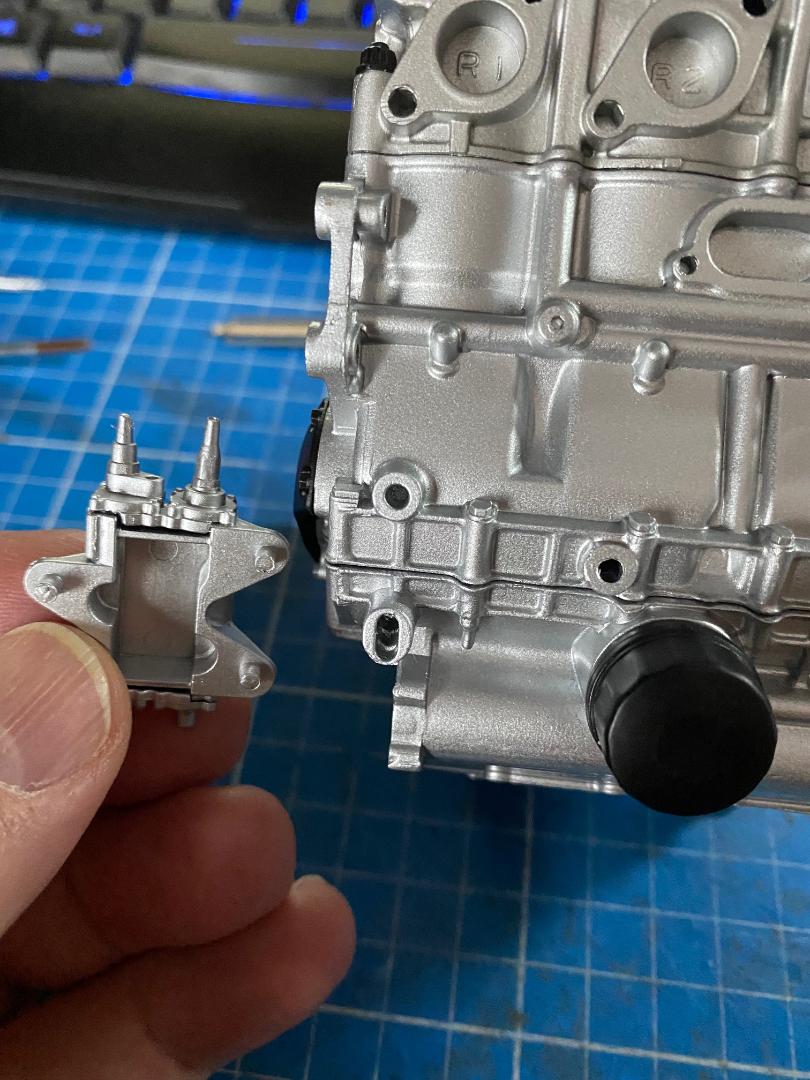
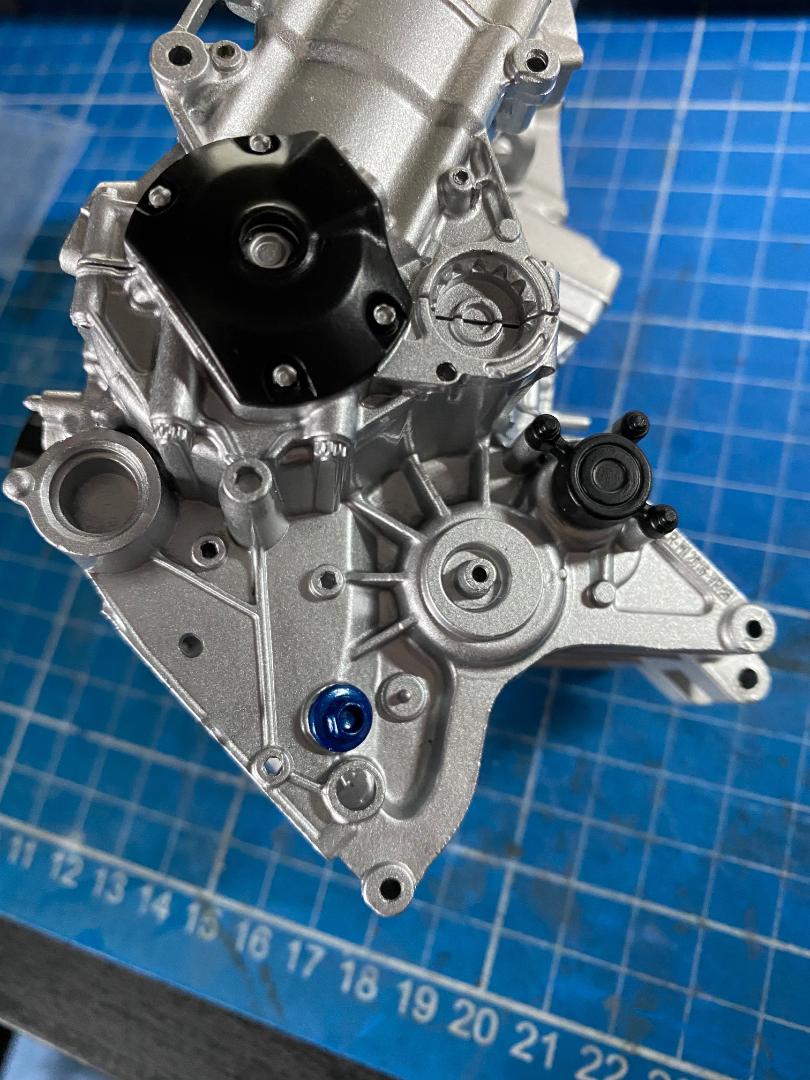
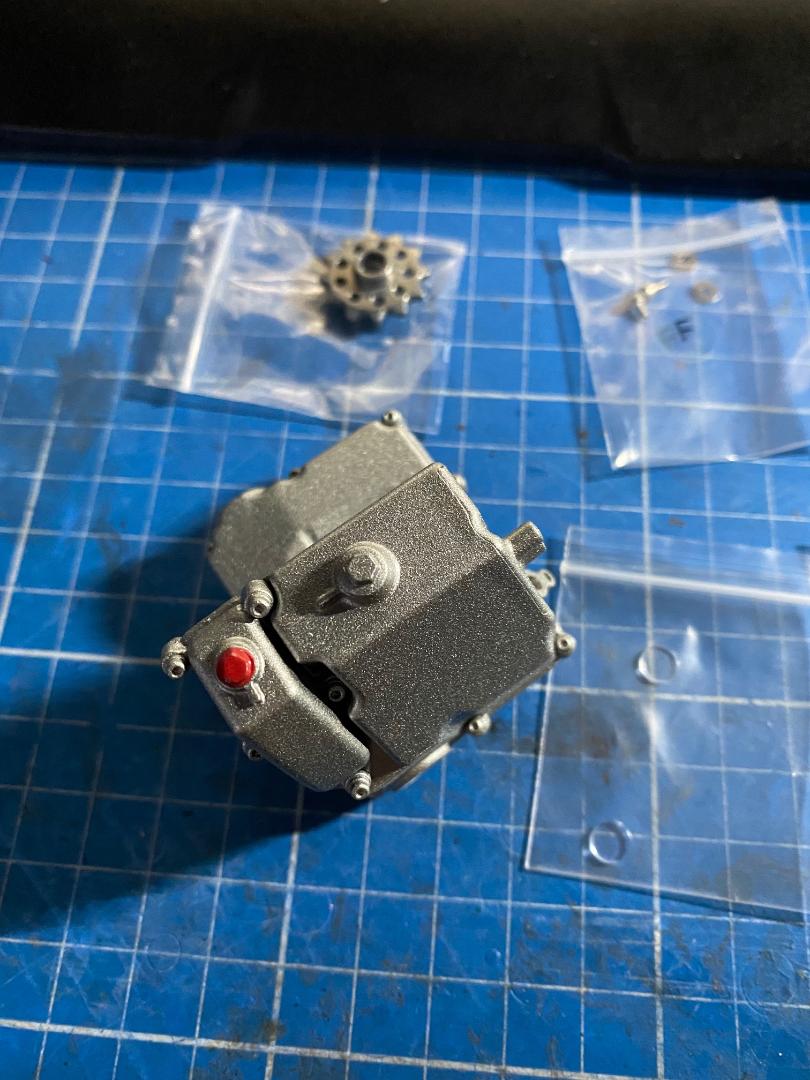
" />Das vormontierte Anbauteil wird zuerst mit der Leitung unten in das Verteilerteil gesteckt und dann mit zwei Stiften in den Zylinderkopf. Der Schlauch geht dabei dann nach hinten über den Ventildeckel hinweg.
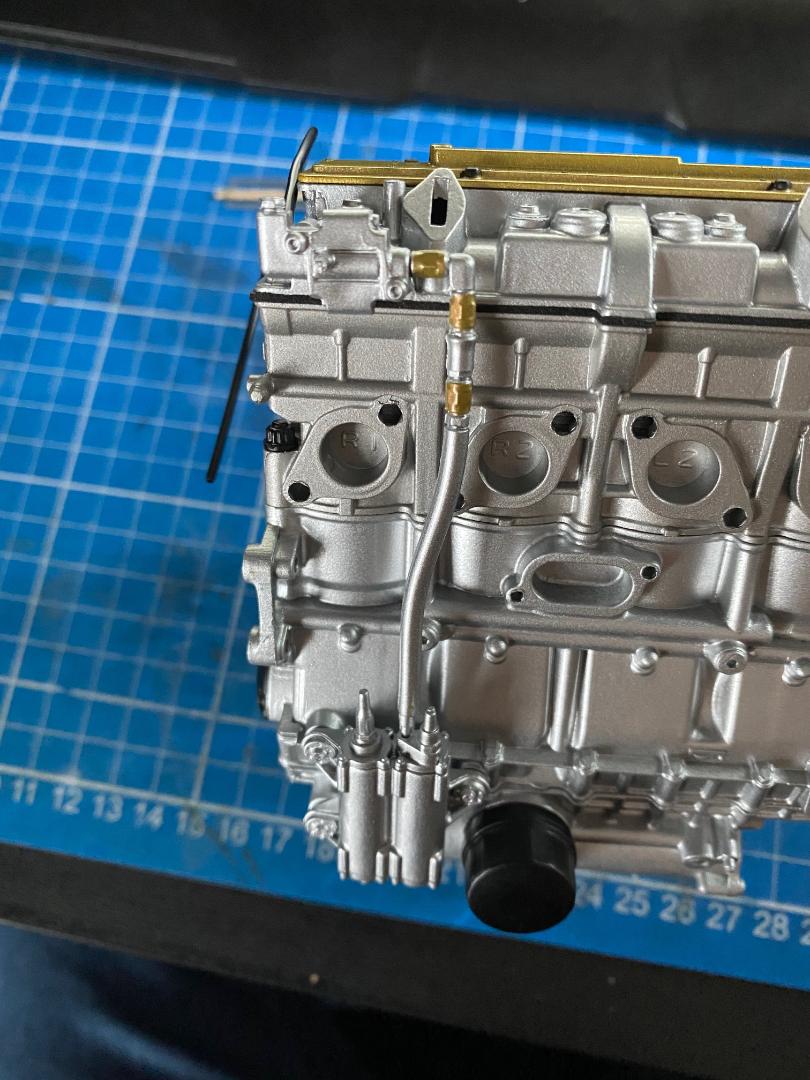 " />
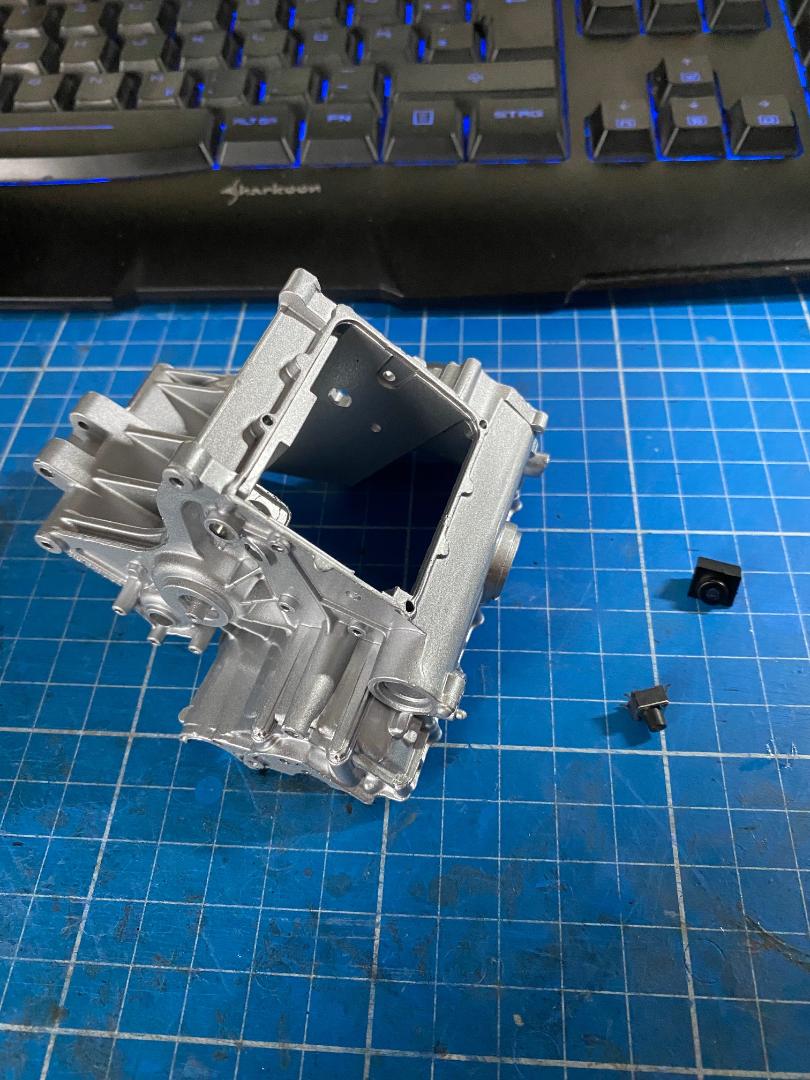
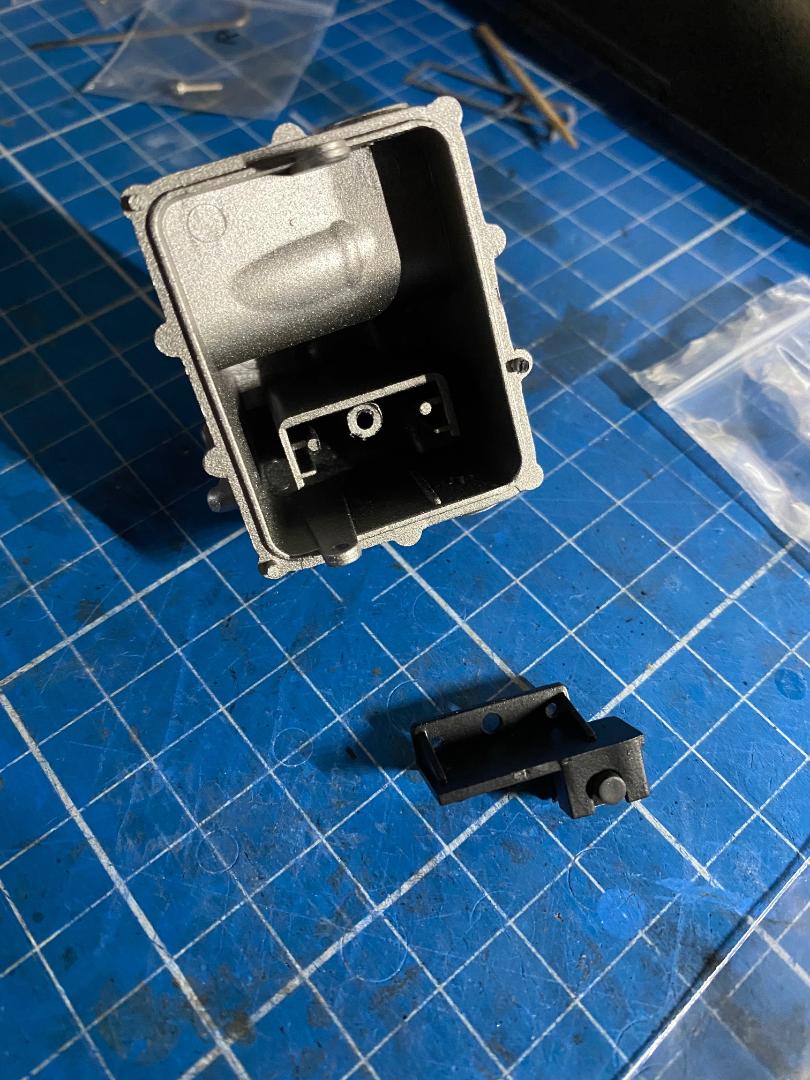
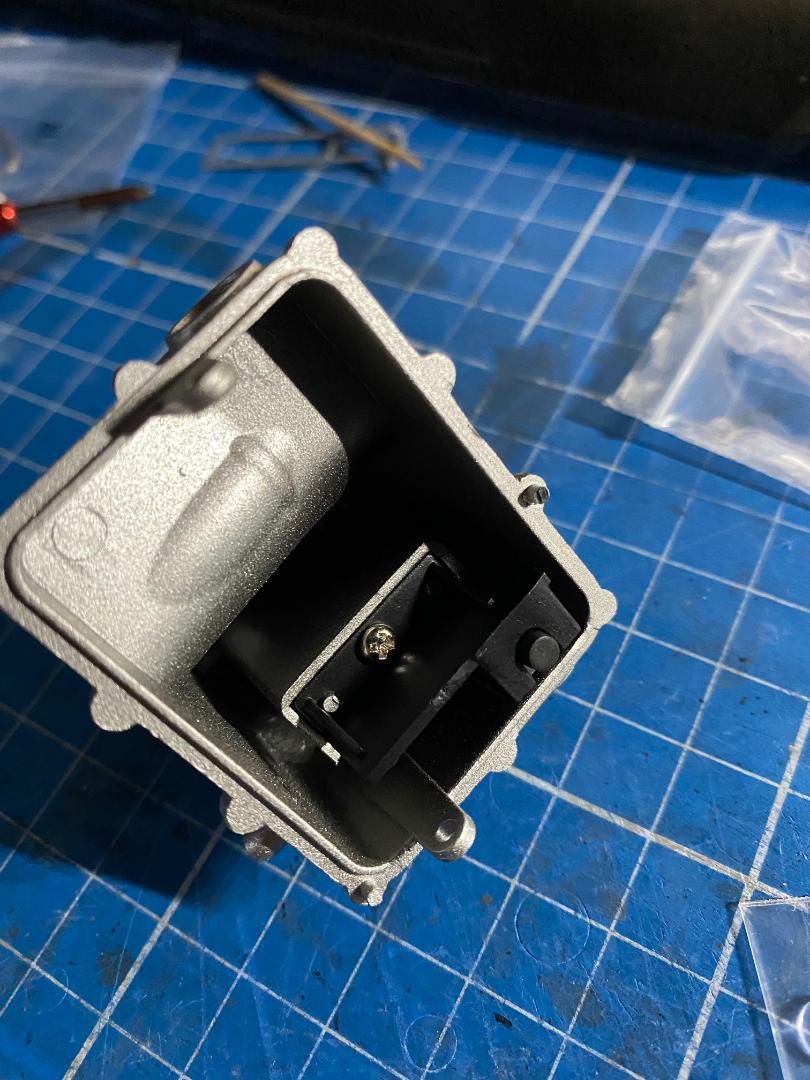
" />Nun wird noch ein -mir unverständlicher- Mikroschalter mit seiner Halterung von unten in die Ölwann geschraubt. Bin mal gespannt, was das noch wird, da er keine Kabel dran hat...
 " />
" /> " />
" /> " />
" />weitere Motoranbauteile und Deckel:
 " />
" />
Maddin- Schneidmatten-Virtuose
John-H. mag diesen Beitrag
Re: Valentino Rossi's Yamaha YZR M1 in 1:4 von DeAgostini
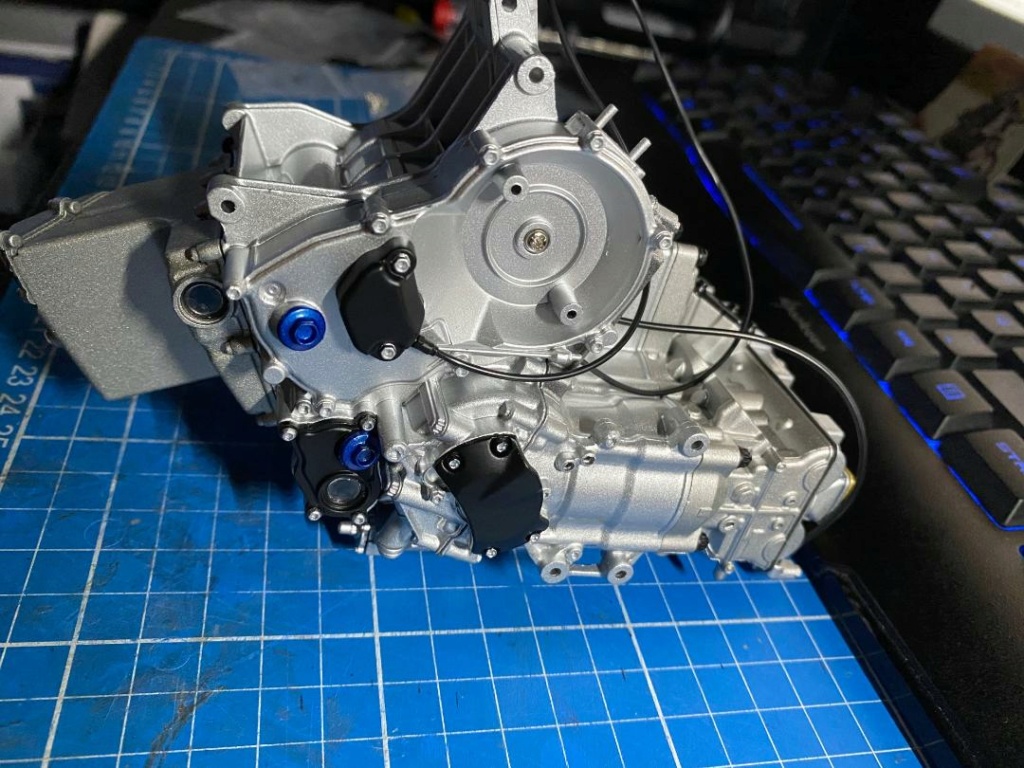
![]() von Maddin Di 14 Dez 2021, 14:56
von Maddin Di 14 Dez 2021, 14:56
 " />
" /> " />
" /> " />
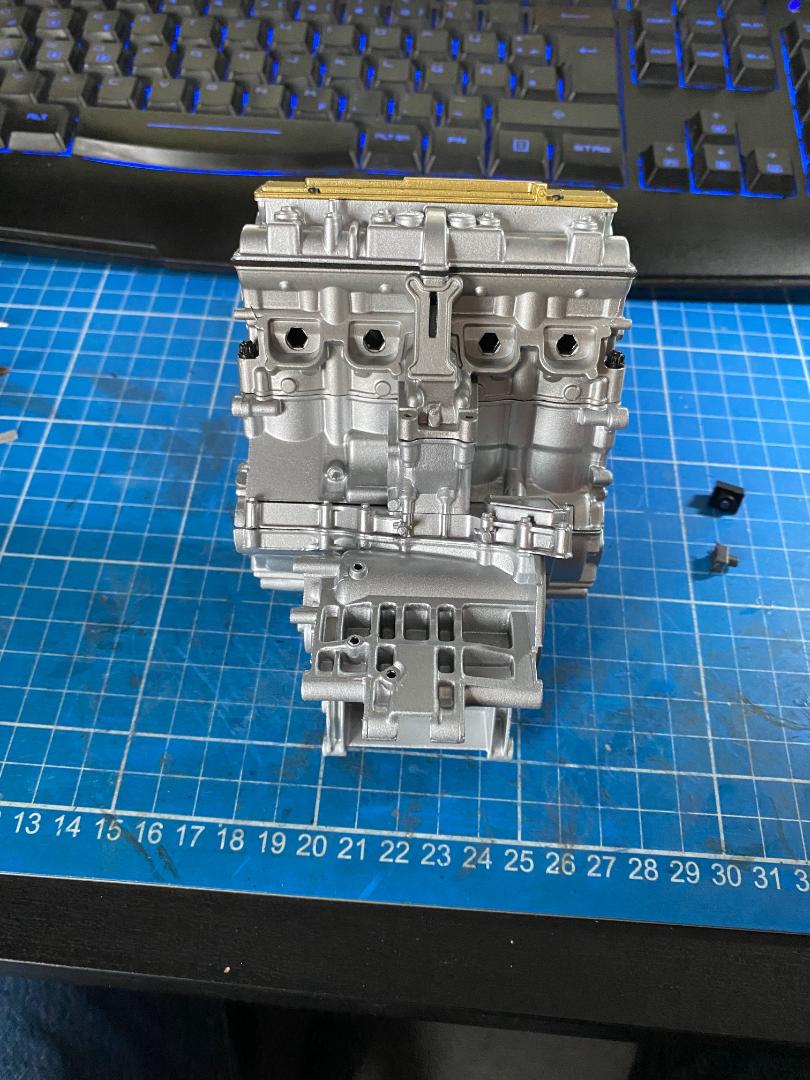
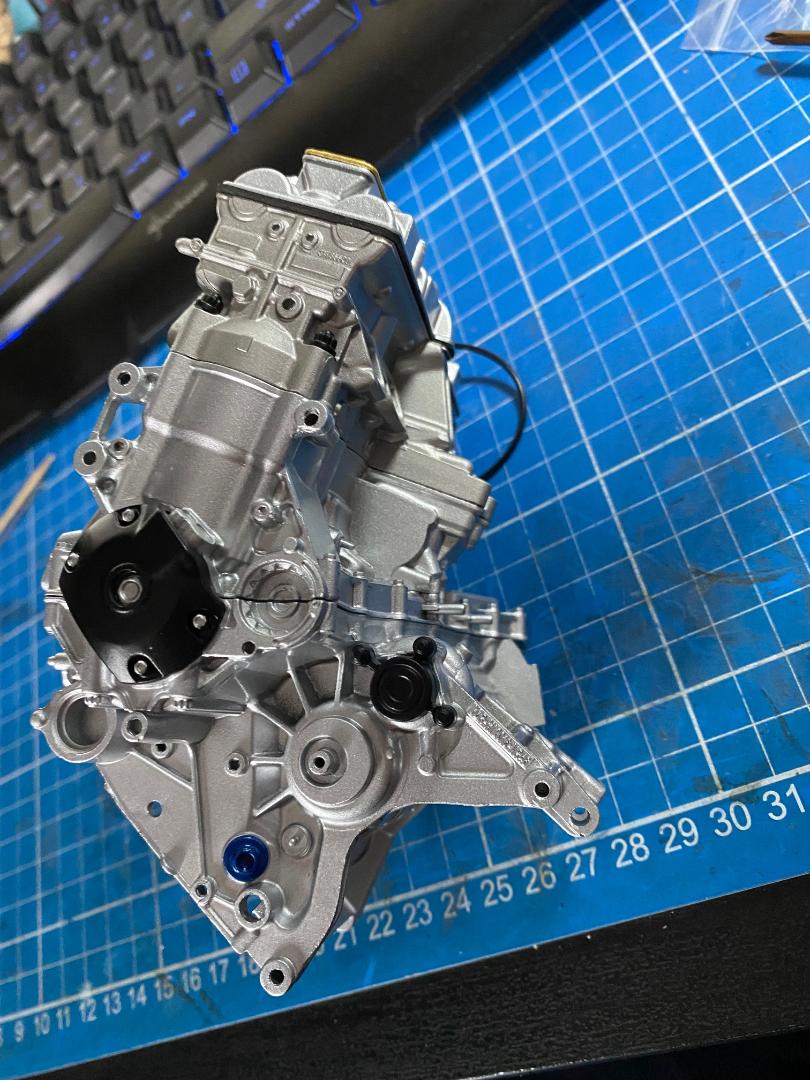
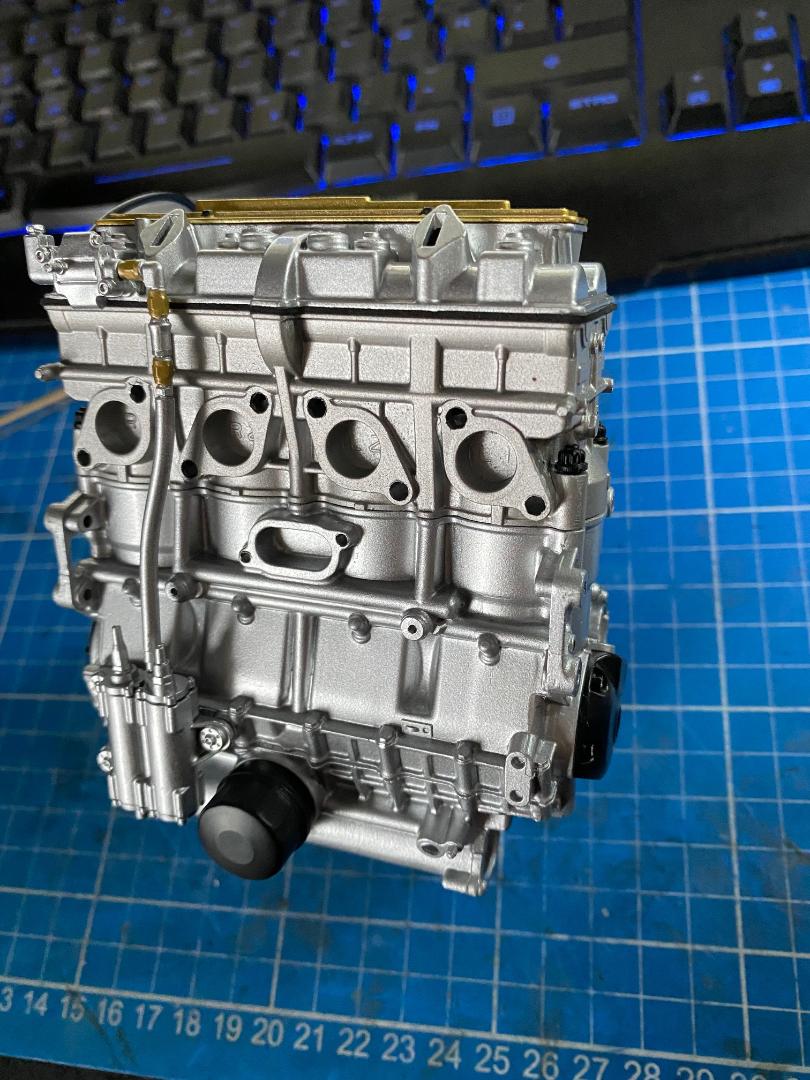
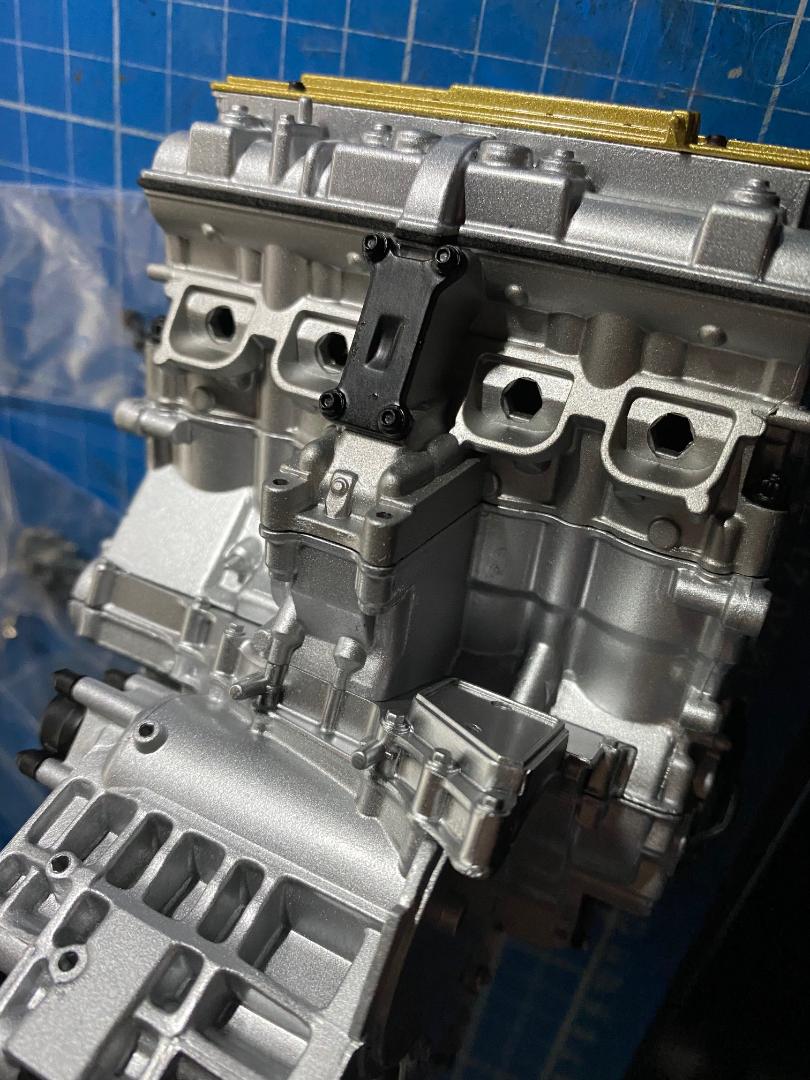
" />Und so sieht der Motor bis jetzt aus und wiegt schon stolze 680 Gramm.
 " />
" /> " />
" /> " />
" />
Maddin- Schneidmatten-Virtuose
John-H. mag diesen Beitrag
Re: Valentino Rossi's Yamaha YZR M1 in 1:4 von DeAgostini
![]() von Maddin Di 14 Dez 2021, 16:21
von Maddin Di 14 Dez 2021, 16:21
Aber nun erstmal wieder Bilder:
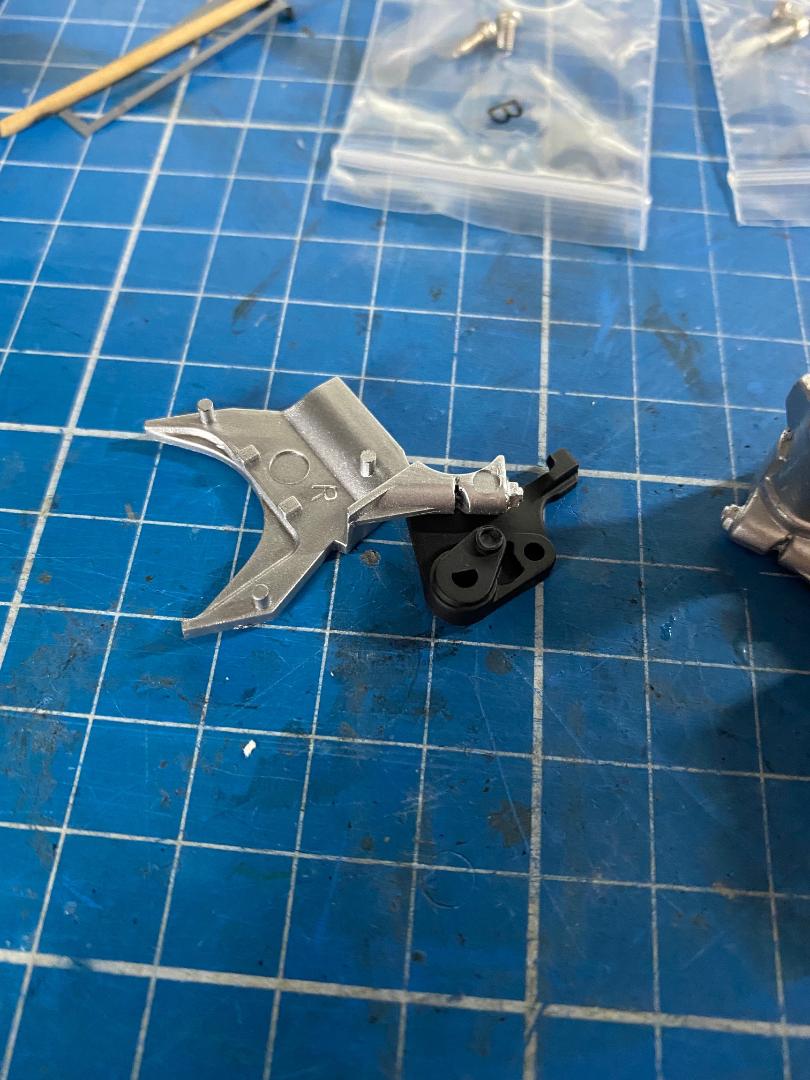
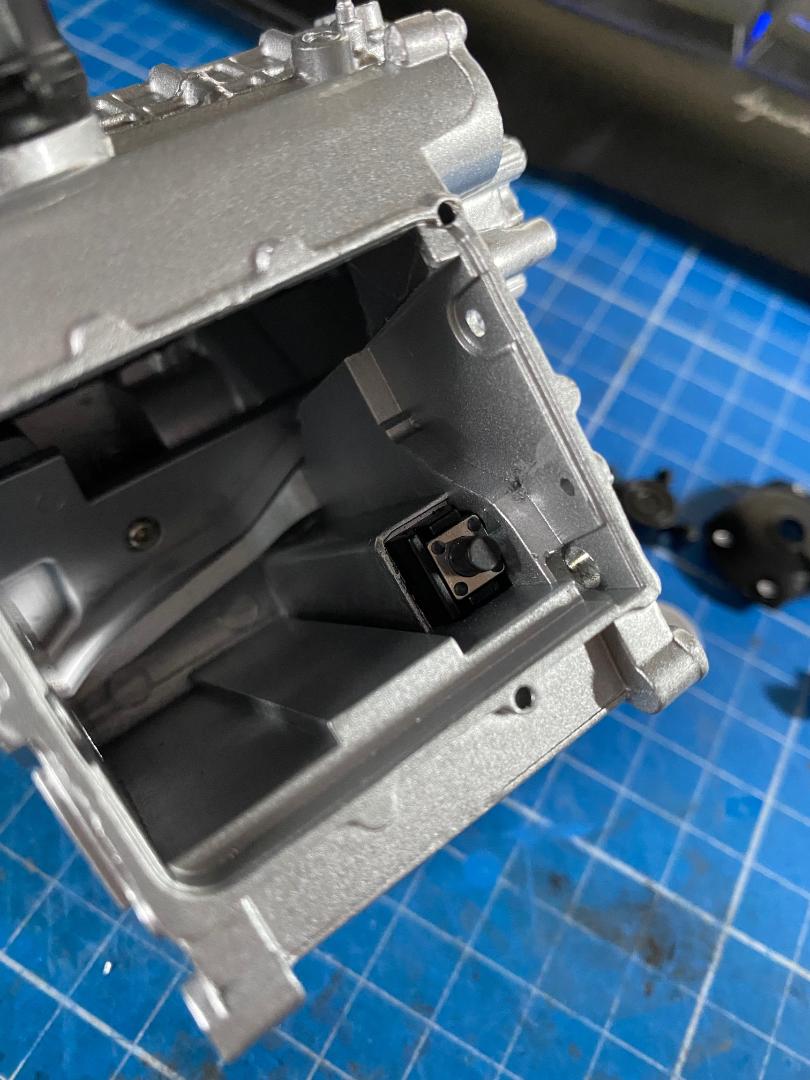
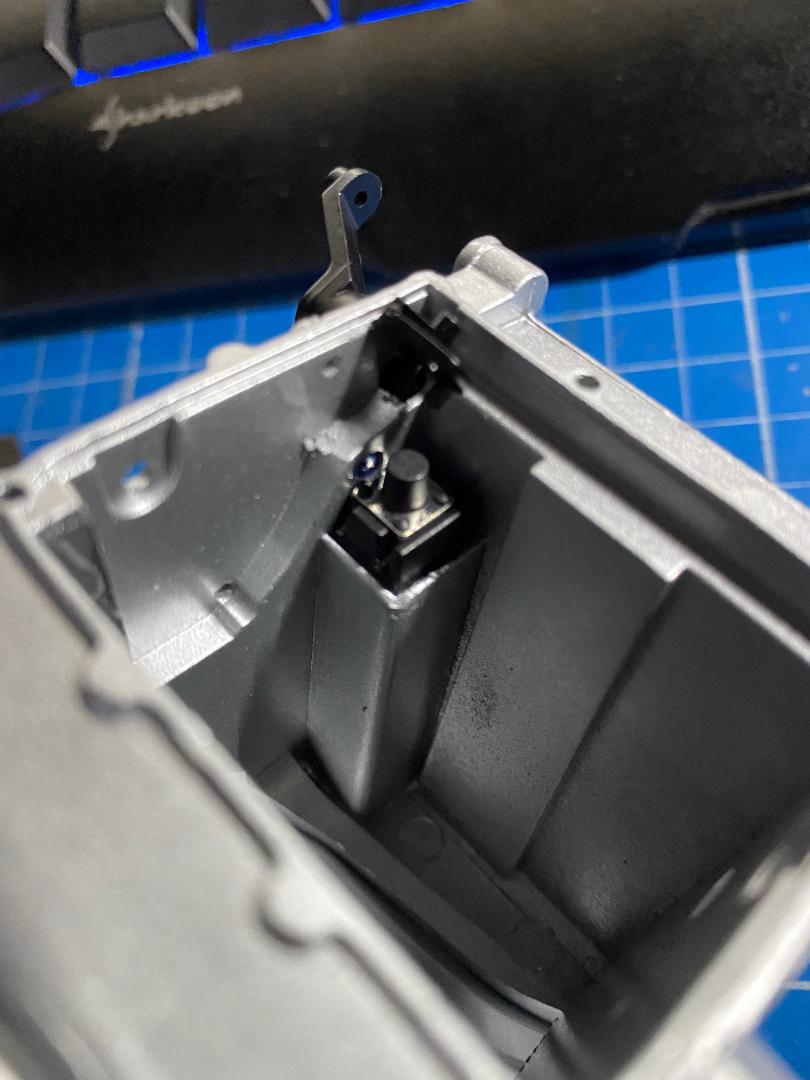
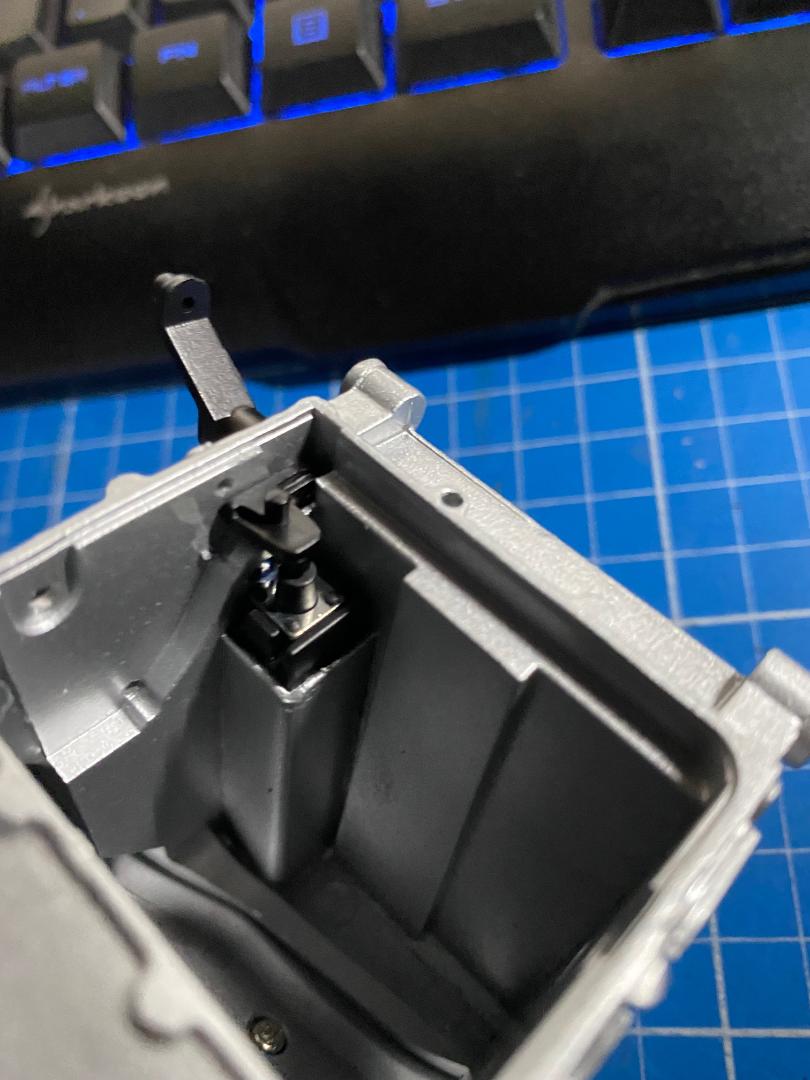
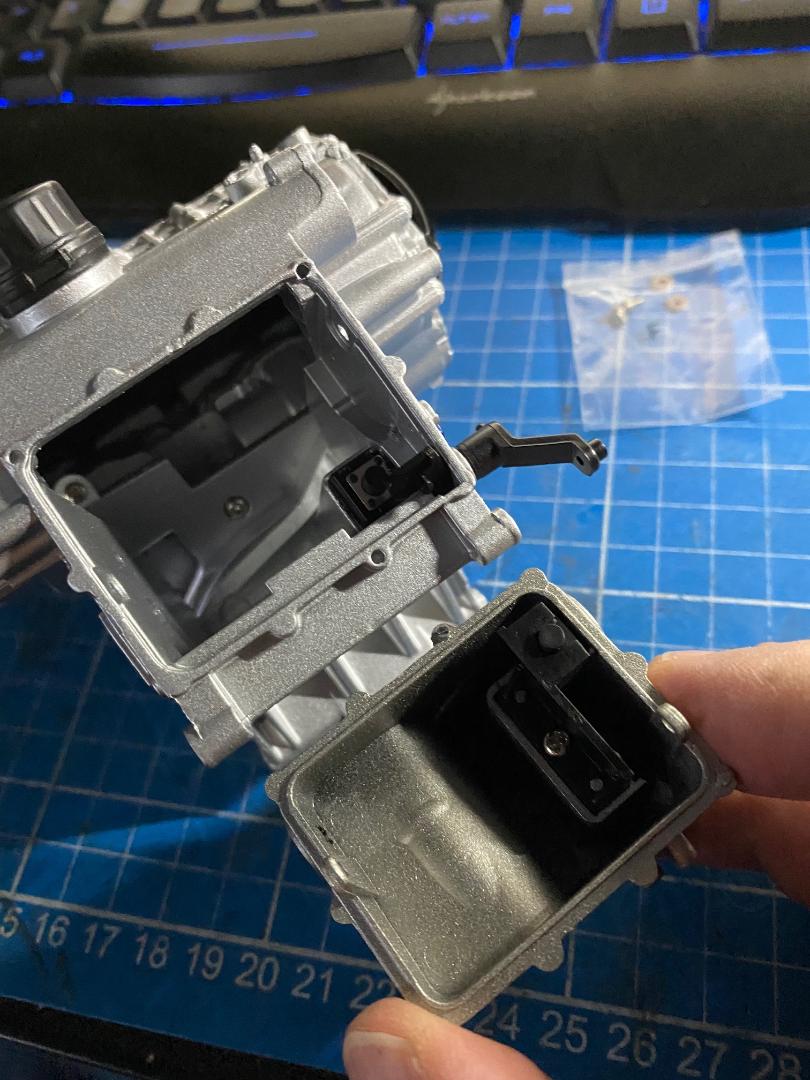
Der Schalthebel hat eine kleine Nase an seiner Achse. Diese faßt in einen Schlitz im Gegenstück, welches innen im Kurbelwellengehäuse eingelegt wird und über den Schalthebel dann je nach Bewegungsrichtung auf einen Mikroschalter drückt. Die beiden Schalthebelteile werden von außen mit einer Inbusschraube verbunden. Hier muss man gut aufpassen, daß Alles richtig zusammensteckt und dann die Inbusschraube gut,aber nicht zu fest anziehen, damit das Gewinde nicht beschädigt wird. Sind ja nur Kunststoffteile.
 " />
" /> " />
" /> " />
" />Der Extratank wird mit zwei Stiften recht stramm in der Ölwanne fixiert.
 " />
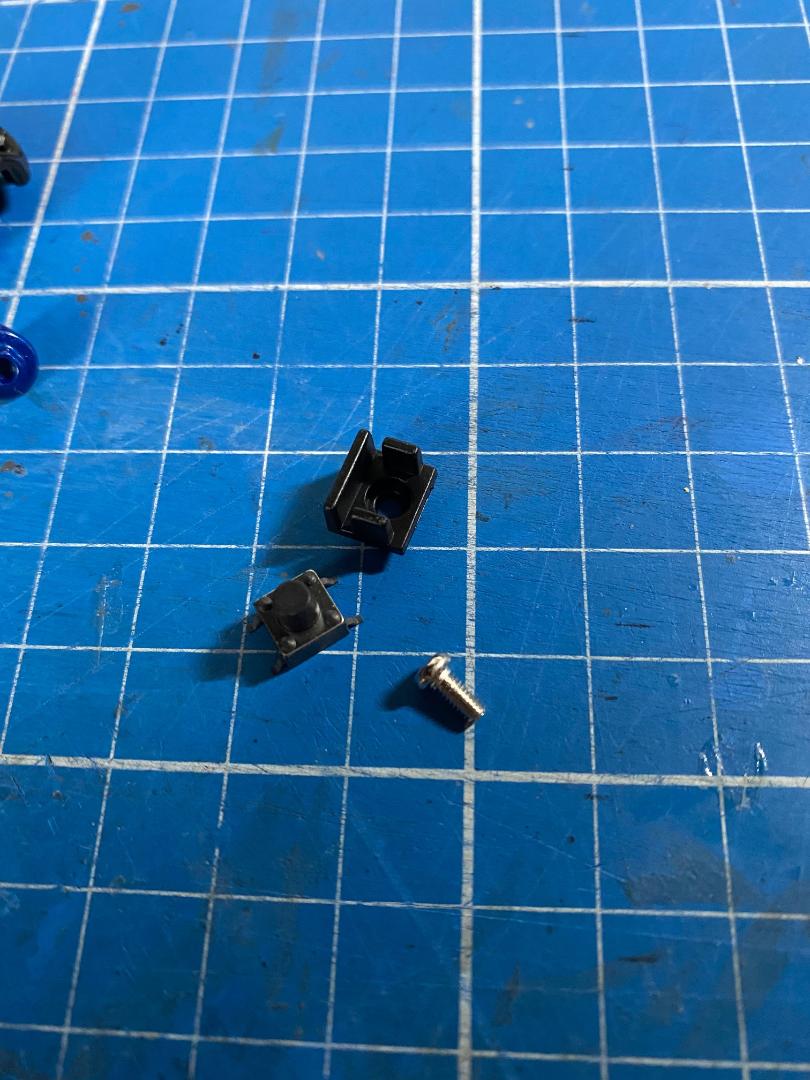
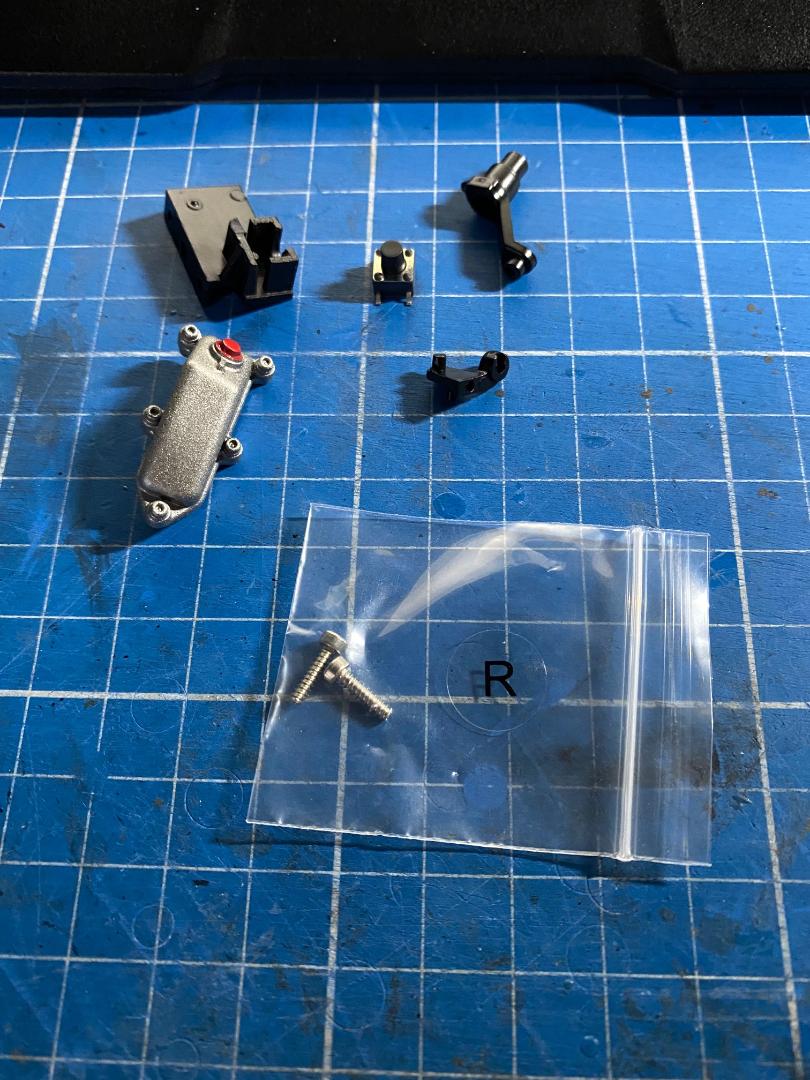
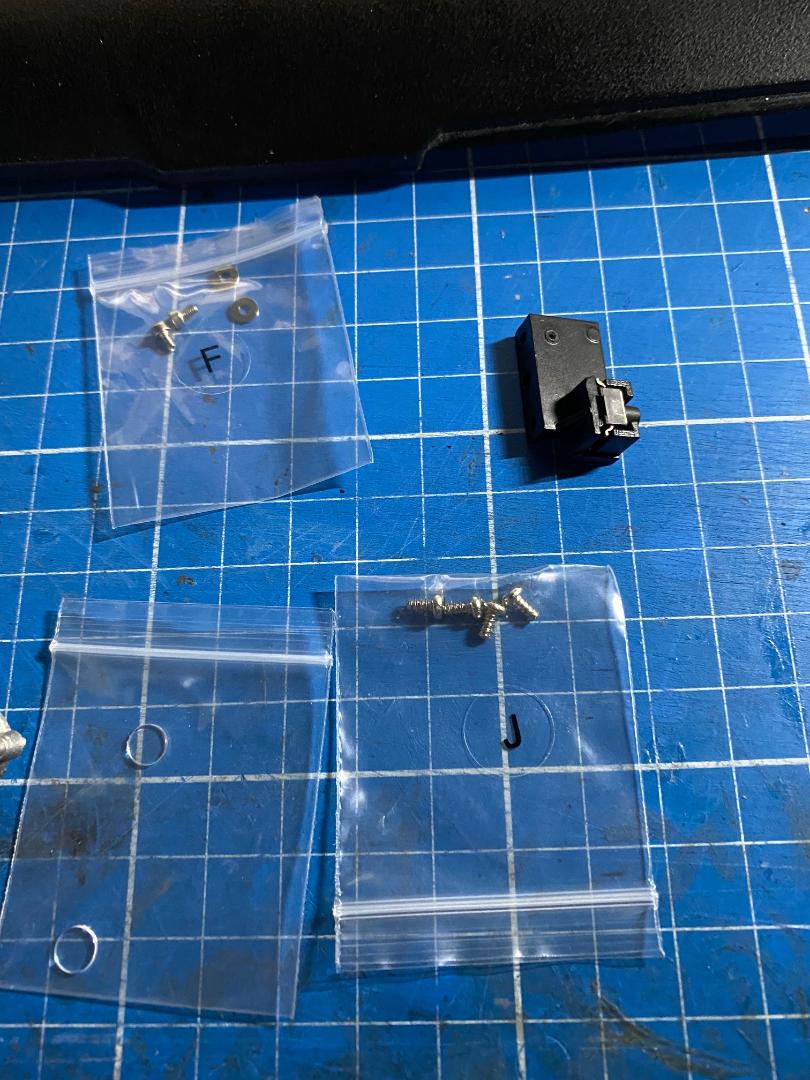
" />der zweite Mikroschalter mit Halterung und sogar ein richtiges Metall-Ritzel sind diesmal dabei.
 " />
" />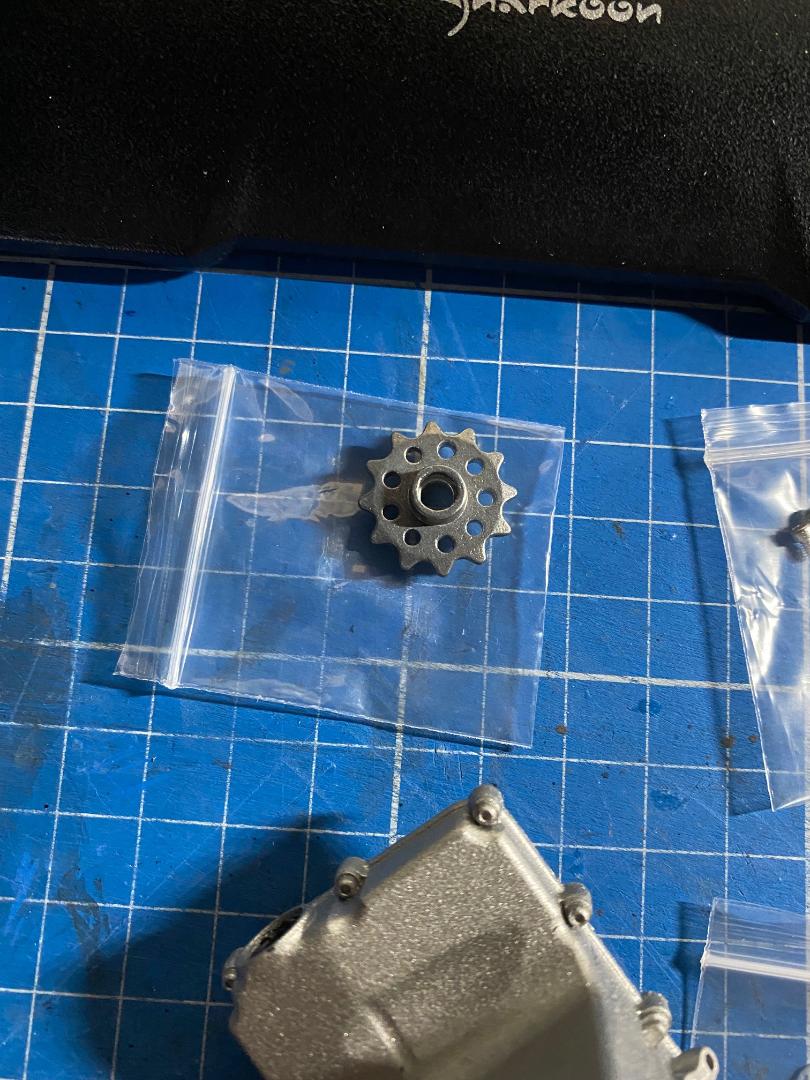 " />
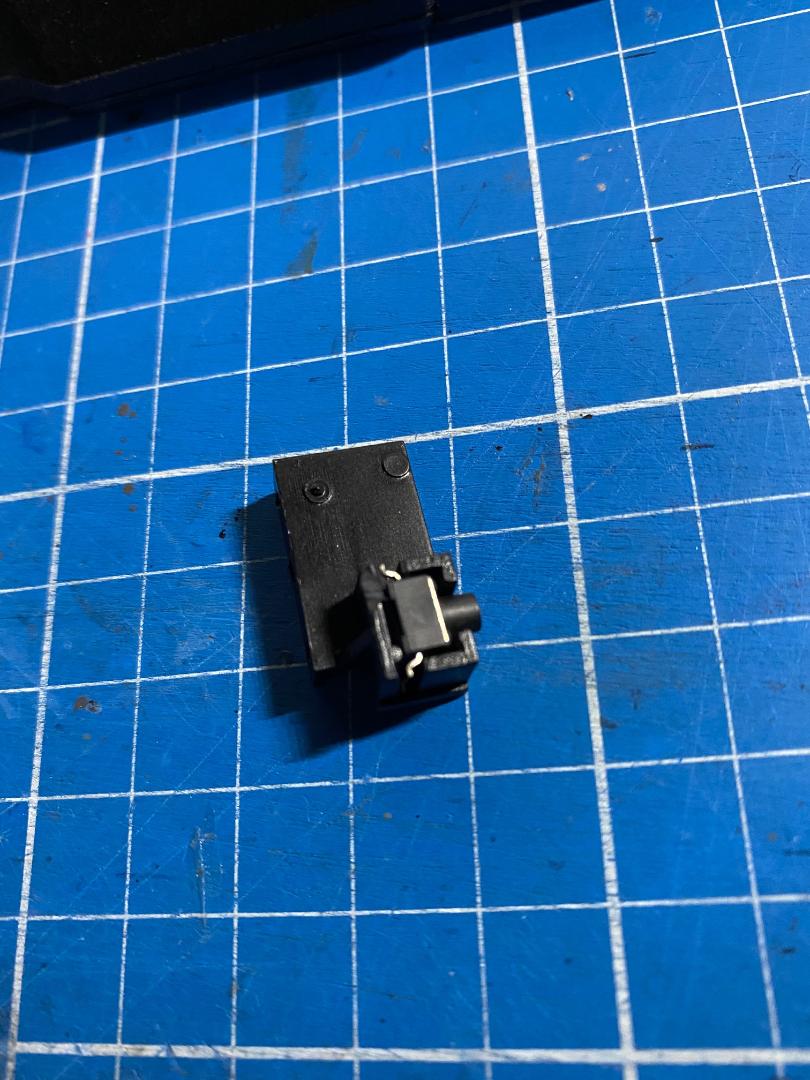
" />Der Mikroschalter wird seitlich in seine Halterung geschoben und Diese dann in der Ölwanne verschraubt.
 " />
" /> " />
" /> " />
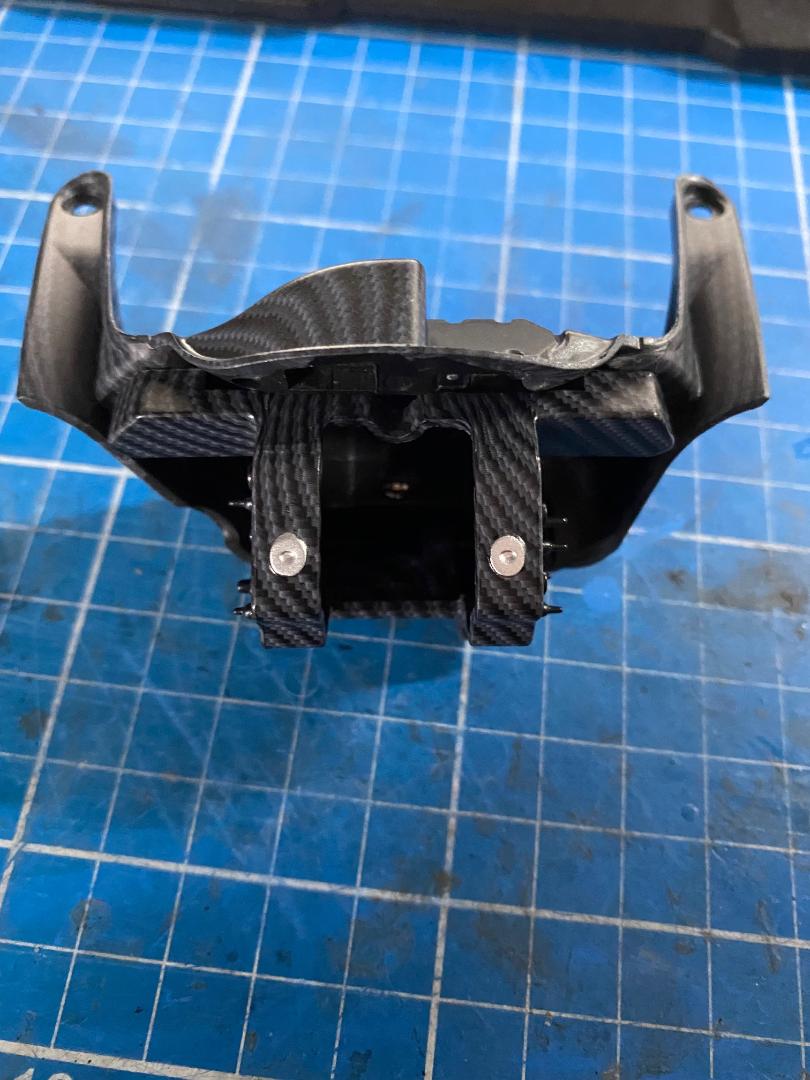
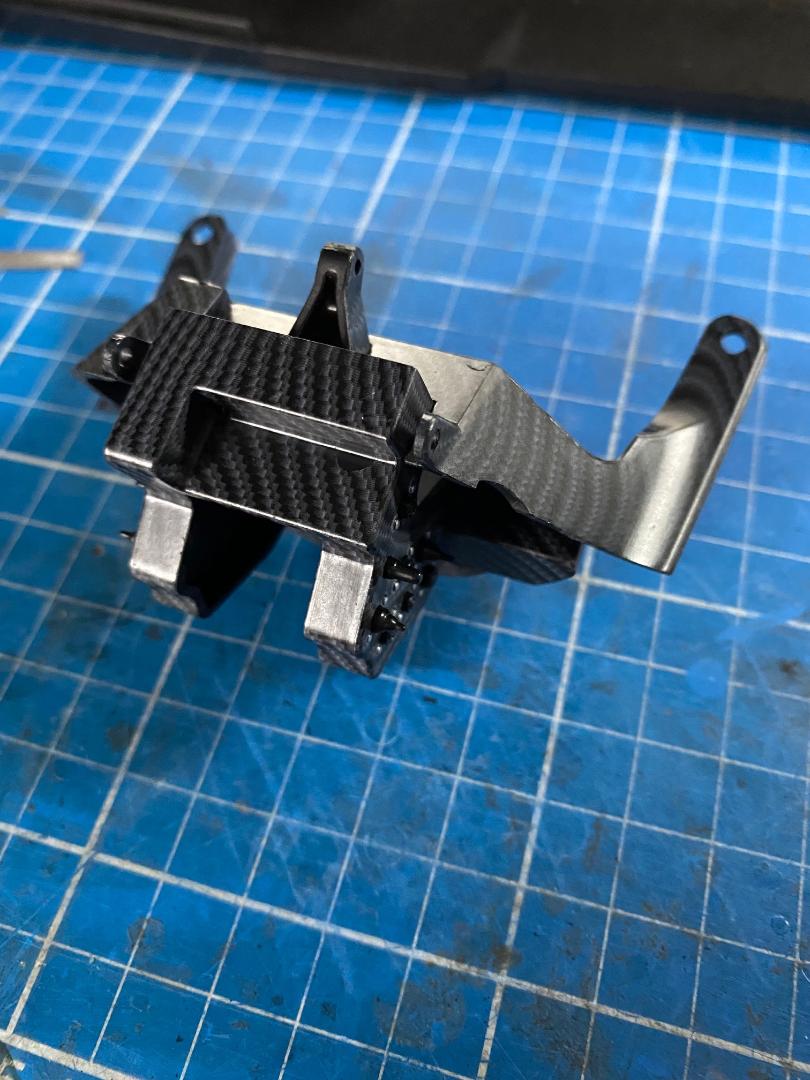
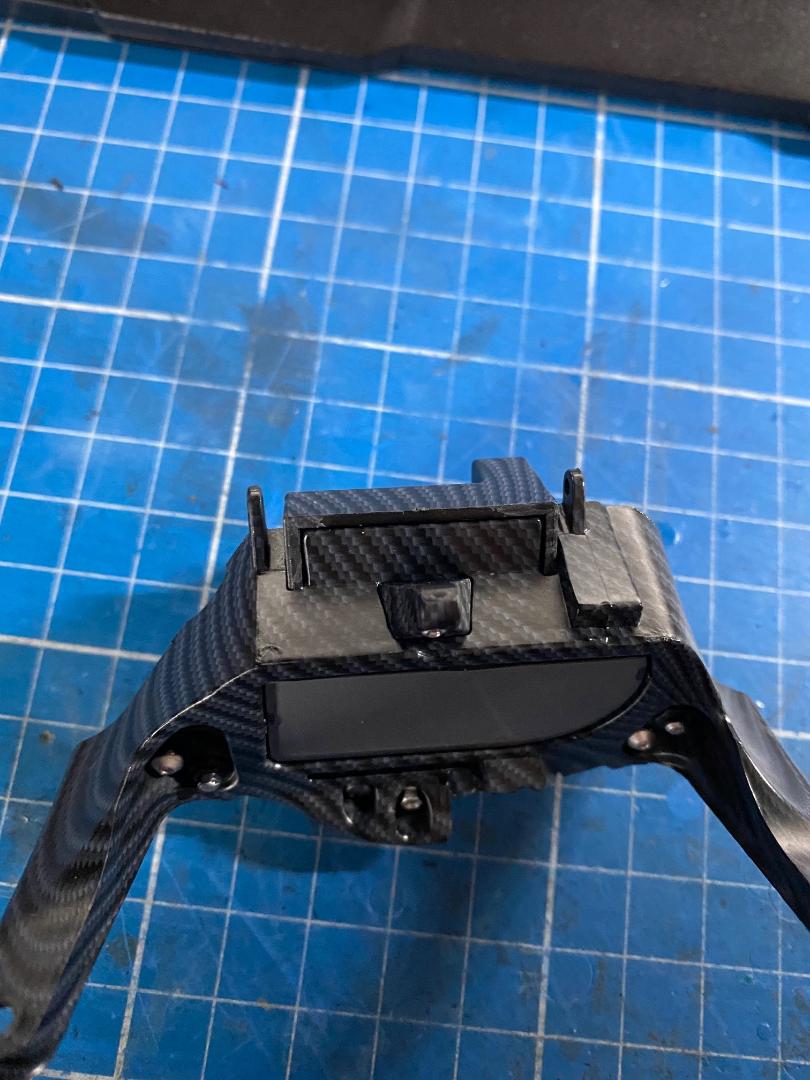
" />Schaugläser auf beiden Seiten hineindrücken (sie rasten gut ein) und das Ganze unter den Motor schrauben.
 " />
" /> " />
" /> " />
" />
Maddin- Schneidmatten-Virtuose
John-H. mag diesen Beitrag
Re: Valentino Rossi's Yamaha YZR M1 in 1:4 von DeAgostini
![]() von Maddin Di 14 Dez 2021, 16:31
von Maddin Di 14 Dez 2021, 16:31

 " />
" /> " />
" /> " />
" /> " />
" /> " />
" /> " />
" /> " />
" /> " />
" /> " />
" /> " />
" />So, das war`s erstmal wieder. Mal schauen, wann ich die Lieferung 5 bekomme. Bis dahin wünsche ich Euch erst einmal -trotz Allem- eine schöne Weihnachtszeit und einen guten Rutsch und bleibt bloß gesund!
Maddin- Schneidmatten-Virtuose
maxl mag diesen Beitrag
Re: Valentino Rossi's Yamaha YZR M1 in 1:4 von DeAgostini
![]() von maxl Di 14 Dez 2021, 17:02
von maxl Di 14 Dez 2021, 17:02
Weiter viel Erfolg bei deinem "gewagten Glücksspiel".
Gruß
Michael

maxl- Forenurgestein

Re: Valentino Rossi's Yamaha YZR M1 in 1:4 von DeAgostini
![]() von Maddin Di 14 Dez 2021, 18:30
von Maddin Di 14 Dez 2021, 18:30
Maddin- Schneidmatten-Virtuose
Re: Valentino Rossi's Yamaha YZR M1 in 1:4 von DeAgostini
![]() von Maddin Di 14 Dez 2021, 18:35
von Maddin Di 14 Dez 2021, 18:35
Maddin- Schneidmatten-Virtuose
Re: Valentino Rossi's Yamaha YZR M1 in 1:4 von DeAgostini
![]() von John-H. Mi 15 Dez 2021, 01:20
von John-H. Mi 15 Dez 2021, 01:20
der Motor macht echt schon was her, und die Konstrukteurs Idee mit den Microschalter
ist ja echt famos!

Ganz ehrlich, ich finde das mit der Online-Anleitung garnicht so schlecht,
denn wenn ich überlege wieviel Papier-Anleitungen bei mir mittlerweile die Ordner füllen,
und die man nur noch zum Staub entfernen in die Hand nimmt........

John-H.- Co - Admin
Re: Valentino Rossi's Yamaha YZR M1 in 1:4 von DeAgostini
![]() von Maddin Mi 15 Dez 2021, 07:24
von Maddin Mi 15 Dez 2021, 07:24
das mit dem übrigbleibenden Papierkrams stimmt natürlich, aber ich finde es wesentlich bequemer, wenn ich das Modell unabhängig von einem Monitor überall bauen kann. Auf diese zusätzliche ganze Begleitdoku bei den meisten Sammelmodellen kann ich dabei echt verzichten. Bei dem McLaren habe ich die Hefte dann aber irgendwann einfach verklappt, weil sich bei ebay auch kein Interessent gefunden hatte. Es wäre aber schon hilfreich, wenn wenigstens die reine Anleitung in Papierform da wäre. Das selber ausdrucken geht da ja schon richtig ins Geld. Ich habe das Admiralsmodell der Bounty noch auf Halde und dafür neben den Schablonen auch die Bauanleitungen ausgedruckt. Sind bei doppelseitigem Druck knapp anderthalb Leitzordner geworden und hat mich einige Tintenpatronen gekostet, da alle Seiten der Bauanleitung komplett farbig sind. Aber so ein Holzmodell kann man nun mal nicht vor dem Rechner bauen.
Maddin- Schneidmatten-Virtuose
Gesponserte Inhalte
Seite 1 von 5 • 1, 2, 3, 4, 5

 Ähnliche Themen
» YAMAHA YZR M1 inkl. Driver
» Yamaha YZF R1 in 1:12 von Tamiya
» YAMAHA RD 250 LC vom Tamiya 1:12
» Bau einer Yamaha MT-01
Der lustige Modellbauer :: Fahrzeuge :: Etappenbausätze / Partworks / Sammelserien :: Fertige Bauberichte