
Valentino Rossi's Yamaha YZR M1 in 1:4 von DeAgostini
Der lustige Modellbauer :: Fahrzeuge :: Etappenbausätze / Partworks / Sammelserien :: Fertige Bauberichte
Seite 2 von 5 •  1, 2, 3, 4, 5

 Re: Valentino Rossi's Yamaha YZR M1 in 1:4 von DeAgostini
![]() von Maddin Mo 03 Jan 2022, 08:38
von Maddin Mo 03 Jan 2022, 08:38
Neue Teile habe ich noch nicht bekommen, dafür die erste Rechnung nach der Umstellung der Zahlungsweise, wenn auch für die schon längst abgebuchte und damit bezahlte Lieferung 4. Und wieder mal Klärungsbedarf... Also neben dem Bauen ist das hier bisher das spannendste Abo...

Maddin- Schneidmatten-Virtuose


Re: Valentino Rossi's Yamaha YZR M1 in 1:4 von DeAgostini
![]() von Maddin Sa 15 Jan 2022, 15:18
von Maddin Sa 15 Jan 2022, 15:18
Endlich ist die fünfte Lieferung eingetroffen, sogar mit Rechnung. Jetzt wird alles gut...
Jede Menge Kleinteile, also endlich wieder jede Menge Bauspaß:
Paket 9:
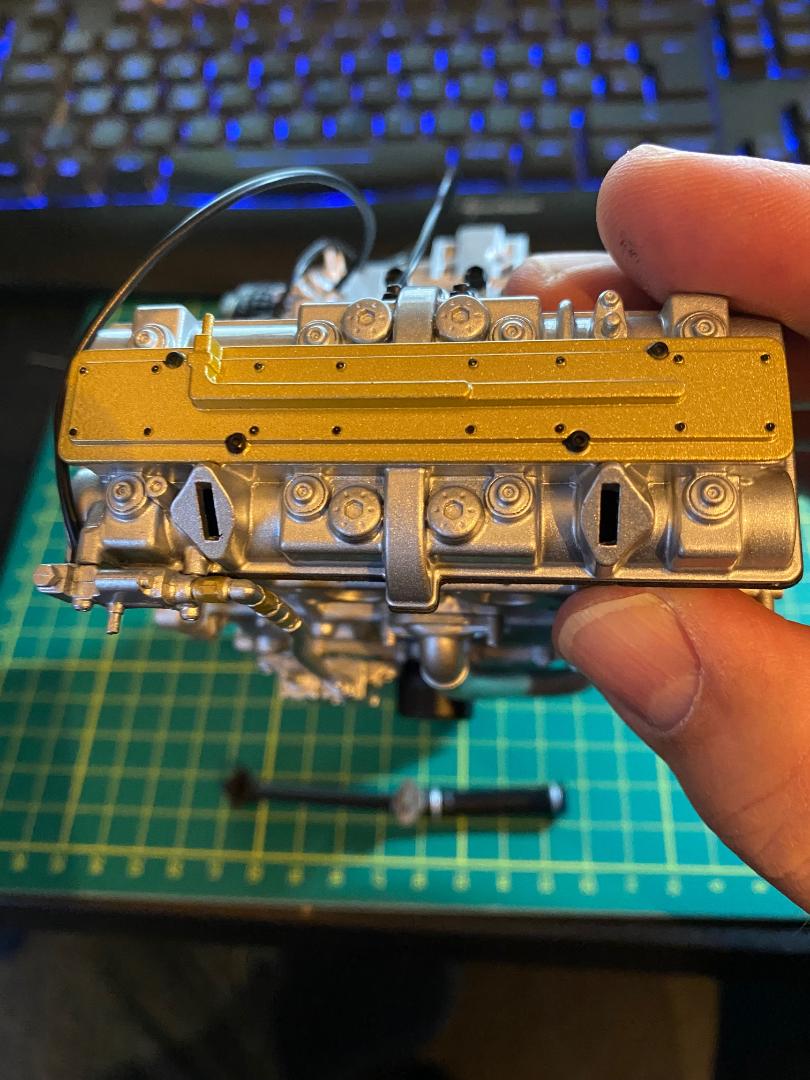
-Die Ölpumpe, der Deckel und das Kurbelgehäuse-Entlüftungsschlauch
Schöne Kunststoffteile, nix groß zu beachten beim Zusammen- und Einbau:
 " />
" /> " />
" /> " />
" /> " />
" /> " />
" /> " />
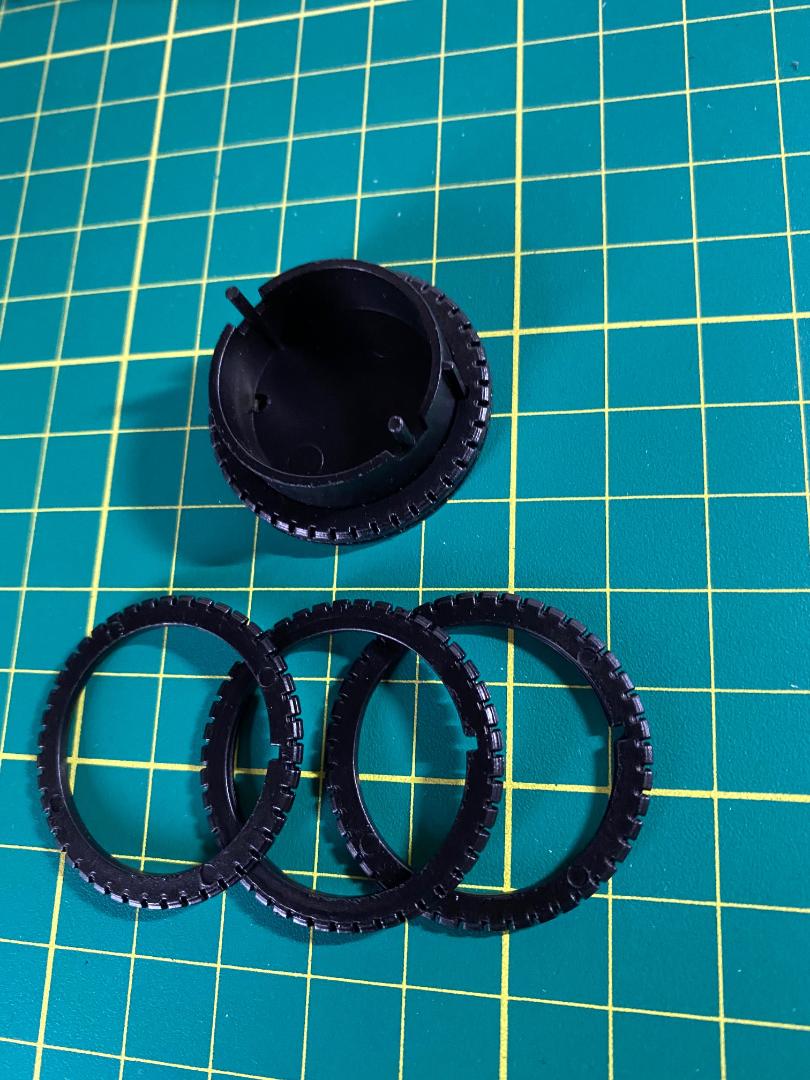
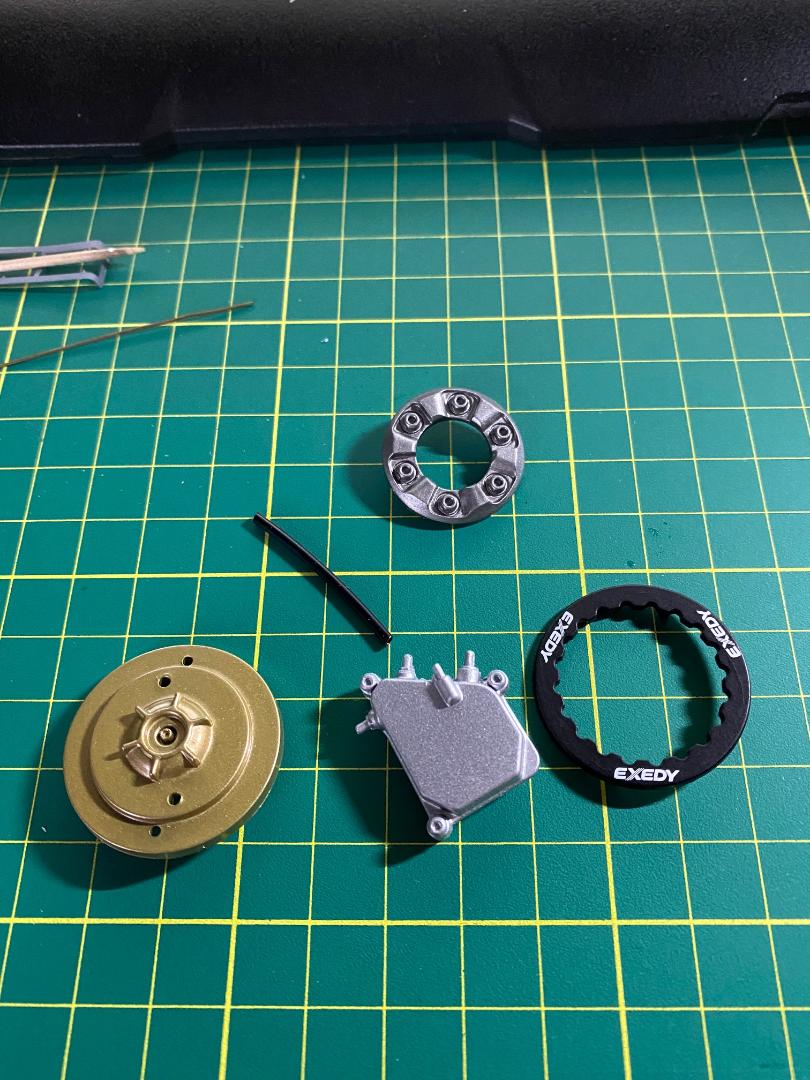
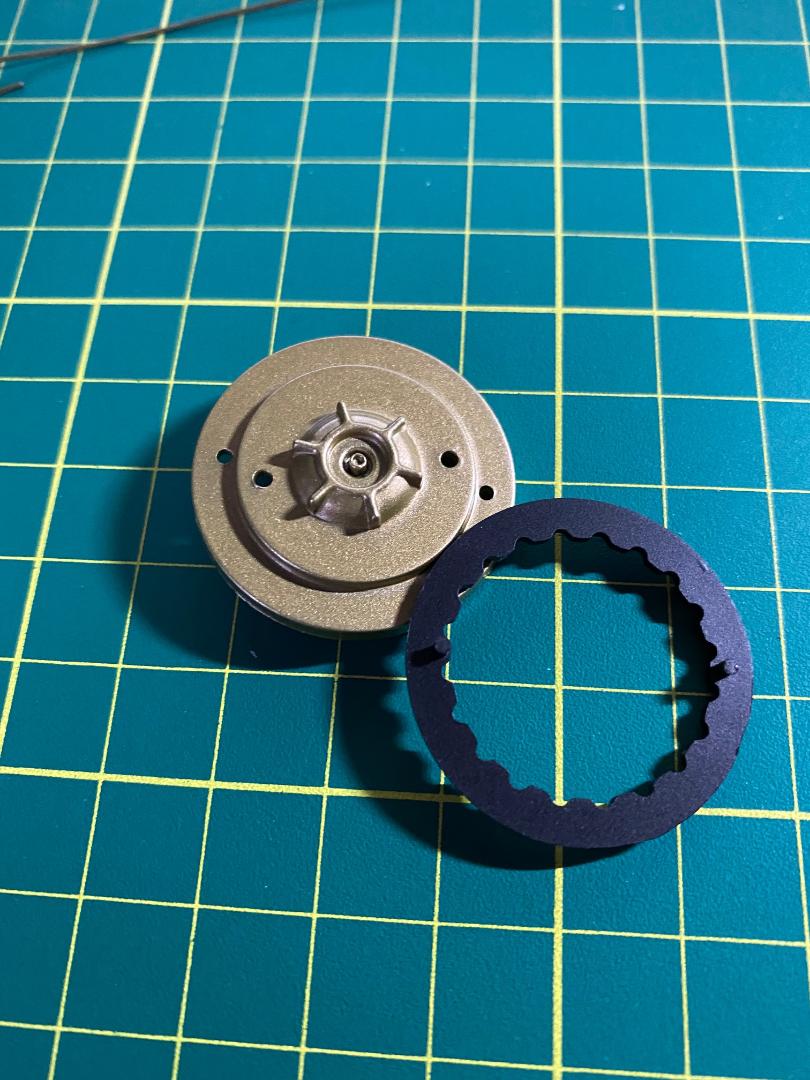
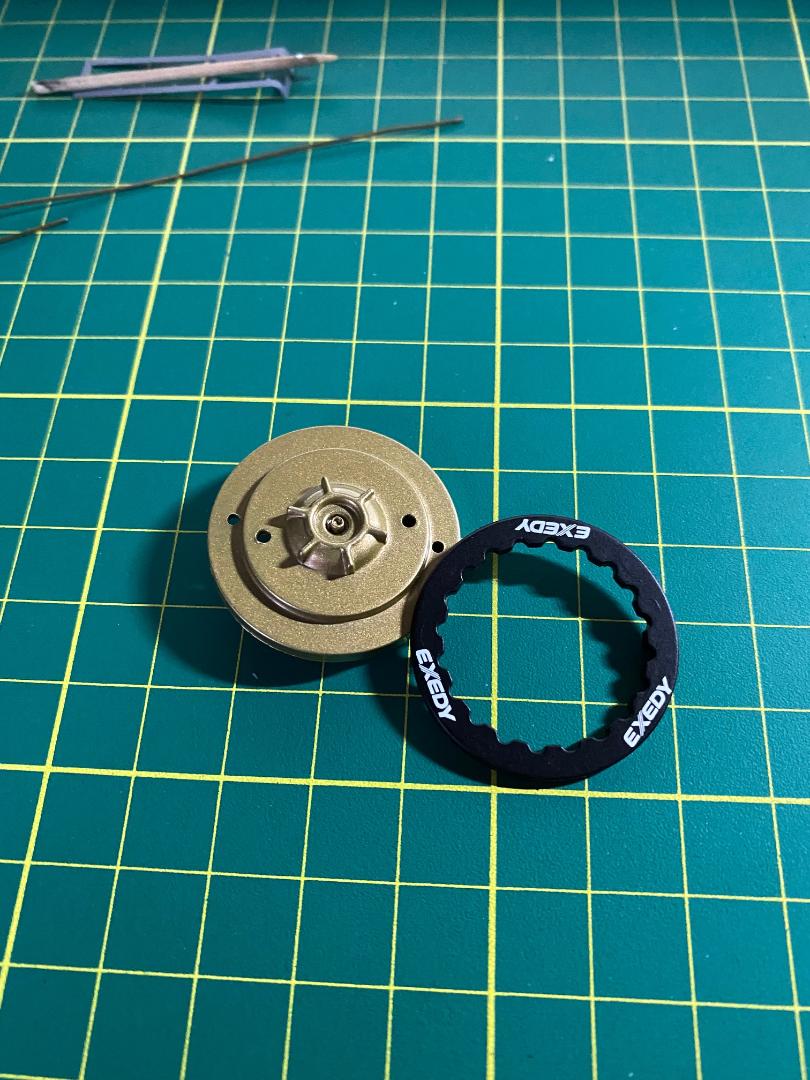
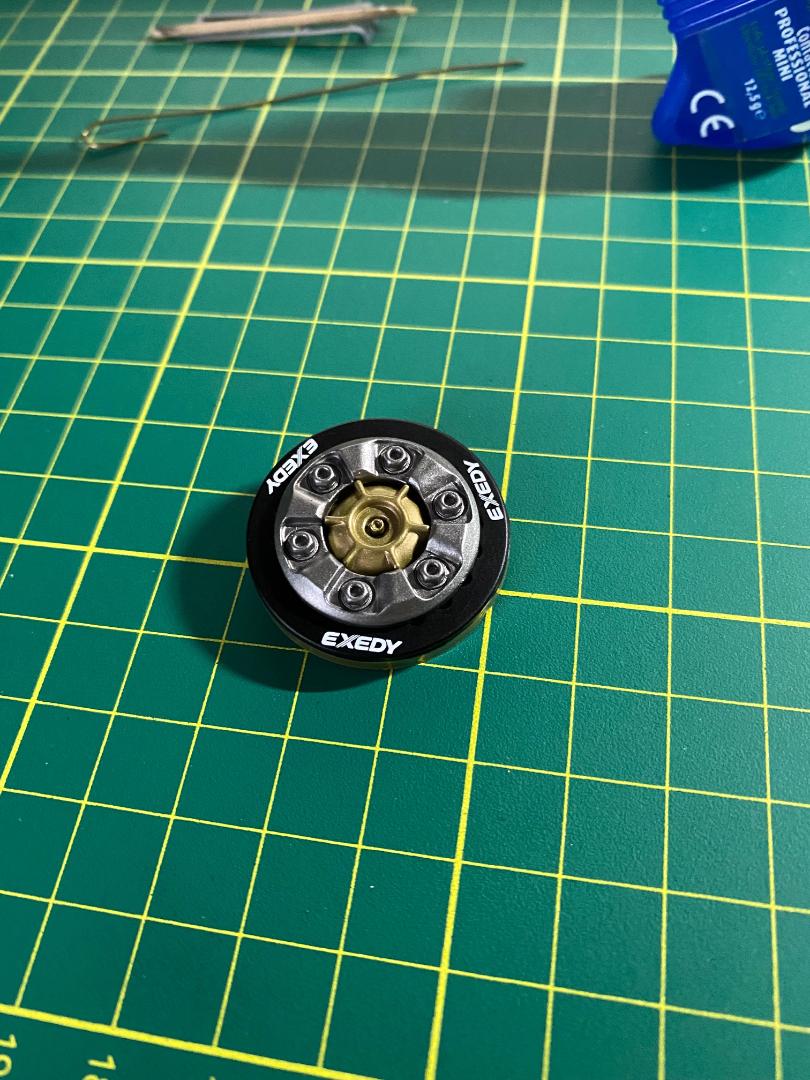
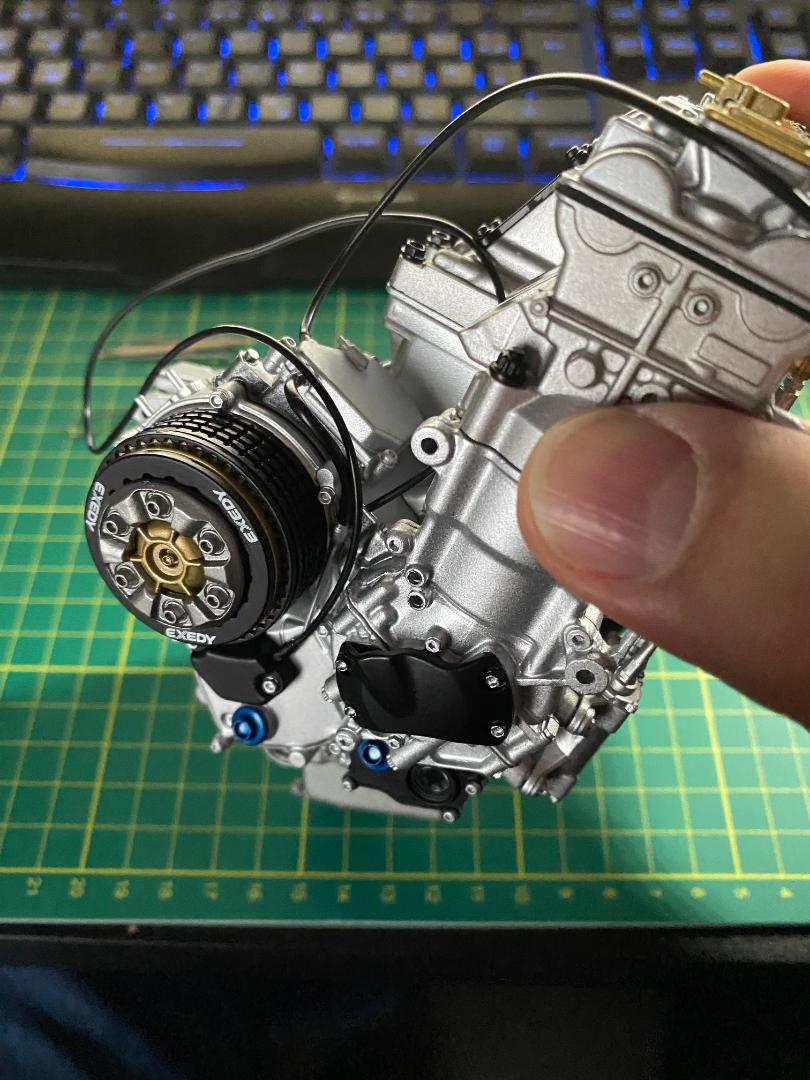
" />-Die Kupplungsglocke und die Kupplungsscheiben
Alles Kunststoffteile. Zuerst die Scheibe C mit der abgesetzten Seite nach unten über den Kupplungskorb schieben. Nase und Nut sind dabei selbsterklärend. Dann die drei gleichen Zwischenscheiben D mit der Nut ausrichten und darüberschieben. Nun die Endscheibe B mit dem Absatz nach oben und ausgerichteter Nut über die beiden Stifte der Kupplungsglocke schieben, bis sie gant anliegt und auch mit der Nut in den Steg des Kupplungskorbes bündig eingerastet ist. Geht sehr stramm und muss kräftig, aber vorsichtig mit einem kleinen Schraubendreher direkt neben den beiden Stiften abwechselnd und stückweise heruntergedrückt werden, um Nichts zu verkannten und womöglich abzubrechen.
 " />
" /> " />
" /> " />
" /> " />
" /> " />
" /> " />
" /> " />
" />Die nächsten Teile kommen im nächsten Zwischenbericht.
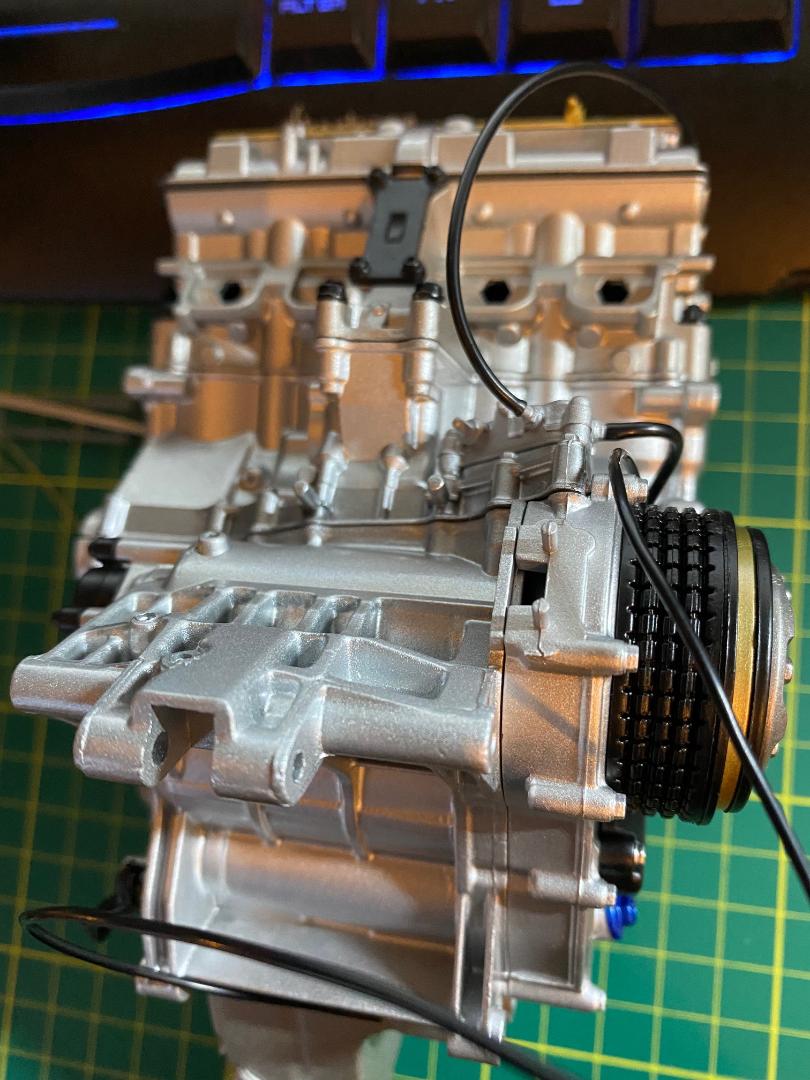
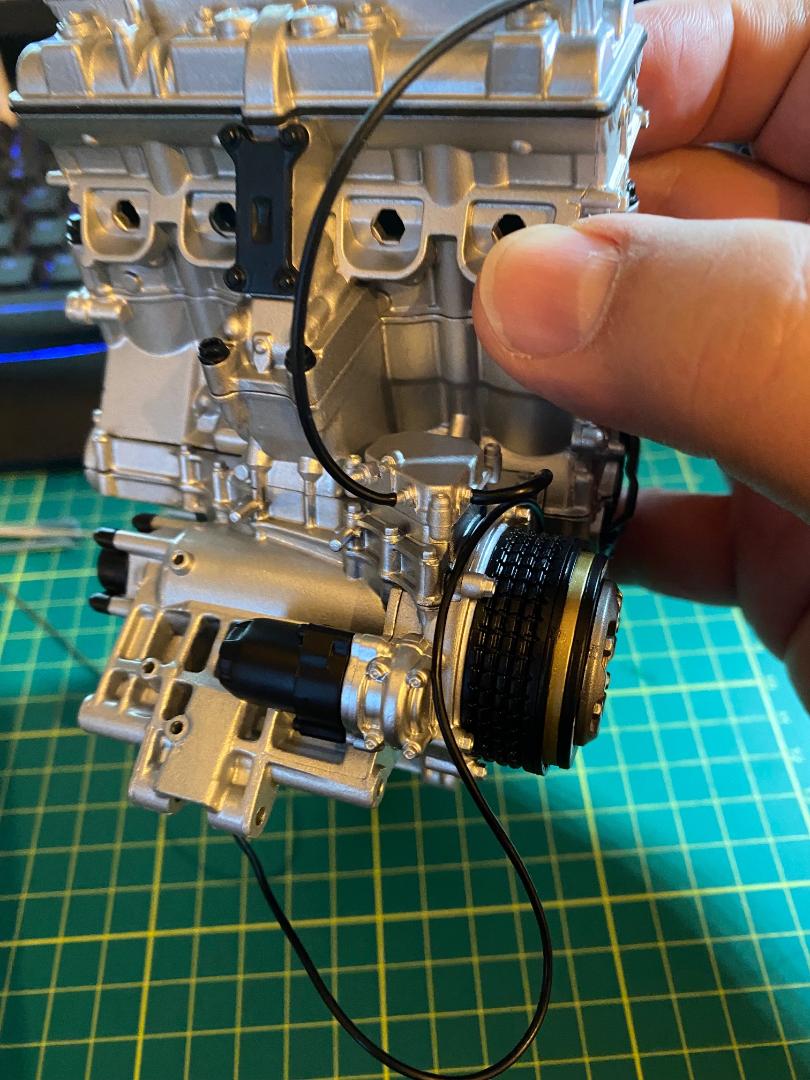
-Der Rohrkasten und die letzten Bauteile der Kupplung:
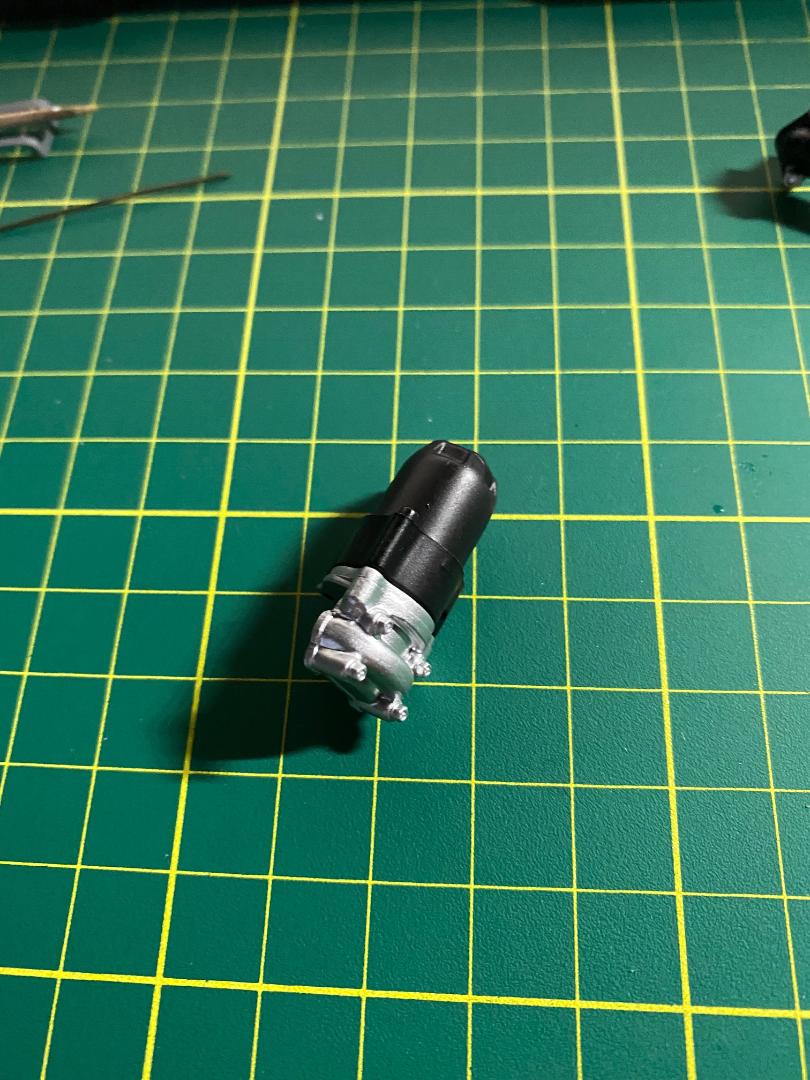
-Die Kühlleitungen und der Anlasser
Paket 10:
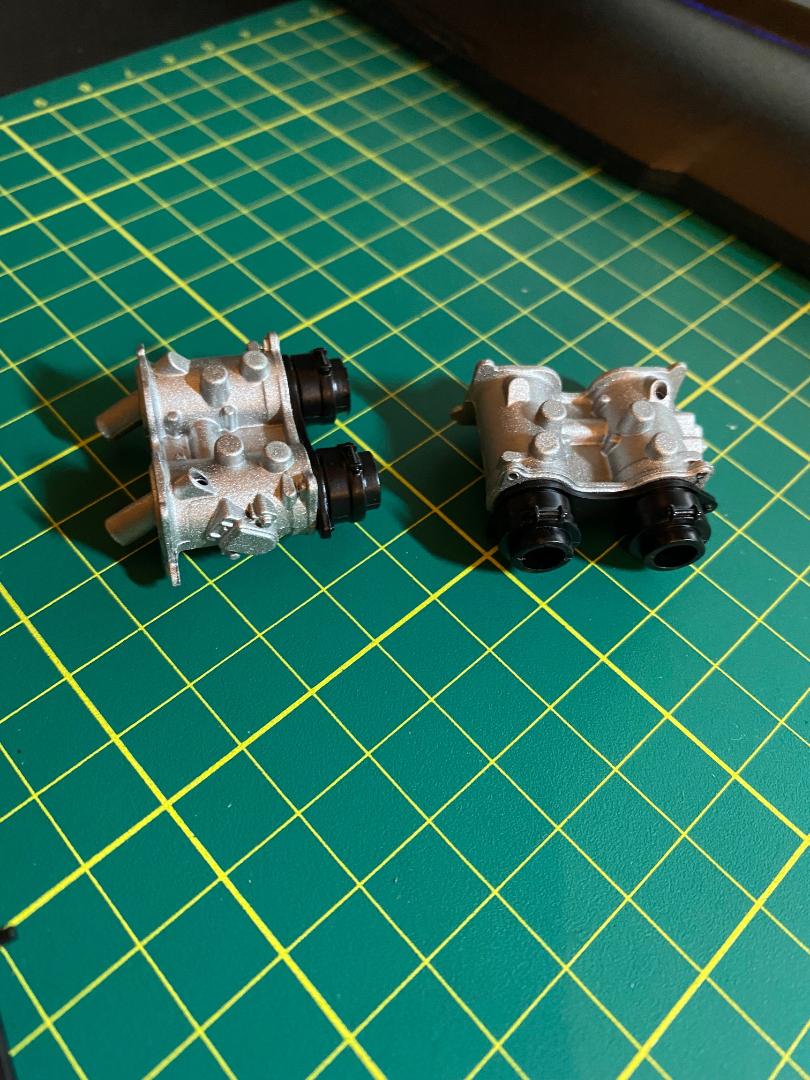
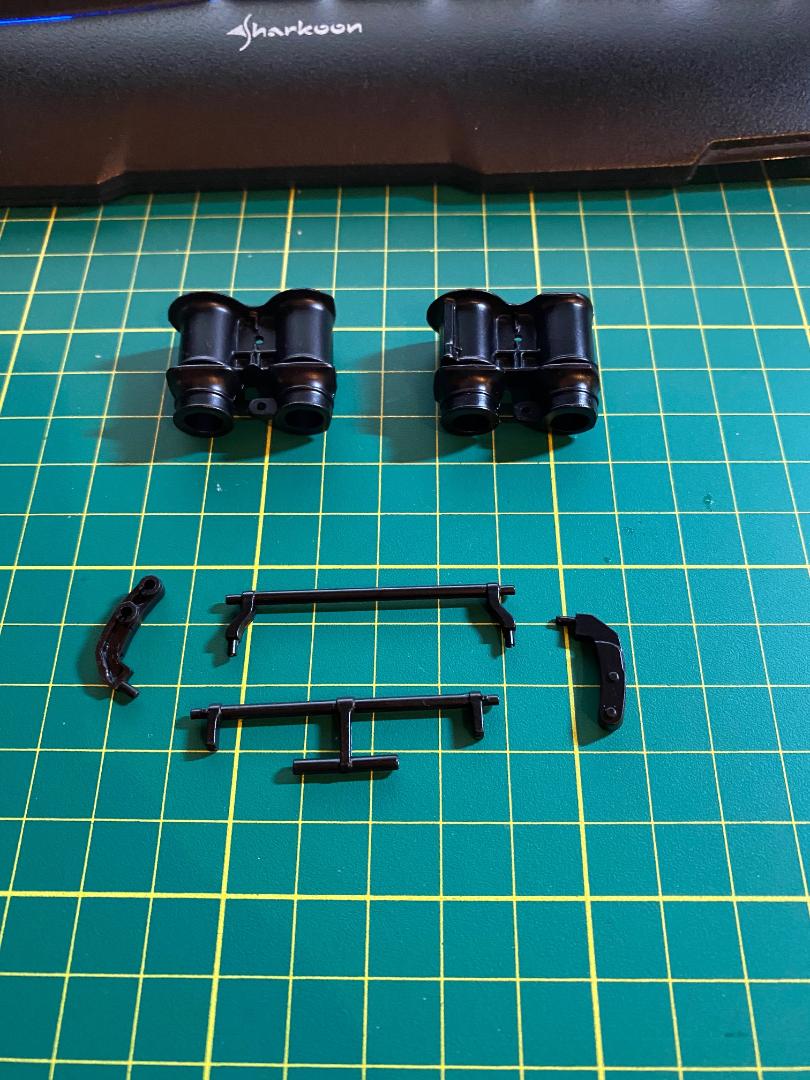
-Die Krümmer, die Drosselklappen, die Gaspedalverschiebung
-Die Absaughörner (Schreibfehler in der Anleitung, eigentlich die Ansaughörner in der Airbox...)
-Rohre und Flansche der Abgaskrümmer
-Der hintere Stoßdämpfer
Maddin- Schneidmatten-Virtuose
Re: Valentino Rossi's Yamaha YZR M1 in 1:4 von DeAgostini
![]() von Maddin Sa 15 Jan 2022, 15:48
von Maddin Sa 15 Jan 2022, 15:48
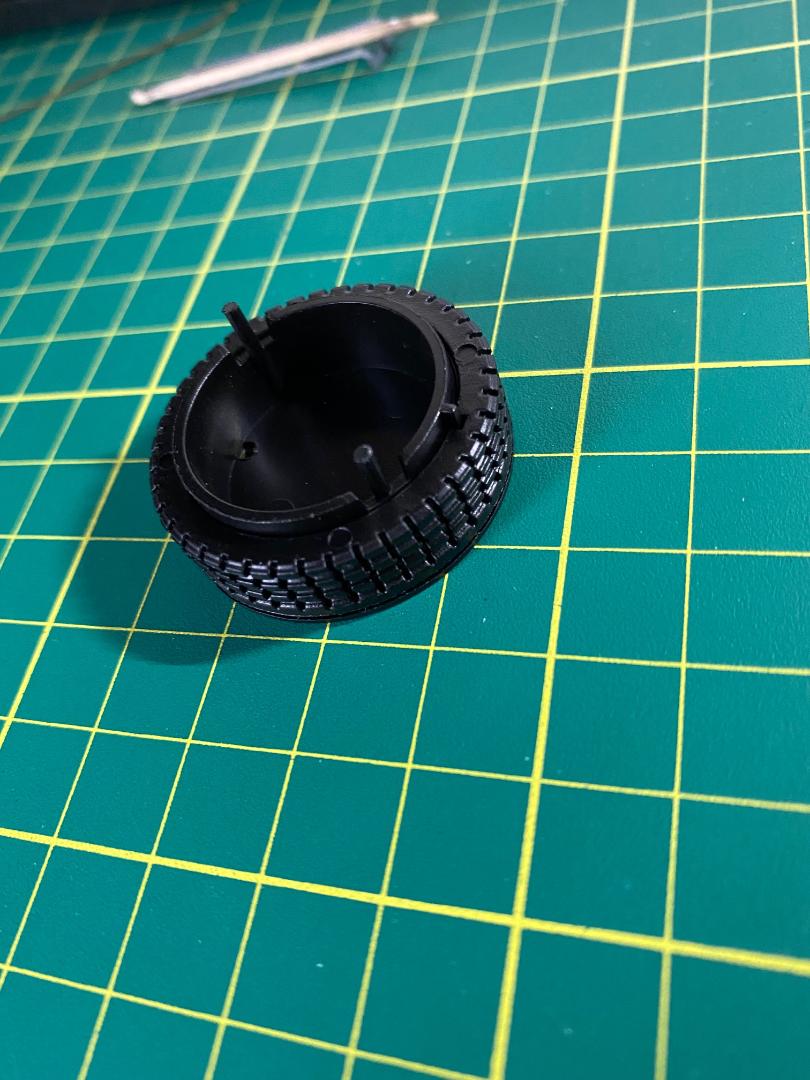
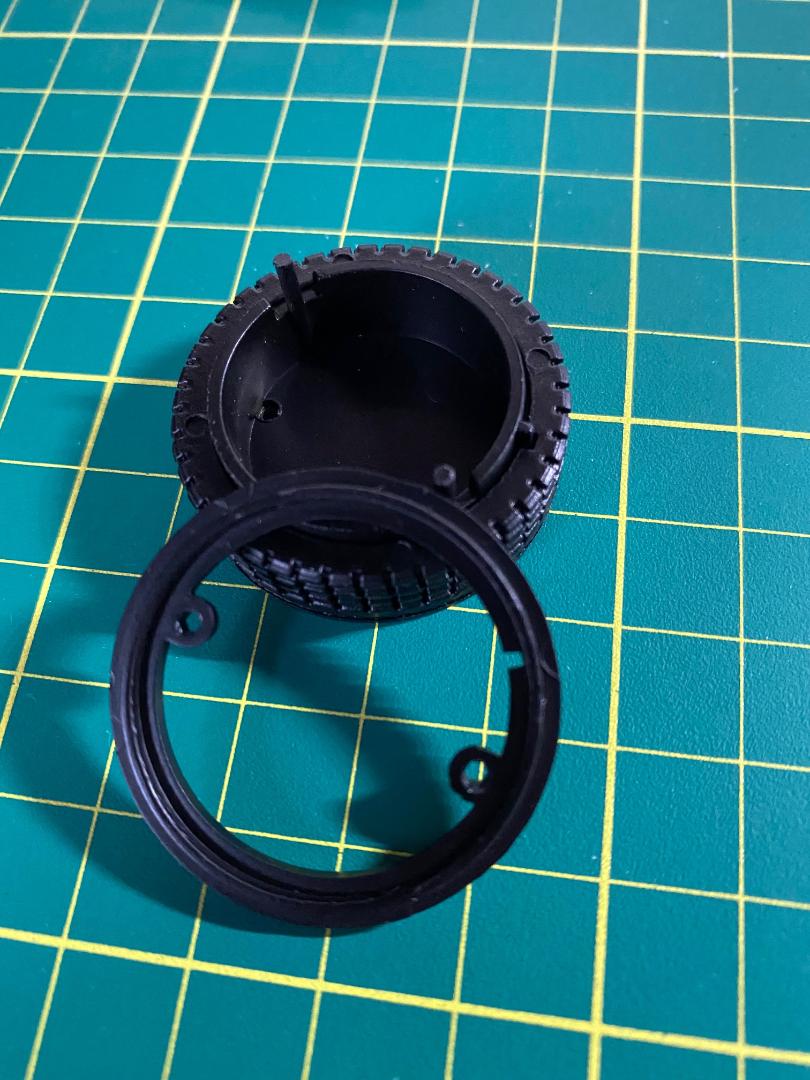
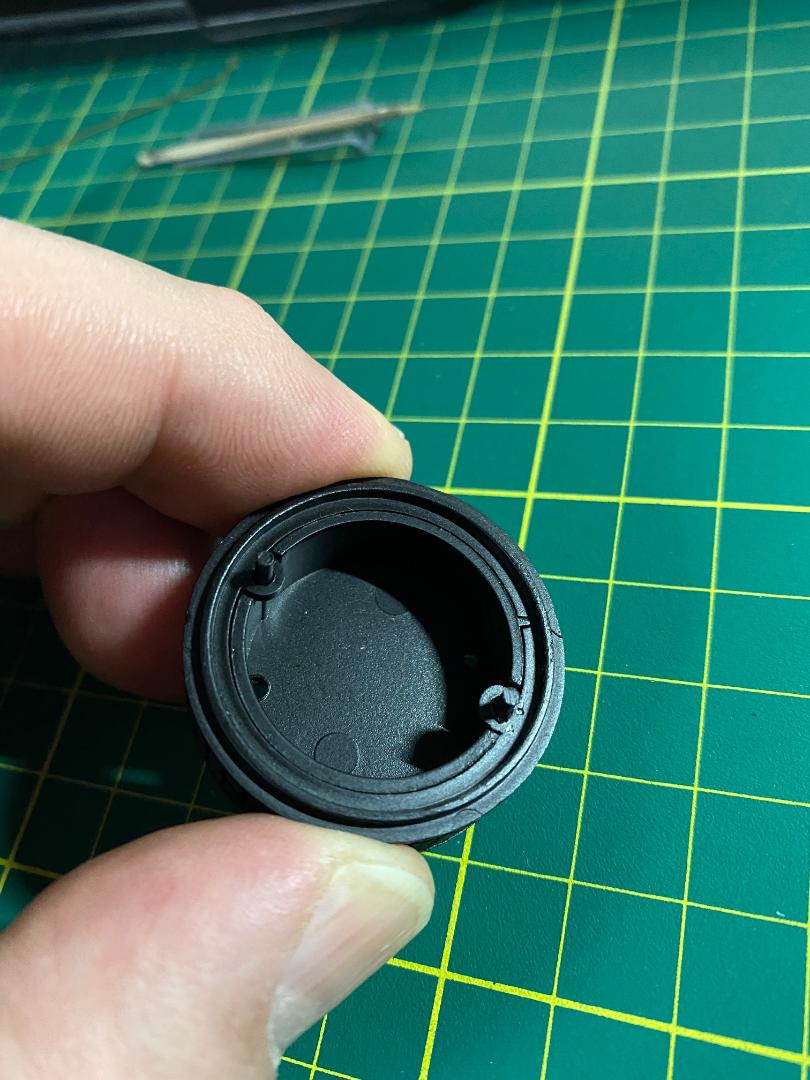
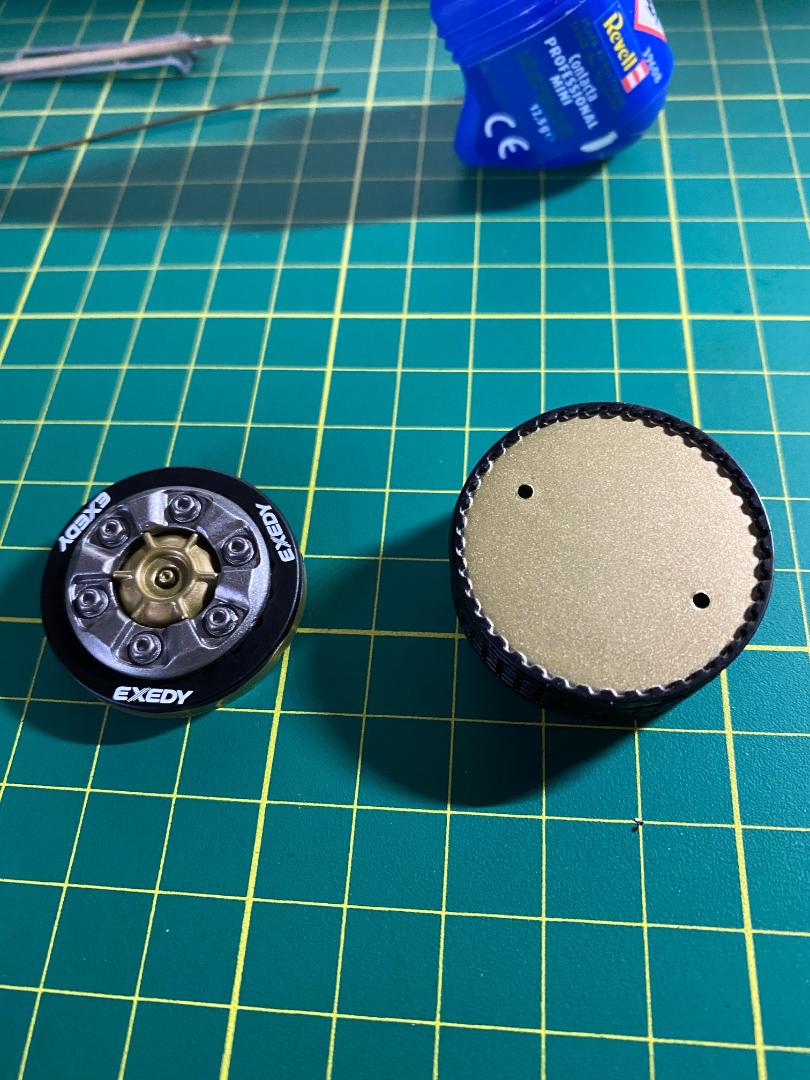
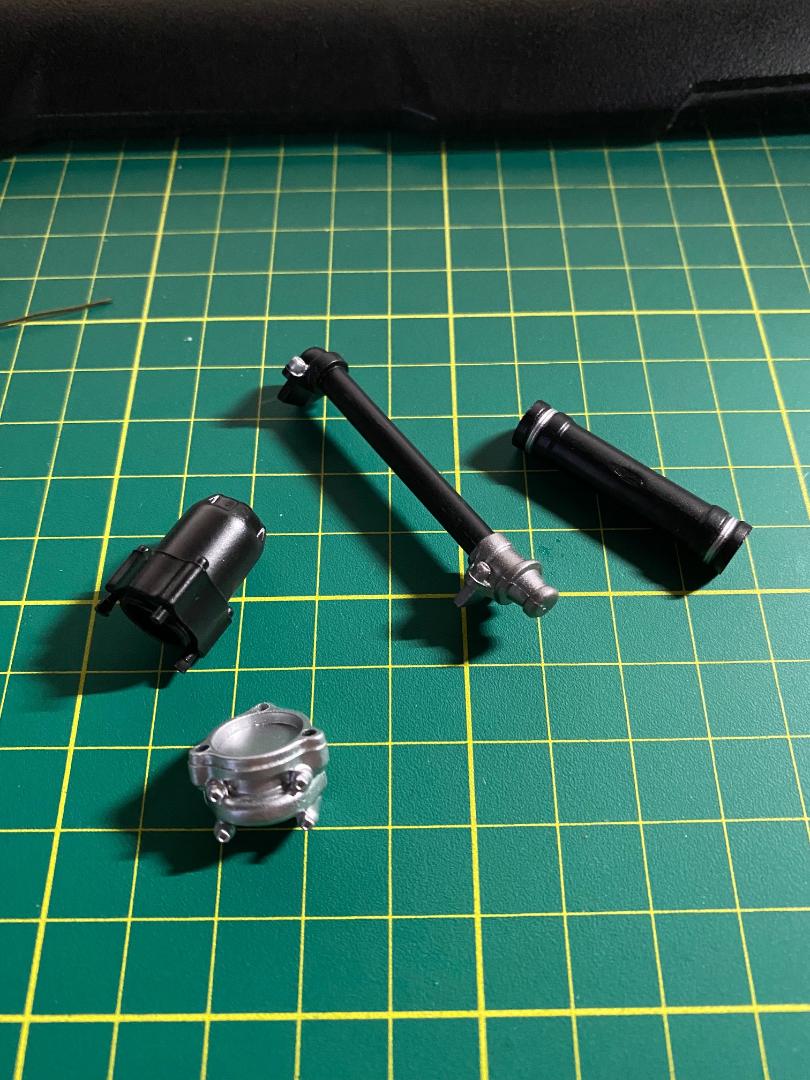
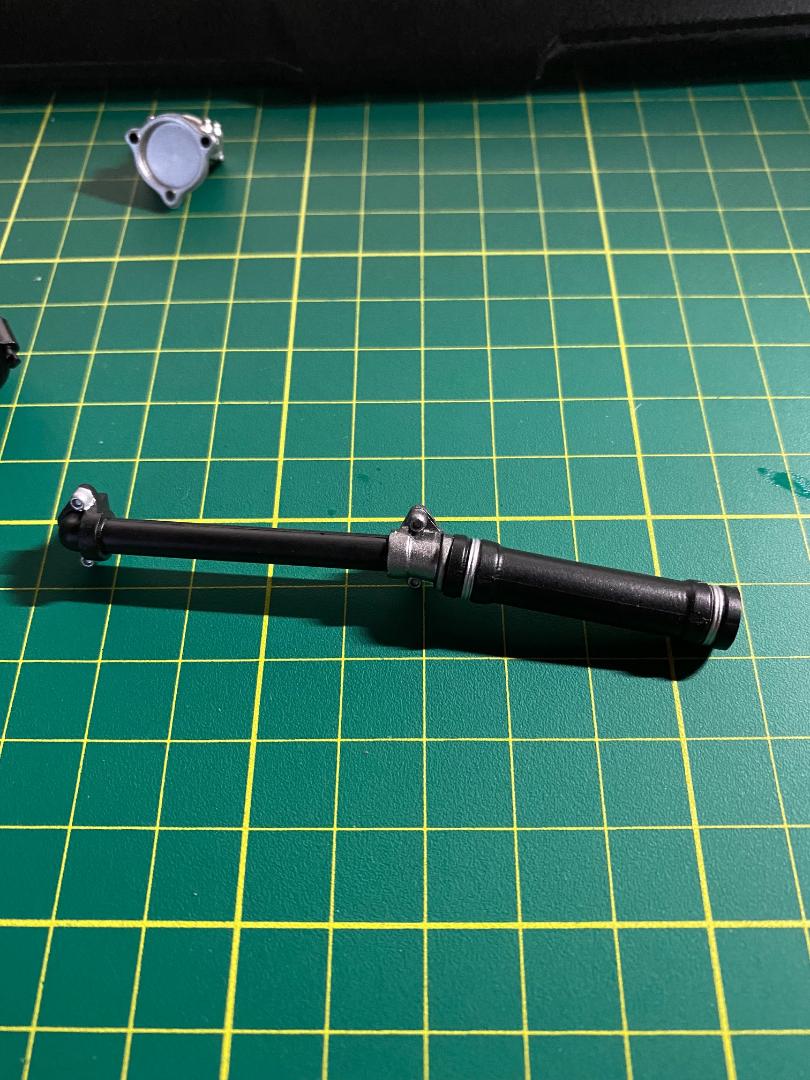
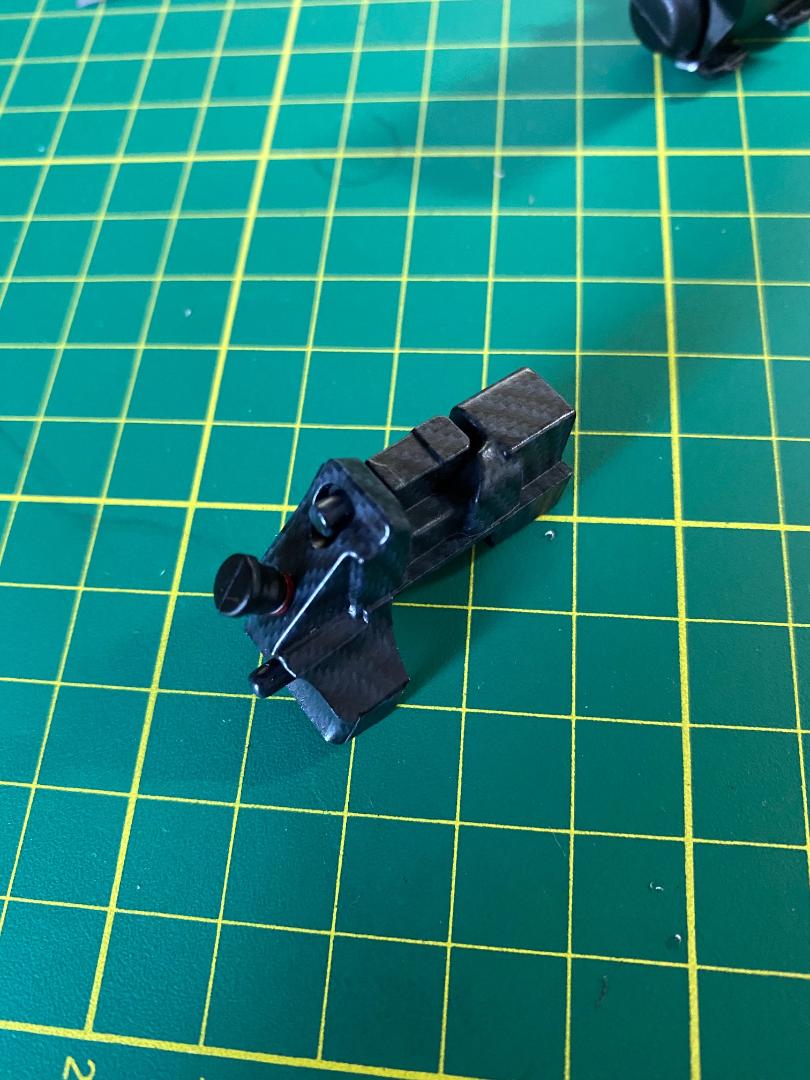
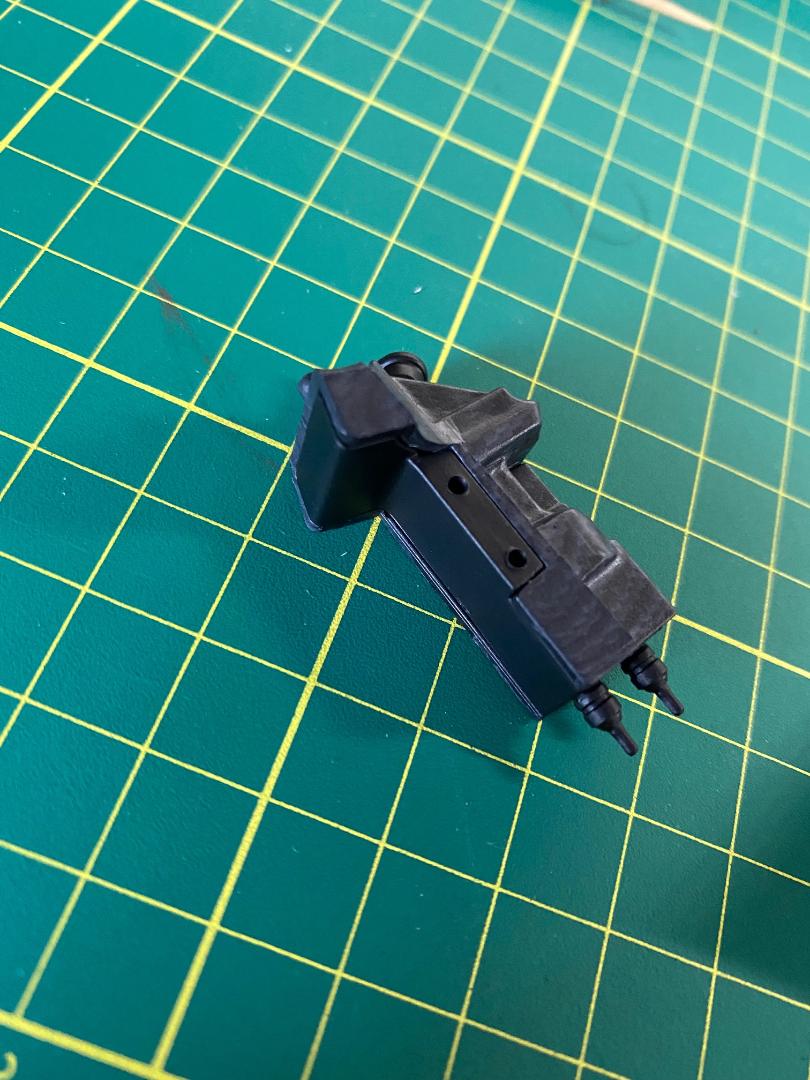
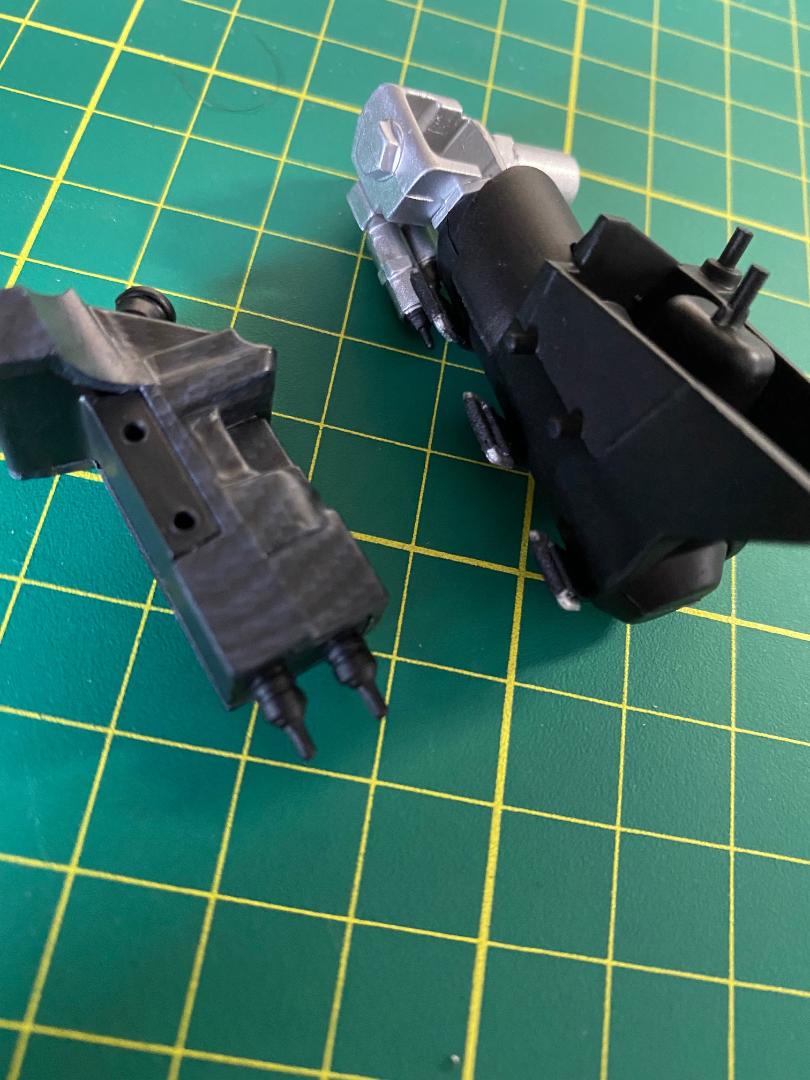
-Der Rohrkasten und die letzten Bauteile der Kupplung:
 " />
" /> " />
" /> " />
" /> " />
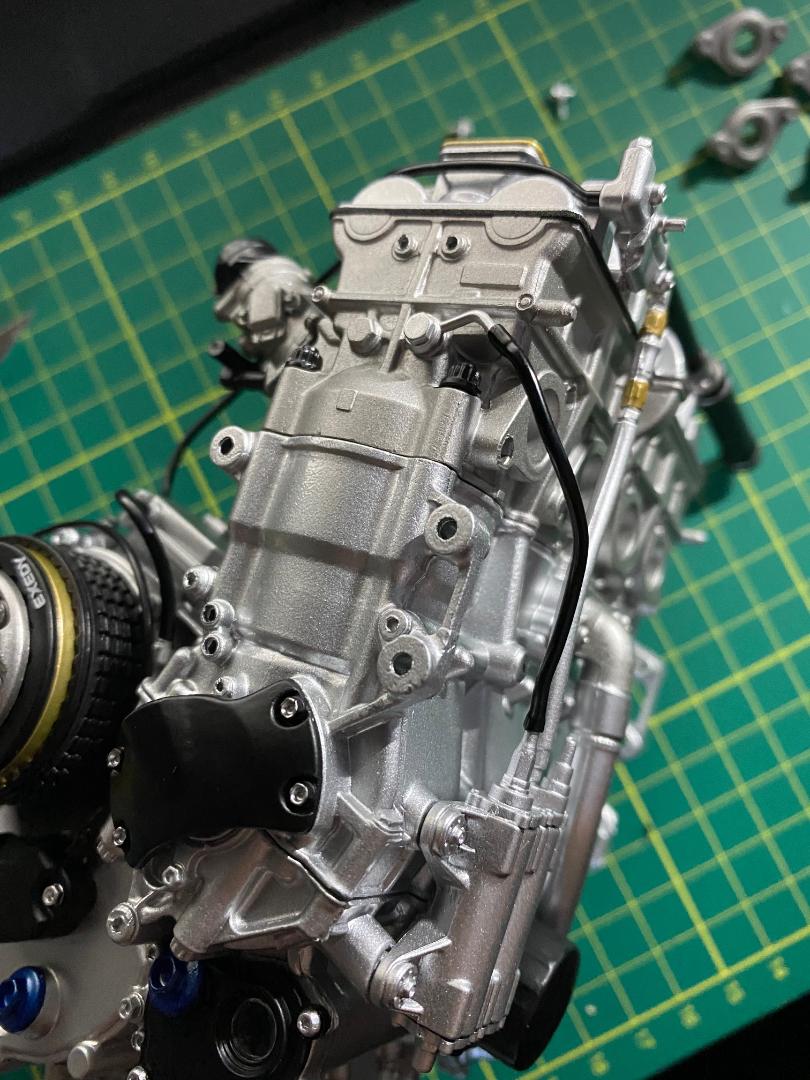
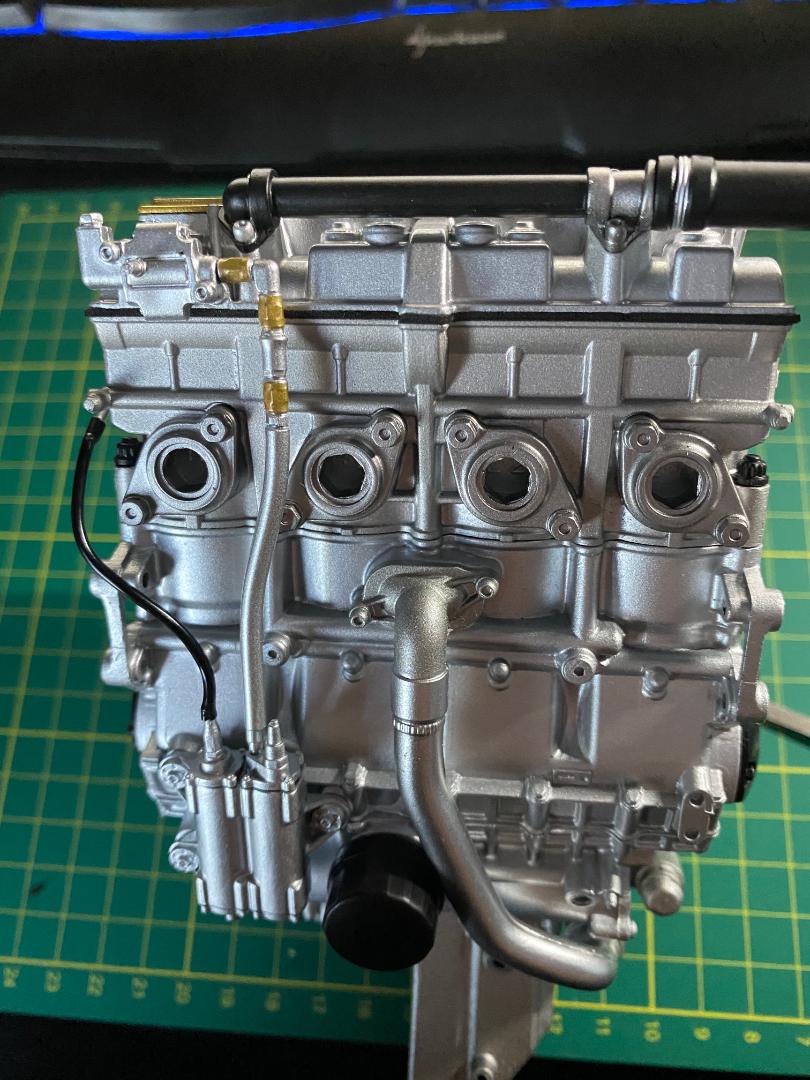
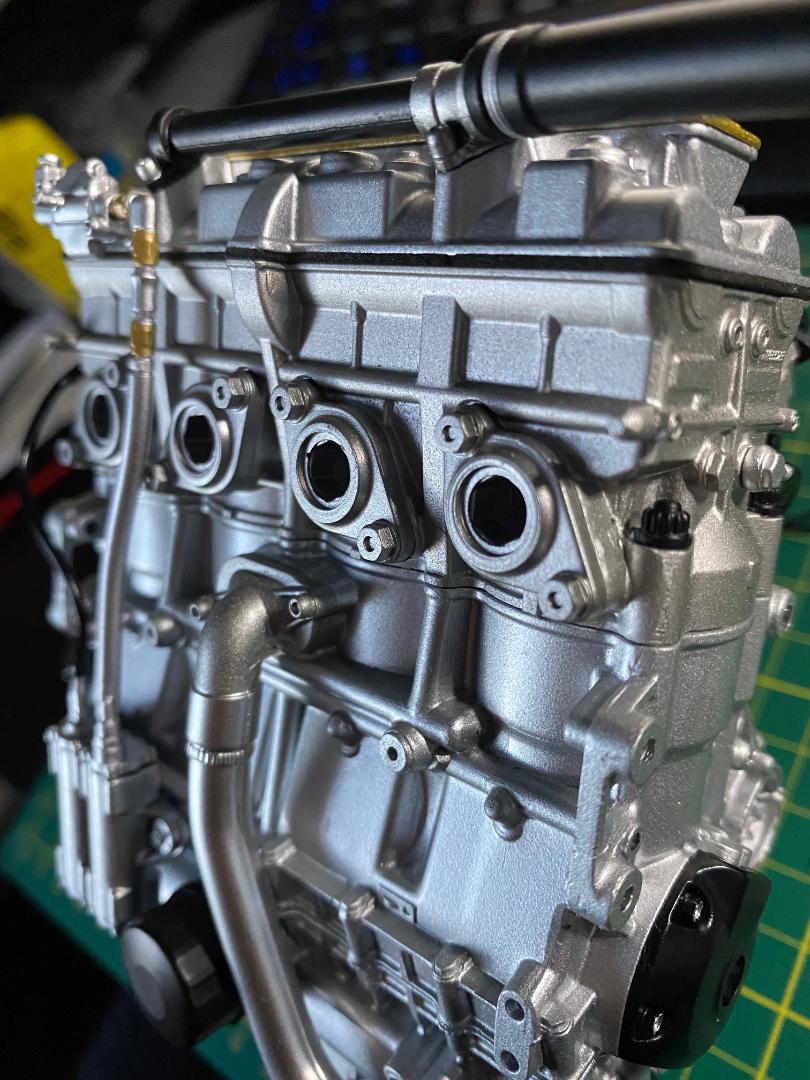
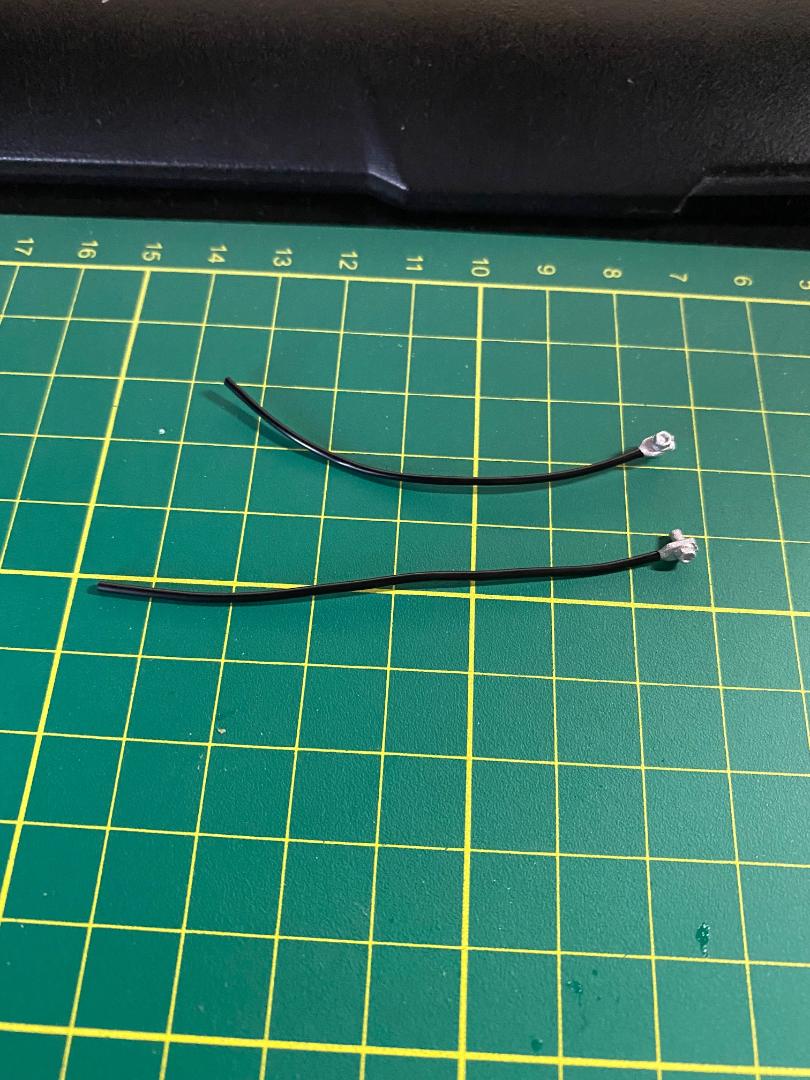
" />Der Rohkasten genannte Deckel wird einfach auf dem Motorblock gedrückt und rastet mit zwei Stiften ein. Die lange Schlauchleitung habe ich nur leicht aufgesteckt, da ich noch passenden dünnen Draht besorgen muss, den ich hineinscheiben will, um den Verlauf der Leitungen stabiler hinzubekommen. Das kurze Schlauchstück wird einfach an die beiden Anschlüsse gesteckt.
 " />
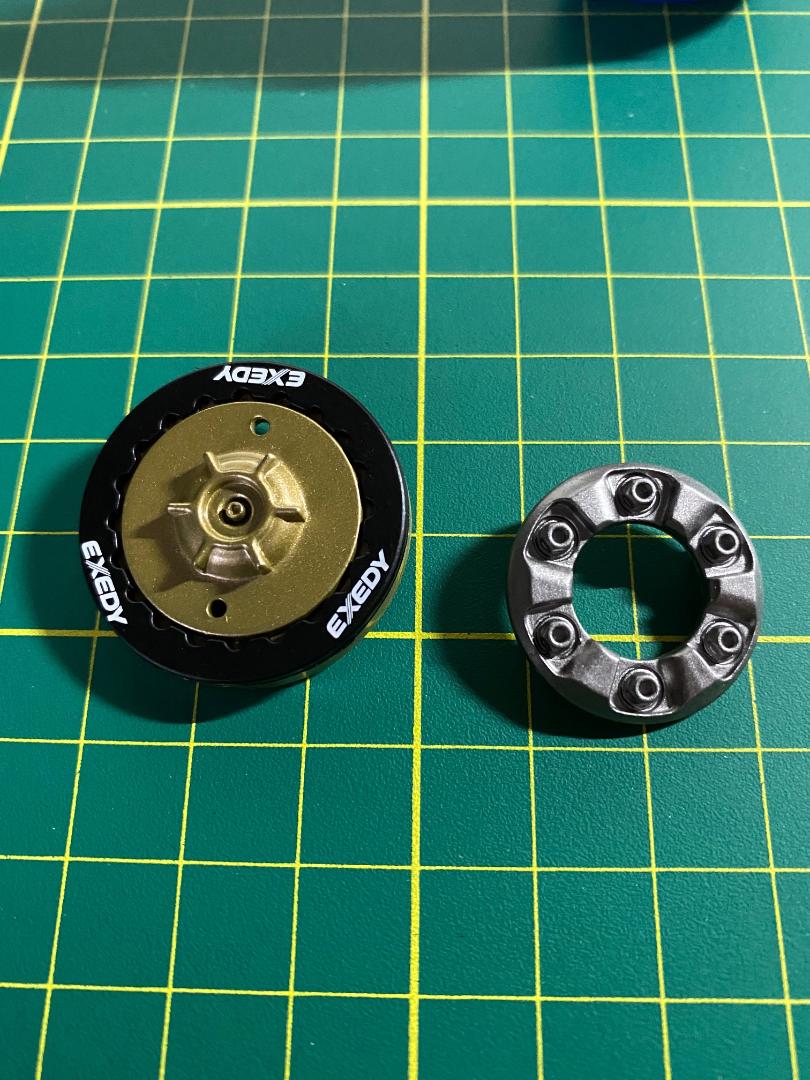
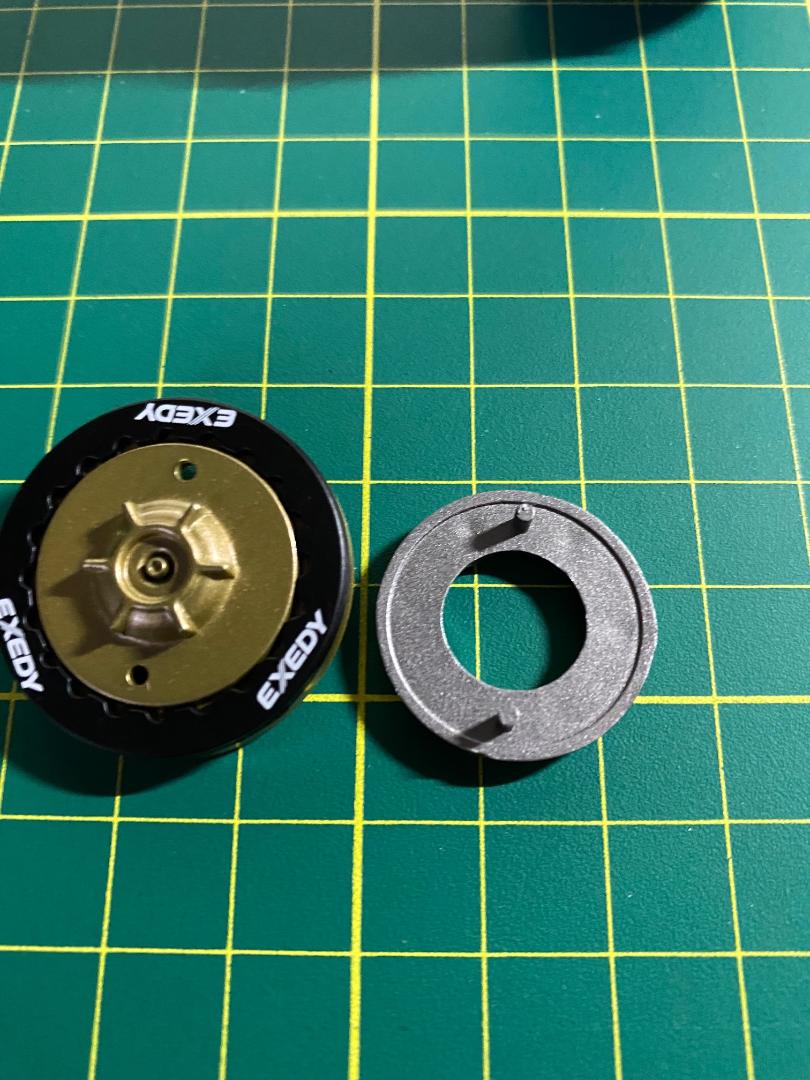
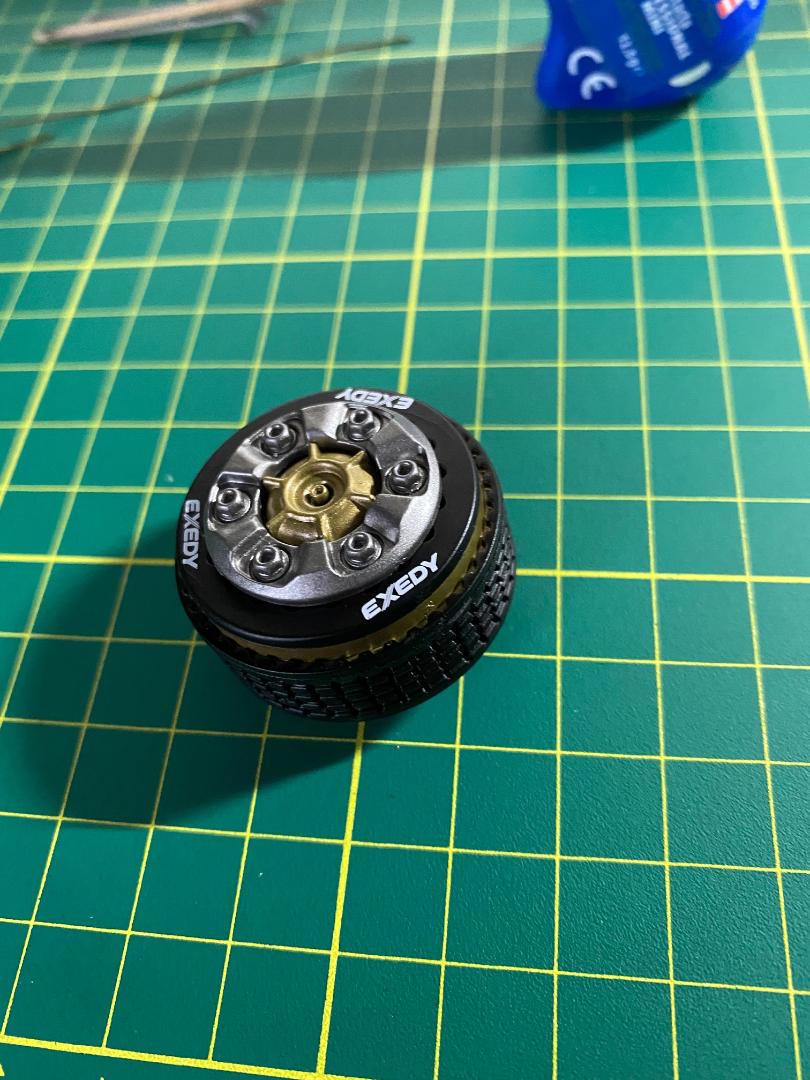
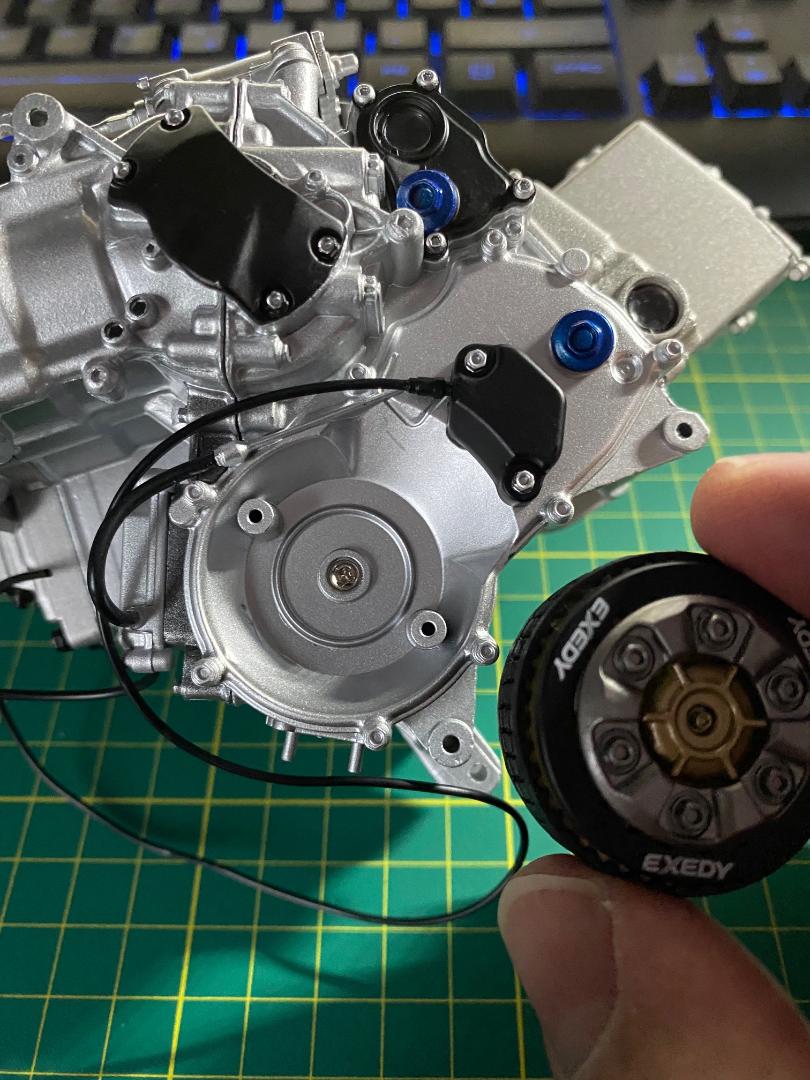
" />Die Druckplatte der Kupplung wird aus drei Teilen zusammengesteckt, deren Stifte ziemlich stramm sitzen. Das Ganze wird dann auf den montierten Kupplungskorb gesteckt. Ich habe alle Stifte von hinten mit Plastikkleber gesichert. Der komplette Kupplungskorb wird dann in die beiden Löcher an der rechten Seite des Motorblocks eingerastet und hält sehr gut ohne Kleber. Sieht immer besser aus...
 " />
" /> " />
" /> " />
" /> " />
" /> " />
" /> " />
" /> " />
" /> " />
" /> " />
" /> " />
" />Damit wandern die weiteren Bauschritte in den nächsten Beitrag.
Maddin- Schneidmatten-Virtuose
John-H. und maxl mögen diesen Beitrag
Re: Valentino Rossi's Yamaha YZR M1 in 1:4 von DeAgostini
![]() von Maddin Sa 15 Jan 2022, 16:28
von Maddin Sa 15 Jan 2022, 16:28
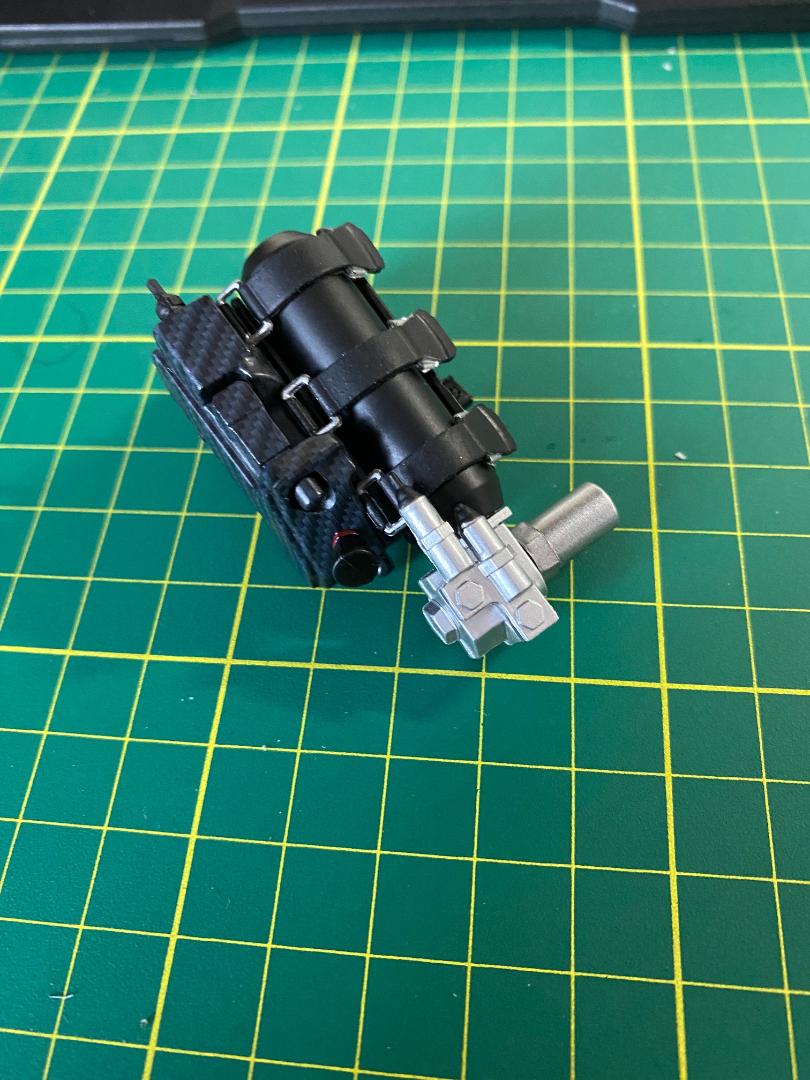
-Die Kühlleitungen und der Anlasser
Bei diesen Teilen ist sogar ein dicker Kühlwasserschlauch aus Gummi dabei. Zu der Montage ist nichts weiter zu sagen:
 " />
" /> " />
" /> " />
" /> " />
" /> " />
" /> " />
" /> " />
" /> " />
" />Das Paket 10 mit:
-Die Krümmer, die Drosselklappen, die Gaspedalverschiebung
-Die Absaughörner (Schreibfehler in der Anleitung, eigentlich die Ansaughörner in der Airbox...)
-Rohre und Flansche der Abgaskrümmer
-Der hintere Stoßdämpfer
muss ich leider auf nächste Woche verschieben. Verschärfter Familiendienst droht... Also geht`s hier hoffentlich Montag dann weiter.
Bis dahin Euch Allen ein schönes Wochenende.
Maddin- Schneidmatten-Virtuose
John-H., doc_raven1000 und maxl mögen diesen Beitrag
Re: Valentino Rossi's Yamaha YZR M1 in 1:4 von DeAgostini
![]() von Maddin Mo 17 Jan 2022, 08:12
von Maddin Mo 17 Jan 2022, 08:12
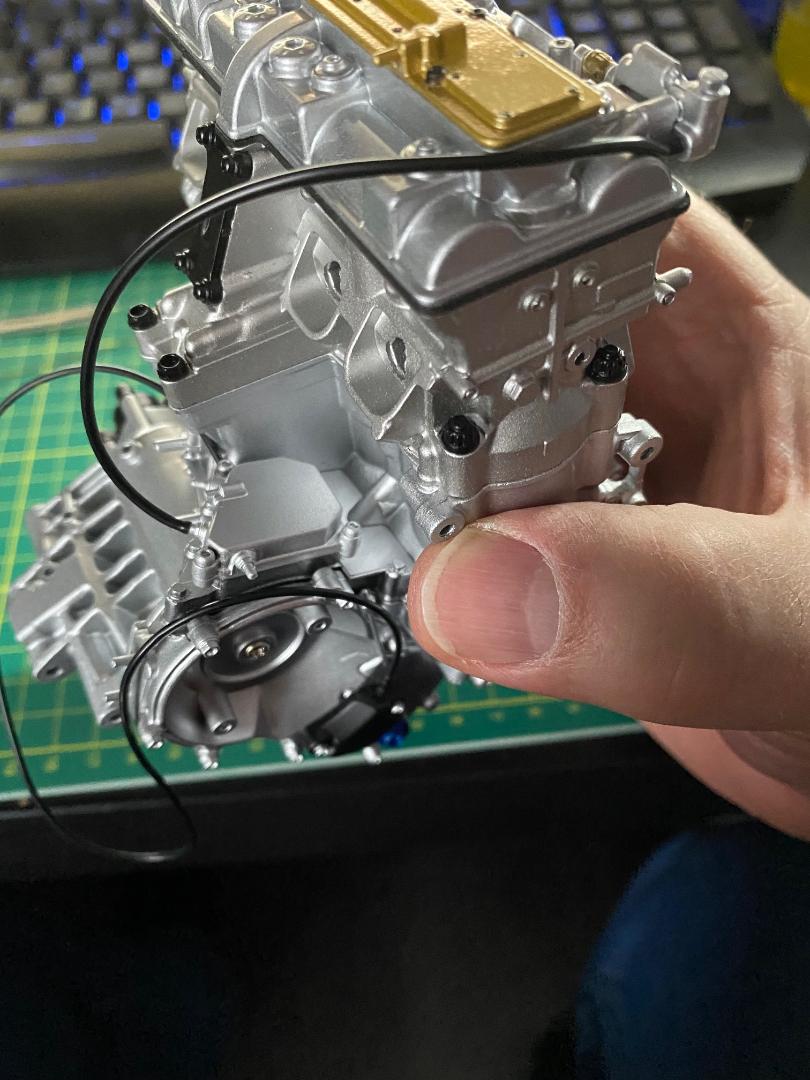
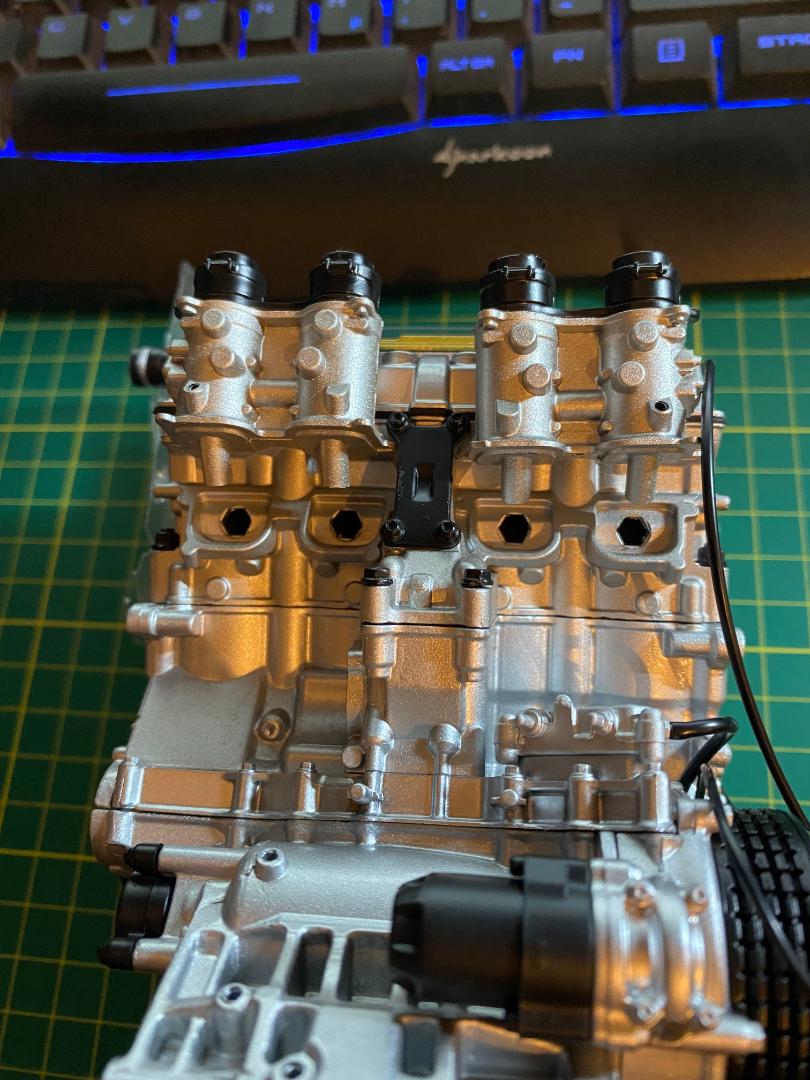
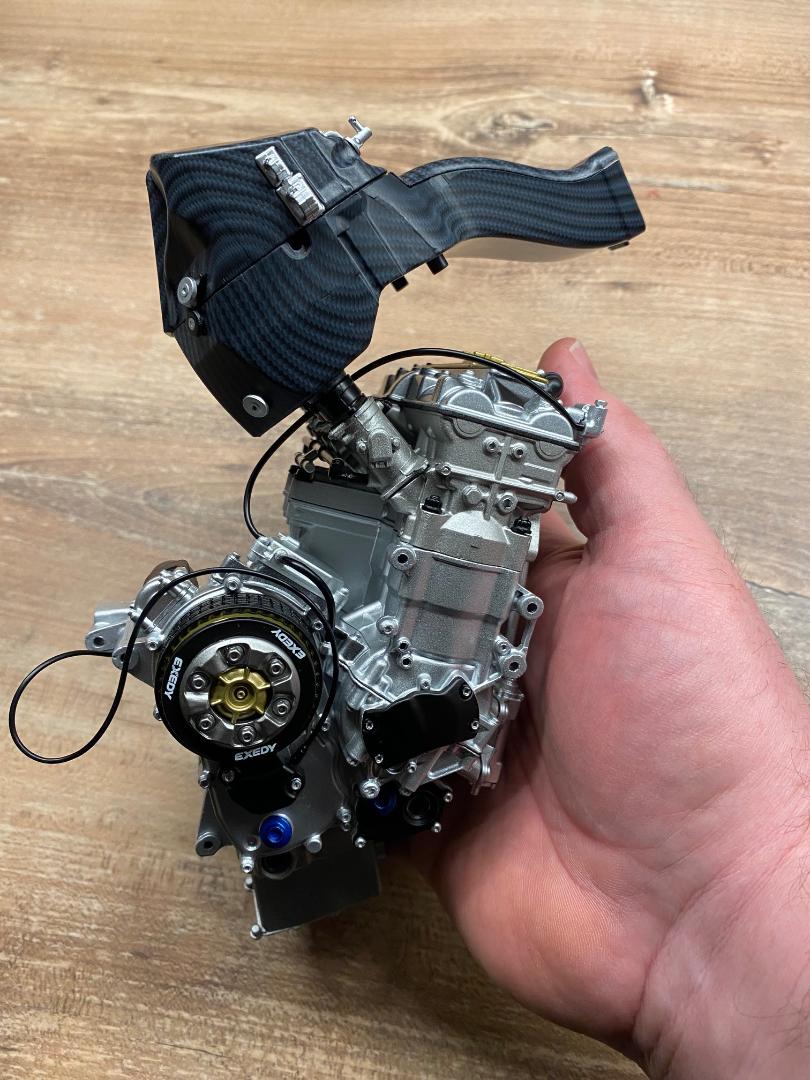
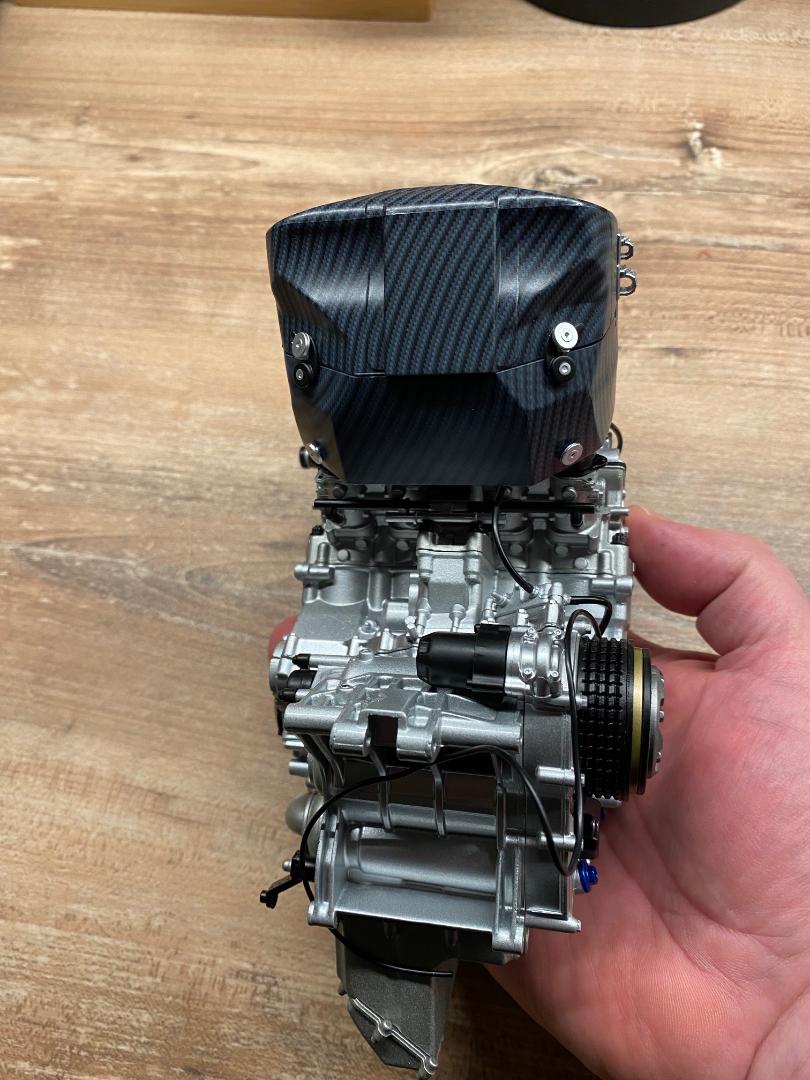
Weiter geht`s mit Paket 10:
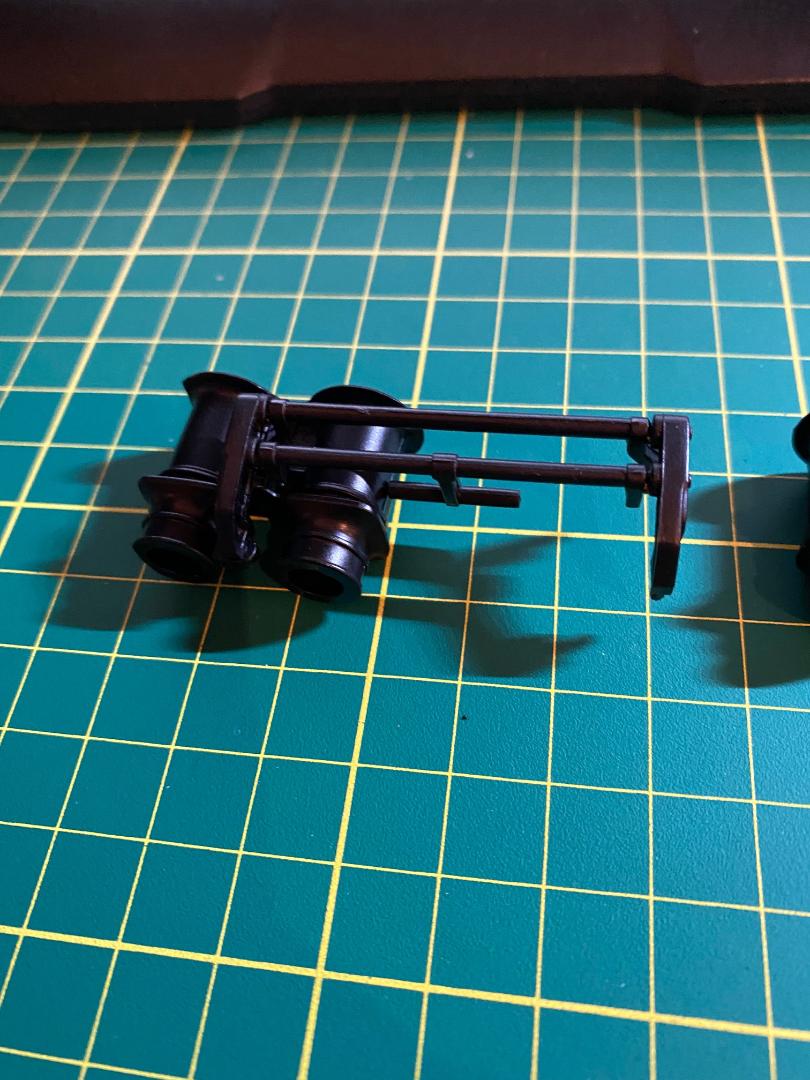
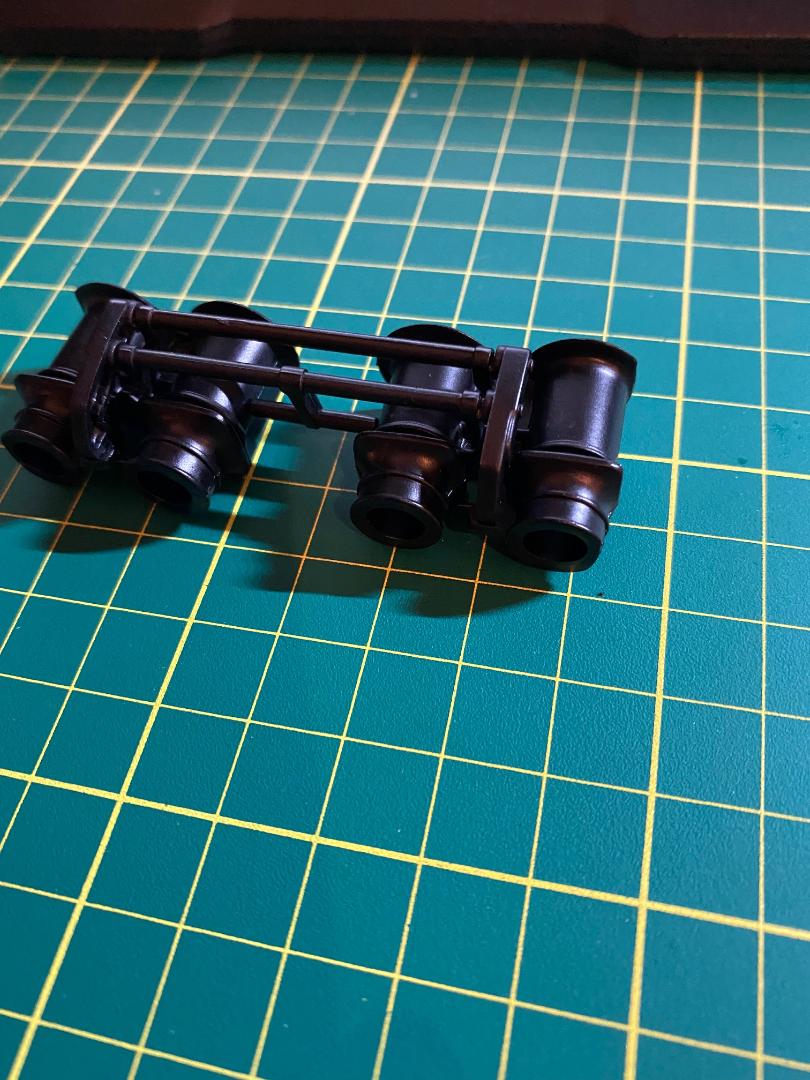
-Die Krümmer, die Drosselklappen, die Gaspedalverschiebung (
 )
)Wieder nette Plastikteile, die richtig ausgerichtet und zusammengesteckt werden müssen. Die schwarzen Ansaugstutzen müssen dabei entsprechend der Anleitung an der richtigen Einspritzeinheit und in der richtigen Position eingesteckt werden und halten sehr gut ohne Kleber. Am Motorblock habe ich sie mit Sekundenkleber fixiert. Das Verbindungsgestänge habe ich mit Plastikkleber fixiert.
 " />
" /> " />
" /> " />
" /> " />
" /> " />
" />
Maddin- Schneidmatten-Virtuose
Re: Valentino Rossi's Yamaha YZR M1 in 1:4 von DeAgostini
![]() von Maddin Mo 17 Jan 2022, 08:18
von Maddin Mo 17 Jan 2022, 08:18
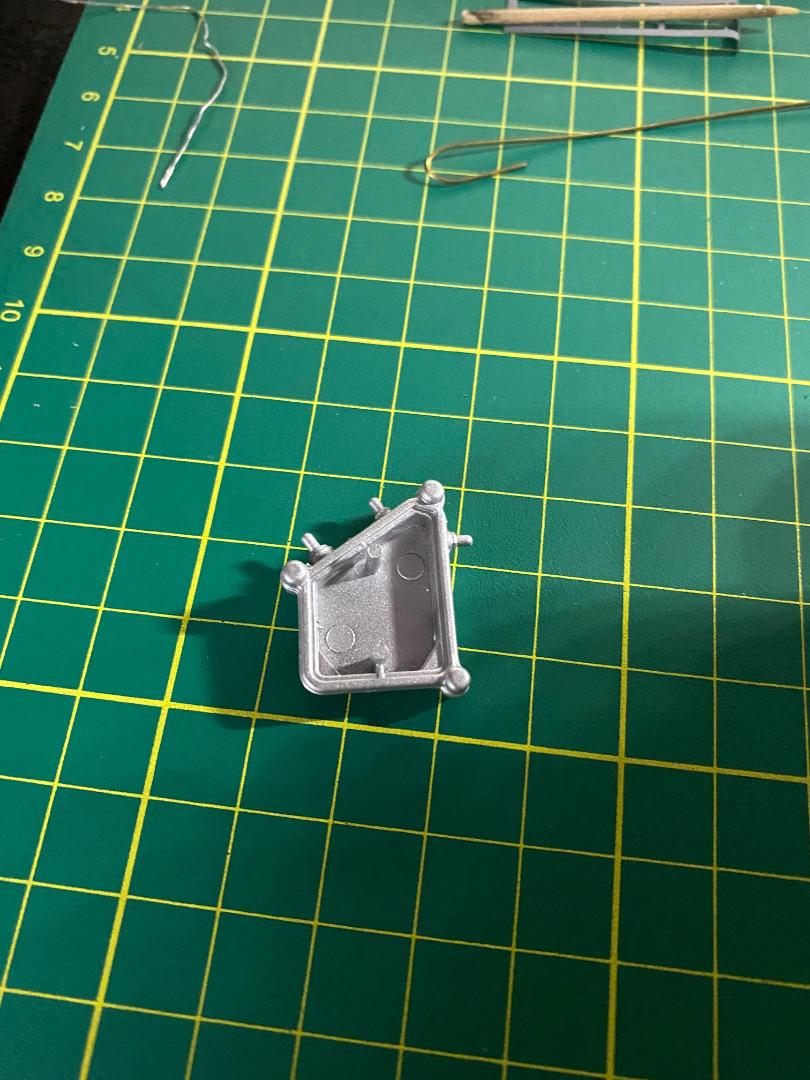
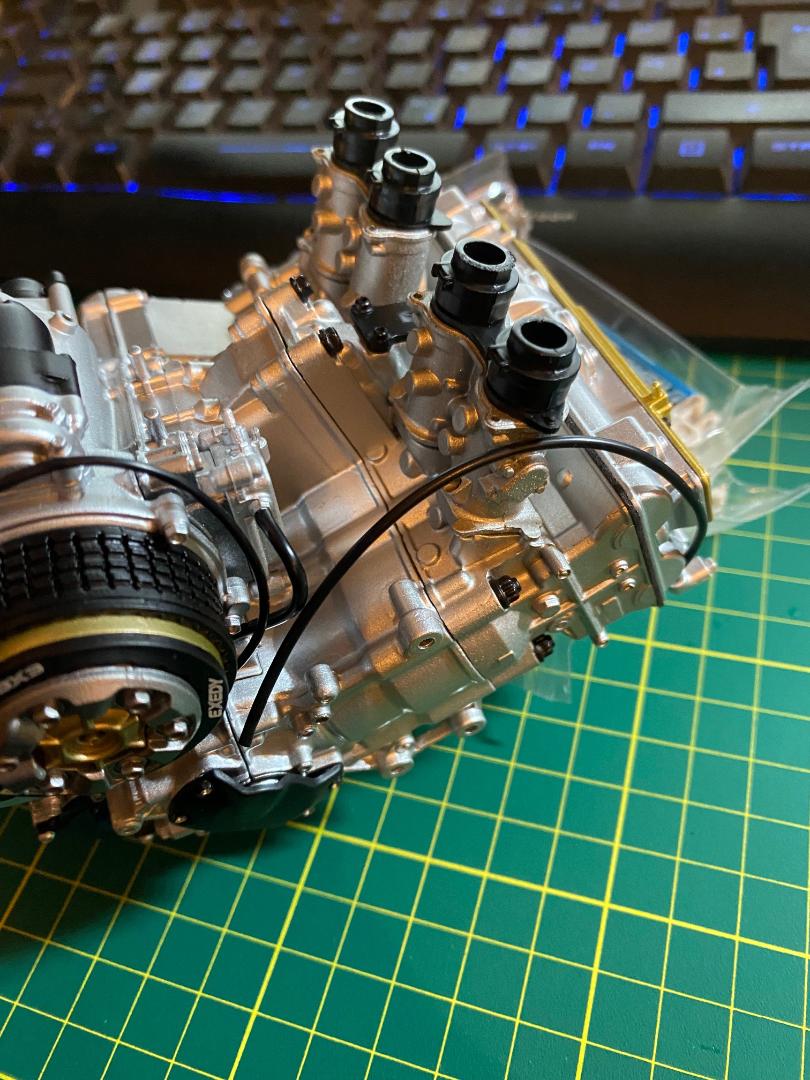
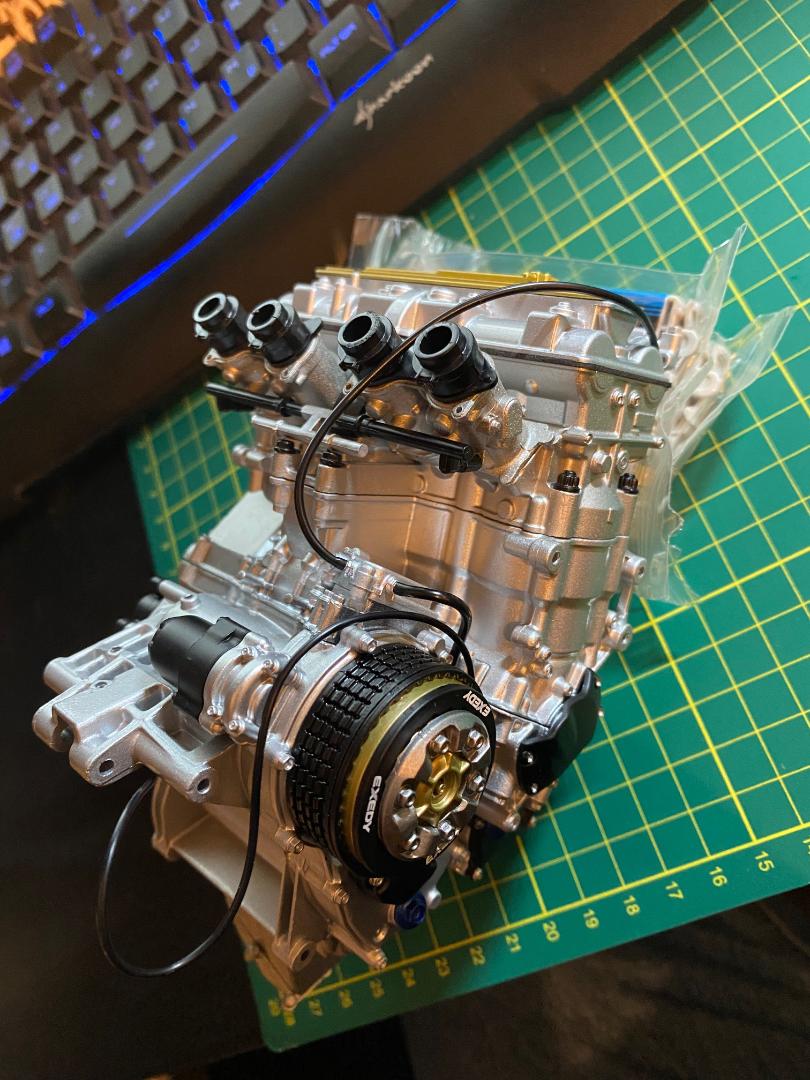
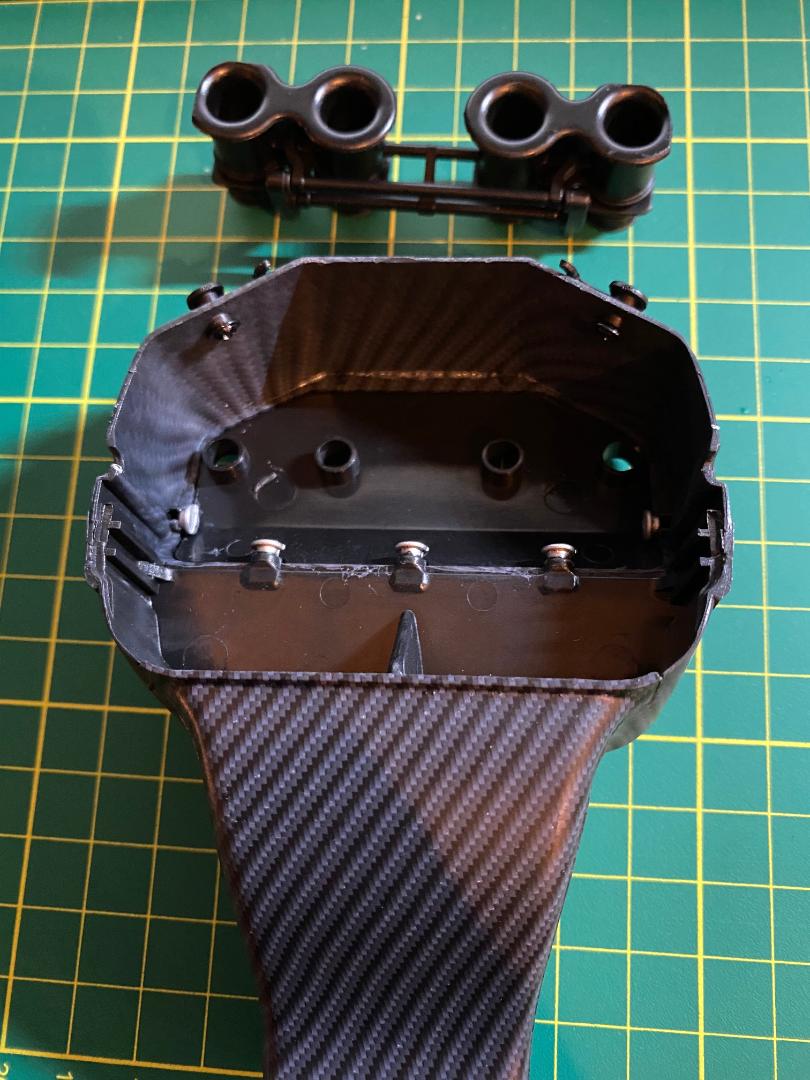
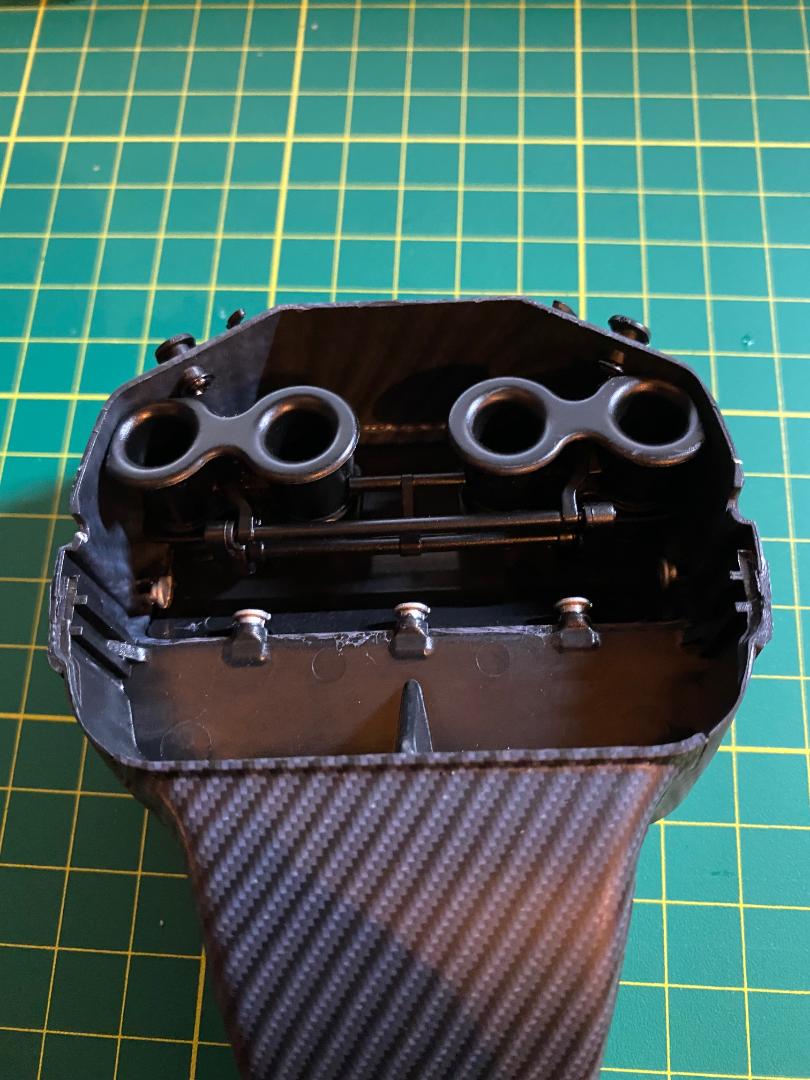
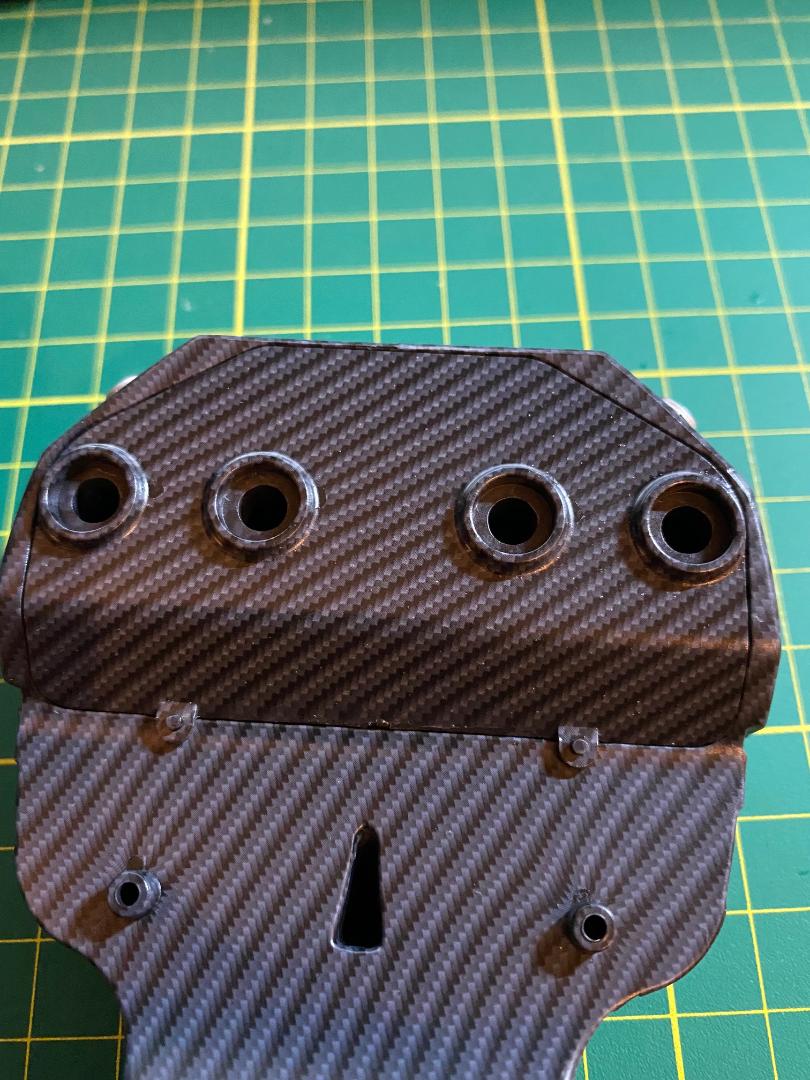
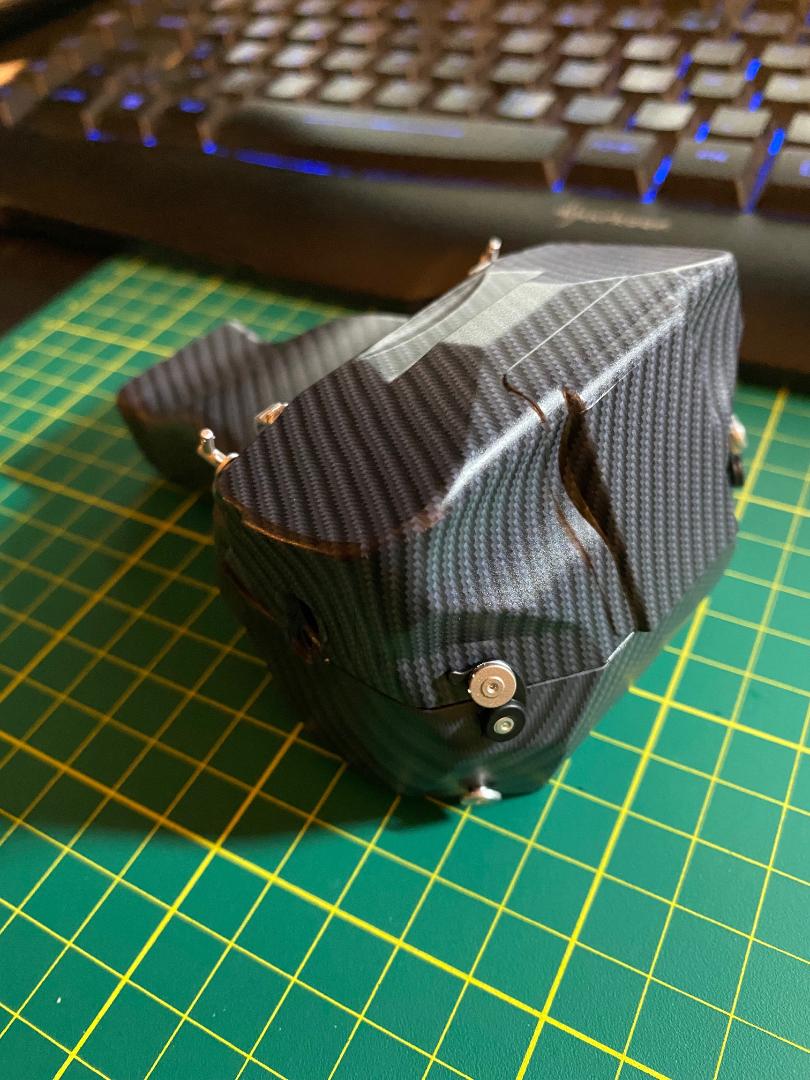
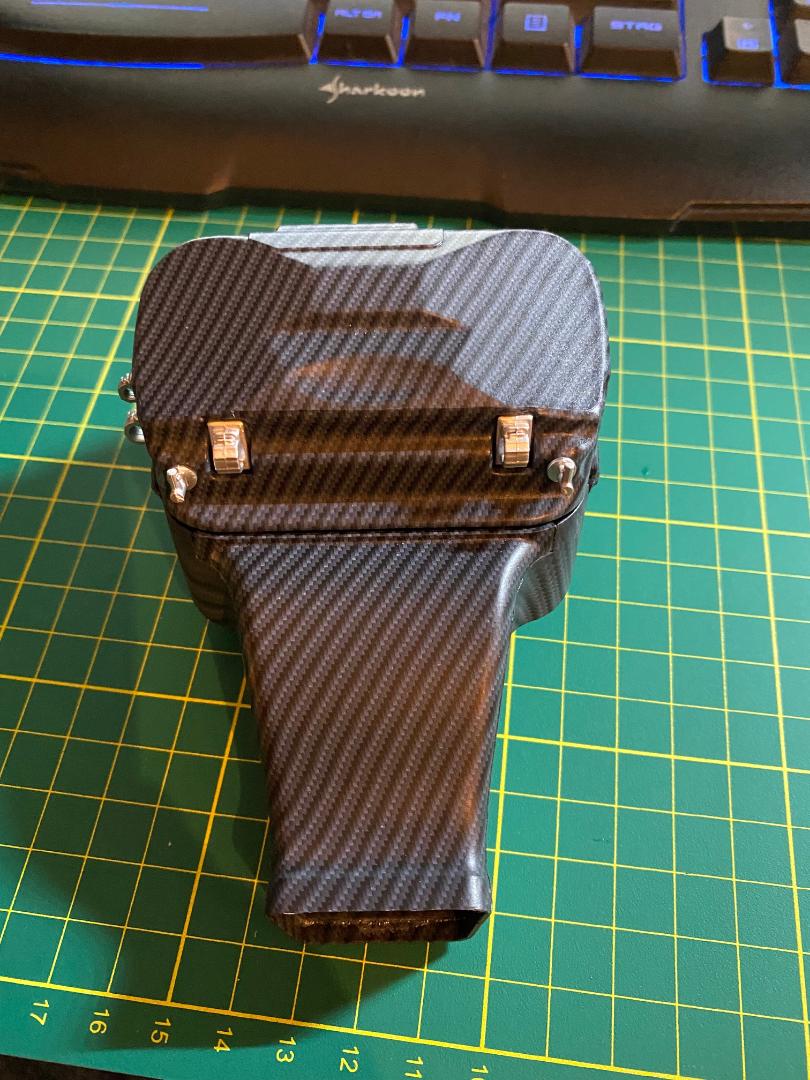
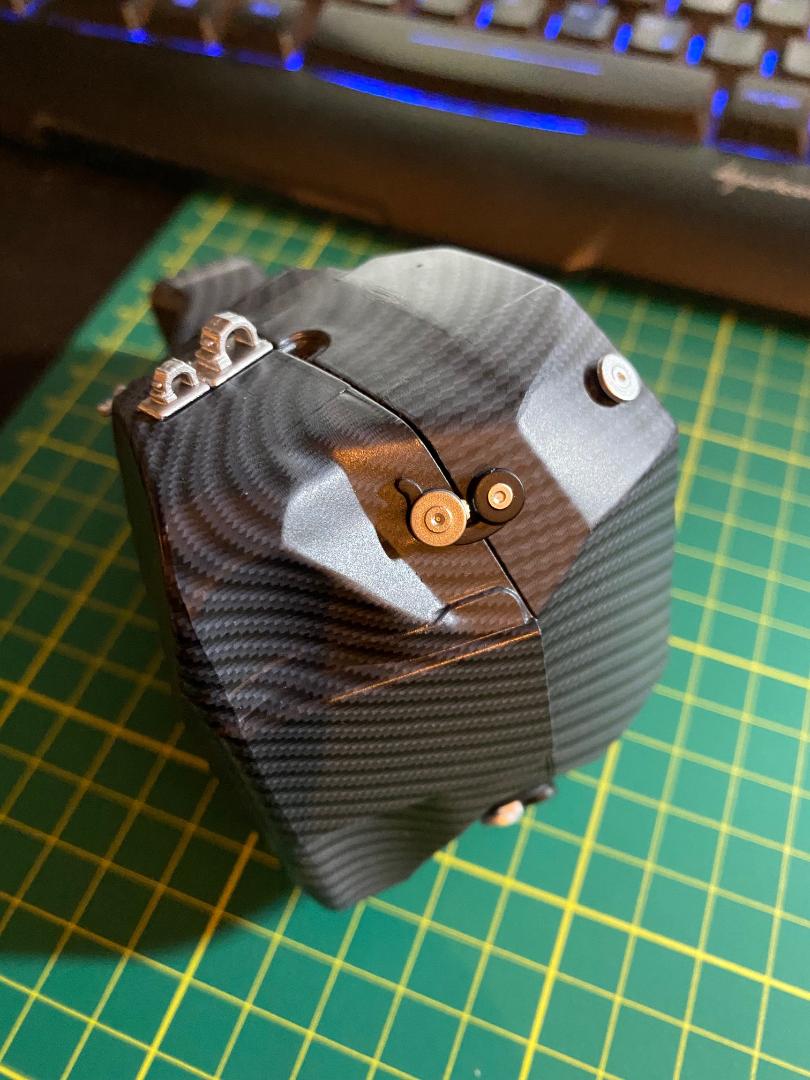
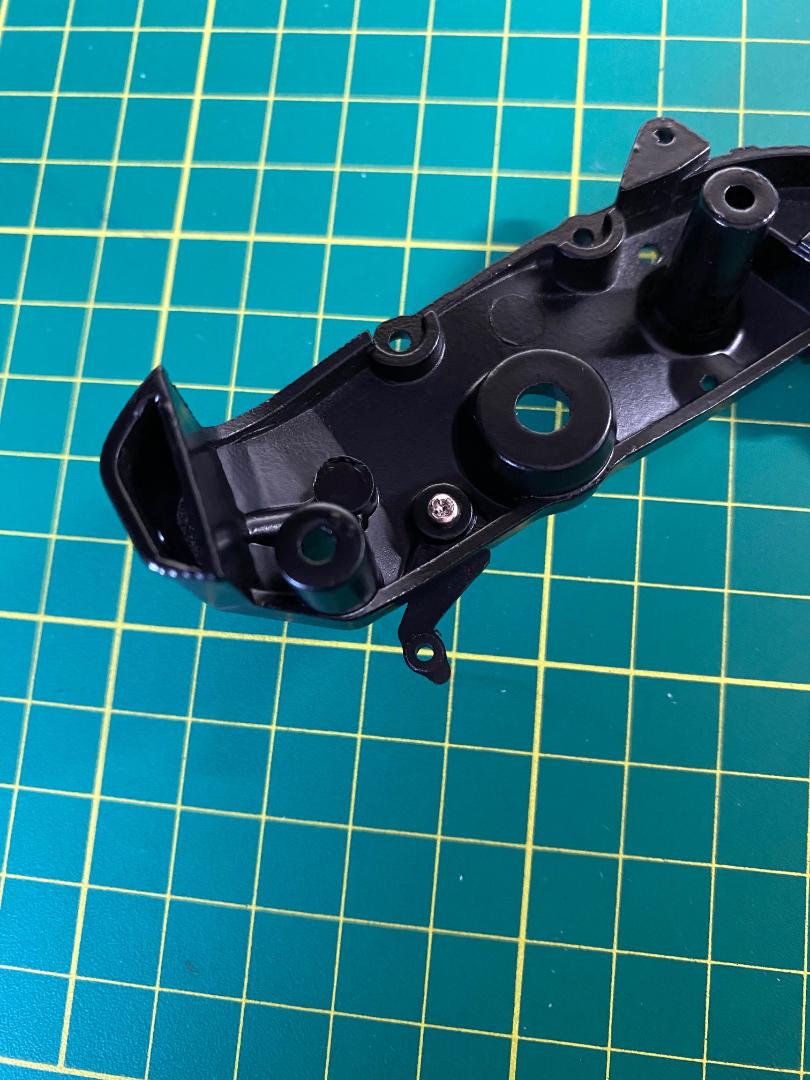
Diese Kunststoffteile werden zusammengesteckt, wobei man wieder auf die kleinen Nasen in den Enden der Verbindungsstangen achten muss. Sie passen nur in einer Stellung in die Seitenteile. Das Ganze wird dann einfach in die Löcher innerhalb der Airbox gedrückt und diese dann mit den Schnellverschlüssen verschlossen. Nicht schön hierbei ist, dass es ja kein Gegenscharnier des Deckels gegenüber gibt. Man muss also die verschlossene Airbox immer vorsichtig anfassen. Sonst könnte der Deckel abgehoben und die Schnellverschlüsse womöglich beschädigt werden. Ich hab dann mal die Airbox auf die Ansaugstutzen aufgesteckt. Wird echt ein cooles Modell. Ich hoffe, dass zumindest das Unterteil der Verkleidung später abnehmbar ist, damit man die ganze Technik dann auch noch sichtbar gemacht werden kann.
 " />
" />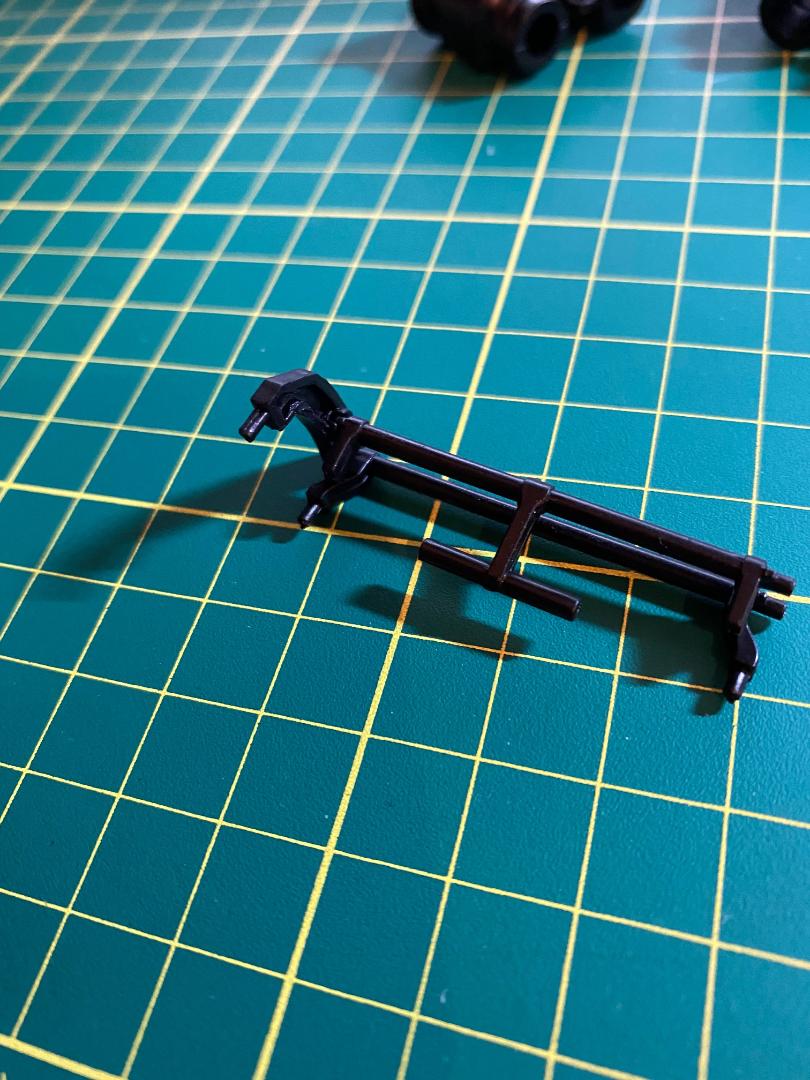 " />
" />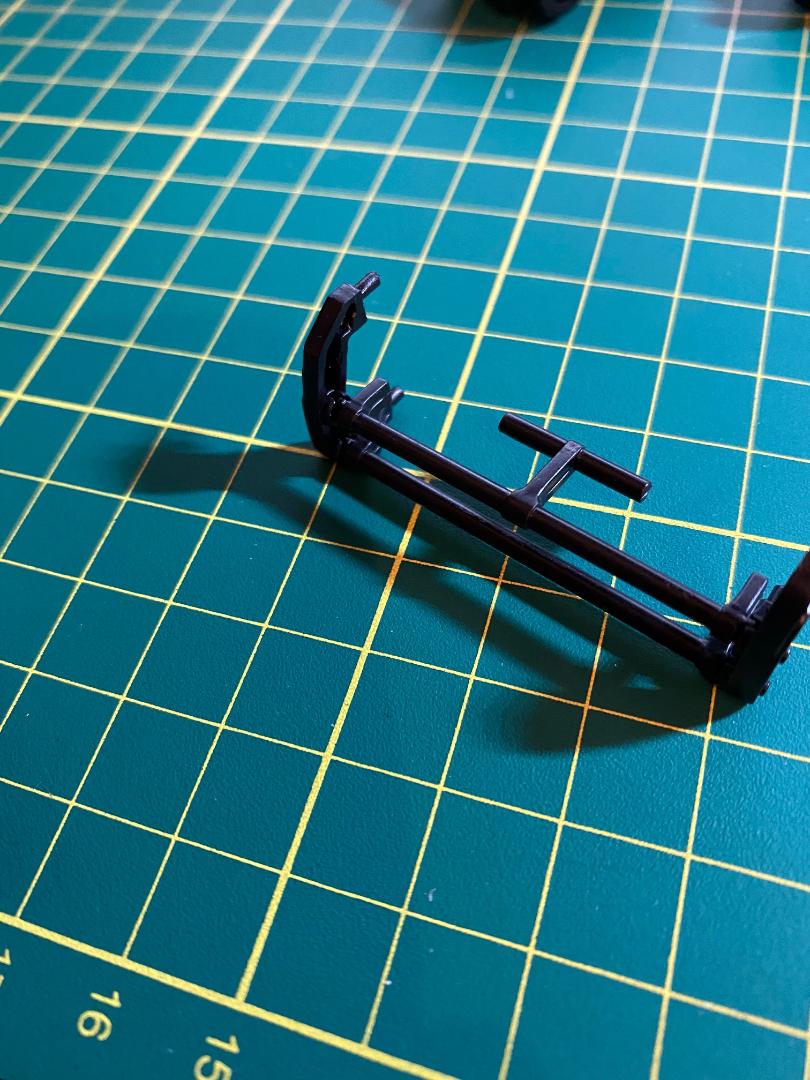 " />
" /> " />
" /> " />
" /> " />
" /> " />
" /> " />
" /> " />
" /> " />
" /> " />
" /> " />
" /> " />
" /> " />
" />Jetzt muss ich erstmal los. Die letzten beiden Bauschritte:
-Rohre und Flansche der Abgaskrümmer,
-Der hintere Stoßdämpfer
gibts dann heute Nachmittag.
Maddin- Schneidmatten-Virtuose
doc_raven1000, ullie46 und klaus.kl mögen diesen Beitrag
Re: Valentino Rossi's Yamaha YZR M1 in 1:4 von DeAgostini
![]() von doc_raven1000 Mo 17 Jan 2022, 11:33
von doc_raven1000 Mo 17 Jan 2022, 11:33


doc_raven1000- Modellbaumeister

Re: Valentino Rossi's Yamaha YZR M1 in 1:4 von DeAgostini
![]() von Maddin Mo 17 Jan 2022, 16:22
von Maddin Mo 17 Jan 2022, 16:22
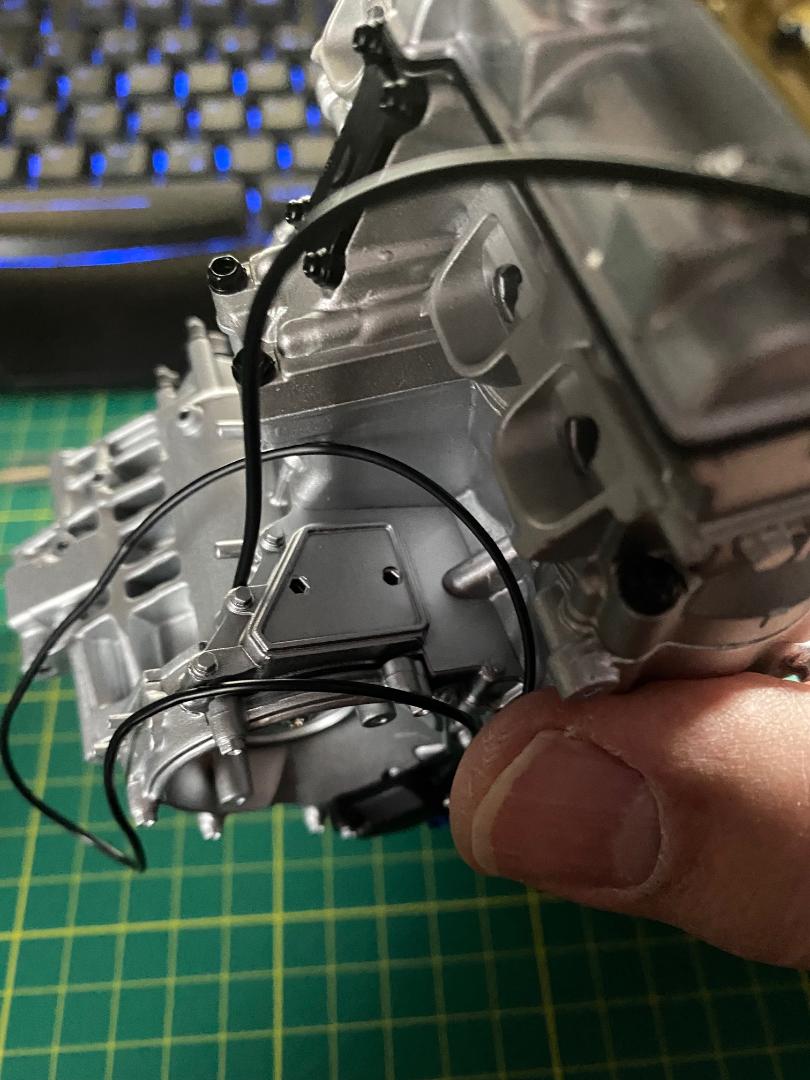
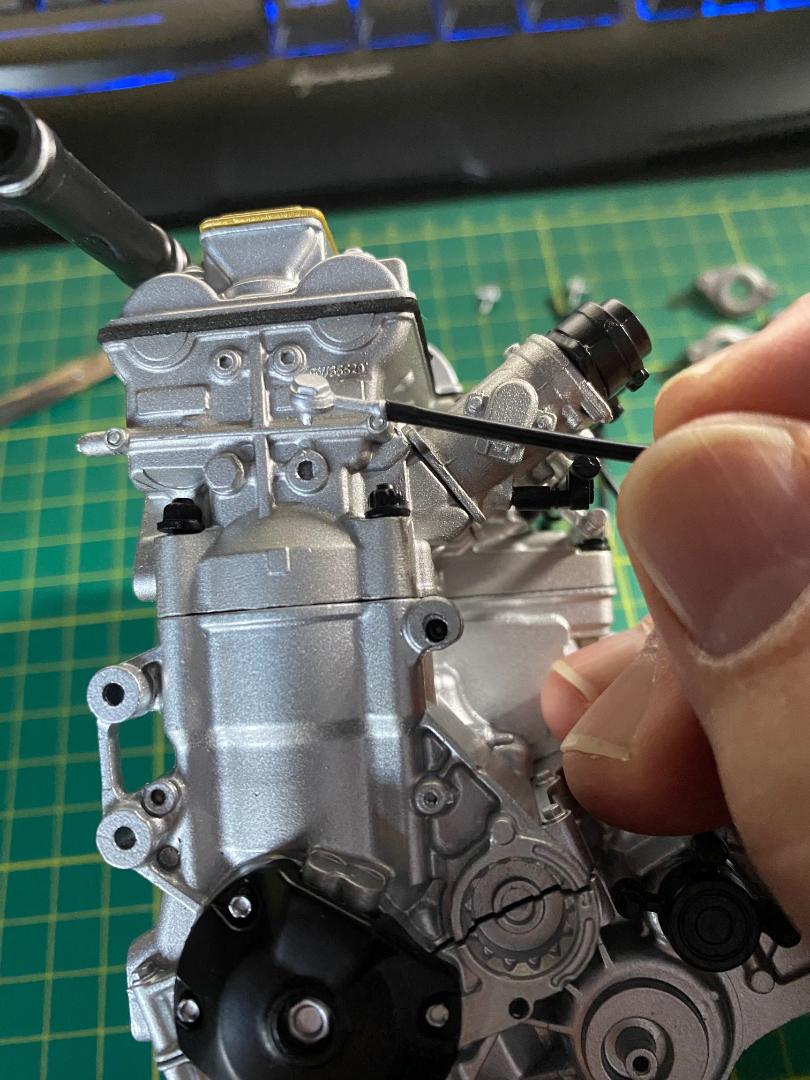
Nu geht`s weiter mit den letzten zwei Tüten. Zur Verstärkung der längeren Schläuche und deren besserer Verlegung habe ich mir heute erstmal eine Rolle 0,5er Bindedraht geholt. Mir war aus meiner Zeit in Rheinhessen die alte Weisheit: "Ist der Winzer mal in Not hilft `ne Rolle Wingertsdroht..." wieder in den Kopf gesprungen... Etwas kürzer geschnitten als der Schlauch, hineingeschoben und schon läßt der Schlauch sich viel besser in Biegungen, usw. drücken und in Form halten.
Aber nun geht`s weiter mit:
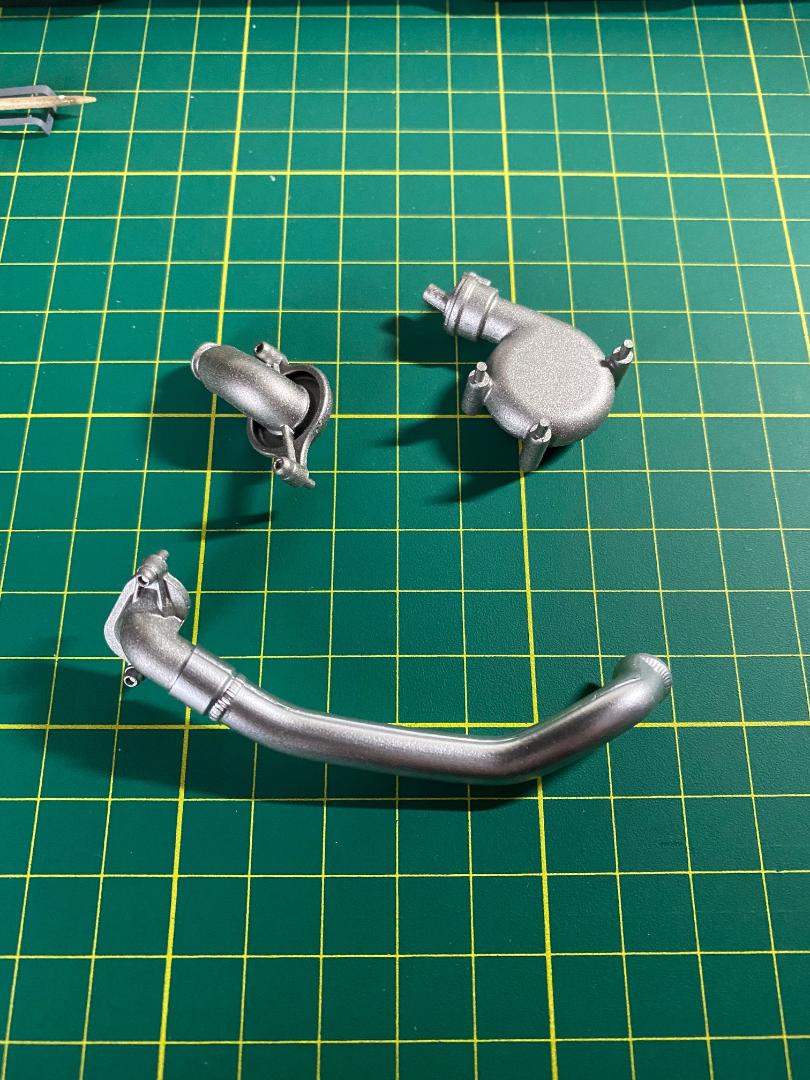
-Rohre und Flansche der Abgaskrümmer, eigentlich Schlauchleitungen und Krümmerflansche..:
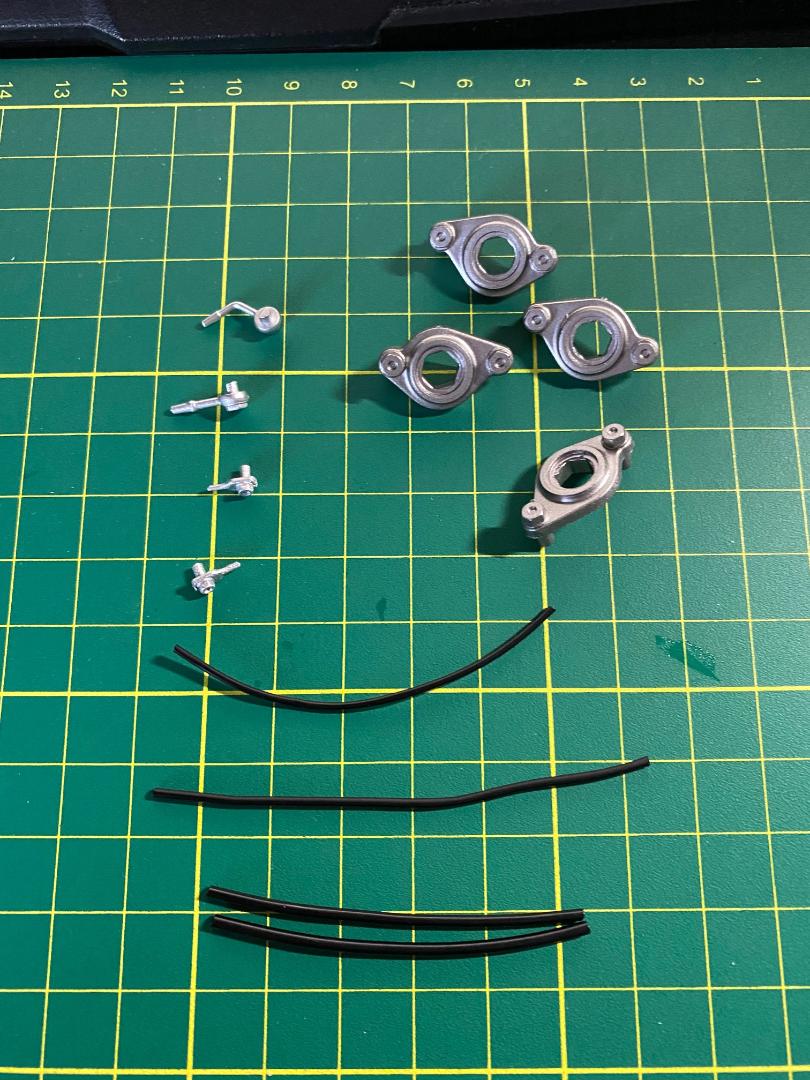
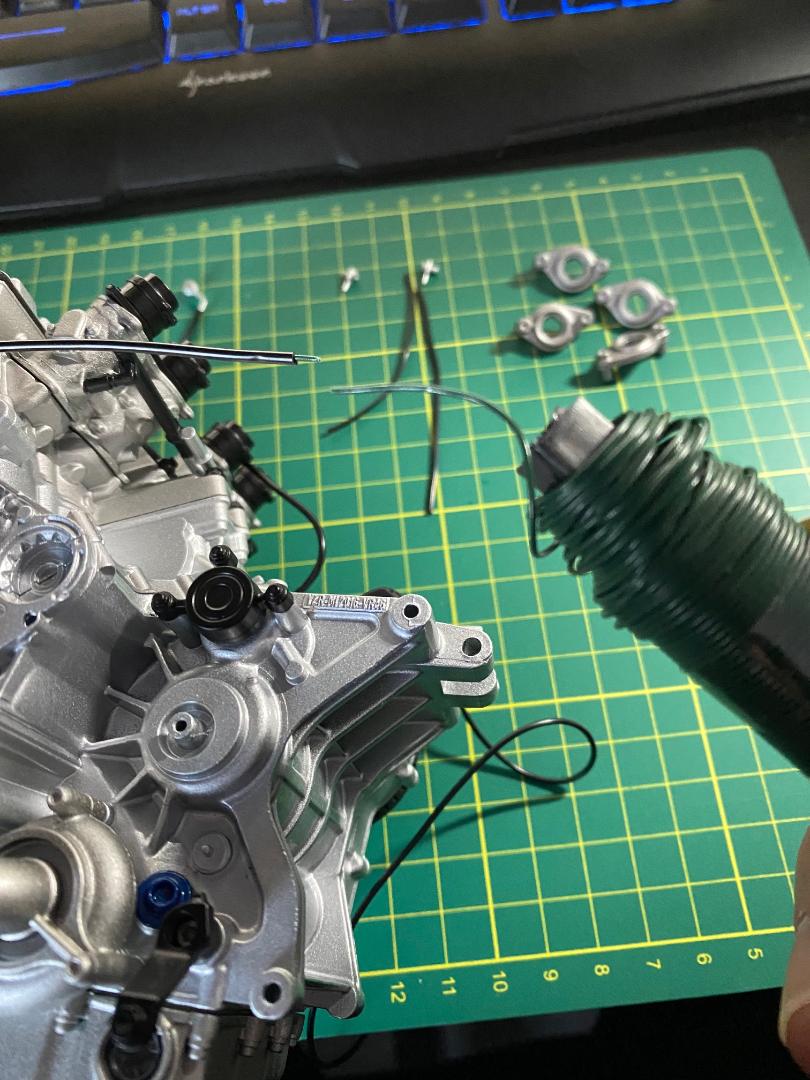
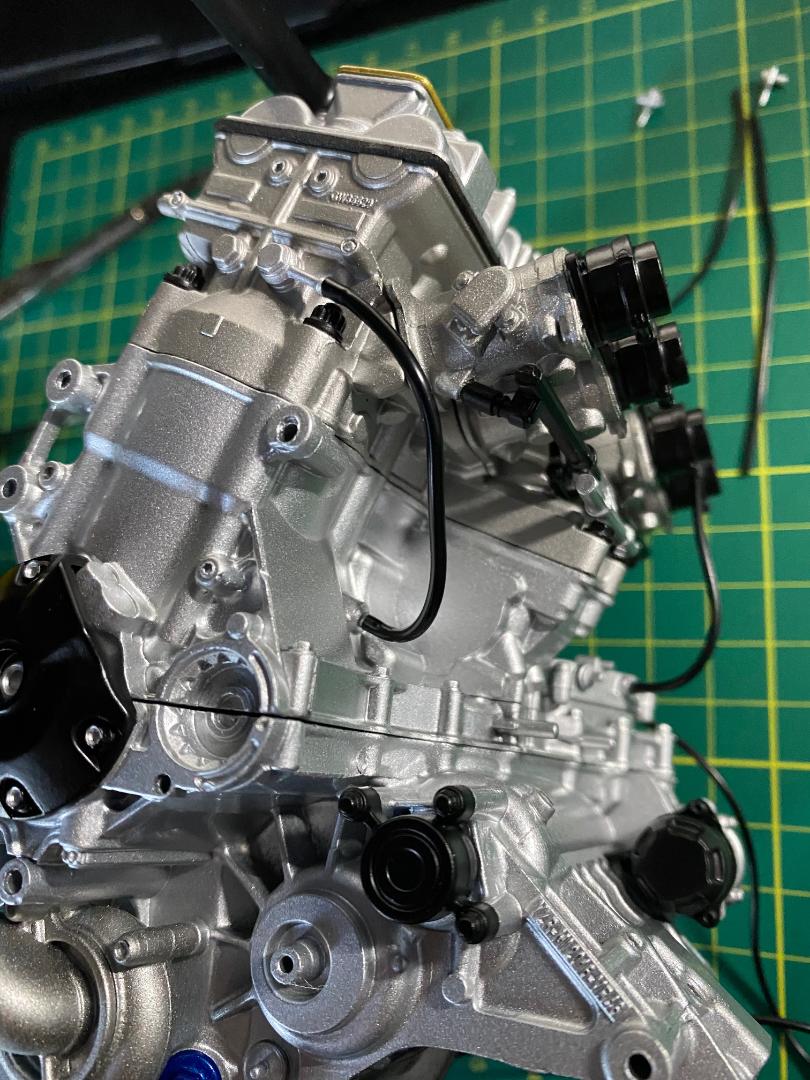
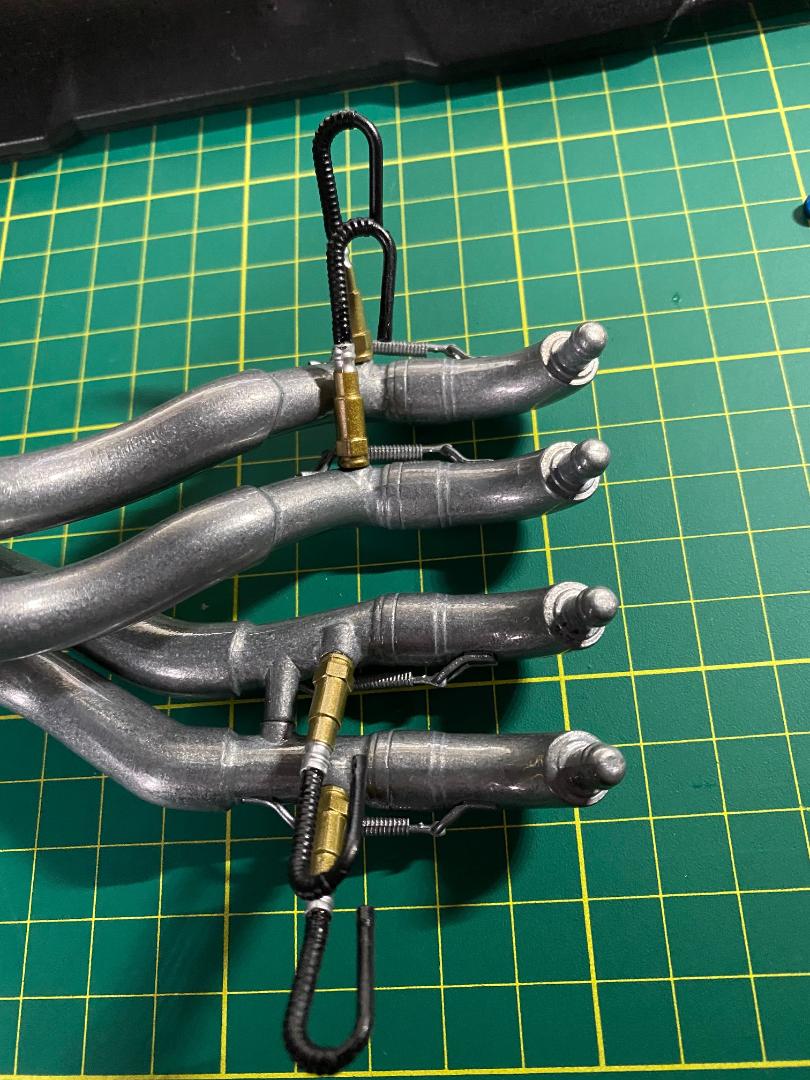
Hier kommen vier Plastik-Krümmerflansche und vier Plastikadapter mit den entsprechenden, fertig auf Länge geschnittenen Kunststoffschläuchen. Die Enden der Adapter sind recht dick, so dass sich die Schläuche am besten mit etwas Kunststoffkleber aufschieben lassen. Trocken wird das nichts. Bei den beiden Schlauchanschlüssen rechts am Fylinderfuß muss der kürzere Schlaufe oben liegen. Die Krümmerflansche sind nach Einbauposition markiert und werden einfach nur stramm in ihre Führungen gedrückt.
 " />
" /> " />
" /> " />
" /> " />
" /> " />
" /> " />
" /> " />
" /> " />
" />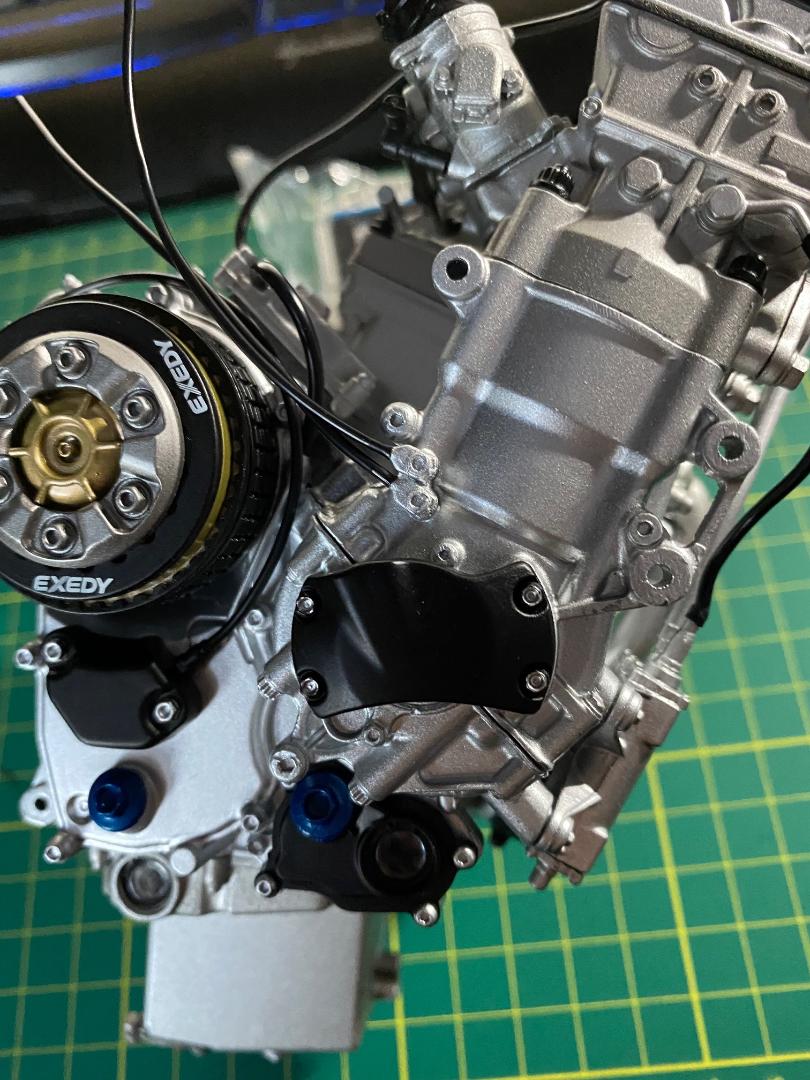 " />
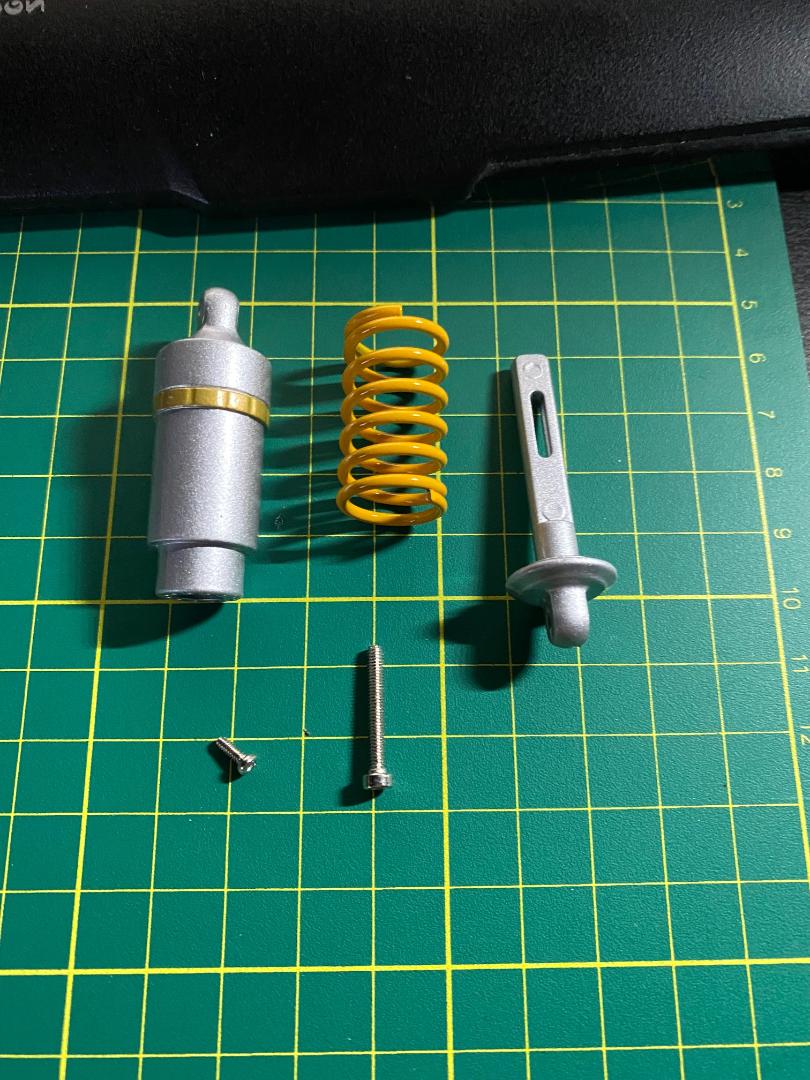
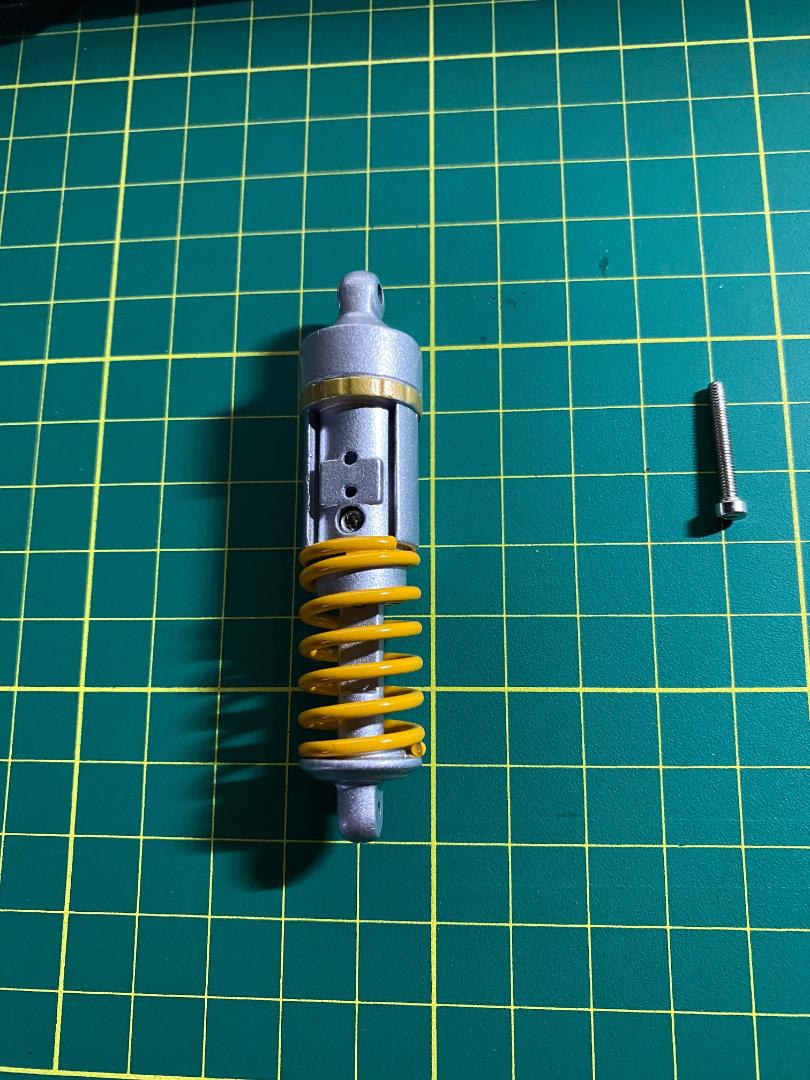
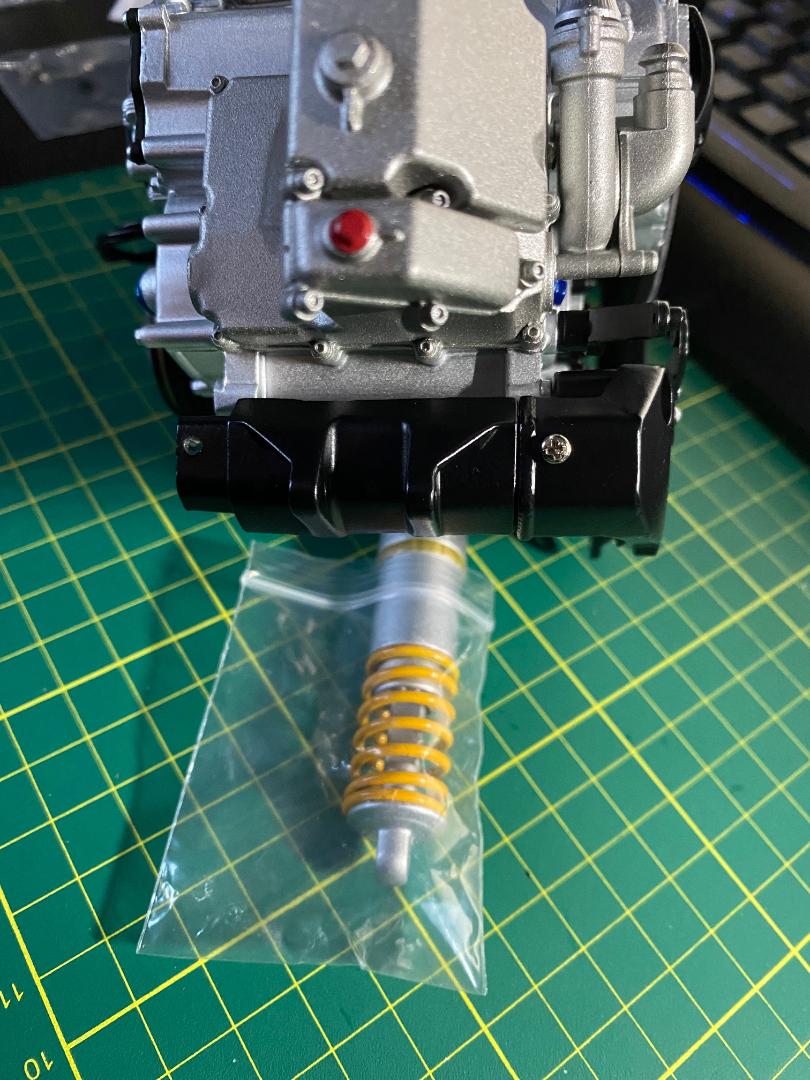
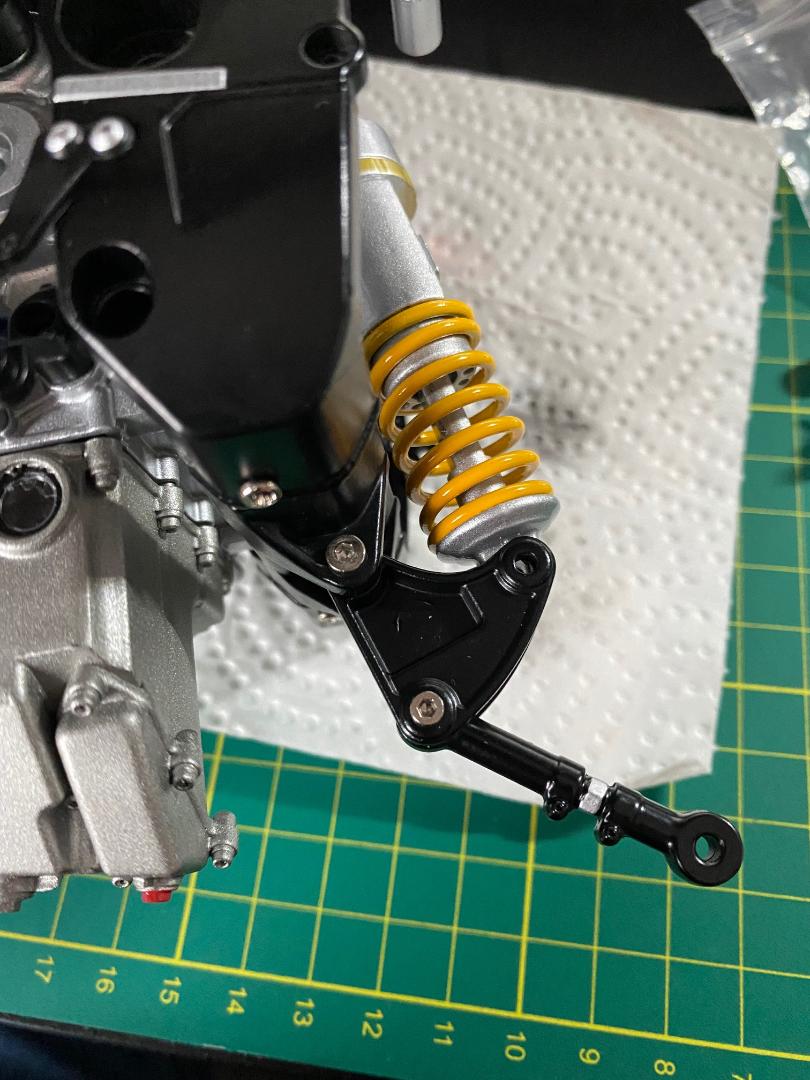
" />-Der hintere Stoßdämpfer
Maddin- Schneidmatten-Virtuose
Re: Valentino Rossi's Yamaha YZR M1 in 1:4 von DeAgostini
![]() von Maddin Mo 17 Jan 2022, 17:34
von Maddin Mo 17 Jan 2022, 17:34
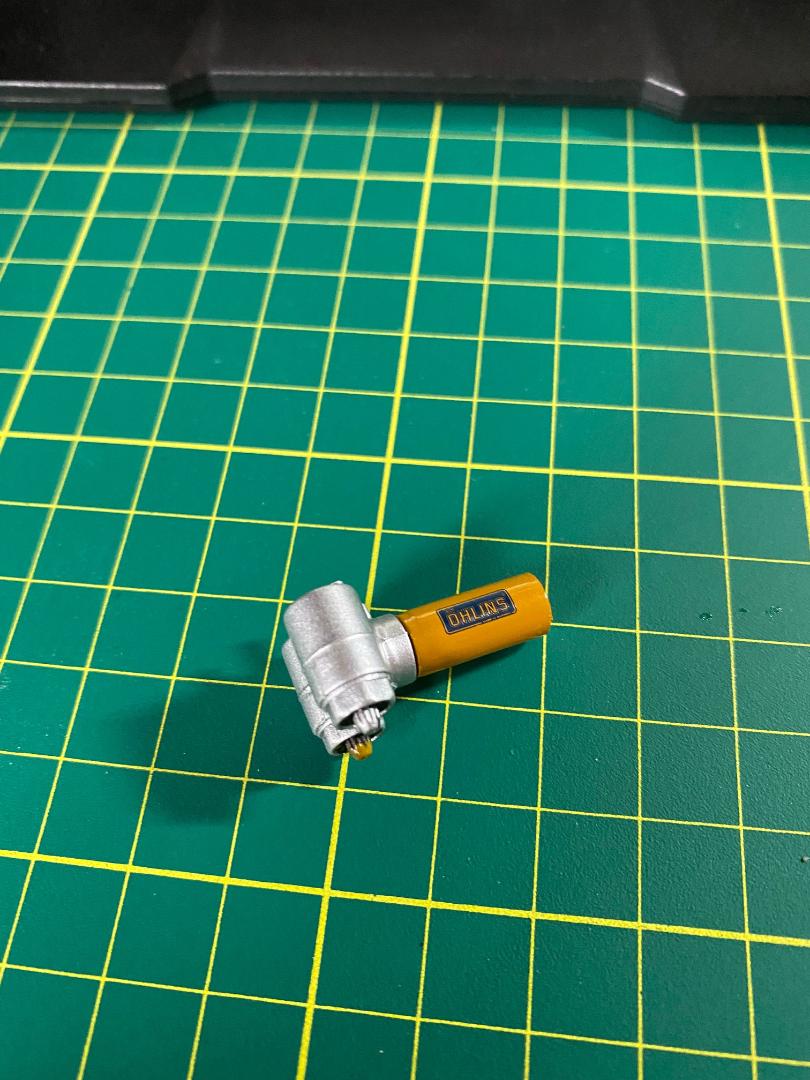
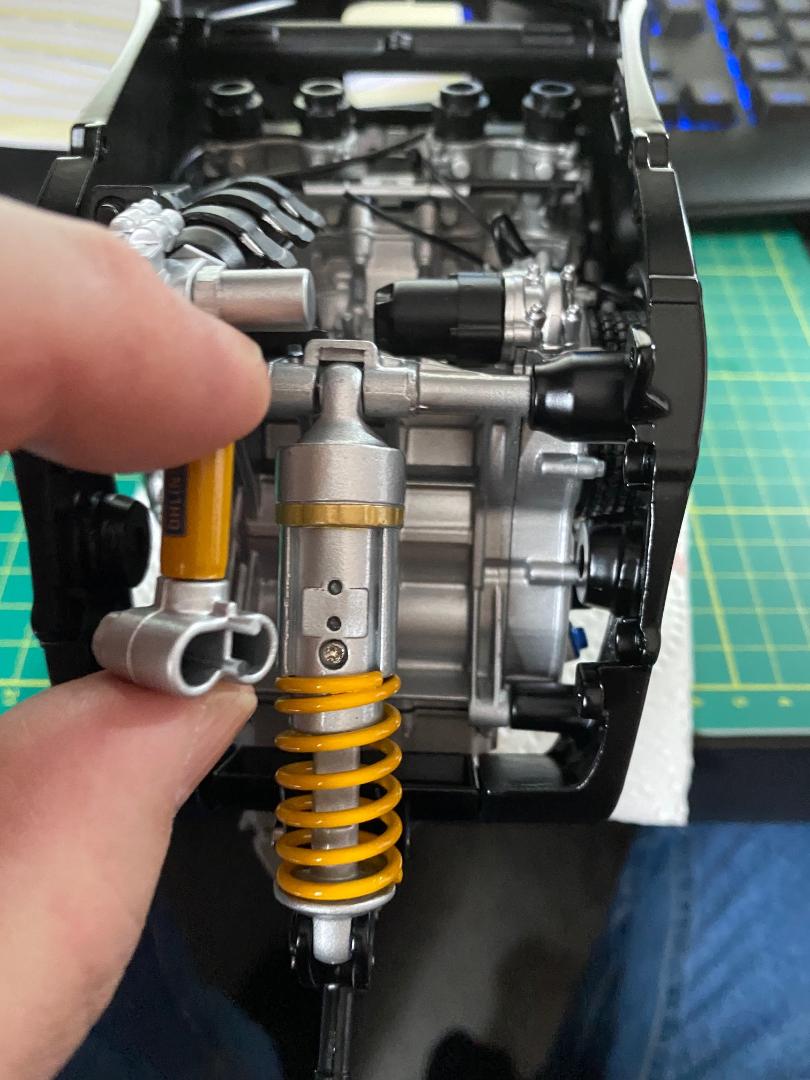
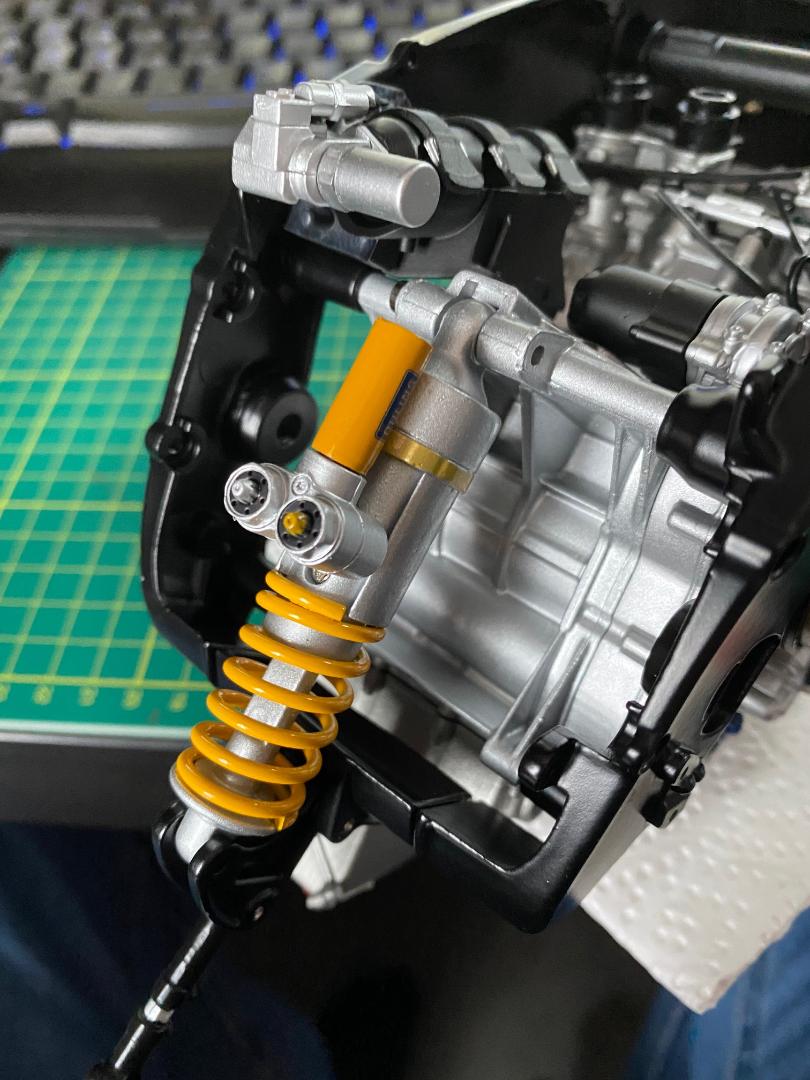
Schönes Teil komplett aus Metall! Die Montage ist sehr einfach. Die Feder auf den Stoßdämpferkörper setzen und die Kolbenstange in das Langloch stecken. Das ganze etwas zusammendrücken und die kleine Schraube eindrehen. Der Anfang der Feder sollte in der Aussparung im Stoßdämpferkörper anliegen. Danach wird der Stoßdämpfer hinten am Motorblock eingesteckt und mit der langen Schraube fixiert. Sehr schön stabile Verbindung. Muss ja nachher auch ein wenig was aushalten. Ich habe zum Schutz vor Kratzern erstmal noch ' ne Tüte über das Federbein gezogen und die Schraube nur lose angesetzt, um bei den weiteren Bauschritten nicht ständig da aufpassen zu müssen und notfalls das Ganze nochmal schnell entfernen zu können, wenn es stört.
 " />
" /> " />
" /> " />
" />So, das war`s erstmal wieder bis zur nächsten Lieferung.
Maddin- Schneidmatten-Virtuose
John-H. und doc_raven1000 mögen diesen Beitrag
Re: Valentino Rossi's Yamaha YZR M1 in 1:4 von DeAgostini
![]() von Maddin Sa 12 Feb 2022, 11:49
von Maddin Sa 12 Feb 2022, 11:49
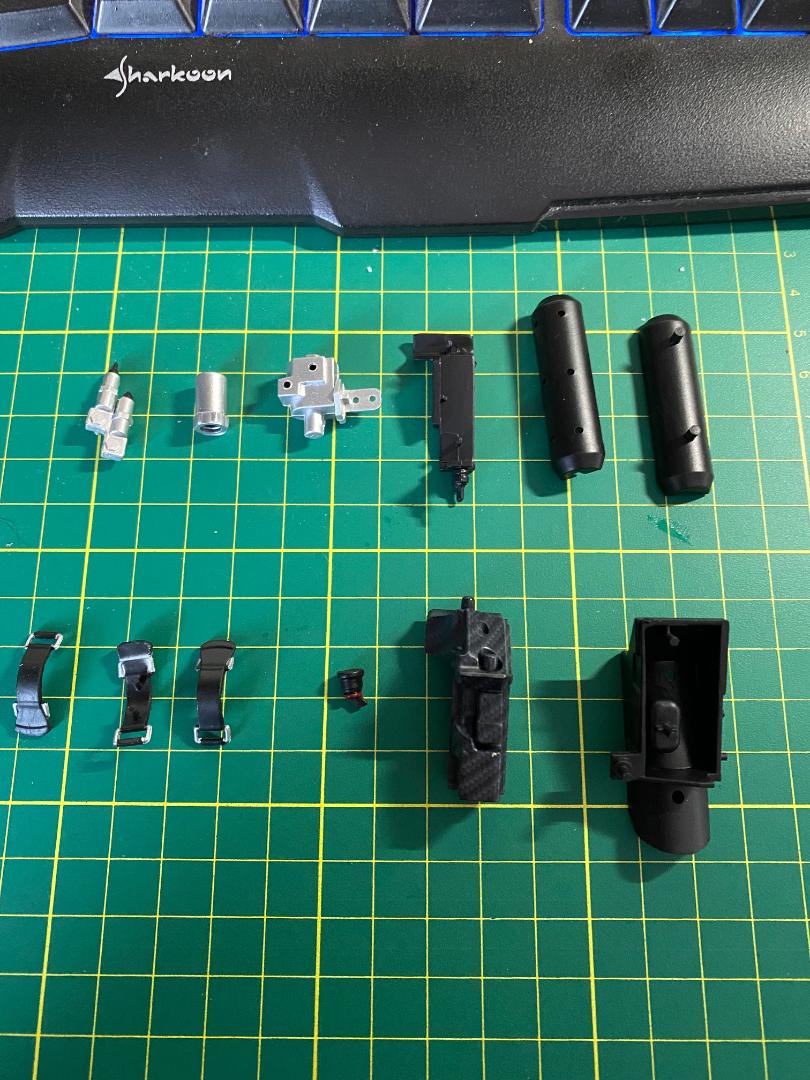
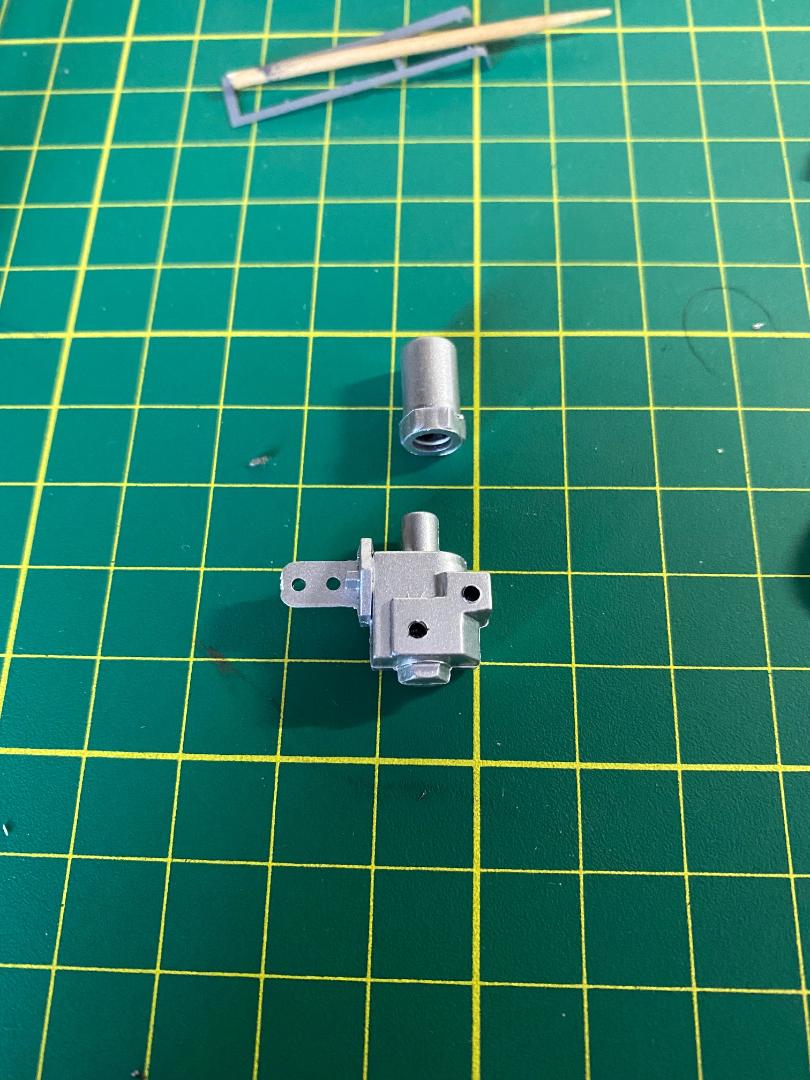
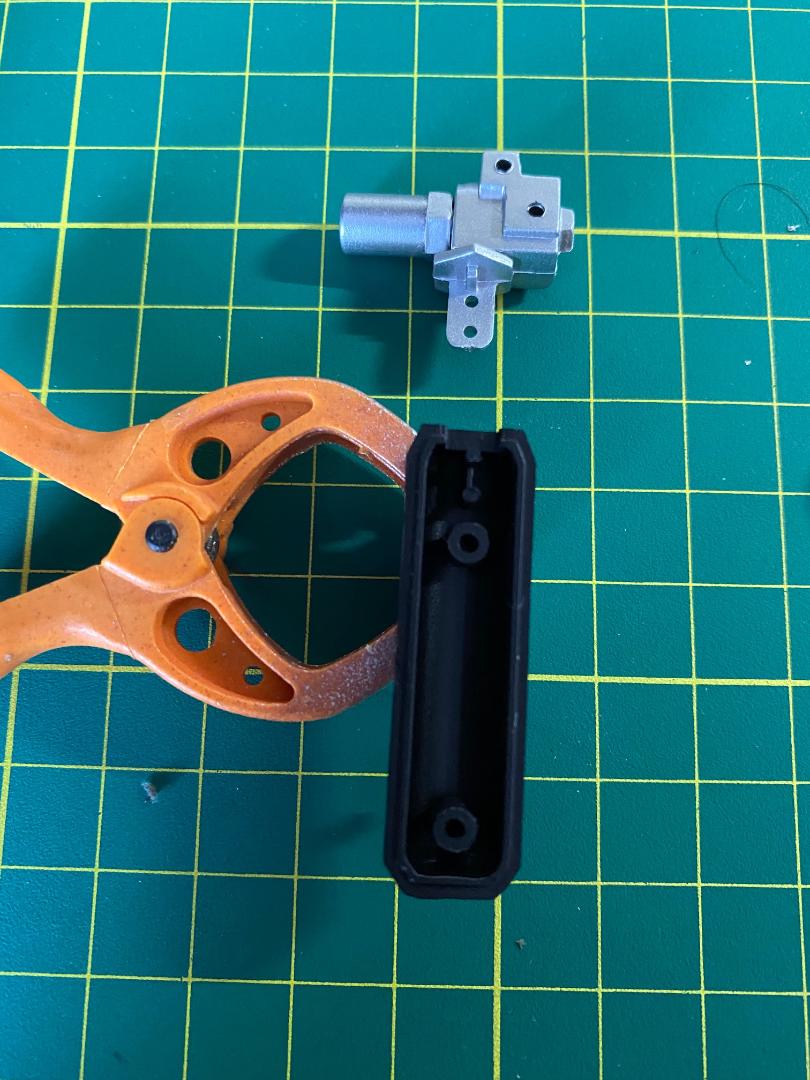
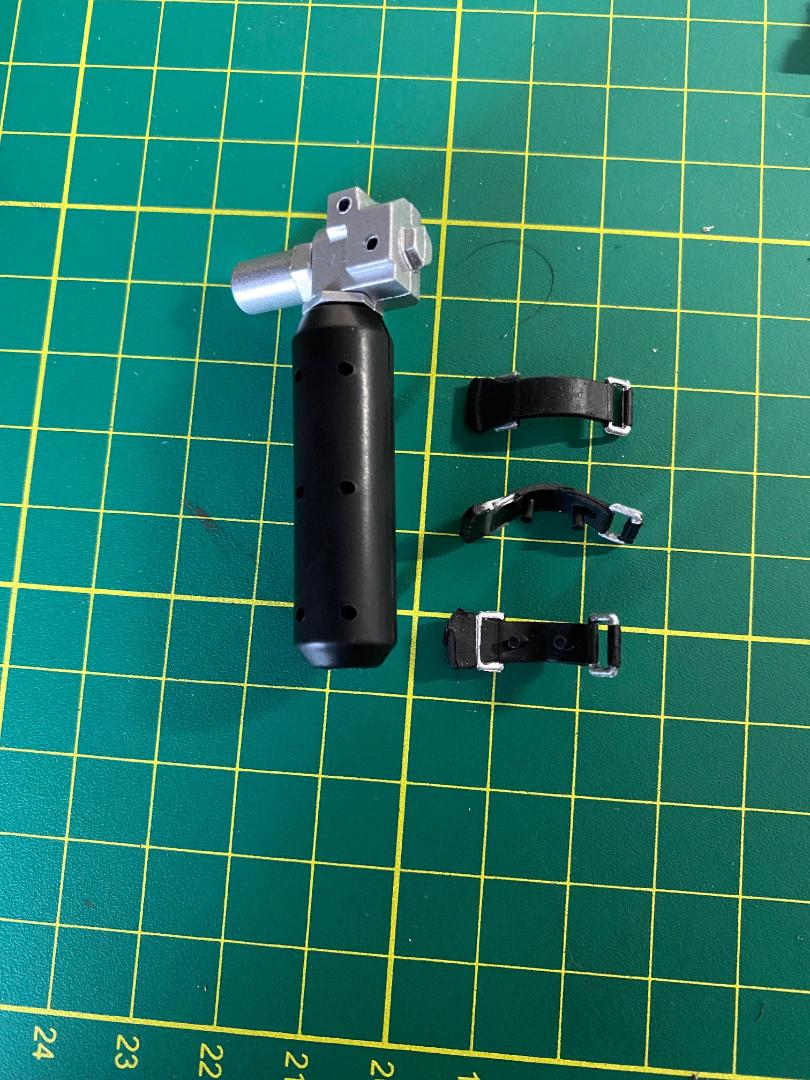
Gestern habe ich die sechste Lieferung mit den Boxen 11 und 12 erhalten:
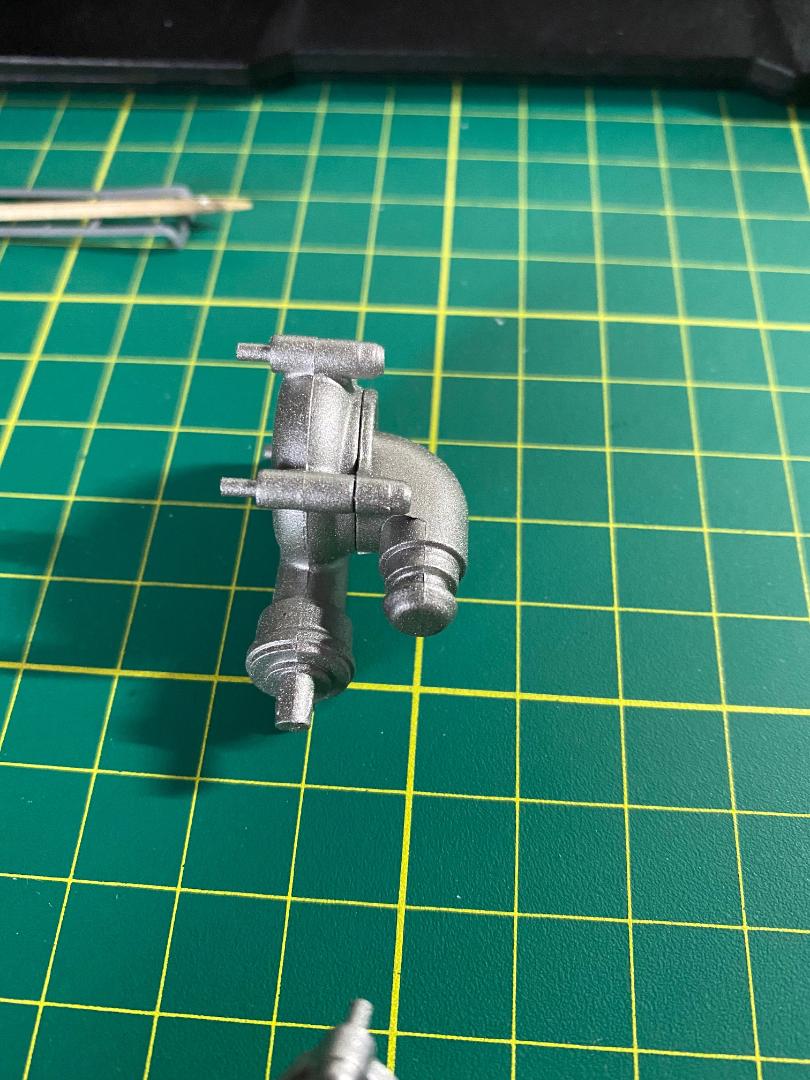
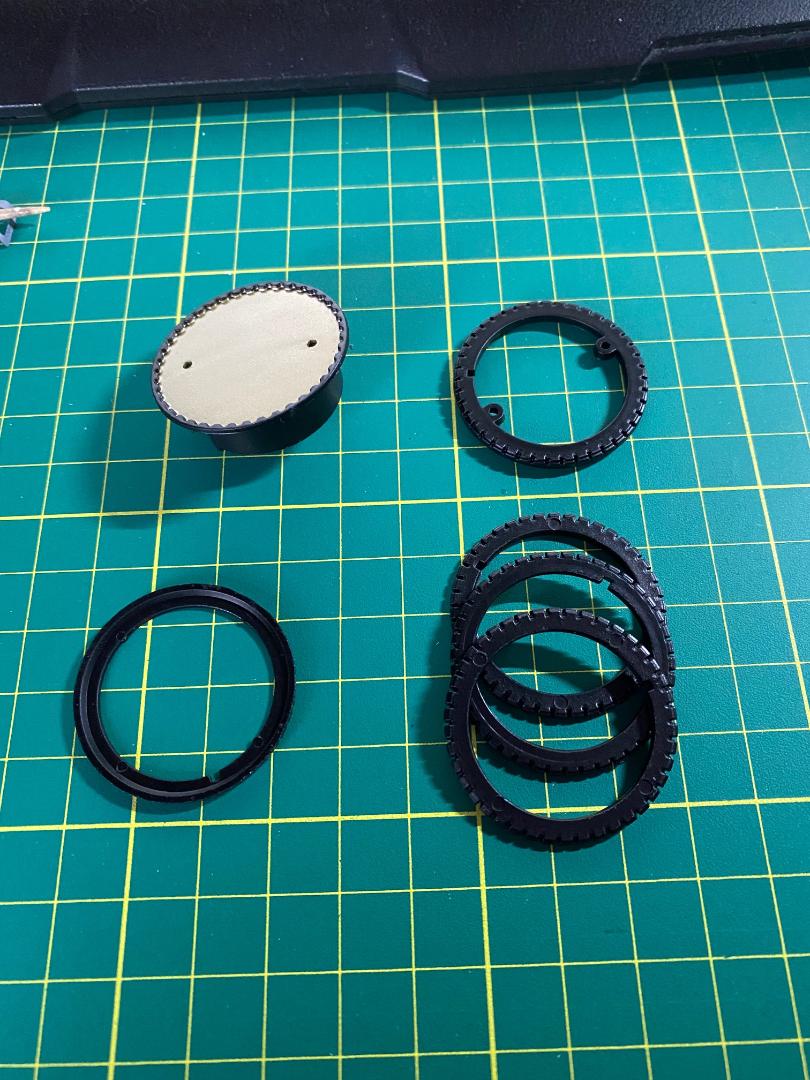
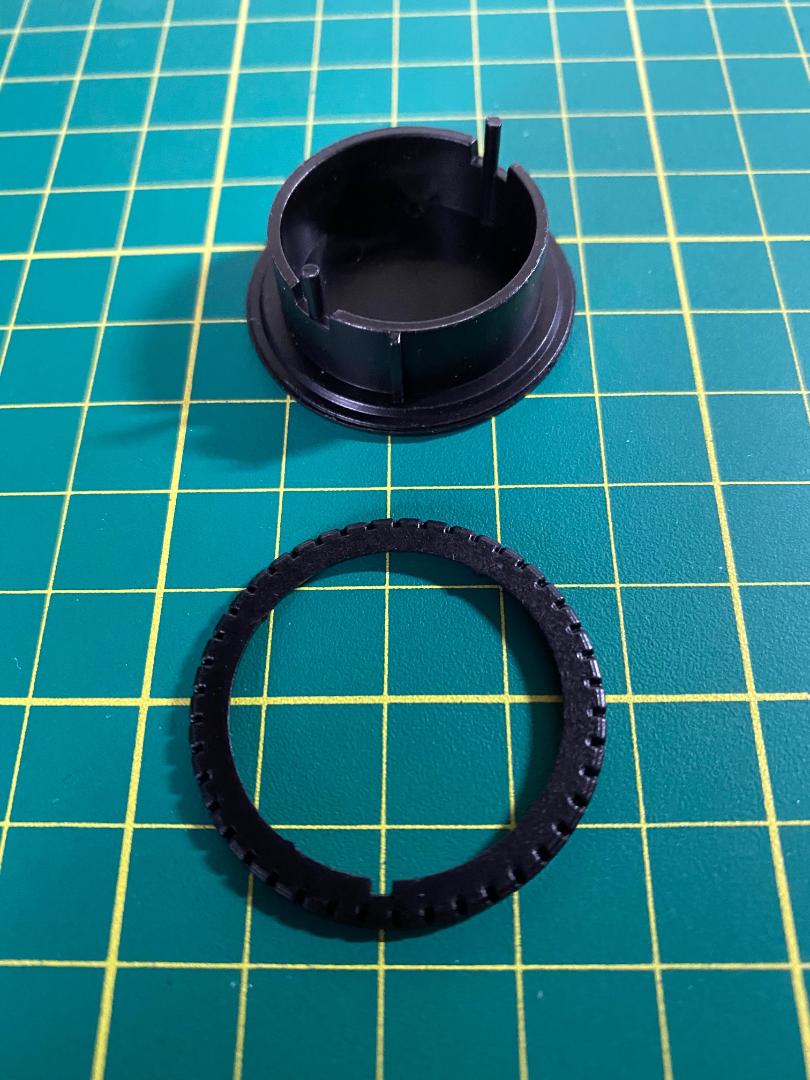
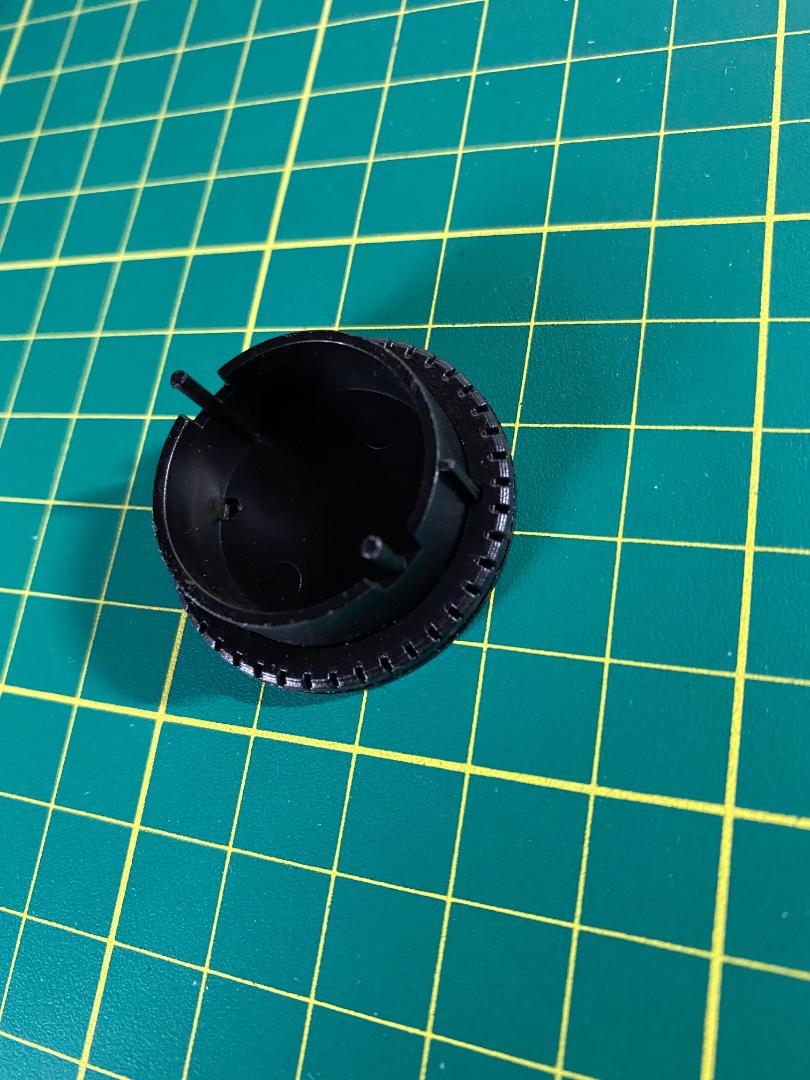
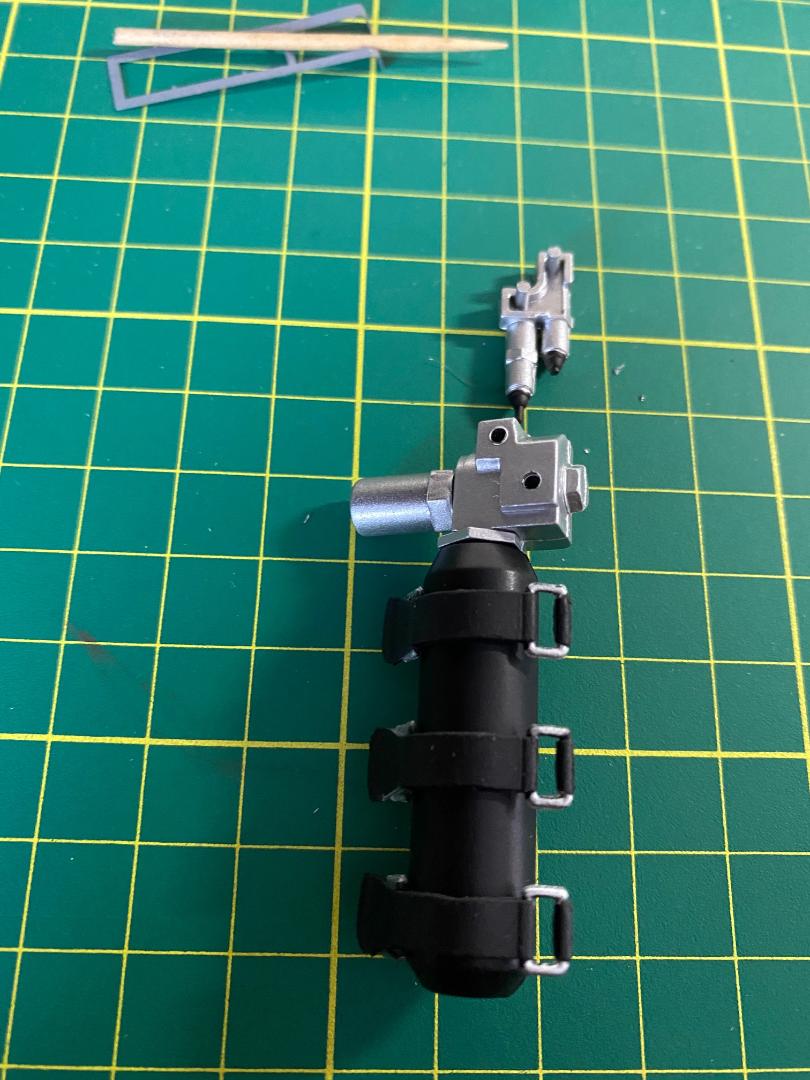
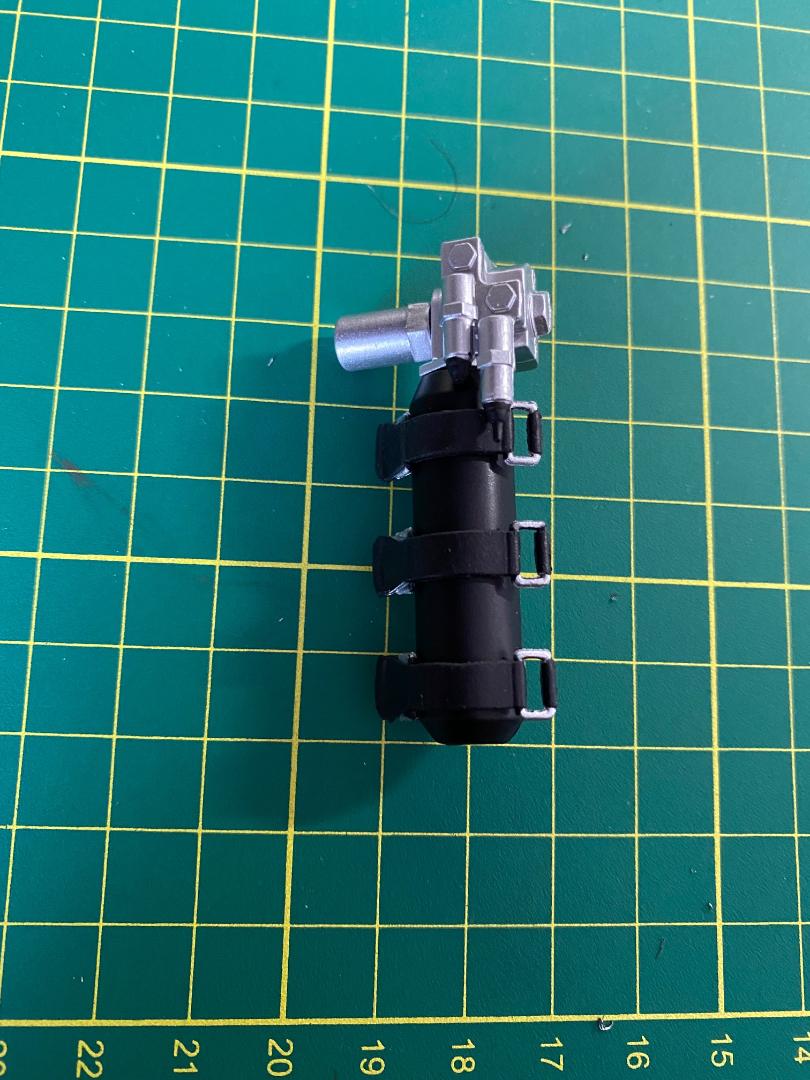
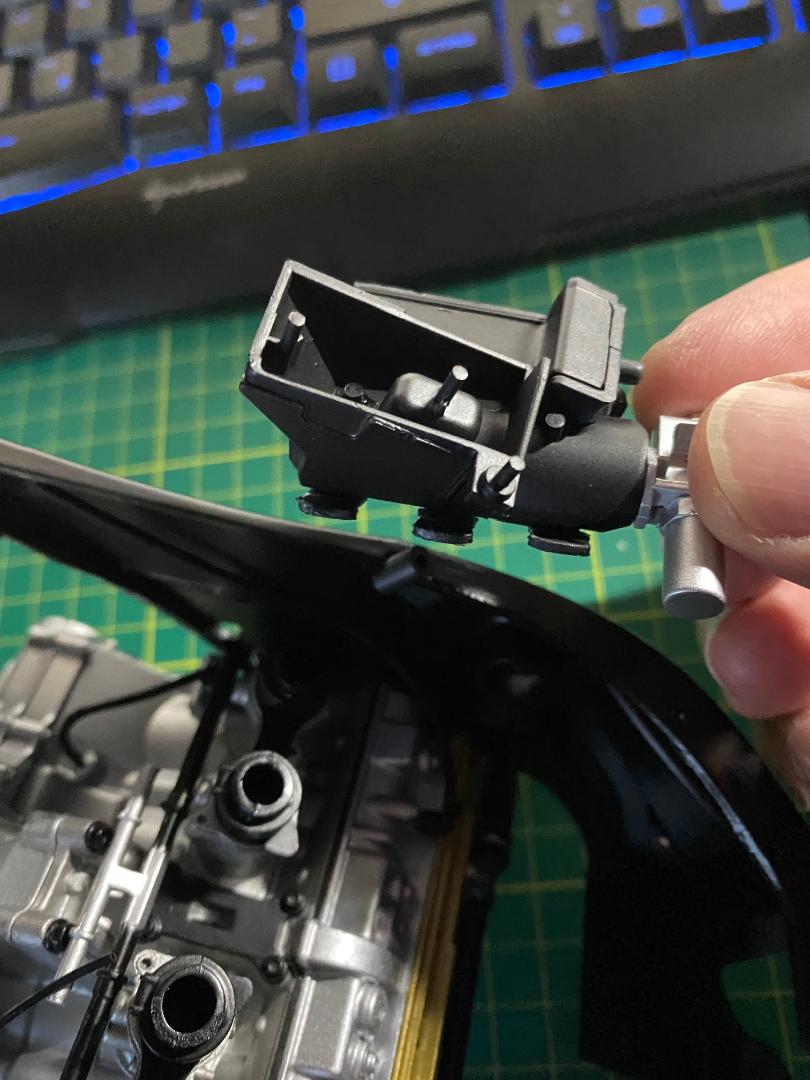
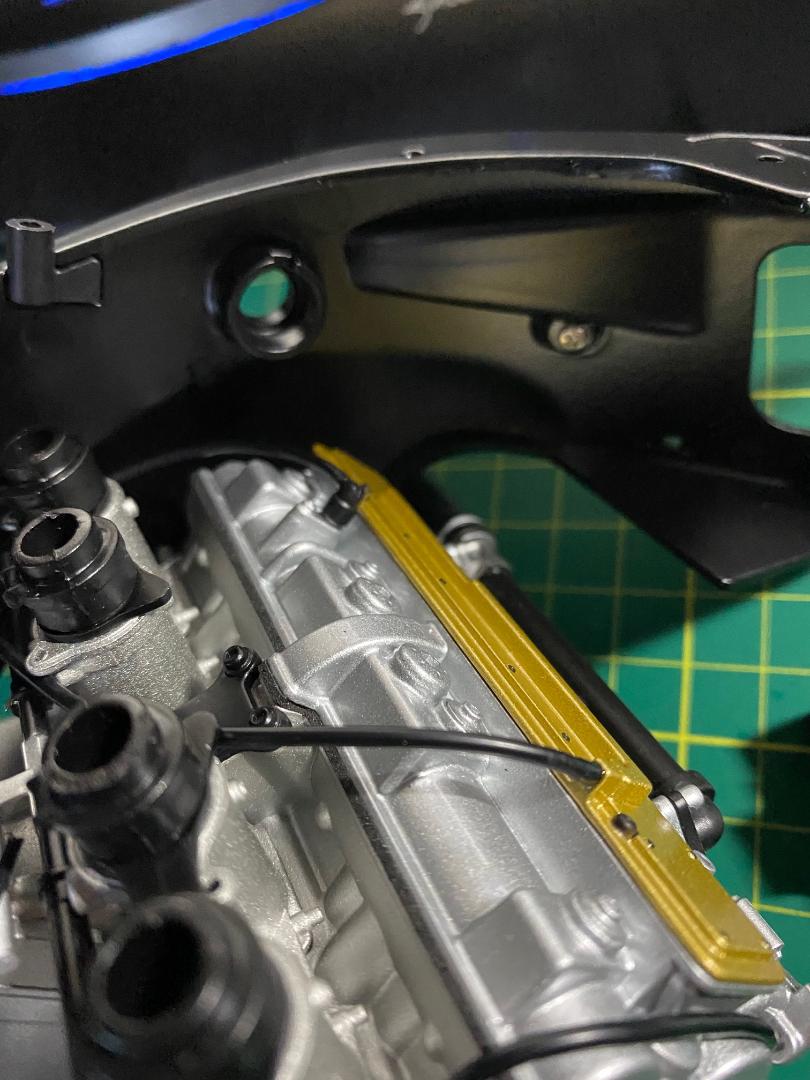
DER DRUCKLUFTBEHÄLTER UND DIE HALTERUNG:
Viele Plastikteile, die sich stur nach Anleitung und fast komplett ohne Klebstoff zusammensetzen lassen. Die drei Klammern sind aus Gummi und ihre jeweils zwei Stifte müssen beim Einsetzen in die schrägen Löcher gut geführt werden. Sonst biegen sie einfach weg.
 " />
" /> " />
" /> " />
" /> " />
" /> " />
" /> " />
" /> " />
" /> " />
" /> " />
" /> " />
" /> " />
" /> " />
" /> " />
" /> " />
" /> " />
" />Als Nächstes geht es demnächst mit dem ersten Motorrahmen und anderen frisch gelieferten 6 Bauschritten weiter.
Maddin- Schneidmatten-Virtuose
Re: Valentino Rossi's Yamaha YZR M1 in 1:4 von DeAgostini
![]() von Maddin Sa 12 Feb 2022, 12:34
von Maddin Sa 12 Feb 2022, 12:34
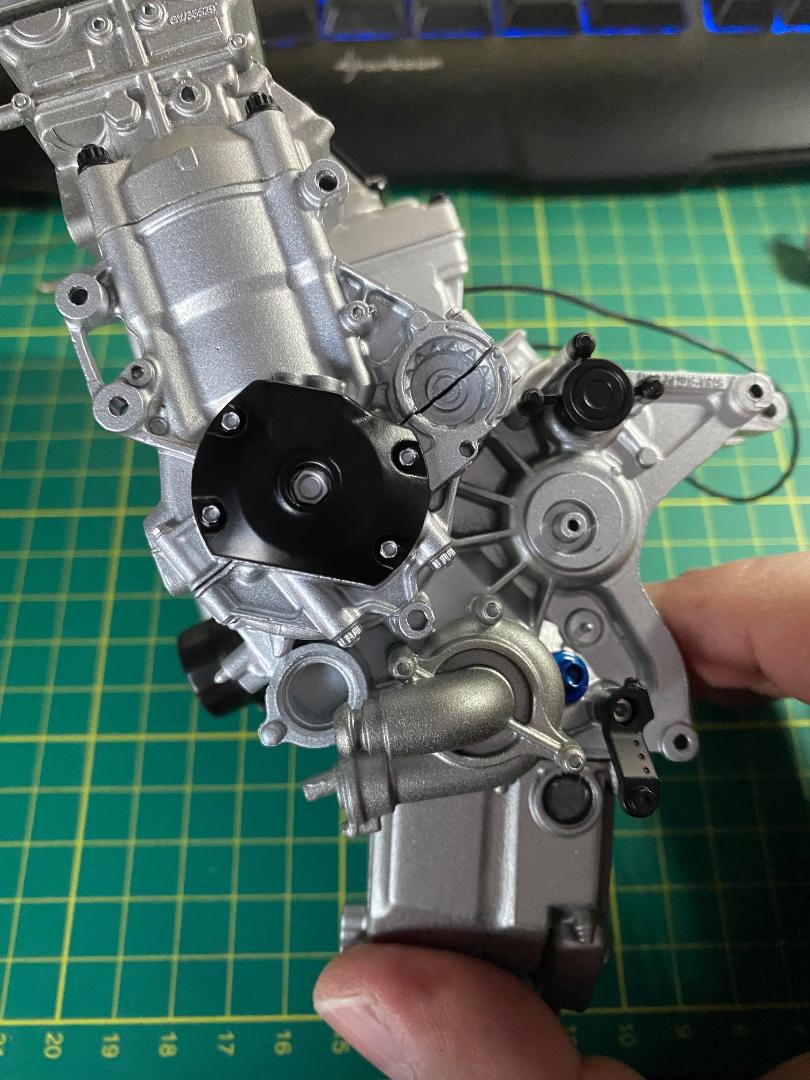
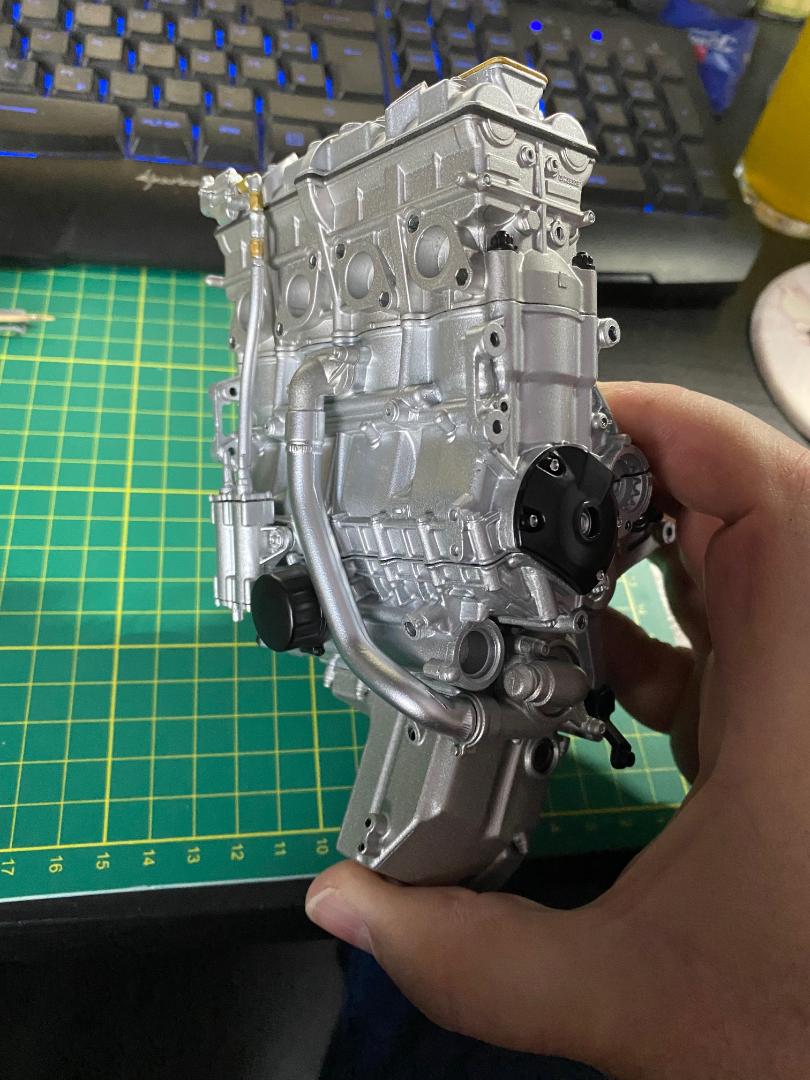
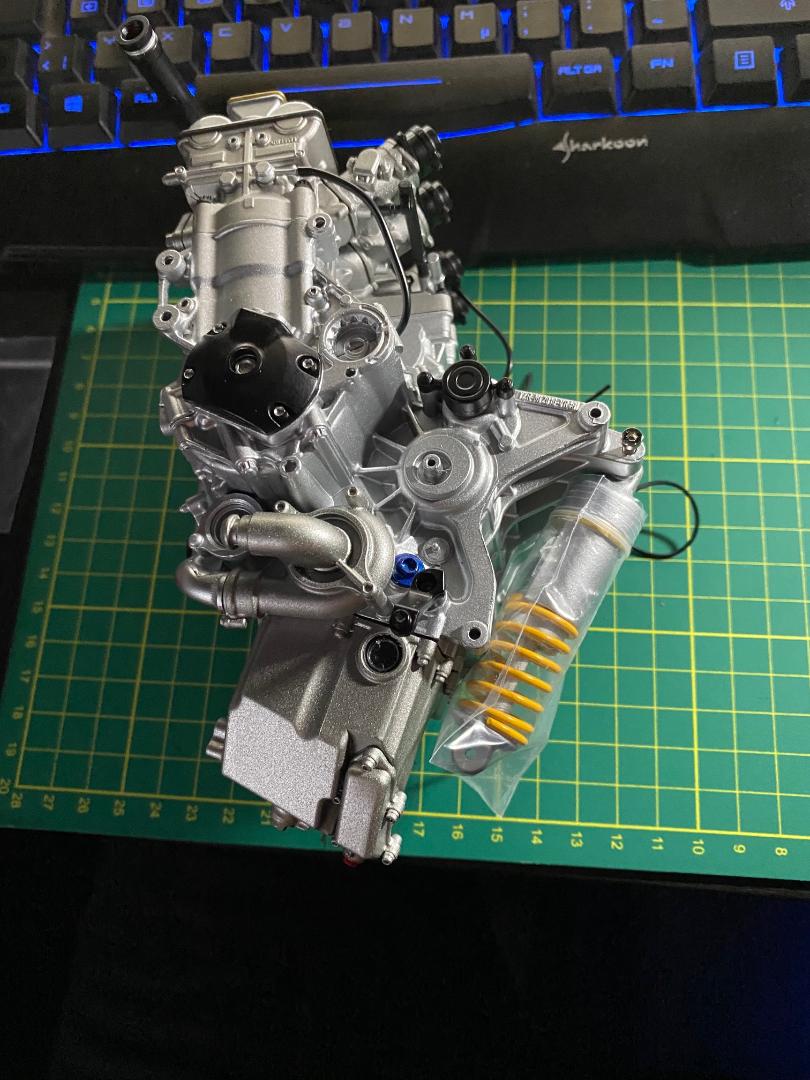
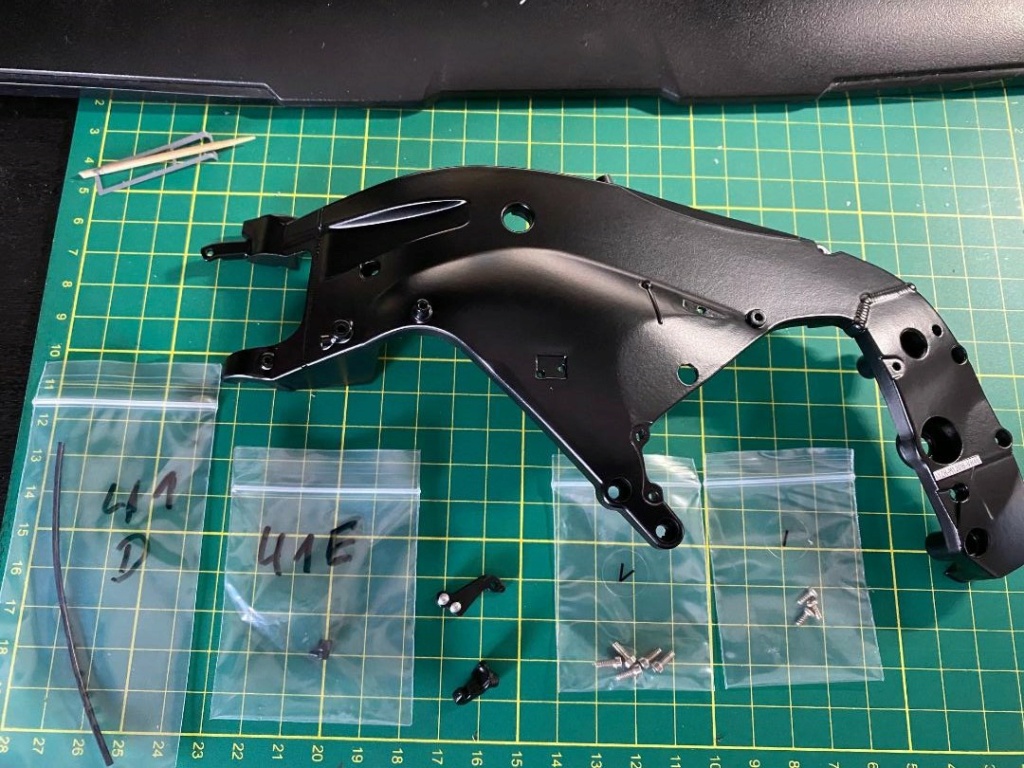
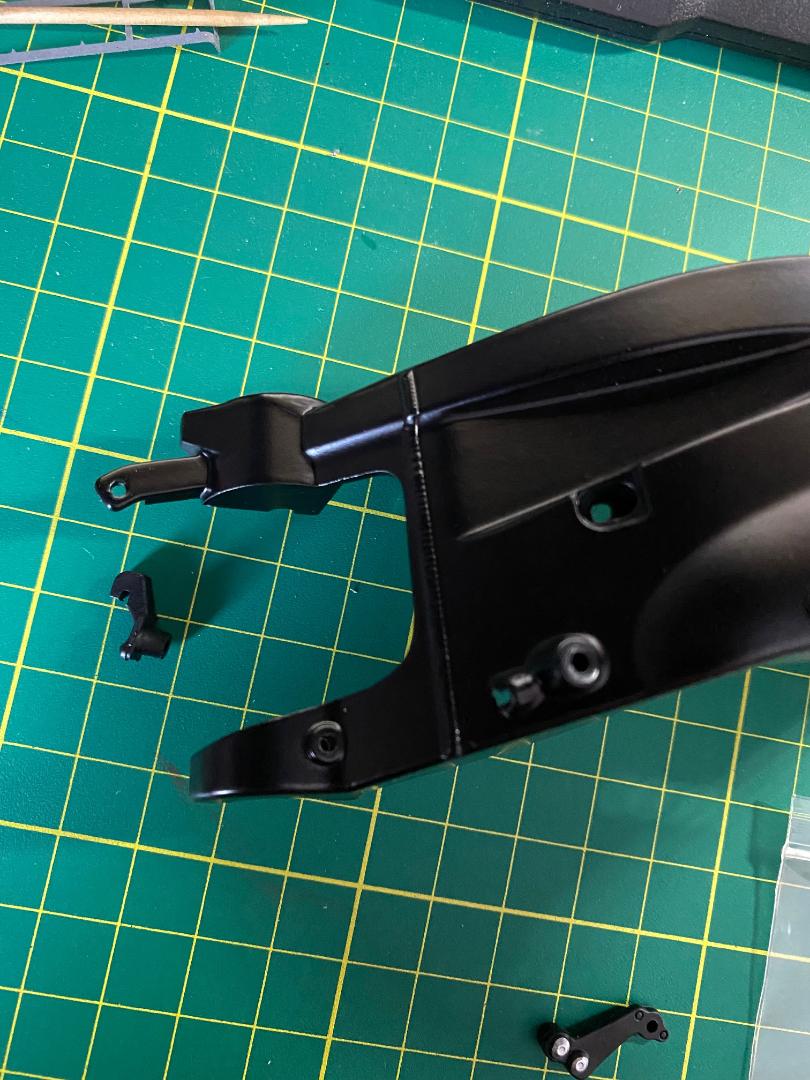
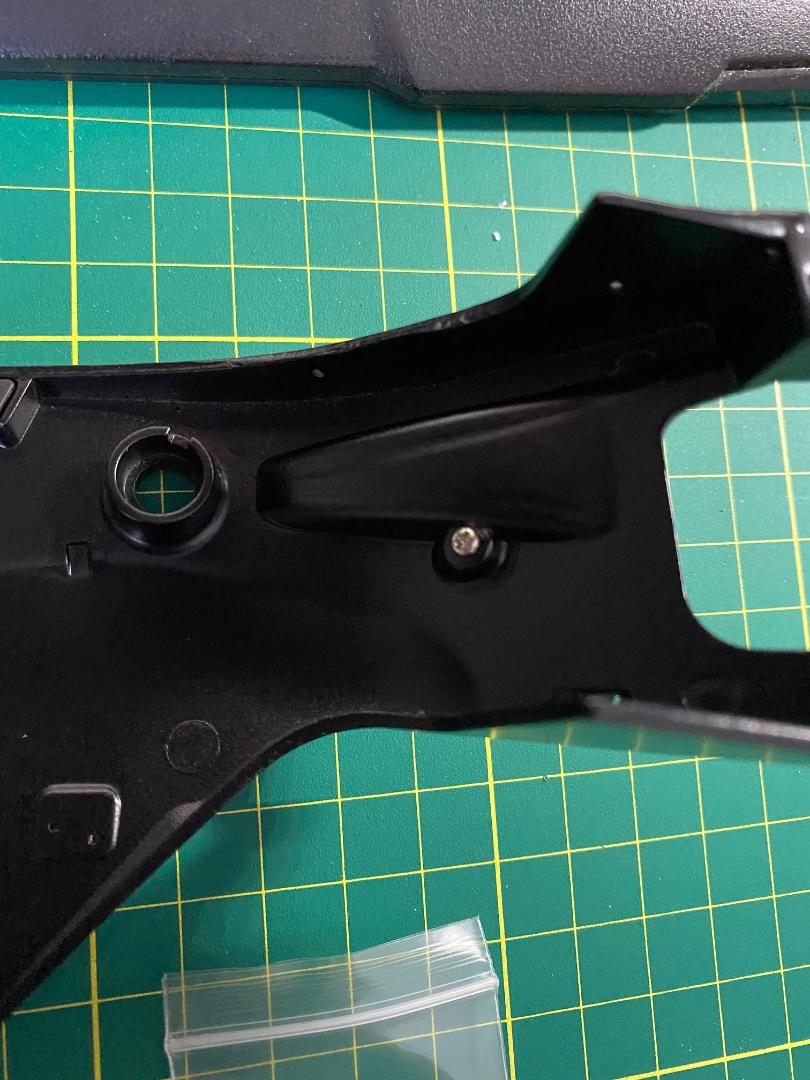
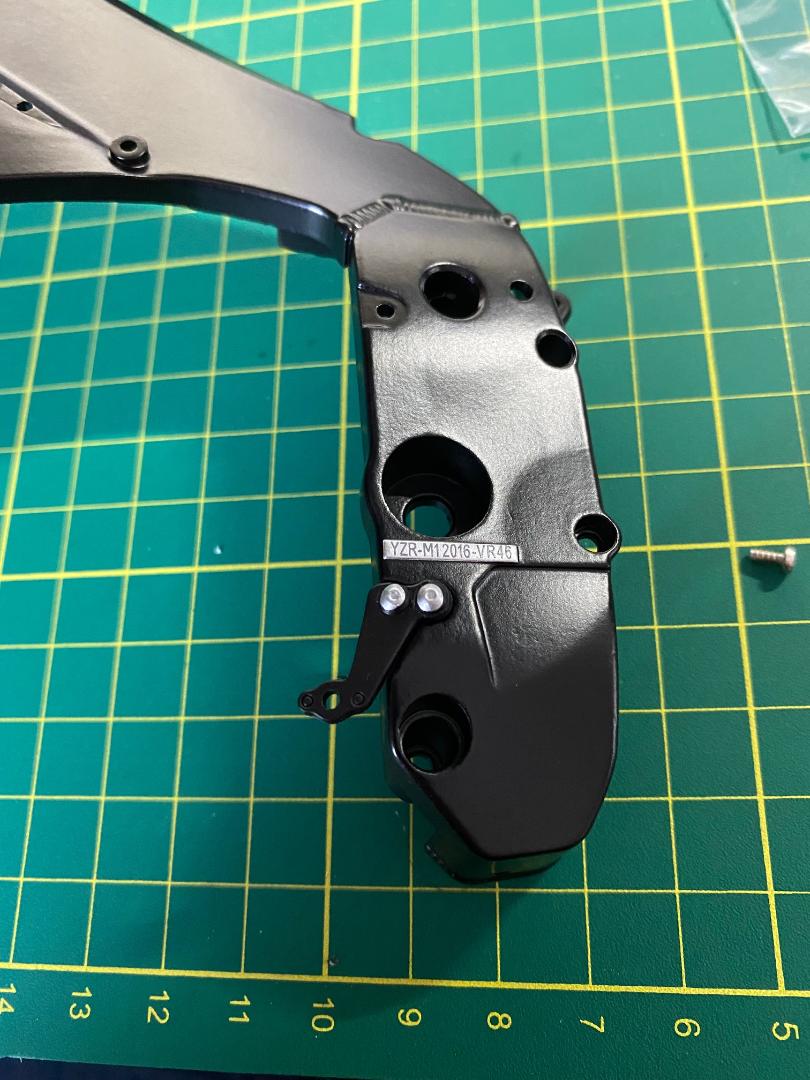
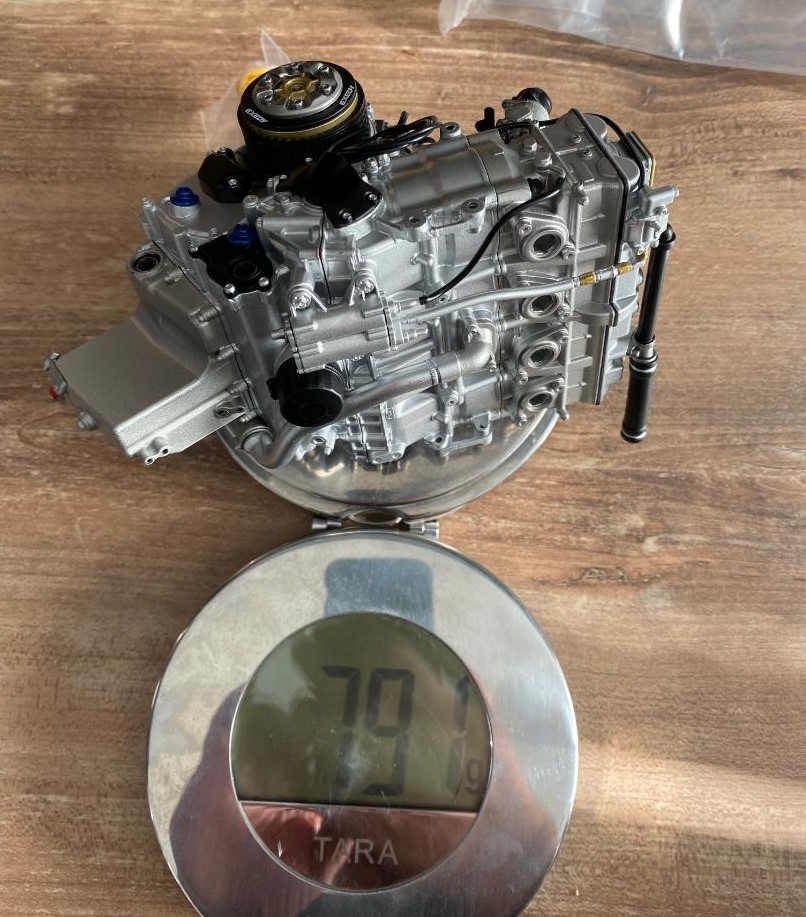
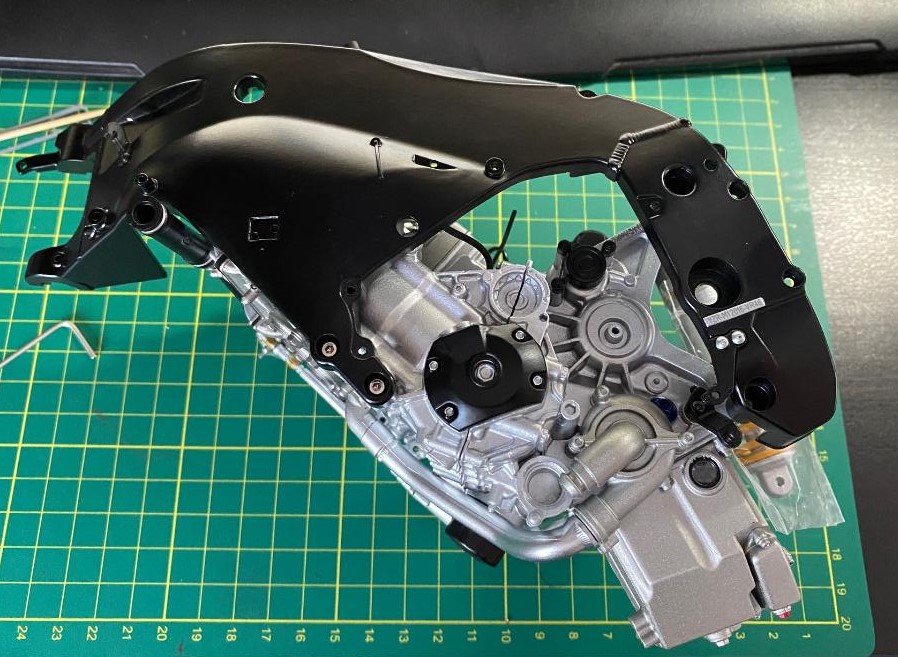
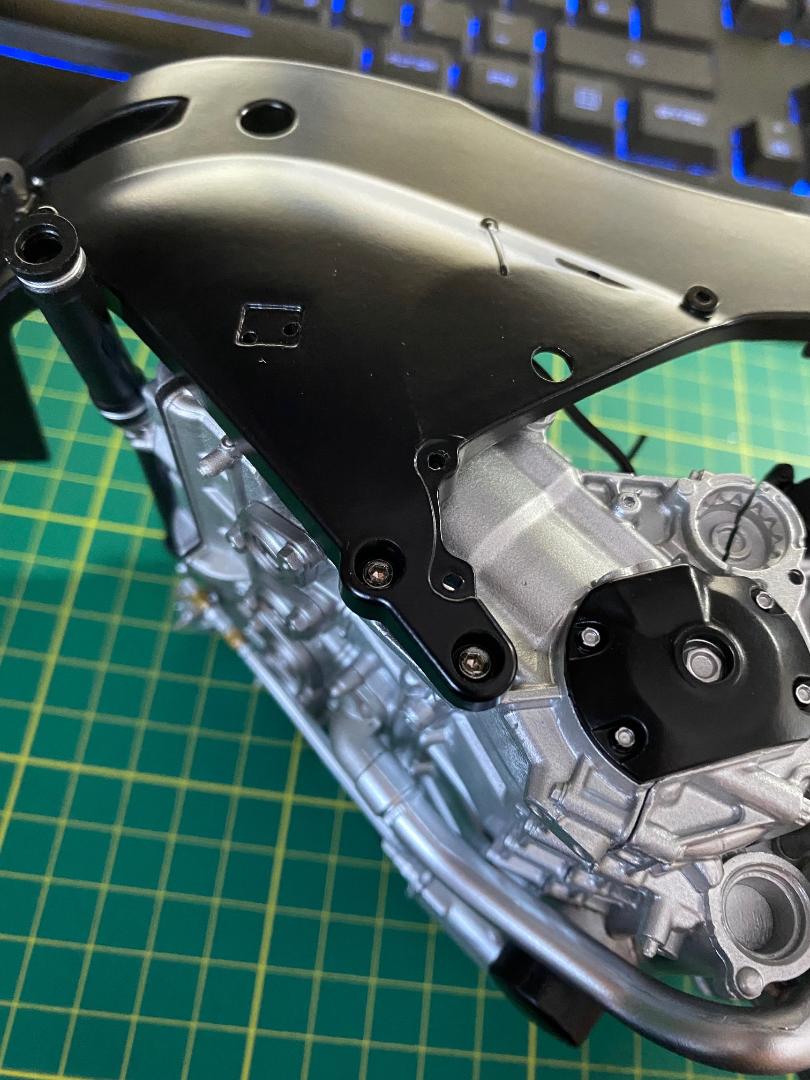
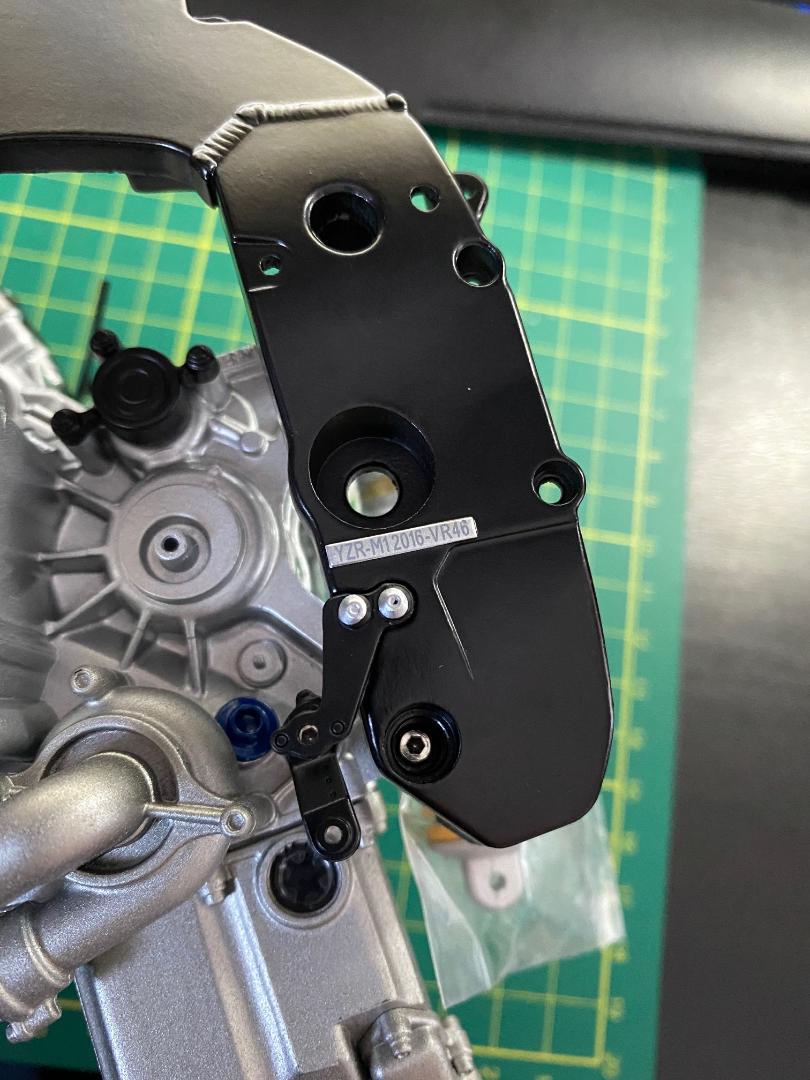
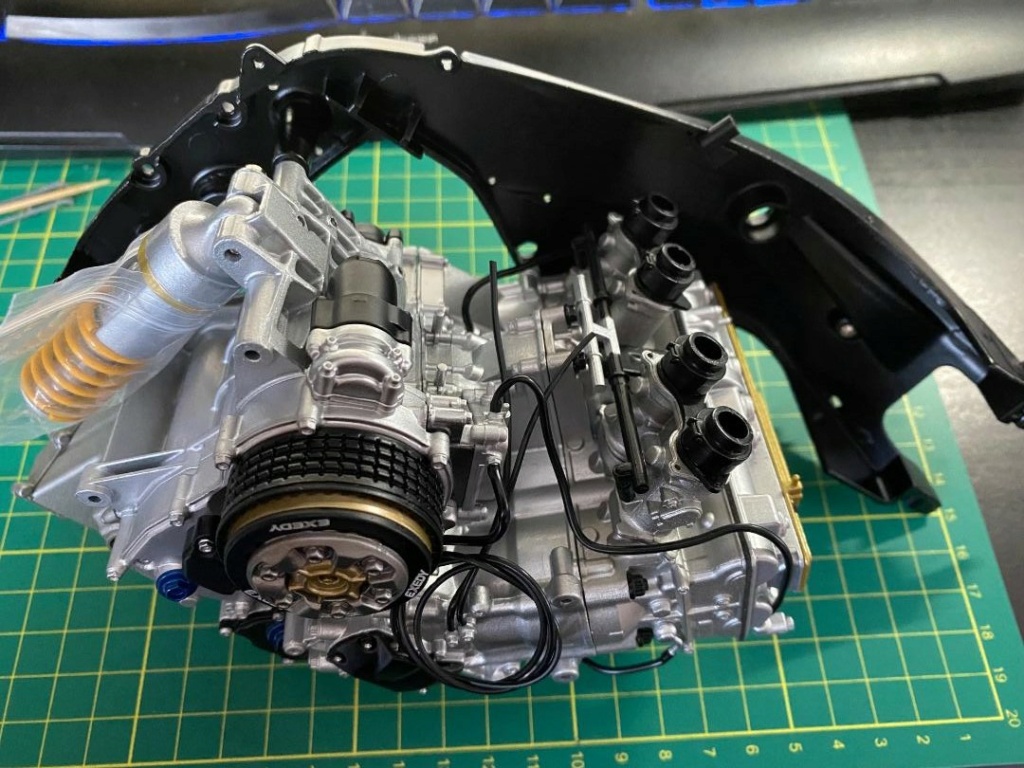
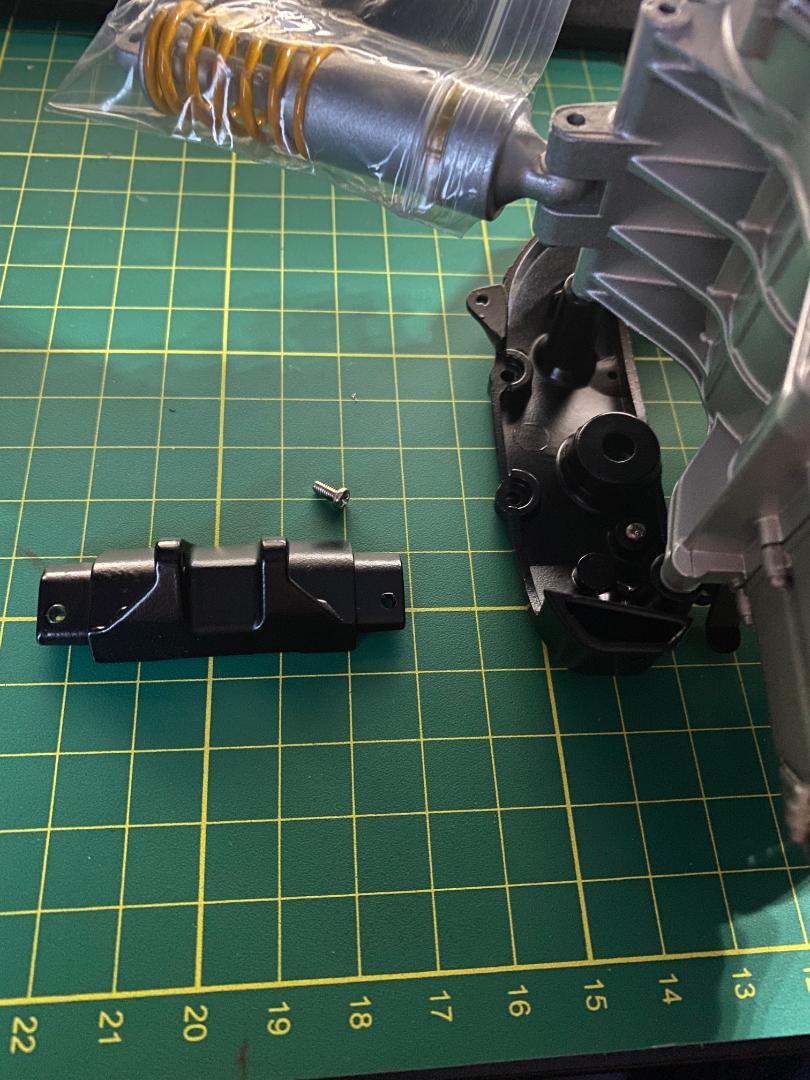
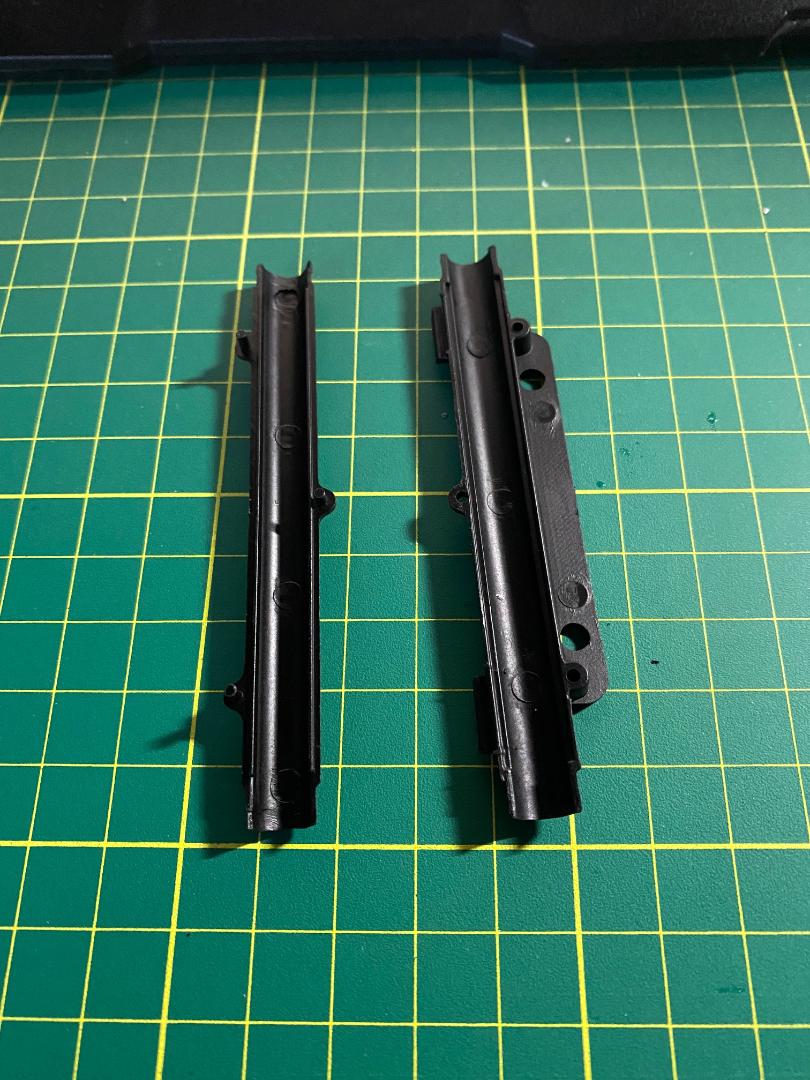
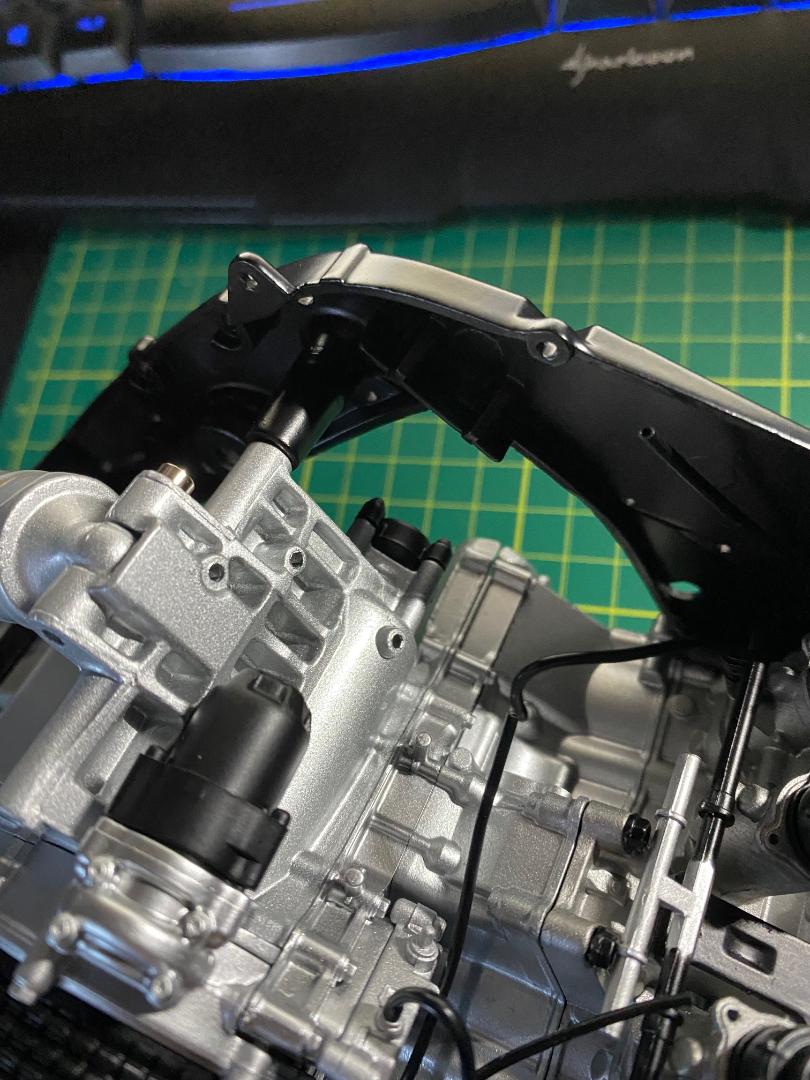
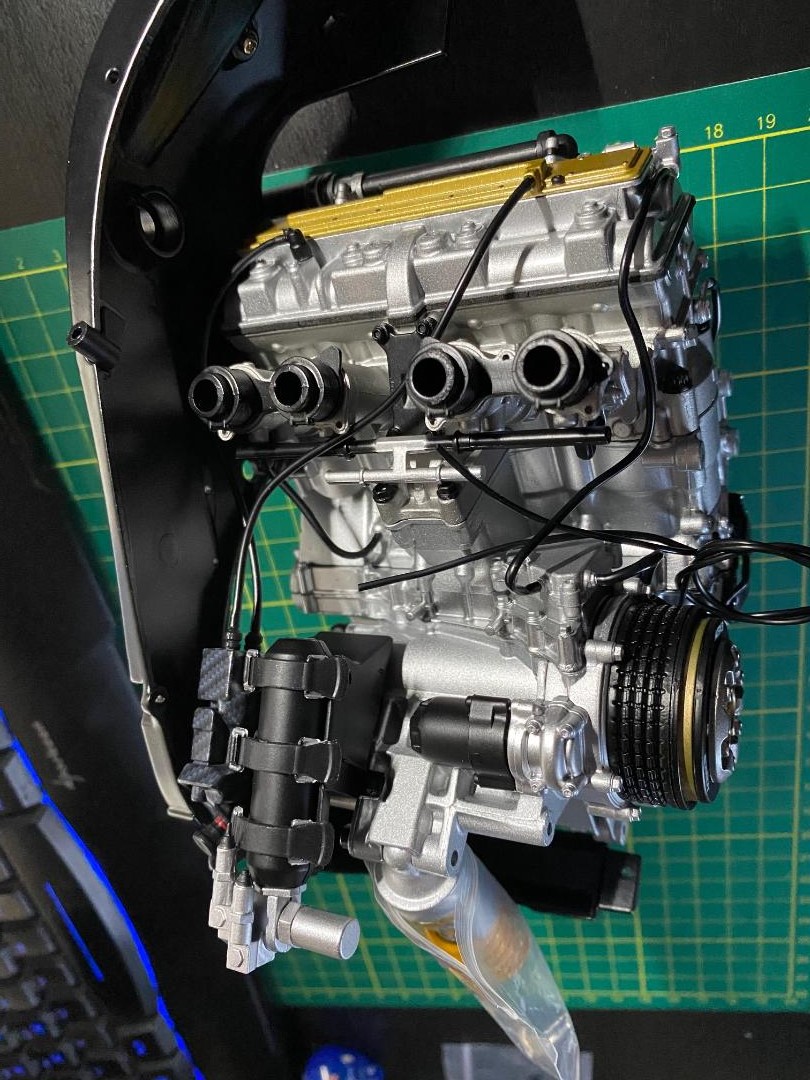
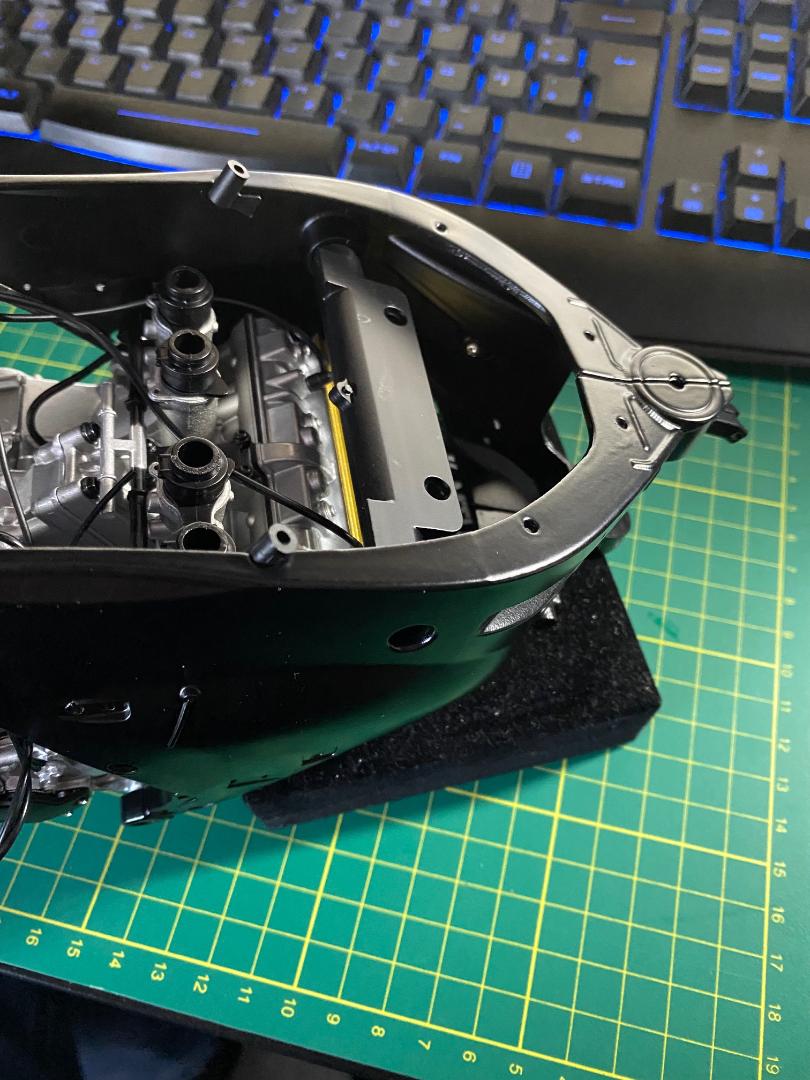
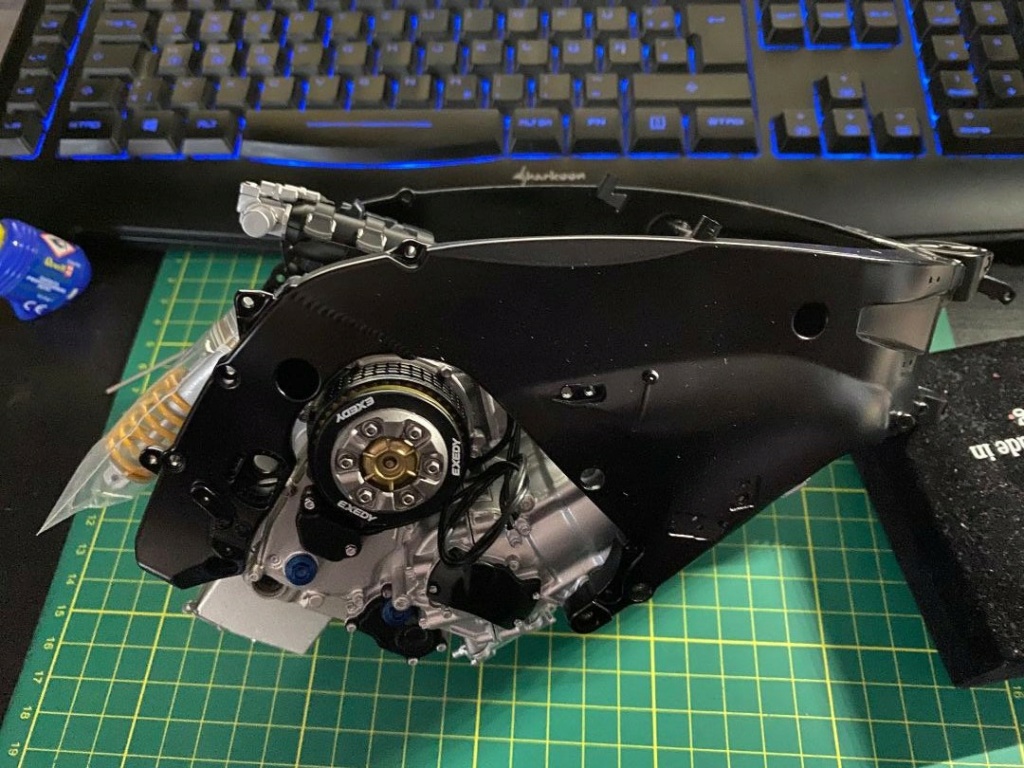
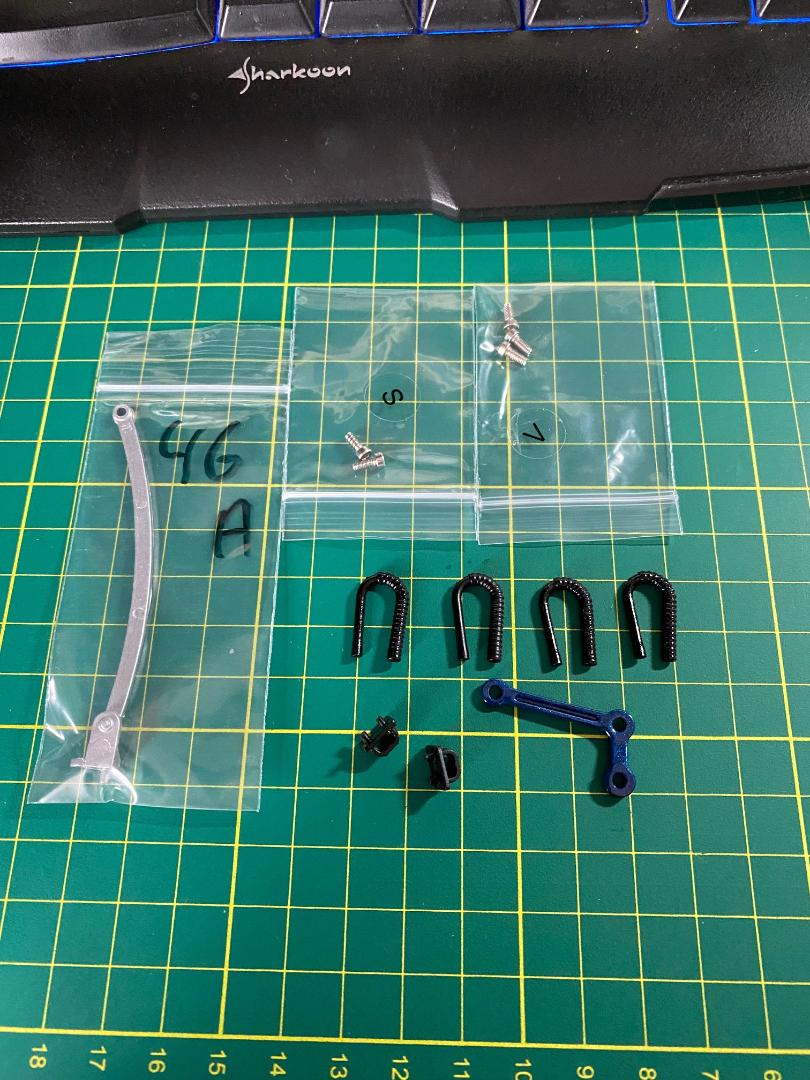
DER LINKE MONOBALKEN DES FAHRGESTELLS
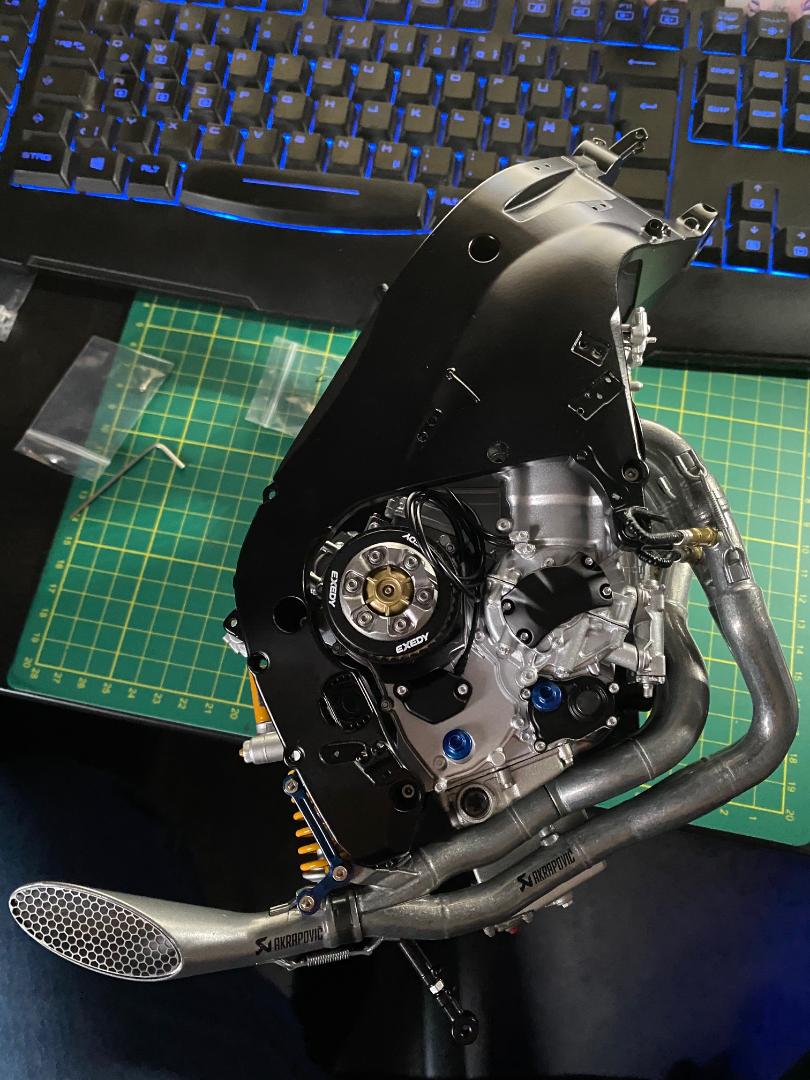
Sehr schönes und gut lackiertes Metallteil mit zwei kleinen Metallhalterungen, die angeschraubt werden. Danach wird das Ganze mit vier Inbus-Schrauben an der linken Seite des Motors angeschraubt. Es sind auch noch ein kleiner Adapter und ein Schlauch dabei, die später angebaut werden. Letzte Chance für mich, den Motor mal allein zu wiegen. Er bringt allein knapp 800 Gramm auf die Waage.
 " />
" /> " />
" /> " />
" /> " />
" /> " />
" /> " />
" /> " />
" /> " />
" /> " />
" /> " />
" /> " />
" /> " />
" /> " />
" />
Maddin- Schneidmatten-Virtuose
Frank Kelle und doc_raven1000 mögen diesen Beitrag
Re: Valentino Rossi's Yamaha YZR M1 in 1:4 von DeAgostini
![]() von Maddin Di 15 Feb 2022, 08:35
von Maddin Di 15 Feb 2022, 08:35
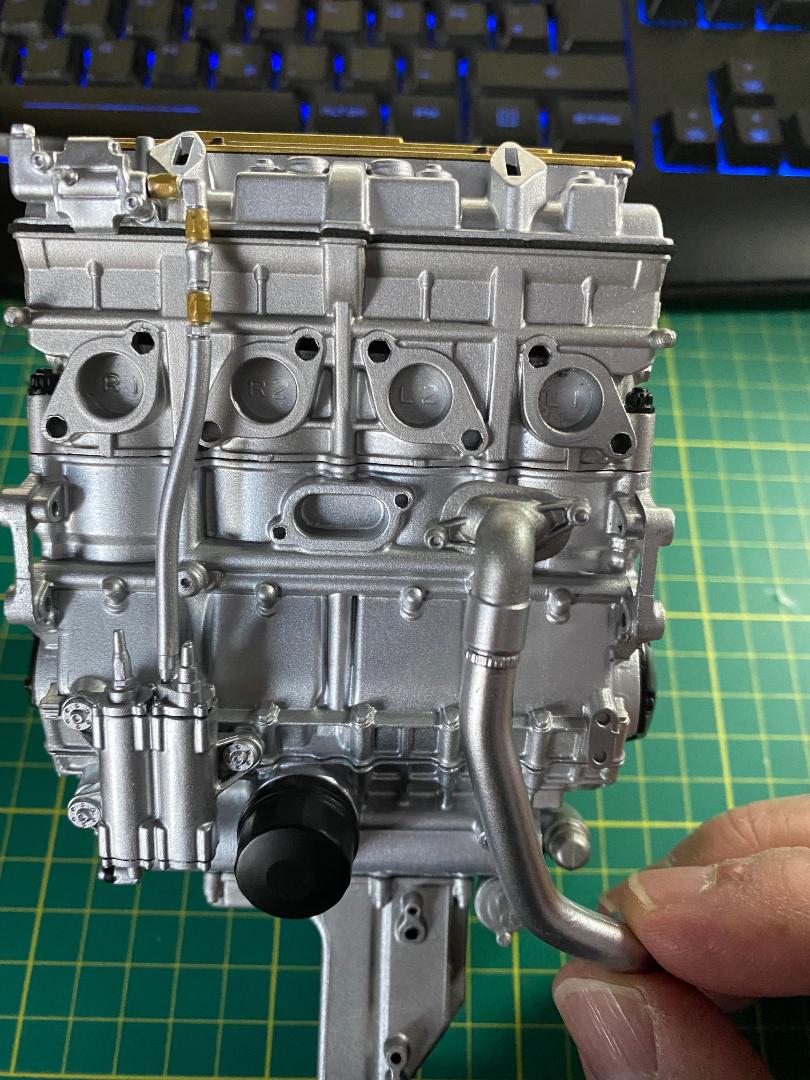
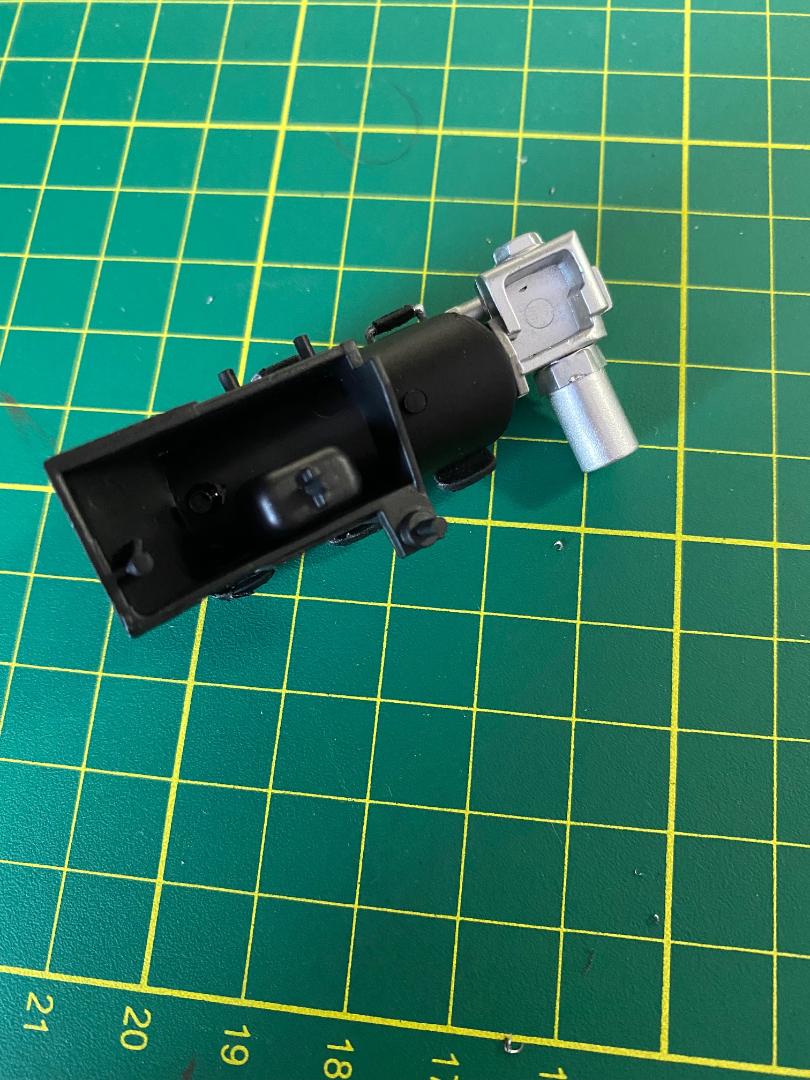
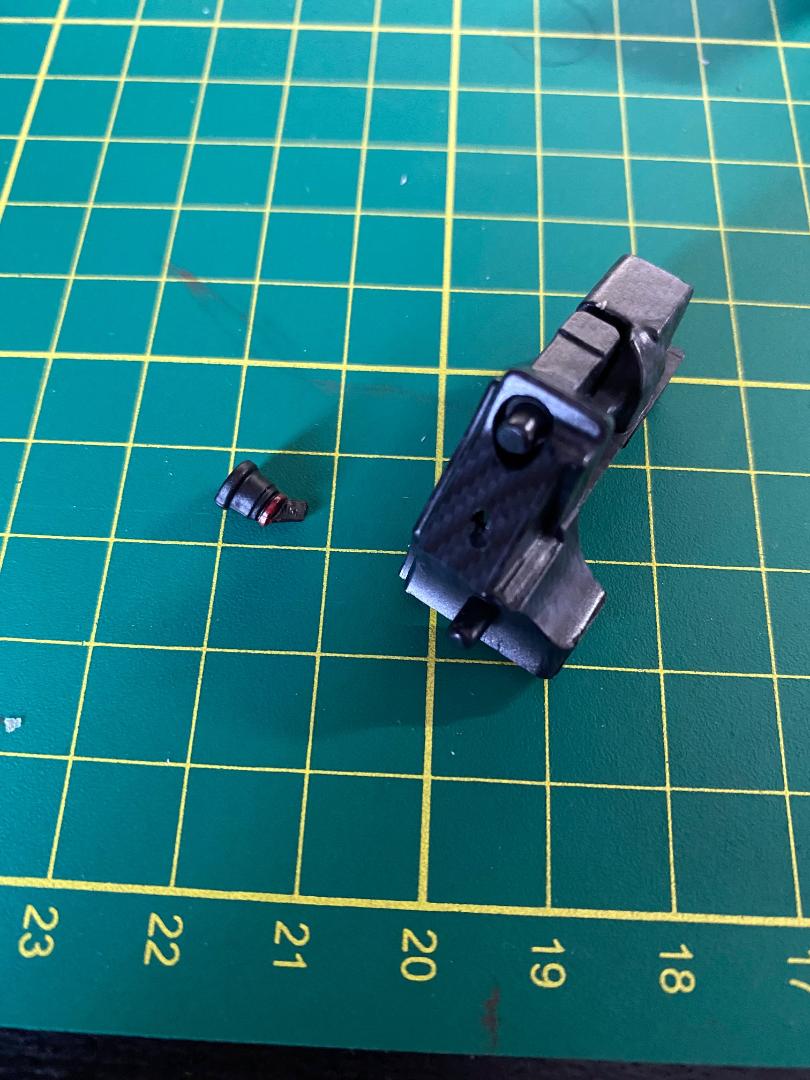
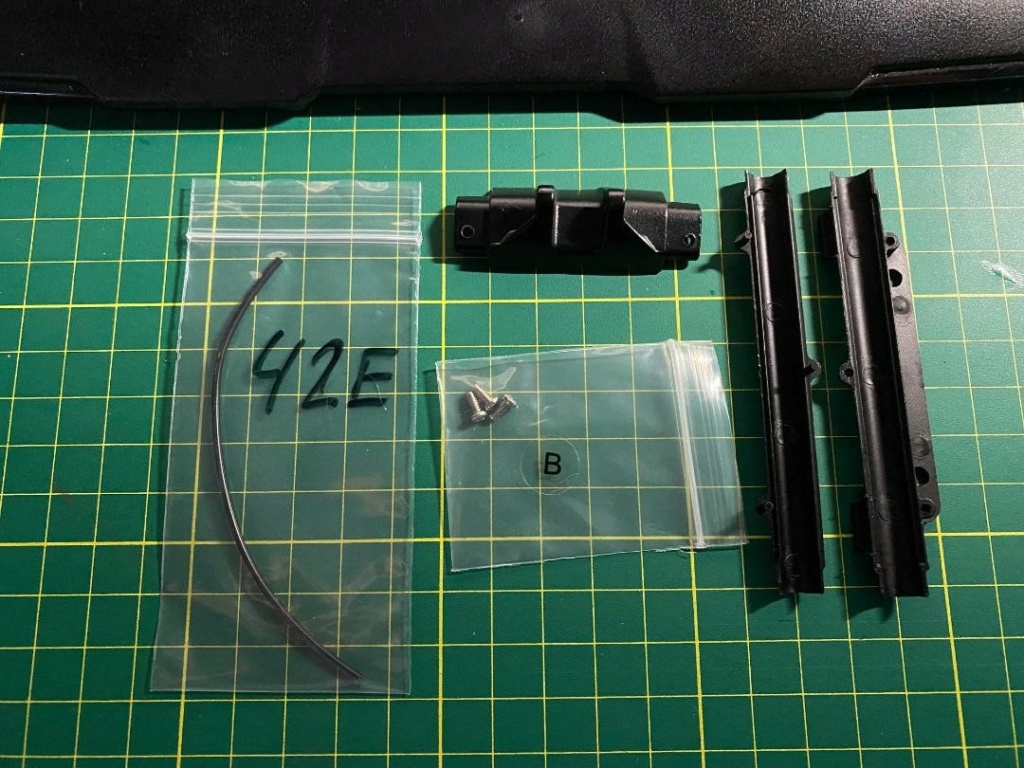
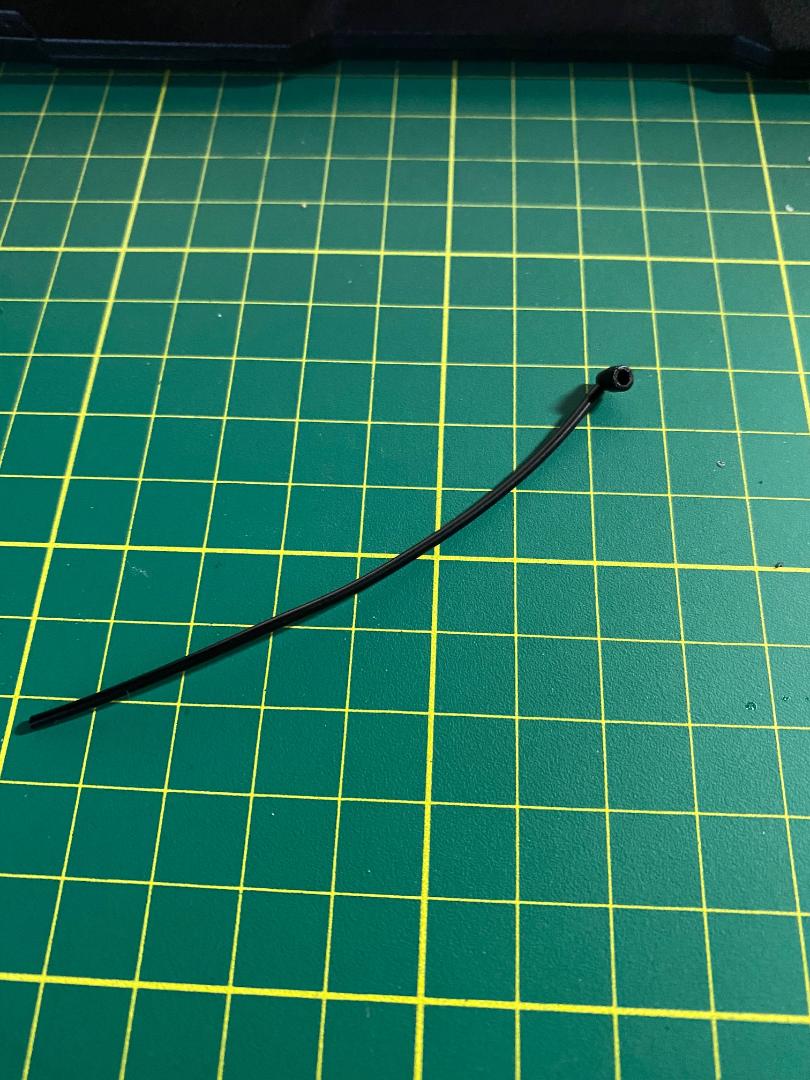
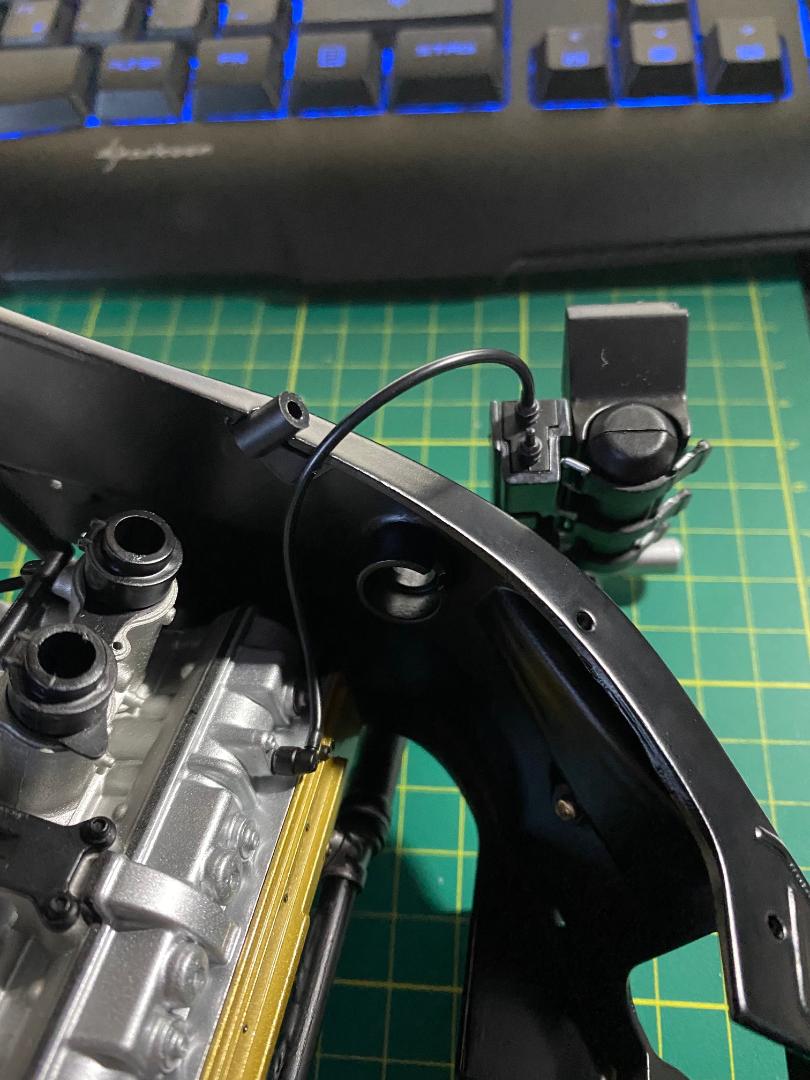
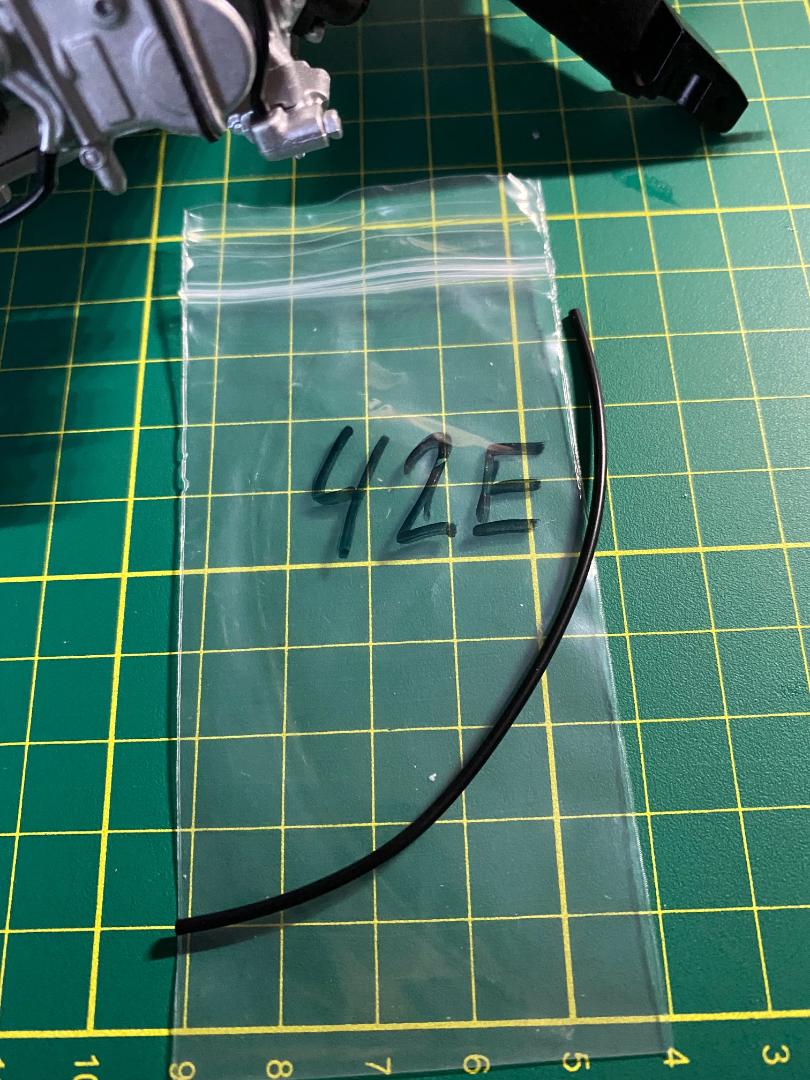
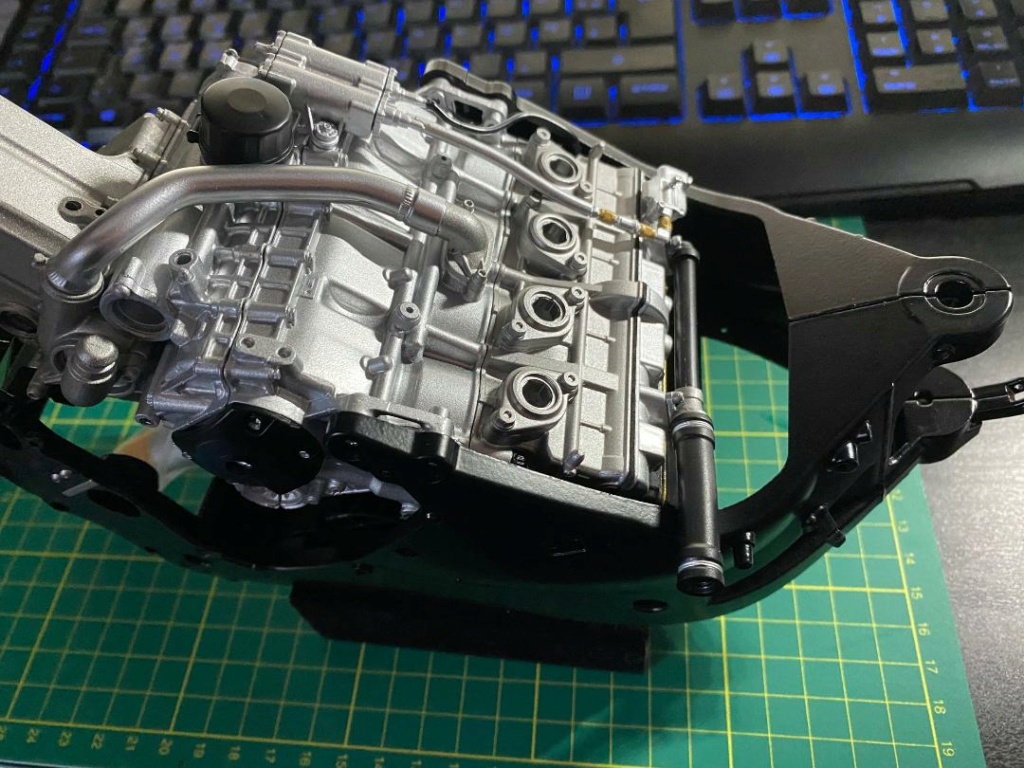
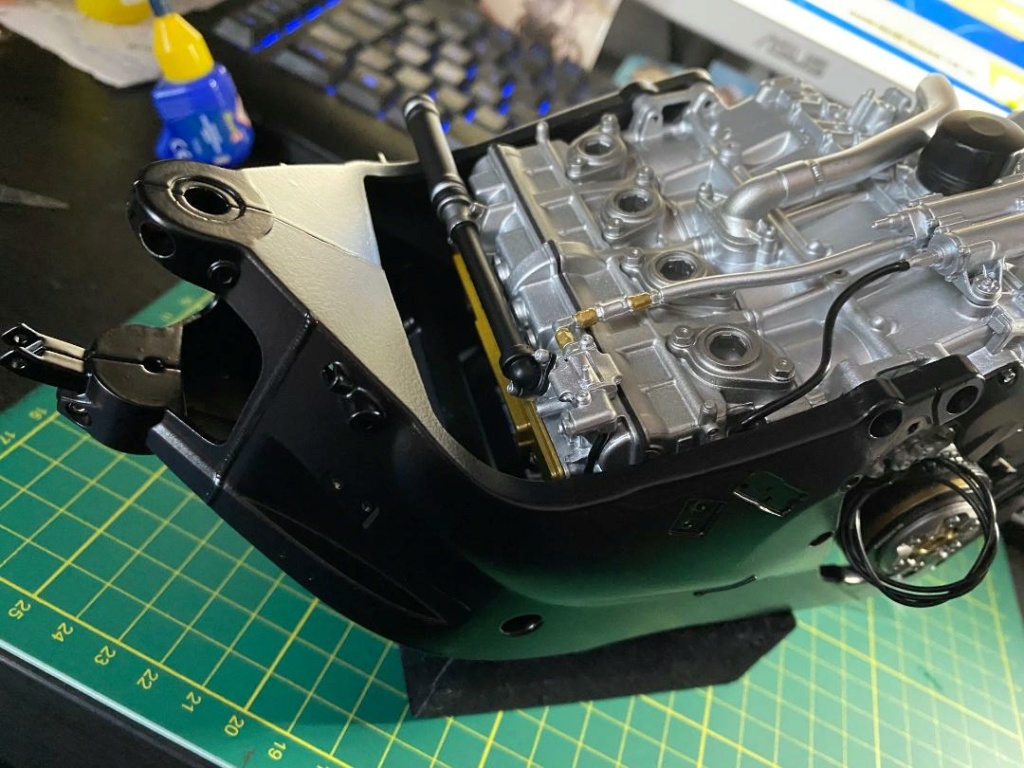
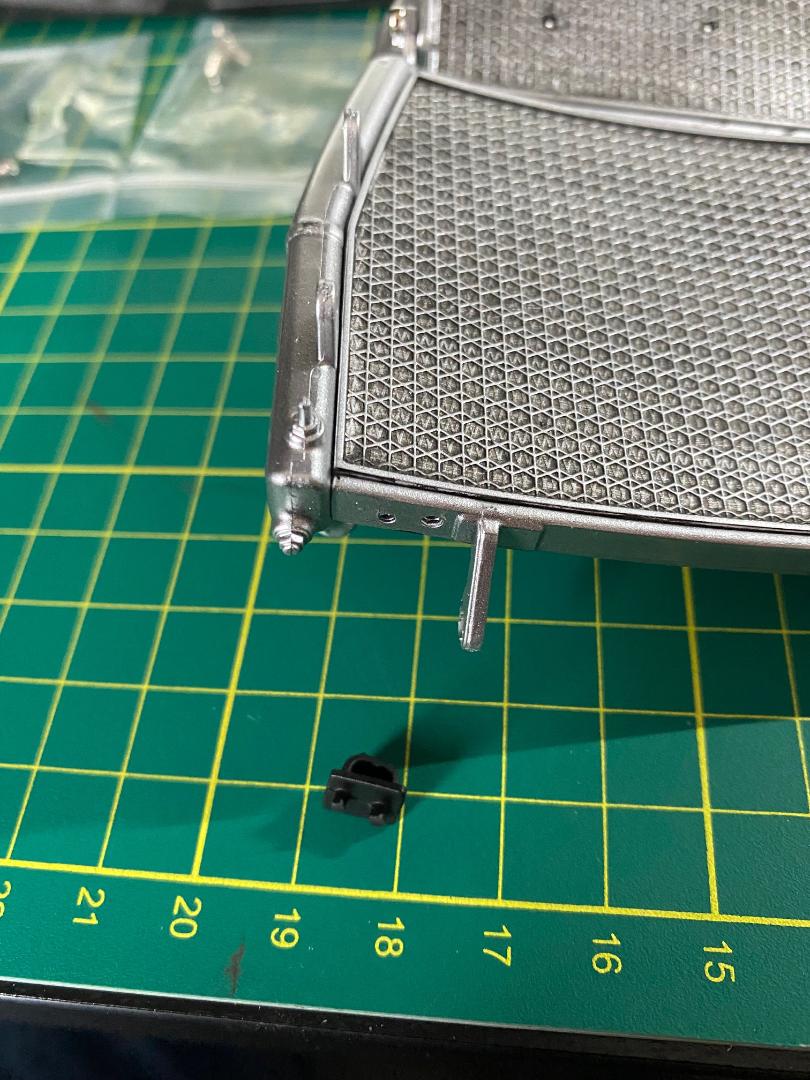
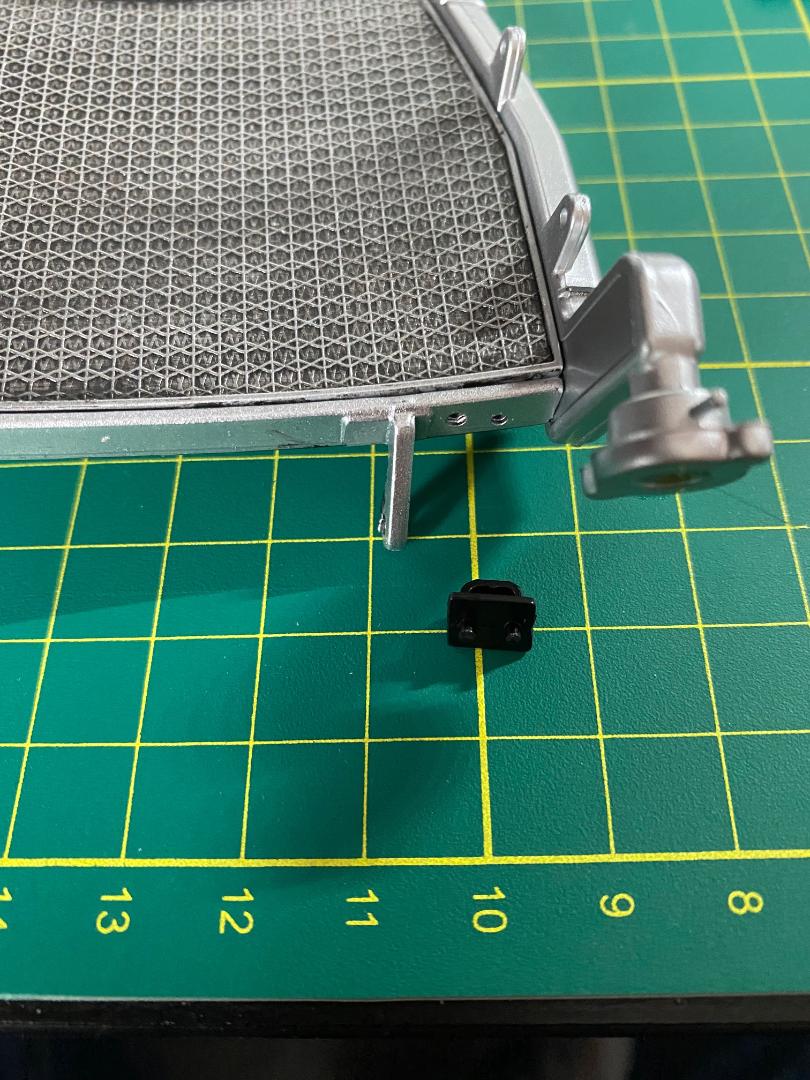
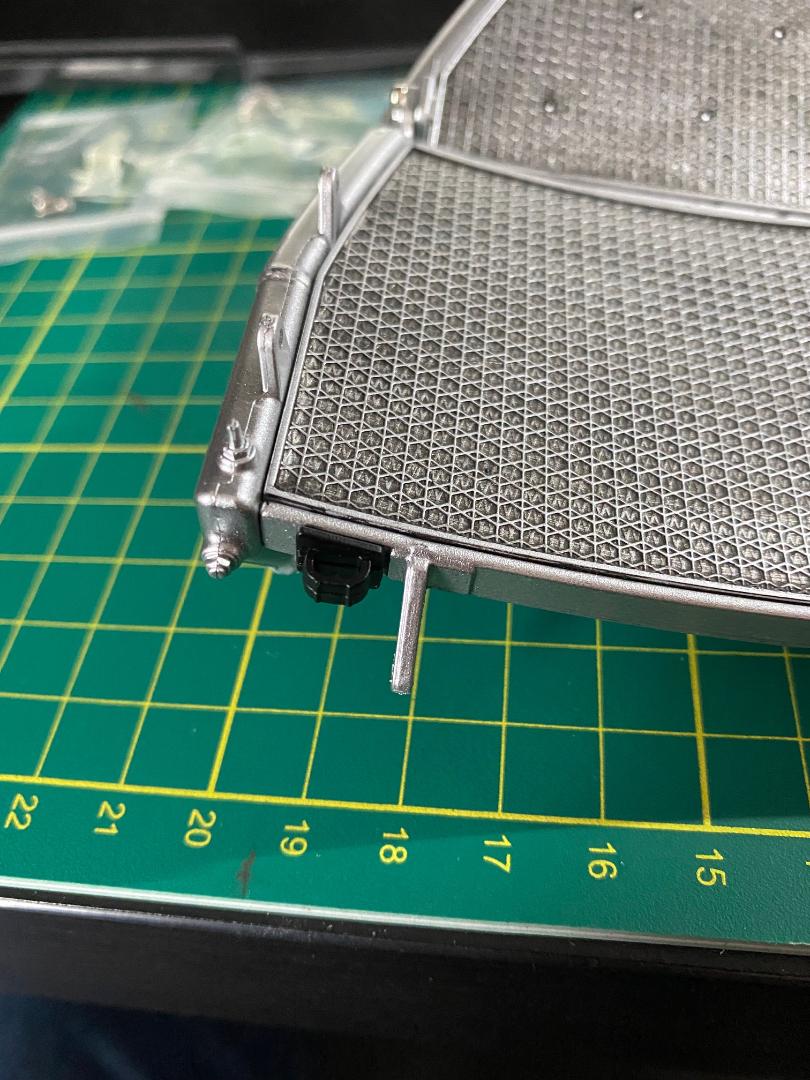
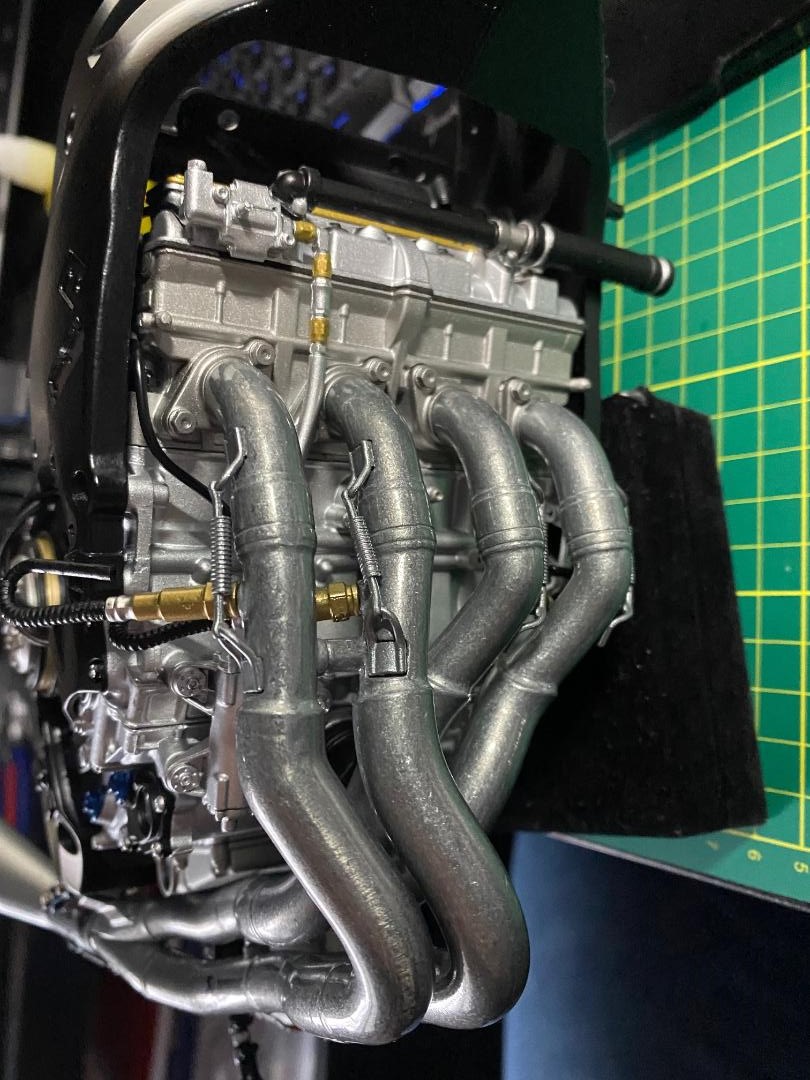
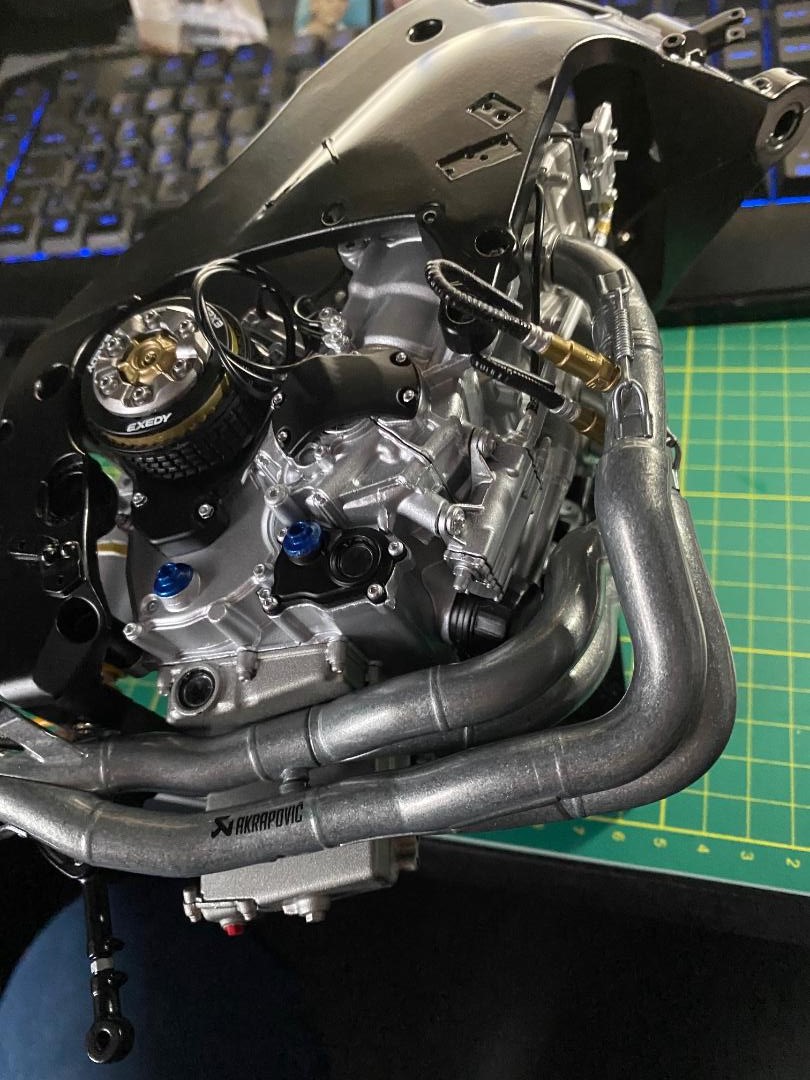
Und weiter geht`s mit dem Druckluftbehälter und den beiden Querstreben des Motorrahmens. Die untere, hintere Querstrebe ist aus Metall, wird recht stramm in ihre Aufnahme geschoben, festgeklopft und mit einer Schraube gesichert. die obere Querstrebe ist aus Kunststoff und wird einfach zusammengedrückt. Ich habe die drei Stifte mit Klebstoff gesichert. Die Schlauchleitung mit Adapter aus Bauschritt 41 und der Schlauch aus Bauschritt 42 werden am Motor mit Sekundenkleber fixiert und an den beiden Anschlüssen des Druckbehälters aufgesteckt. Sie gehen da sehr stramm drauf, sodaß ich hier auf Kleber verzichtet habe. Das Ganze wird dann, mit Sekundenkleber gesichert, mit drei Stiftverbindungen auf den Motoblock gesteckt. Die Löcher mussten vorher gut entgratet und etwas geweitet werden, da ich Angst hatte, die Stifte sonst womöglich zu beschädigen. War recht stramm.
 " />
" /> " />
" /> " />
" /> " />
" /> " />
" /> " />
" /> " />
" /> " />
" /> " />
" /> " />
" /> " />
" /> " />
" /> " />
" /> " />
" />
Maddin- Schneidmatten-Virtuose
Thoto mag diesen Beitrag
Re: Valentino Rossi's Yamaha YZR M1 in 1:4 von DeAgostini
![]() von Maddin Di 15 Feb 2022, 08:46
von Maddin Di 15 Feb 2022, 08:46
 " />
" /> " />
" /> " />
" /> " />
" /> " />
" /> " />
" /> " />
" /> " />
" /> " />
" /> " />
" />
Maddin- Schneidmatten-Virtuose
doc_raven1000, maxl, klaus.kl und Thoto mögen diesen Beitrag
Re: Valentino Rossi's Yamaha YZR M1 in 1:4 von DeAgostini
![]() von doc_raven1000 Di 15 Feb 2022, 08:52
von doc_raven1000 Di 15 Feb 2022, 08:52

doc_raven1000- Modellbaumeister
Re: Valentino Rossi's Yamaha YZR M1 in 1:4 von DeAgostini
![]() von Maddin Di 15 Feb 2022, 11:49
von Maddin Di 15 Feb 2022, 11:49
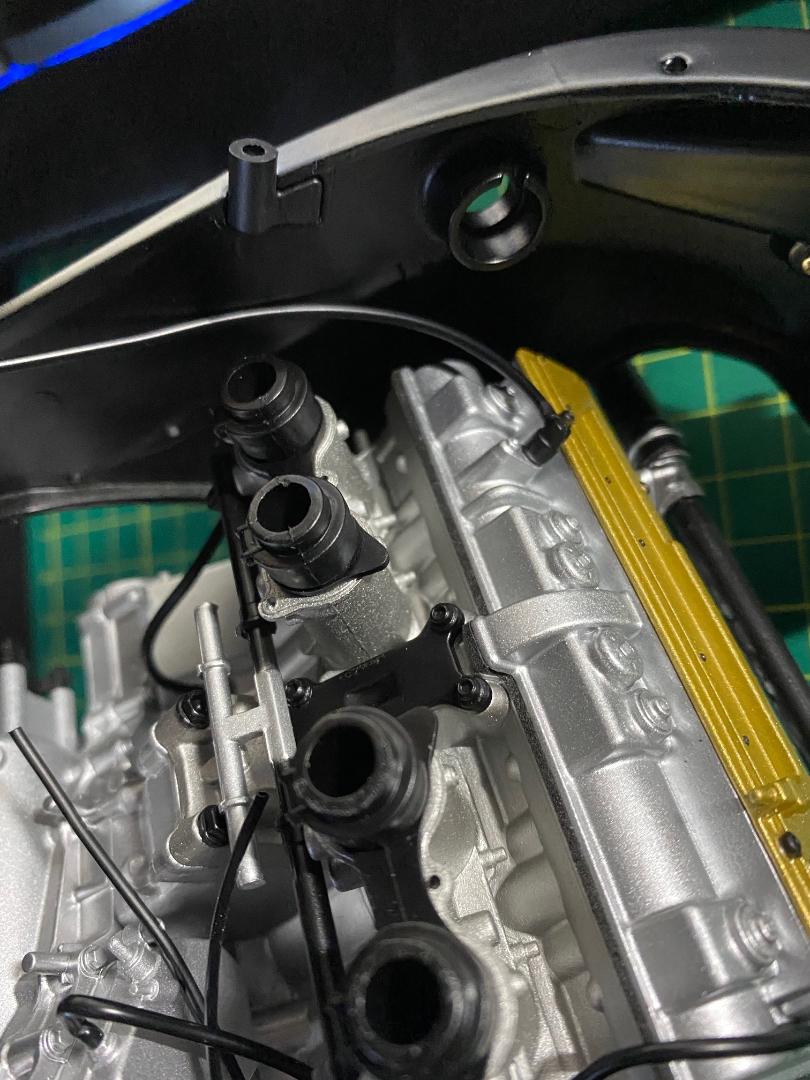
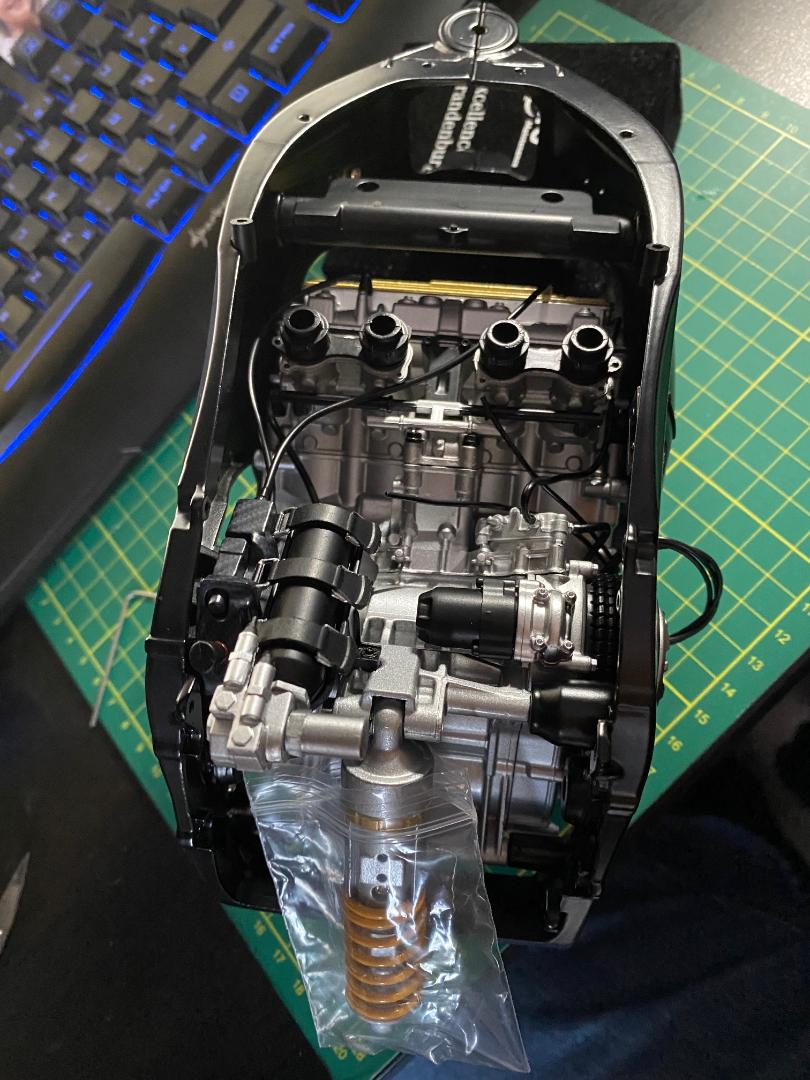
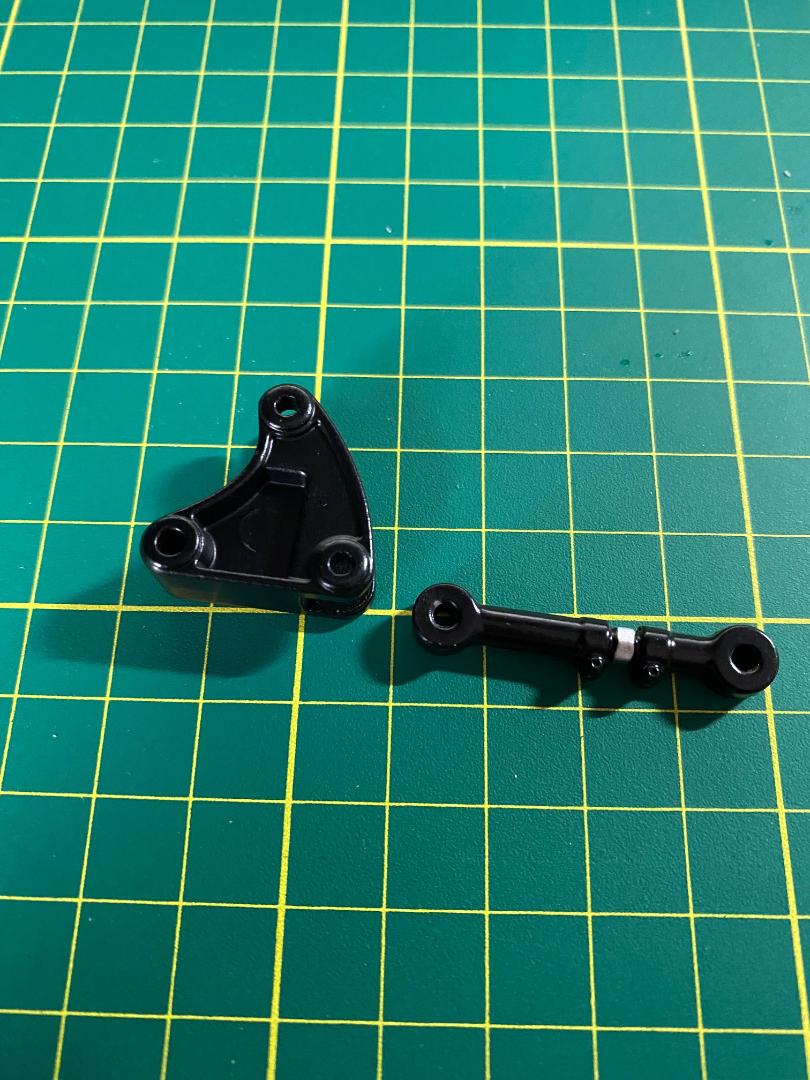
Aber nun geht`s mit den nächsten Teilen der Hinterradfederung weiter.
Umlenkhebel und Gewindestange sind aus Metall, der Rückgewinnungstank mit Ventilblock aus Kunststoff. Alles leicht zu montieren. Warum die Schraube zum Federbein jetzt noch nicht dabei ist erschließt sich mir zwar nicht so richtig, aber wir wollen mal nicht rummäkeln...
 " />
" /> " />
" /> " />
" /> " />
" /> " />
" /> " />
" /> " />
" />
Maddin- Schneidmatten-Virtuose
doc_raven1000, ullie46, maxl und Thoto mögen diesen Beitrag
Re: Valentino Rossi's Yamaha YZR M1 in 1:4 von DeAgostini
![]() von Maddin Di 15 Feb 2022, 17:21
von Maddin Di 15 Feb 2022, 17:21
 " />
" /> " />
" /> " />
" /> " />
" /> " />
" /> " />
" /> " />
" /> " />
" /> " />
" /> " />
" />Das wars dann erstmal wieder bis zur nächsten Lieferung.
Maddin- Schneidmatten-Virtuose
doc_raven1000, Glufamichel, klaus.kl und Thoto mögen diesen Beitrag
Re: Valentino Rossi's Yamaha YZR M1 in 1:4 von DeAgostini
![]() von Maddin Fr 18 Feb 2022, 08:16
von Maddin Fr 18 Feb 2022, 08:16
Es gibt aufregende Neuigkeiten. Ich habe gestern eine Mail von DeAgostini bekommen, dass das Lager umzieht und habe das Angebot bekommen, die restlichen Lieferungen in einem Rutsch und dann für 20% Rabatt zu bekommen. Das wäre ja fein. Mal schauen, ob das wirklich klappt. Dann geht es hier natürlich deutlich schneller voran. Drückt mir die Daumen.
Maddin- Schneidmatten-Virtuose
meninho mag diesen Beitrag
Re: Valentino Rossi's Yamaha YZR M1 in 1:4 von DeAgostini
![]() von Thoto Fr 18 Feb 2022, 11:58
von Thoto Fr 18 Feb 2022, 11:58
Ich drück auf jeden Fall die Daumen.
Vielleicht hauen die noch mehr Angebote raus?

Thoto- Modellbau-Experte

Re: Valentino Rossi's Yamaha YZR M1 in 1:4 von DeAgostini
![]() von Maddin Fr 18 Feb 2022, 14:32
von Maddin Fr 18 Feb 2022, 14:32
Maddin- Schneidmatten-Virtuose
Re: Valentino Rossi's Yamaha YZR M1 in 1:4 von DeAgostini
![]() von Maddin Sa 26 Feb 2022, 11:13
von Maddin Sa 26 Feb 2022, 11:13
Maddin- Schneidmatten-Virtuose
Six-Seven mag diesen Beitrag
Re: Valentino Rossi's Yamaha YZR M1 in 1:4 von DeAgostini
![]() von Thoto Sa 26 Feb 2022, 23:36
von Thoto Sa 26 Feb 2022, 23:36
Genau, laß dich nicht veräppeln.
Wenn die nicht wollen wie vereinbart gibt es Mittel und Wege.
Hatte sowas letzten Sommer mit einer Waschmaschine für den Ältesten meiner Holden. Haben erst rumgezickt, und als ich dann das böse Wort "Deckungskauf" aufgefahren hab hat er dann sogar eine bessere Waschmaschine bekommen.
Thoto- Modellbau-Experte
Re: Valentino Rossi's Yamaha YZR M1 in 1:4 von DeAgostini
![]() von Maddin Mo 28 Feb 2022, 10:07
von Maddin Mo 28 Feb 2022, 10:07
 " />
" /> " />
" /> " />
" />Hab auch gleich mal in Box 22 nachgesehen, da ich mir nicht ganz sicher war, ob der Ständer mit beim normalen Abo dabei ist. Isser zum Glück. Da frag ich mich, warum er dann einzeln angeboten wurde. Ist ja längst ausverkauft.
Jetzt werden die nächsten Tage natürlich richtig schwer, abzuwarten bis zur Klärung und erstmal nicht weiterbauen zu können. Ist wie vor einem Teller mit nem Riesensteak zu sitzen und nur dran riechen zu dürfen...
Maddin- Schneidmatten-Virtuose
Re: Valentino Rossi's Yamaha YZR M1 in 1:4 von DeAgostini
![]() von Maddin Di 01 März 2022, 15:00
von Maddin Di 01 März 2022, 15:00
Habe nun doch alle Kartons geöffnet, den Inhalt gesichtet und sortiert und nun sind es nur noch zwei kleine Kartons anstatt der beiden Riesendinger. Da ich noch nichts auspacken möchte gibt`s die Fotos dann ertst bei den nächsten Bauschritten. Aber soviel kann ich schonmal sagen: Echt klasse! Mordsbreiter Hinterradreifen, coole echte Metallkette und der Aufbockständer ist auch ein richt schweres Metallteil. Und so, wie ich das sehe, werde ich an der linken Seite die beiden Unterteile der Verkleidung weglassen können, um die Motortechnik zeigen zu können. Die Verschraubungen sind dafür gut geeignet.
Eo, nun konnt Ihr genauso rumhibbeln, wie ich, bis es dann endlich weitergeht.
Maddin- Schneidmatten-Virtuose
doc_raven1000 mag diesen Beitrag
Re: Valentino Rossi's Yamaha YZR M1 in 1:4 von DeAgostini
![]() von Thoto Di 01 März 2022, 18:35
von Thoto Di 01 März 2022, 18:35

Thoto- Modellbau-Experte
Re: Valentino Rossi's Yamaha YZR M1 in 1:4 von DeAgostini
![]() von Maddin Di 01 März 2022, 18:57
von Maddin Di 01 März 2022, 18:57
Maddin- Schneidmatten-Virtuose
Gesponserte Inhalte
Seite 2 von 5 • 1, 2, 3, 4, 5

 Ähnliche Themen
» YAMAHA YZR M1 inkl. Driver
» Yamaha YZF R1 in 1:12 von Tamiya
» YAMAHA RD 250 LC vom Tamiya 1:12
» Bau einer Yamaha MT-01
Der lustige Modellbauer :: Fahrzeuge :: Etappenbausätze / Partworks / Sammelserien :: Fertige Bauberichte