
Valentino Rossi's Yamaha YZR M1 in 1:4 von DeAgostini
Der lustige Modellbauer :: Fahrzeuge :: Etappenbausätze / Partworks / Sammelserien :: Fertige Bauberichte
Seite 3 von 5 •  1, 2, 3, 4, 5

 Re: Valentino Rossi's Yamaha YZR M1 in 1:4 von DeAgostini
![]() von Maddin Mi 02 März 2022, 15:50
von Maddin Mi 02 März 2022, 15:50
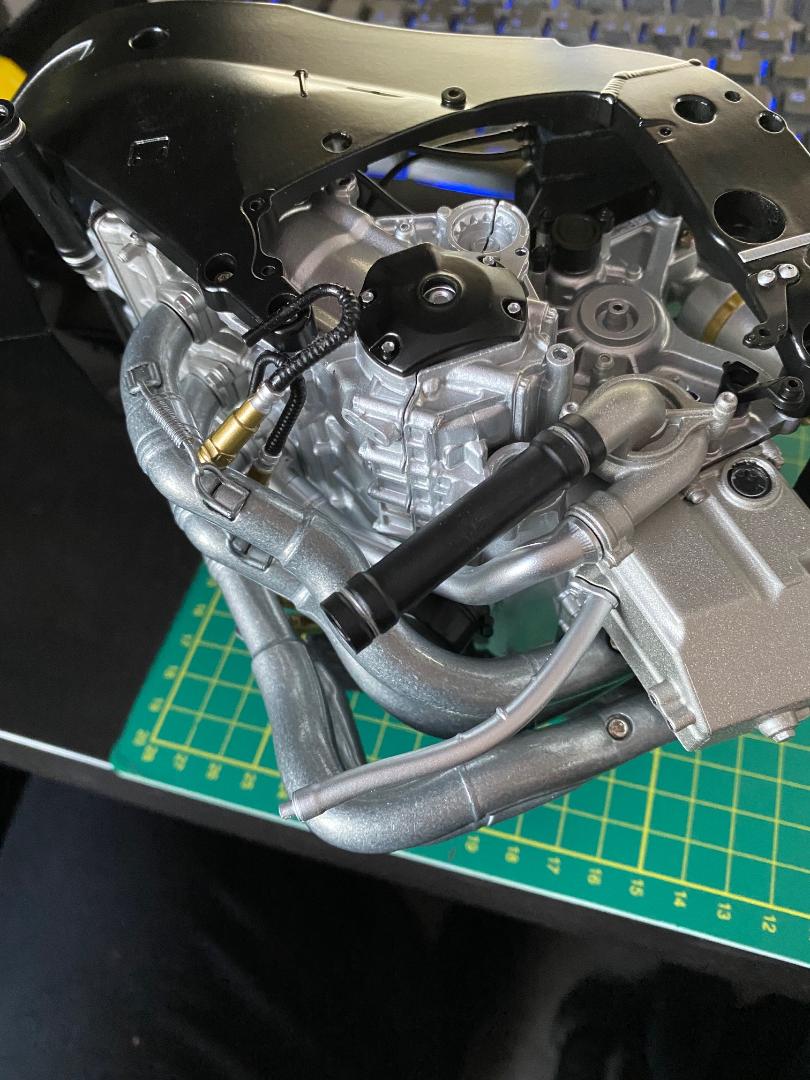
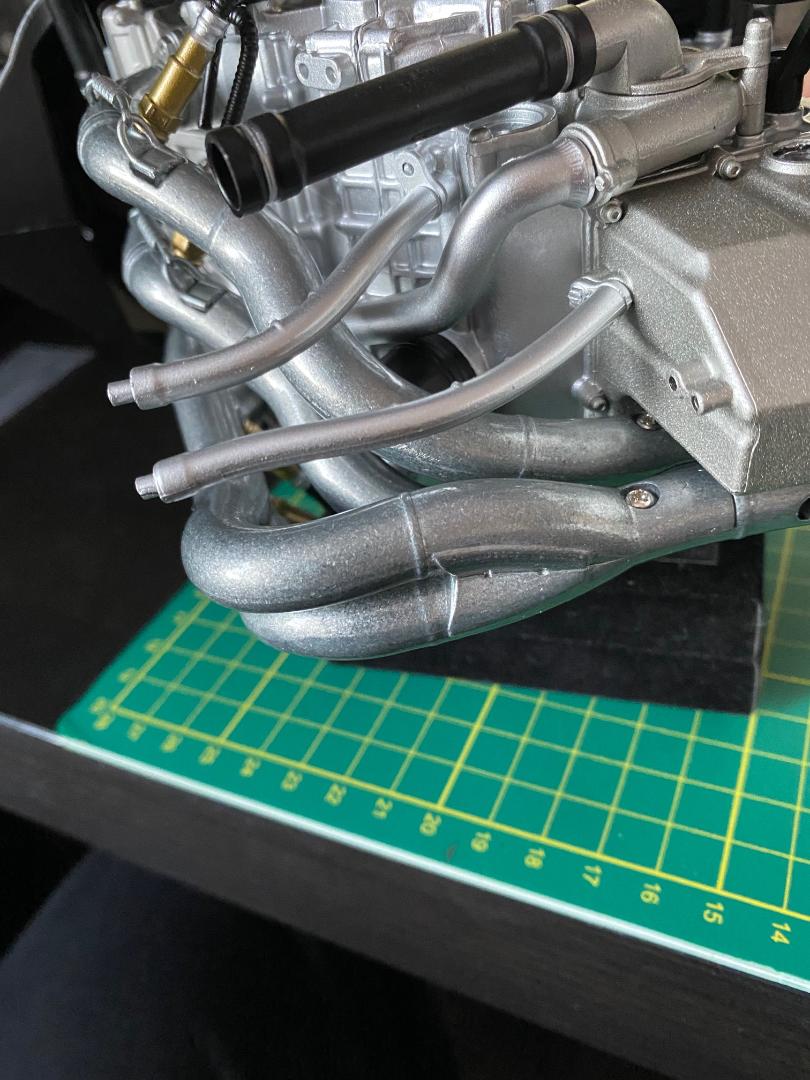
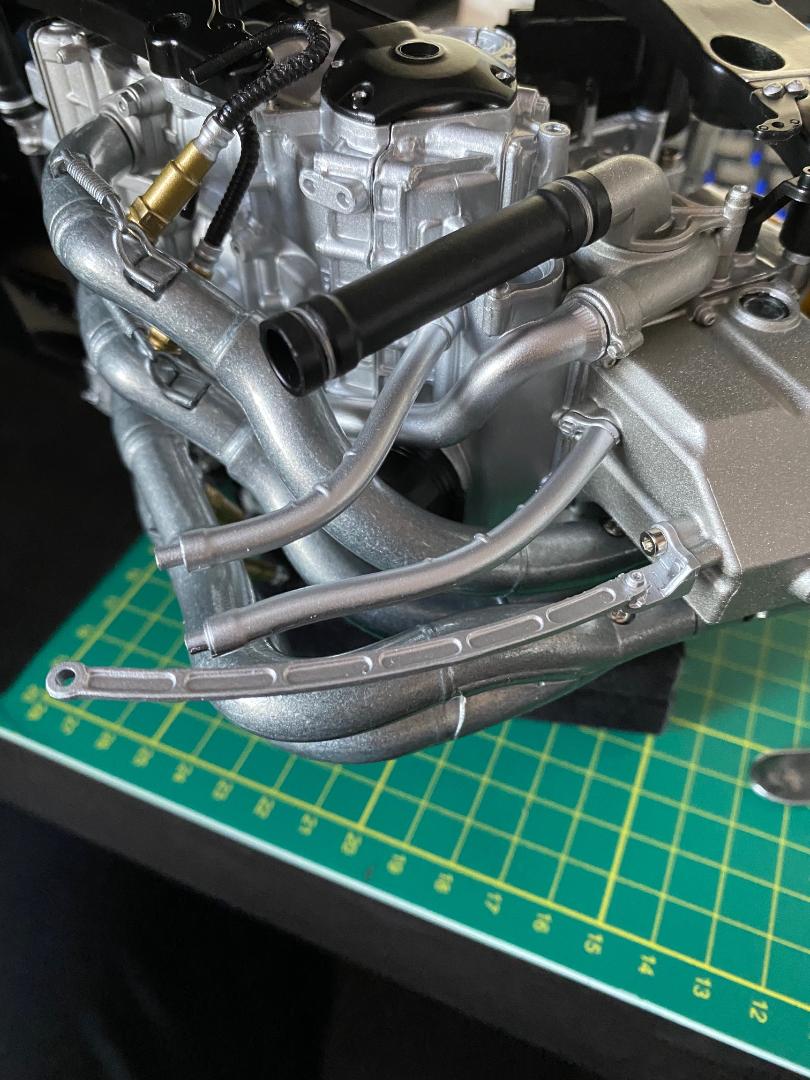
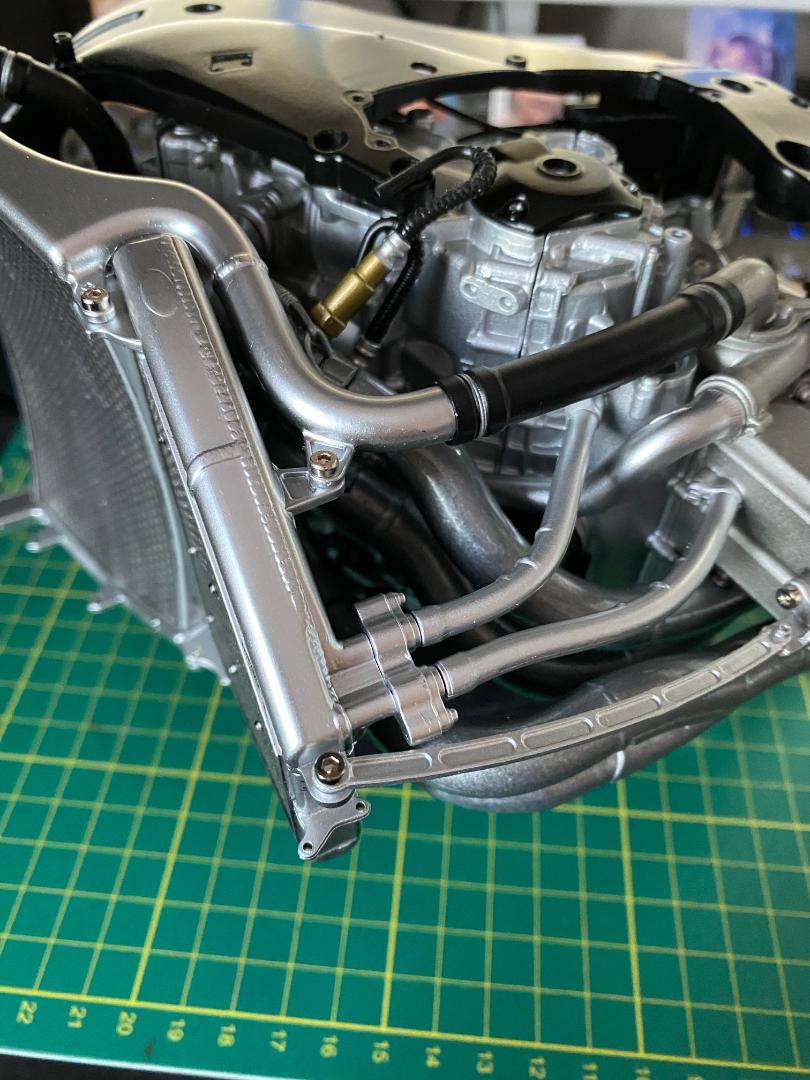
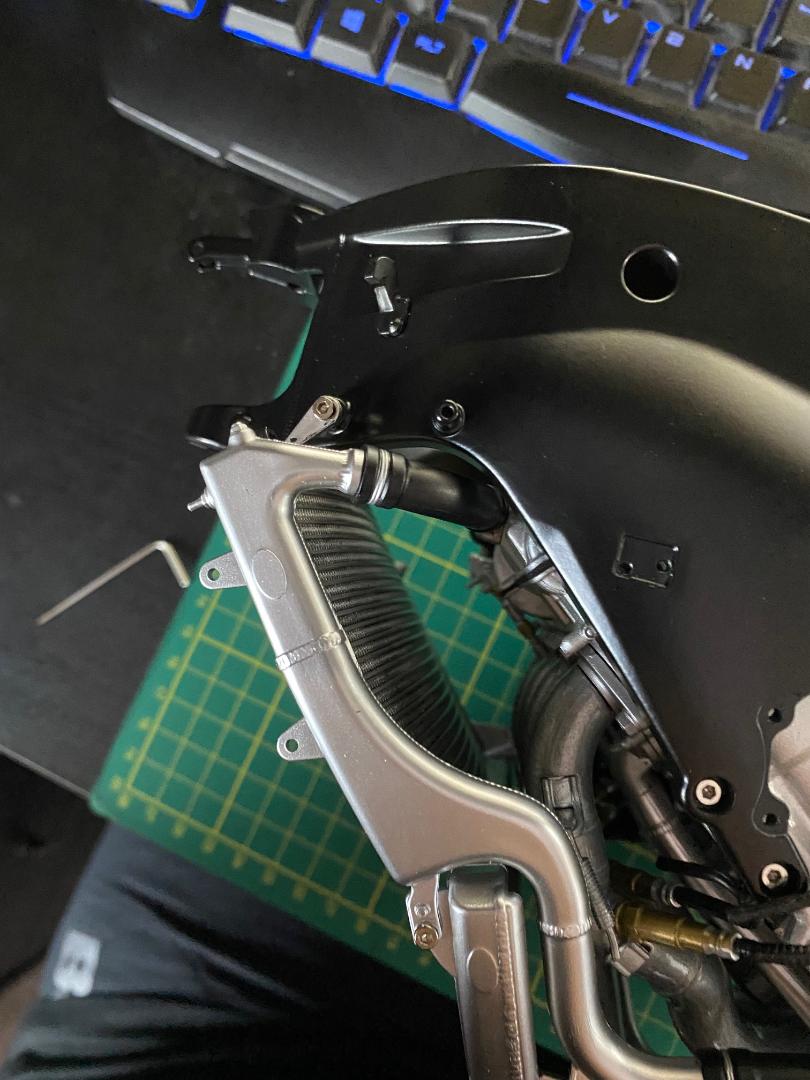
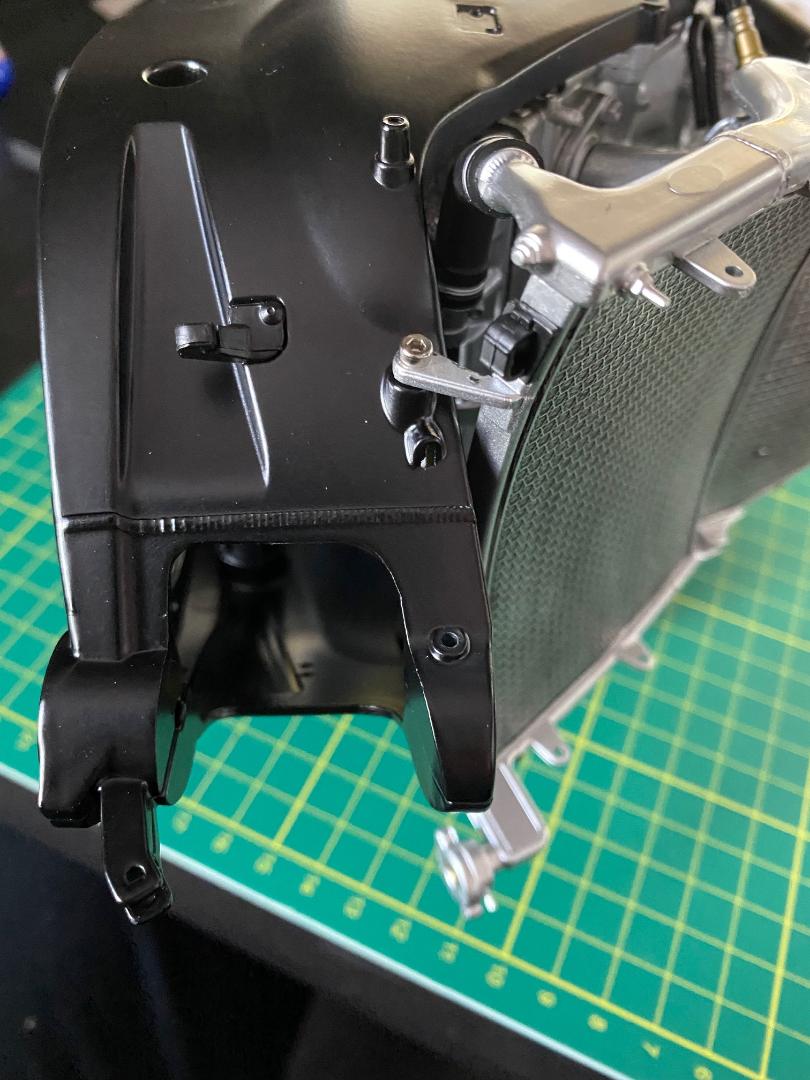
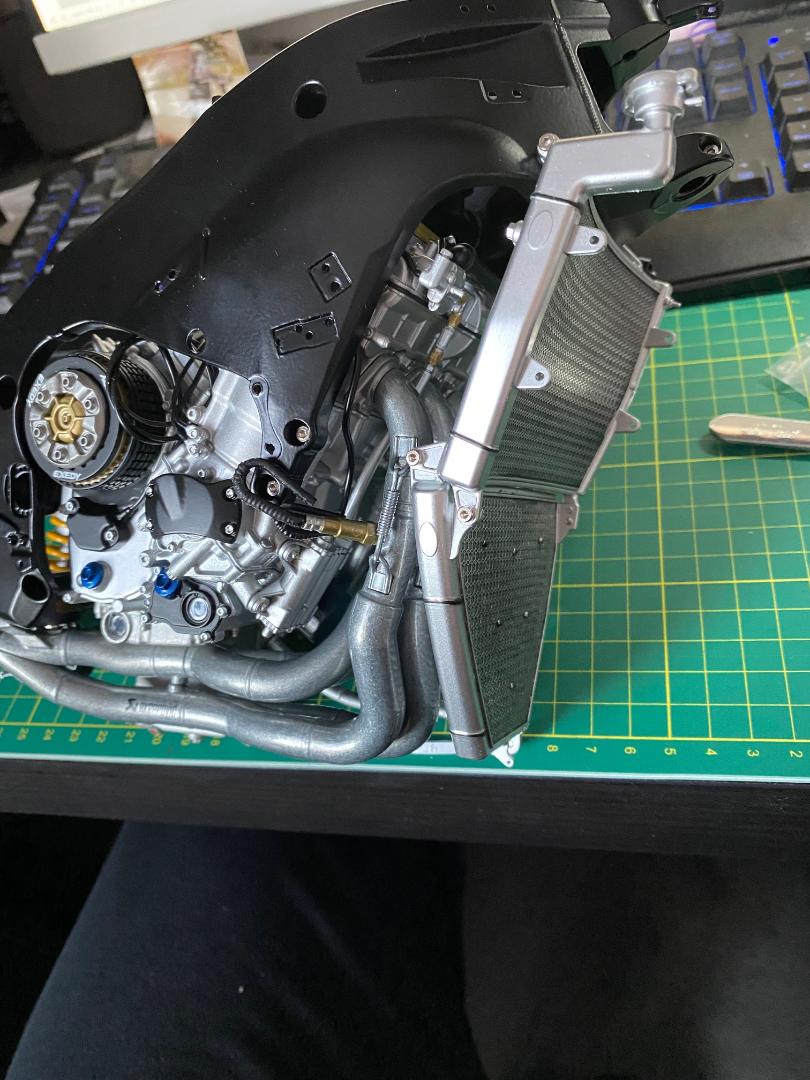
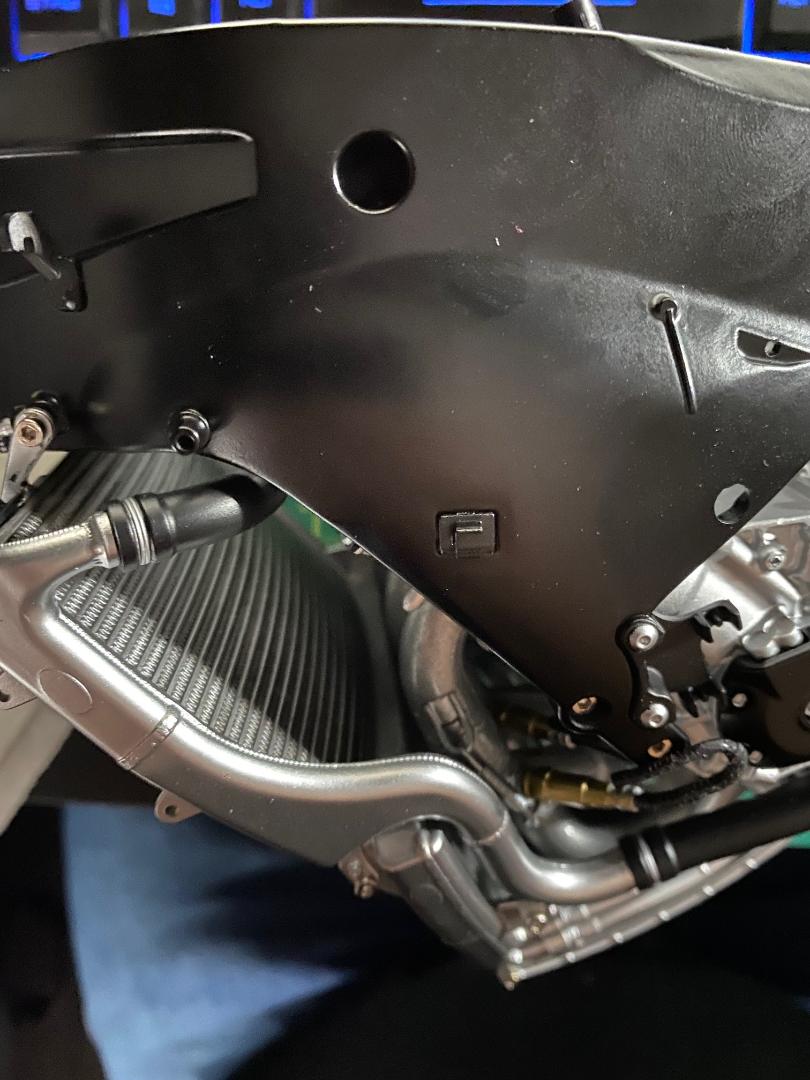
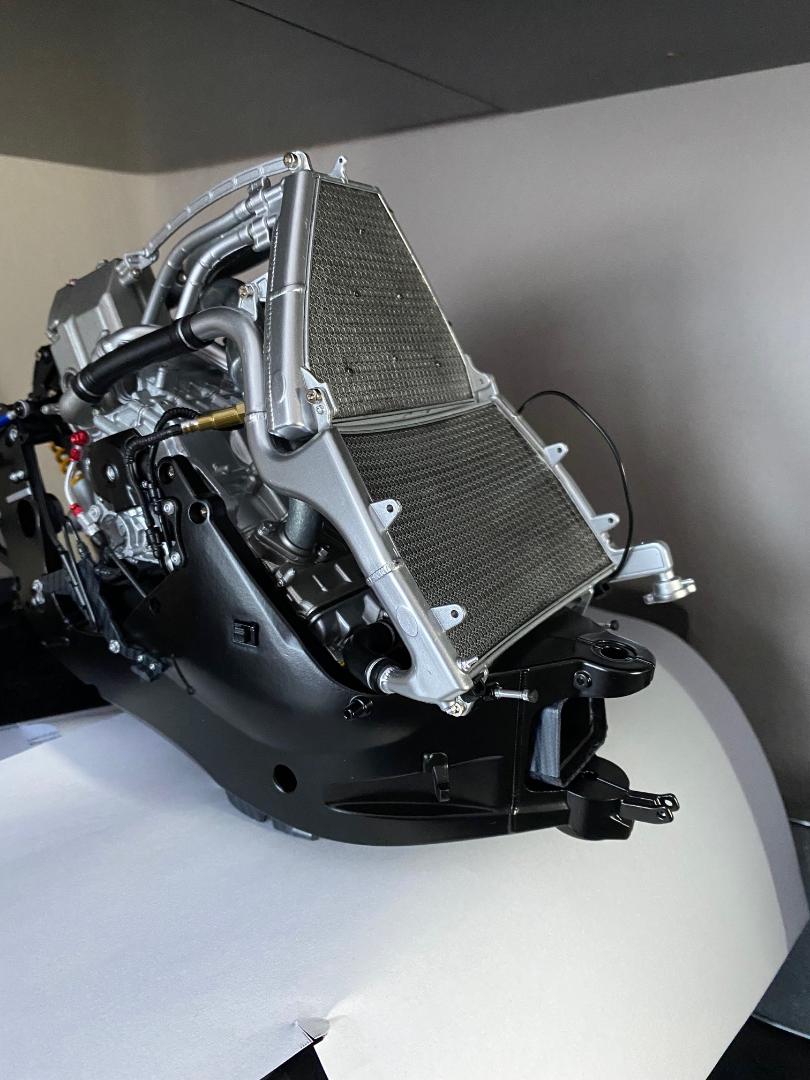
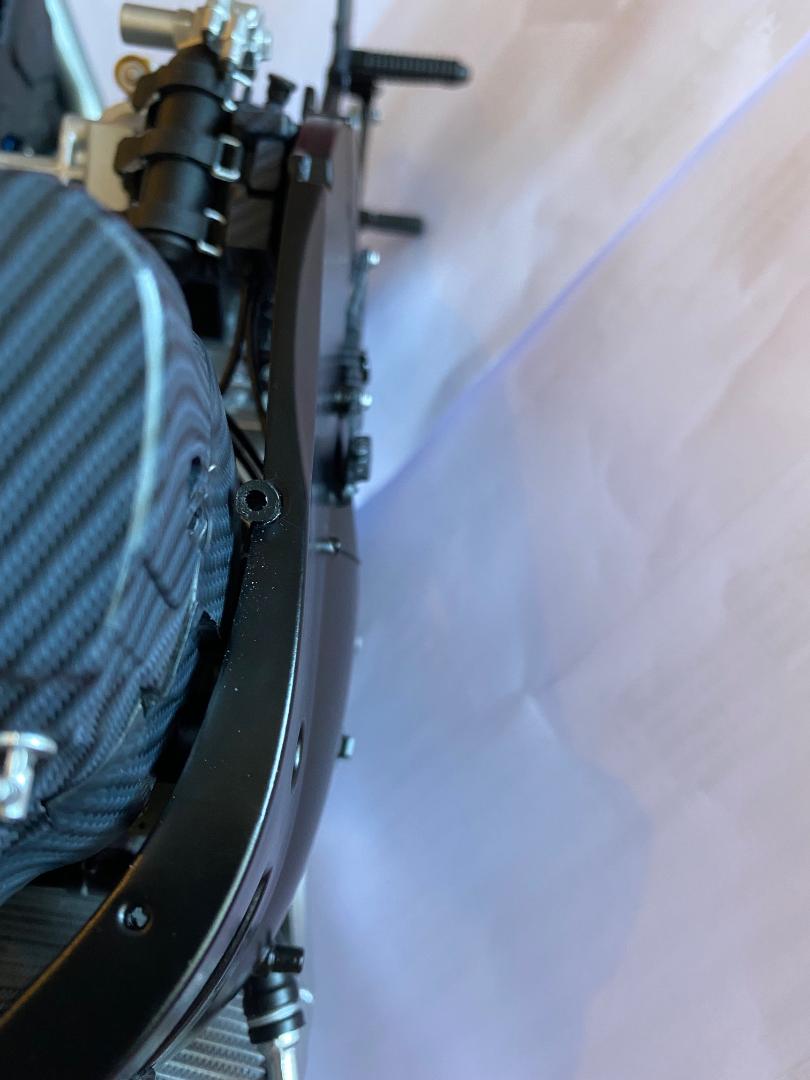
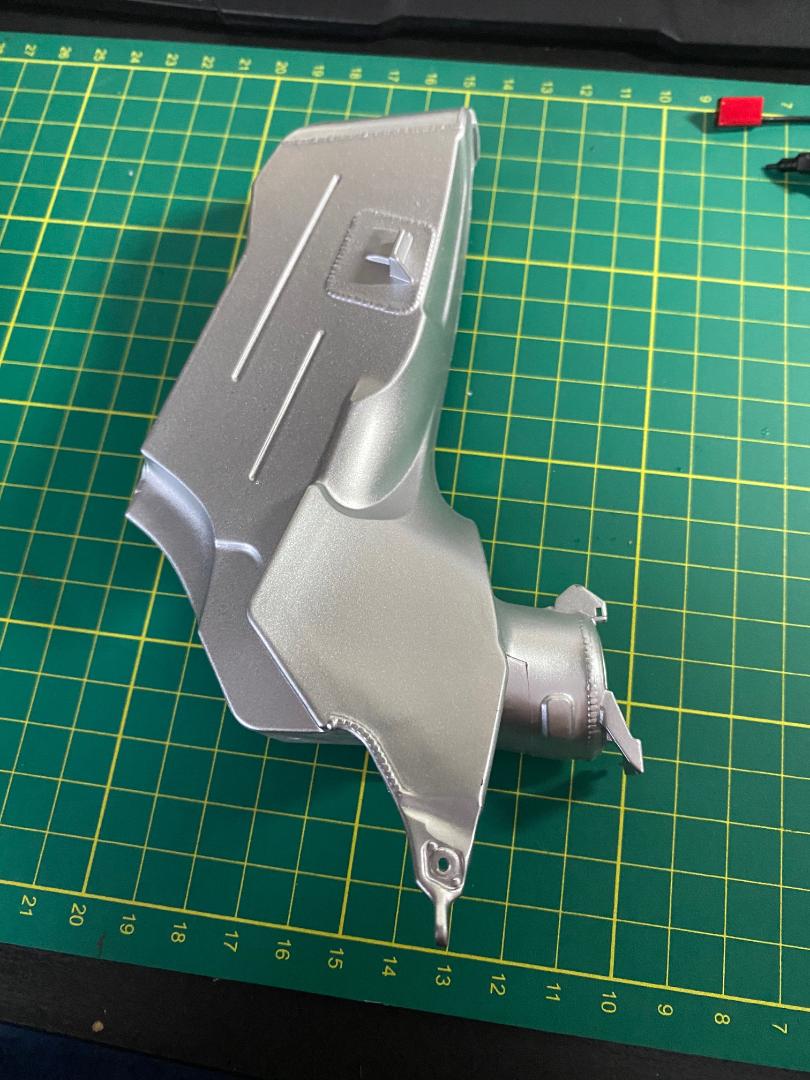
Ich habe Bauschritt 47 durchgeführt und die letzten Kühlleitungen, die untere Kühlerhalterung und den Kühler selbst angebaut.
Dazu wurde die Halterung aus dem vorherigen Bauschritt, ein weiterer dicker Gummischlauch und zwei Plastikrohre verbaut. Nach dem Entragten der Steckverbindungen passte das Alles sehr gut. Nur zum Einbau des Kühlers bräuchte man ein paar Hände mehr, da fast alle Leitungen gleichzeitig angesetzt werden müssen.
 " />
" /> " />
" /> " />
" /> " />
" /> " />
" /> " />
" /> " />
" /> " />
" /> " />
" /> " />
" /> " />
" />
Maddin- Schneidmatten-Virtuose

doc_raven1000, maxl, Six-Seven und Thoto mögen diesen Beitrag

Re: Valentino Rossi's Yamaha YZR M1 in 1:4 von DeAgostini
![]() von Maddin Do 03 März 2022, 09:26
von Maddin Do 03 März 2022, 09:26
Nicht wundern. Frank war so nett und hat auf meinen Wunsch hin den nun nicht mehr passenden Titel des Bauberichts angepasst.
Maddin- Schneidmatten-Virtuose
Re: Valentino Rossi's Yamaha YZR M1 in 1:4 von DeAgostini
![]() von Maddin Do 03 März 2022, 15:51
von Maddin Do 03 März 2022, 15:51
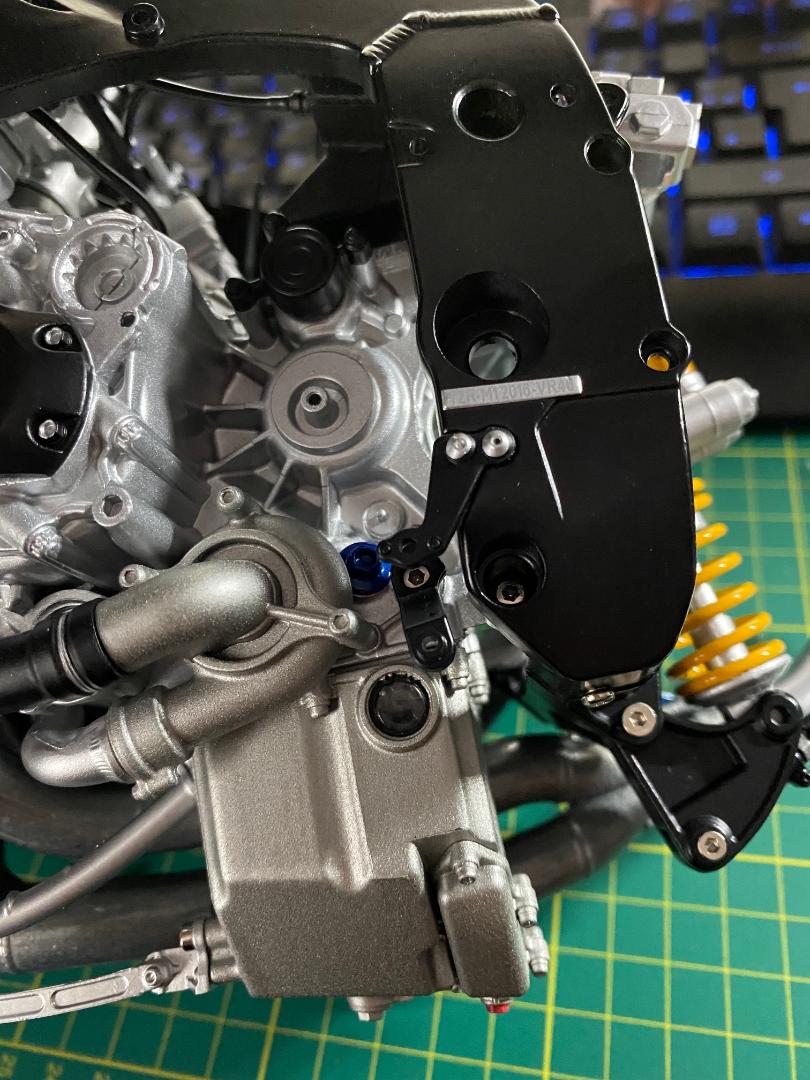
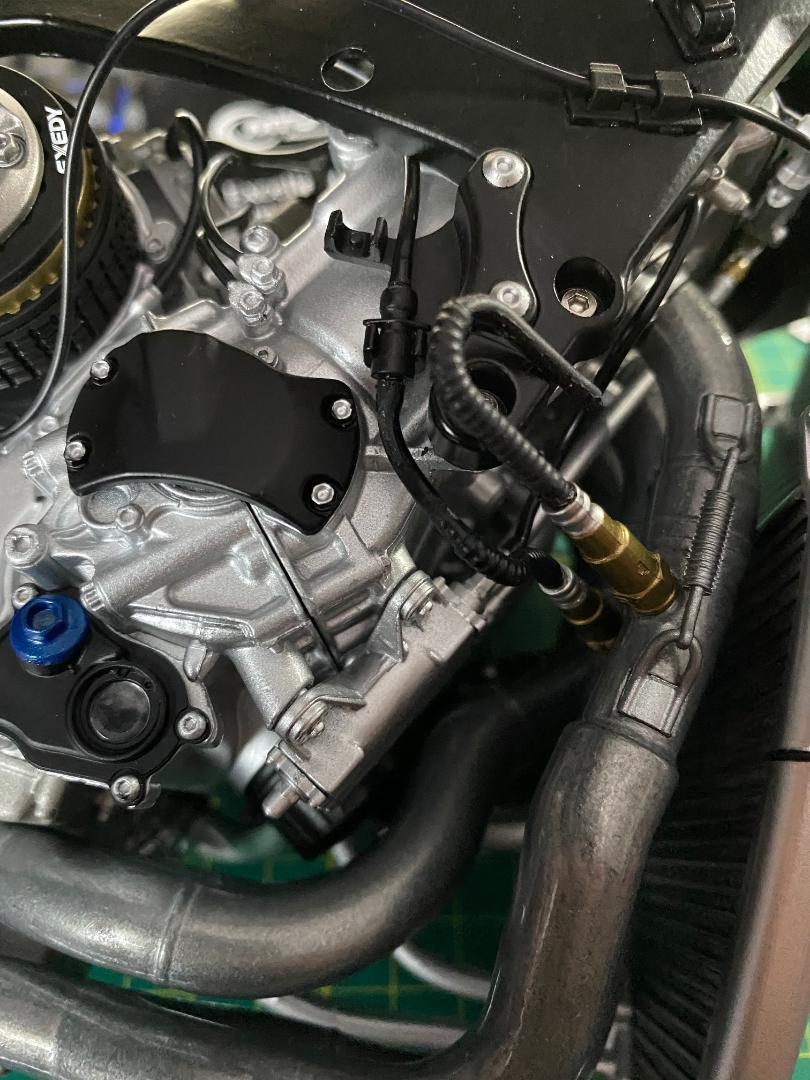
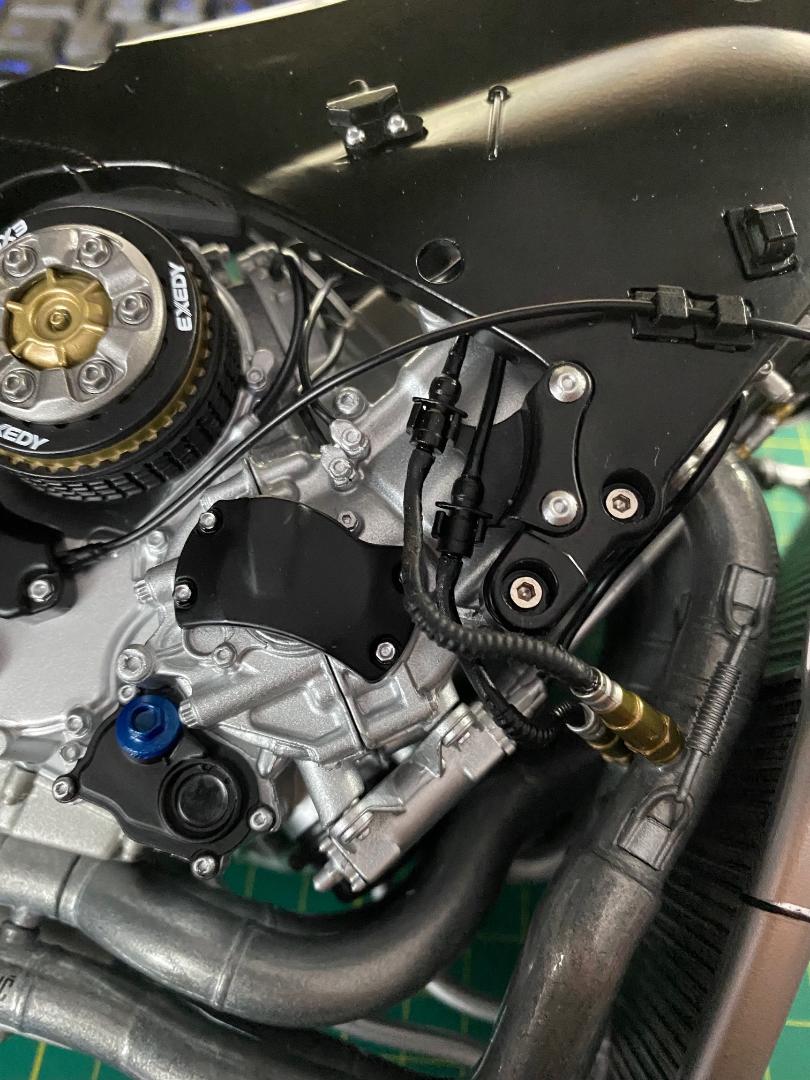
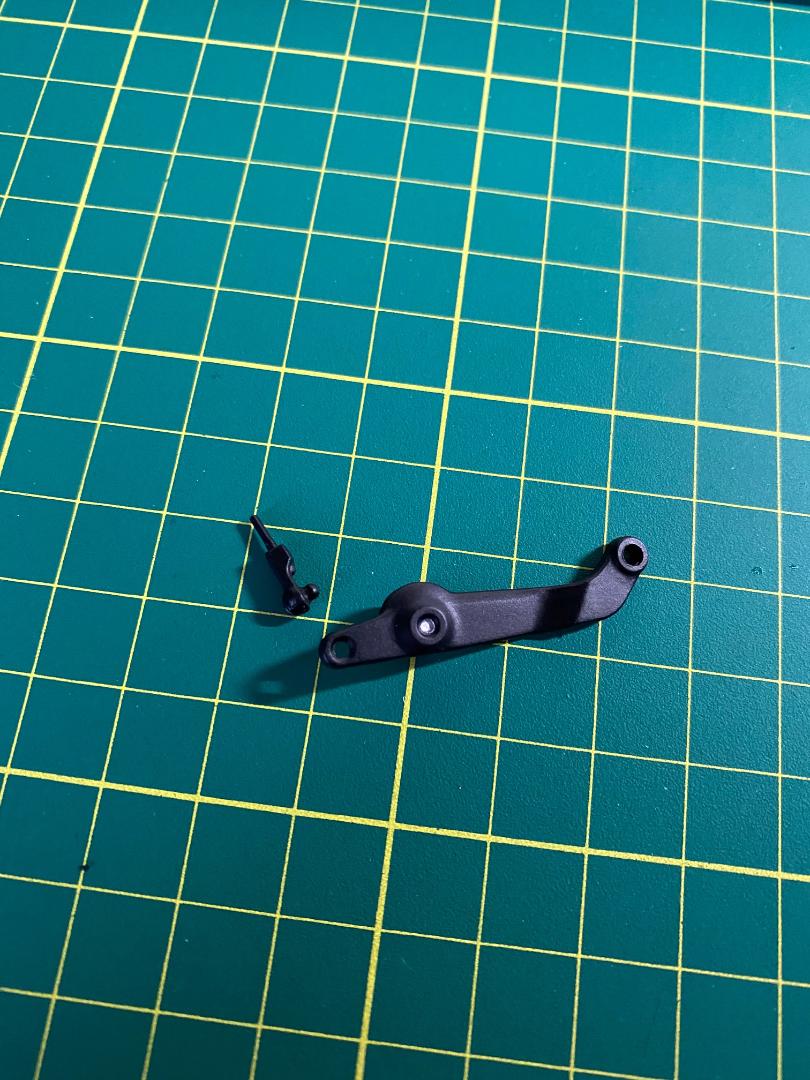
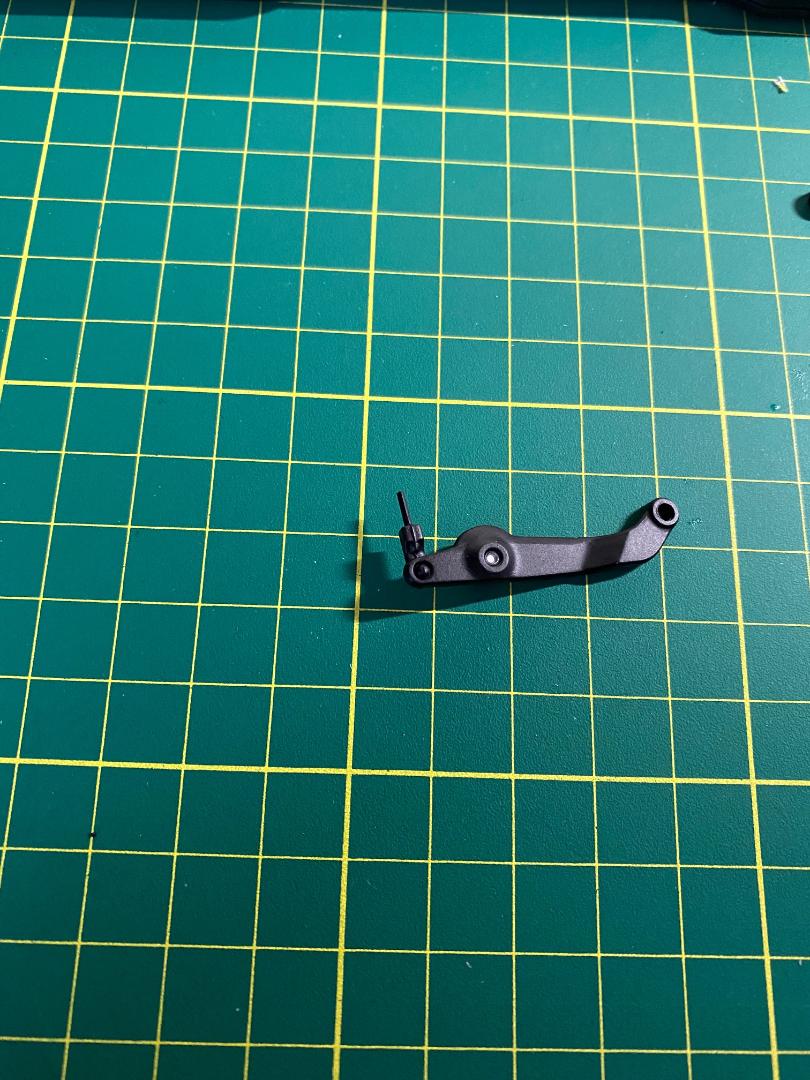
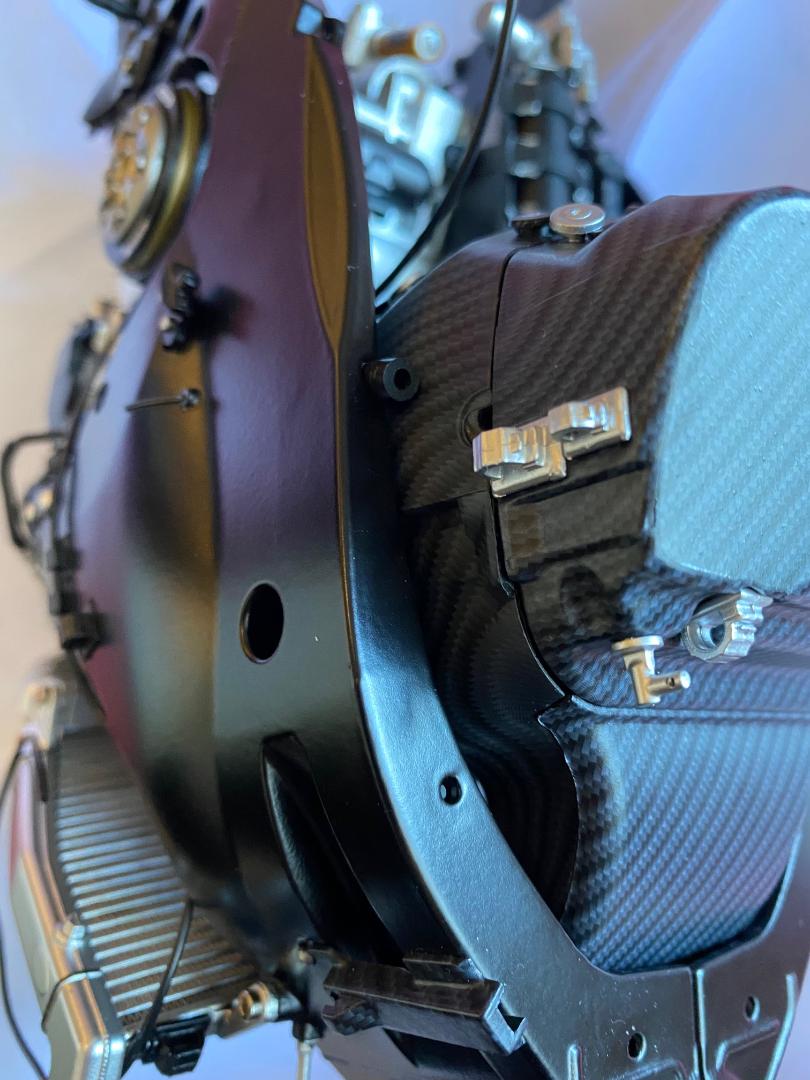
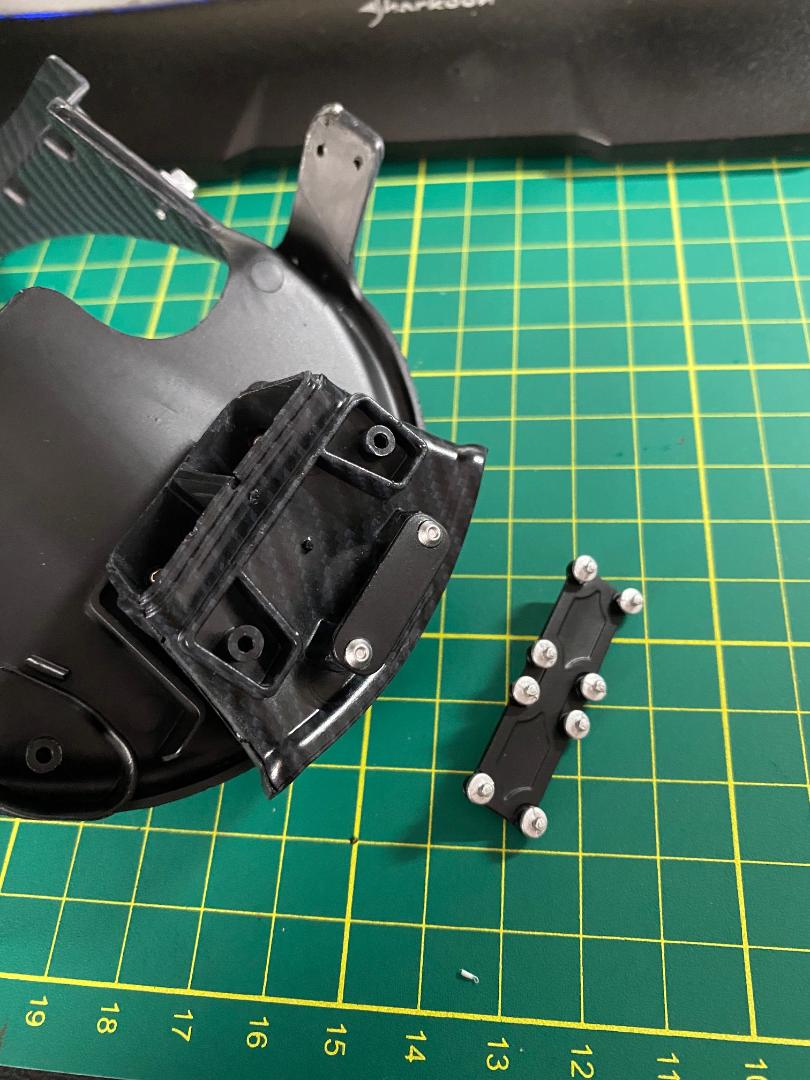
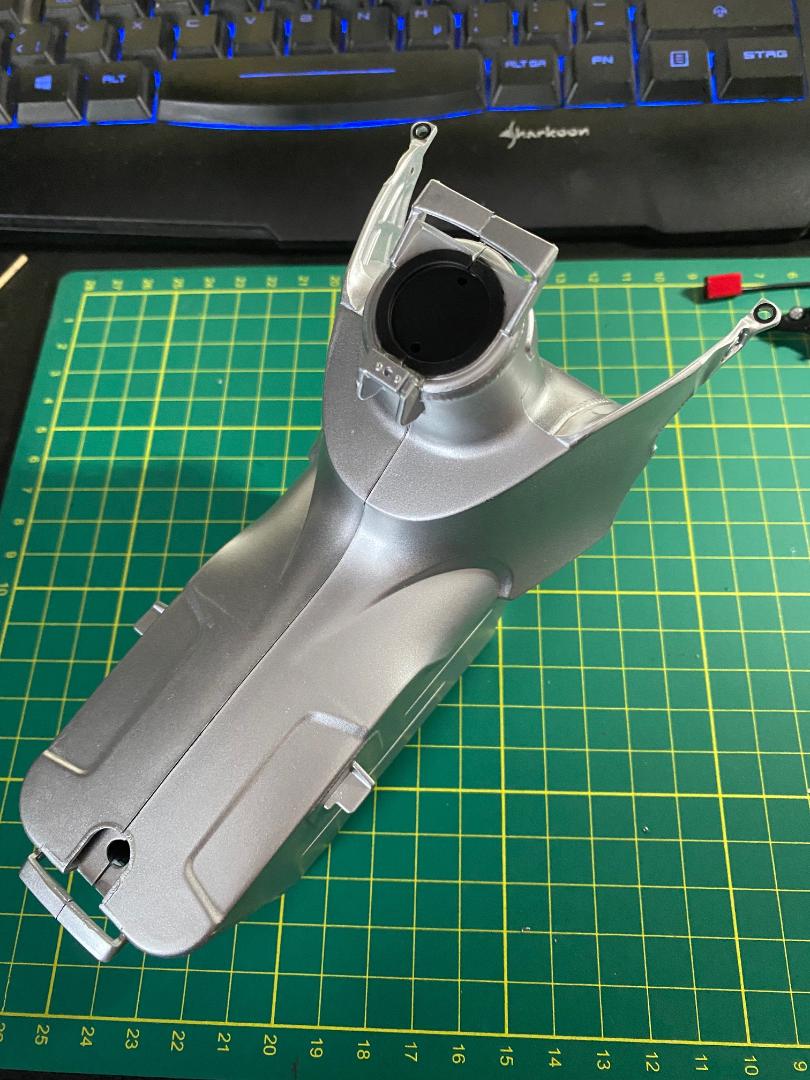
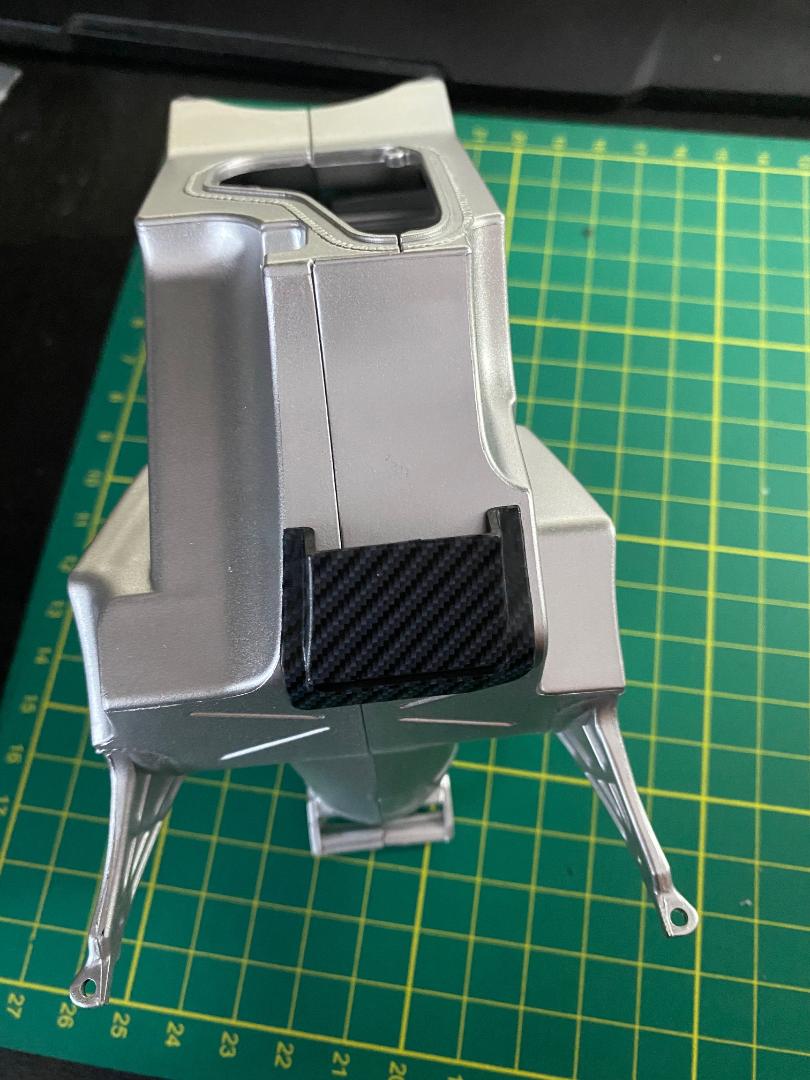
Und weiter geht`s in kleinen Schritten. Im Bauschritt 48 wurden dei beiden Lenkanschläge, zwei Halterungen, eine Abdeckkappe für eine Motorverschraubung und zwei Steckadapter mit Leitungen an die beiden linken Lambdasonden angebaut. Alle Teile habe ich etwas entgratet und mit Sekundenkleber (Halterungen und Anschläge), bzw. Kunststoffkleber (Leitungen) fixiert. Jetzt kommt langsam das ordentliche Gewicht von über einem Kilo der Baugruppe zum Tragen. Man muss gut aufpassen, wie man das Ganze zur Montage ablegt, um keine empfindlichen Kleinteile auf der jeweiligen Unterseite zu beschädigen.
 " />
" /> " />
" /> " />
" /> " />
" /> " />
" /> " />
" /> " />
" /> " />
" /> " />
" /> " />
" /> " />
" /> " />
" /> " />
" />
Maddin- Schneidmatten-Virtuose
maxl mag diesen Beitrag
Re: Valentino Rossi's Yamaha YZR M1 in 1:4 von DeAgostini
![]() von Maddin Mo 07 März 2022, 09:52
von Maddin Mo 07 März 2022, 09:52
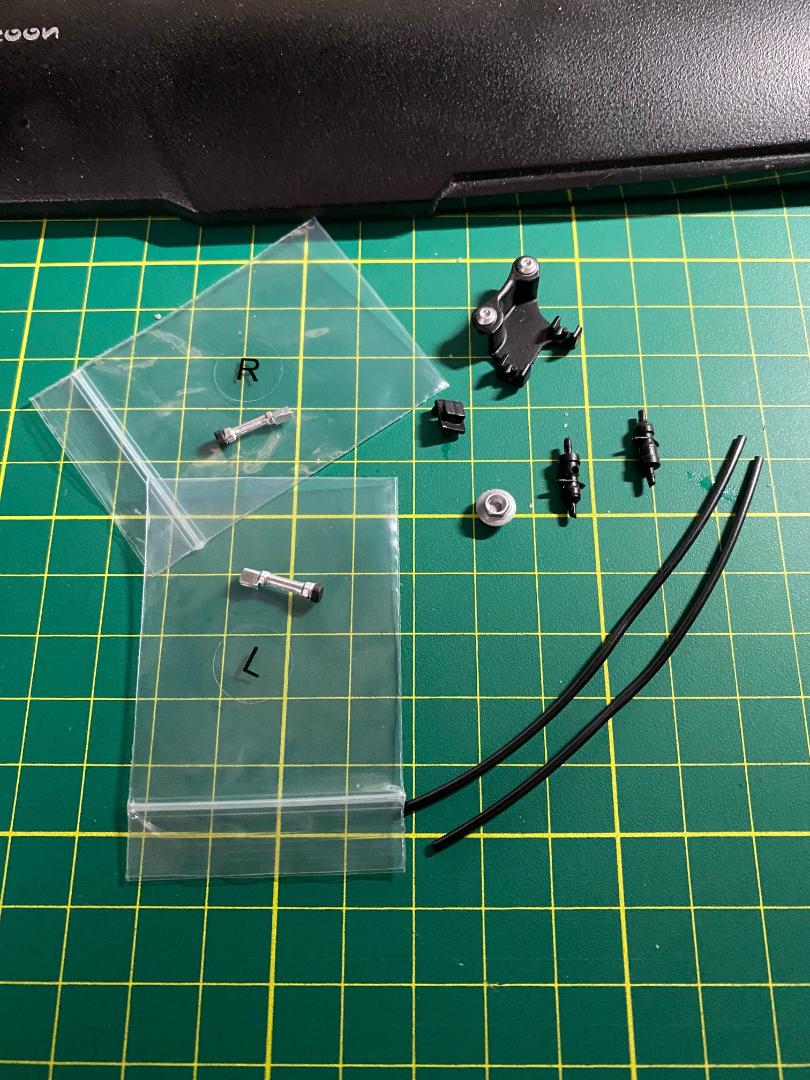
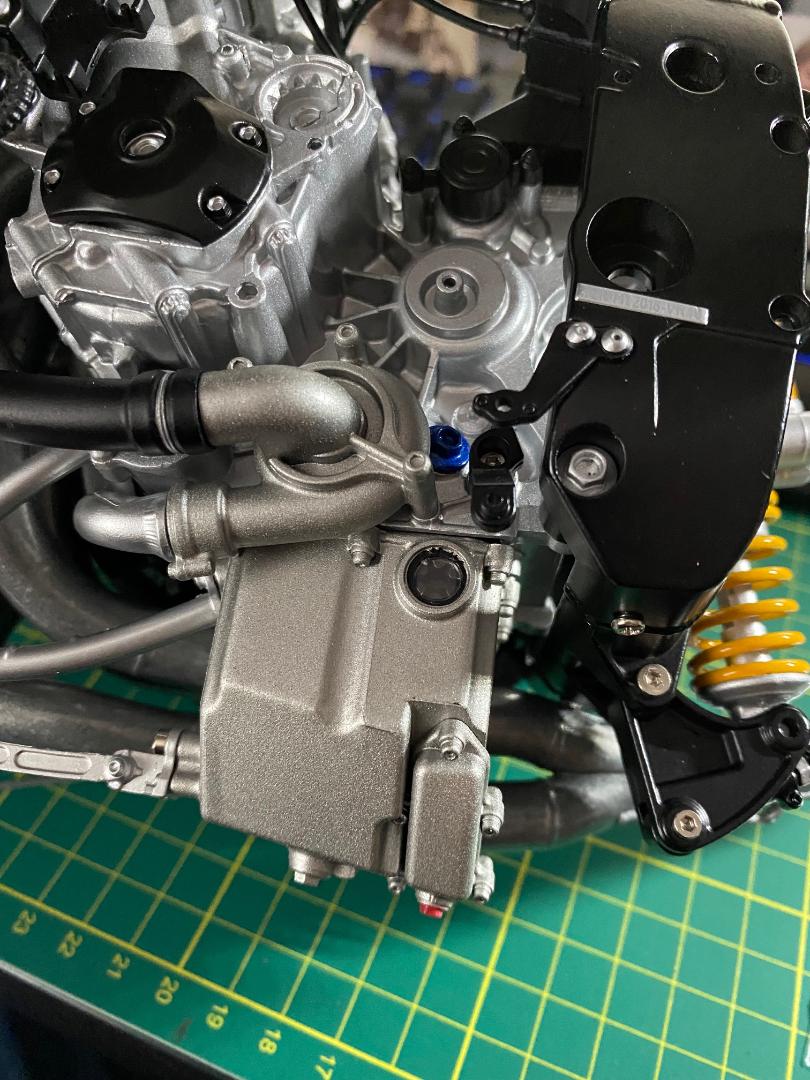
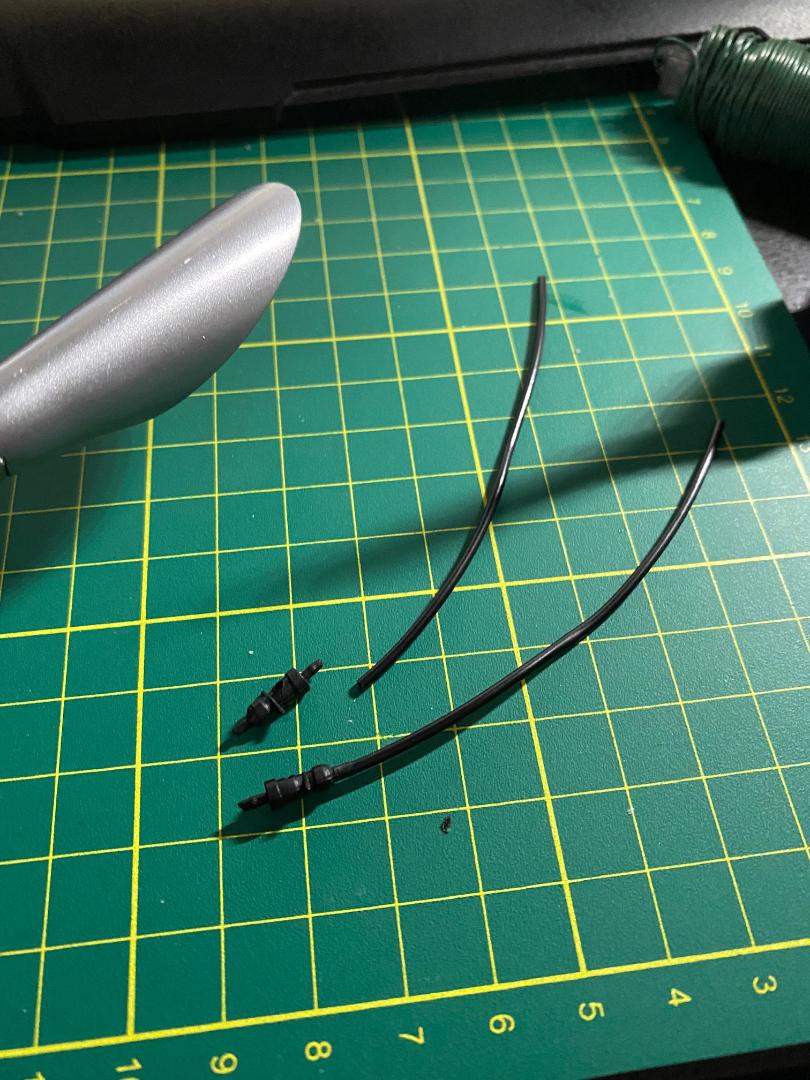
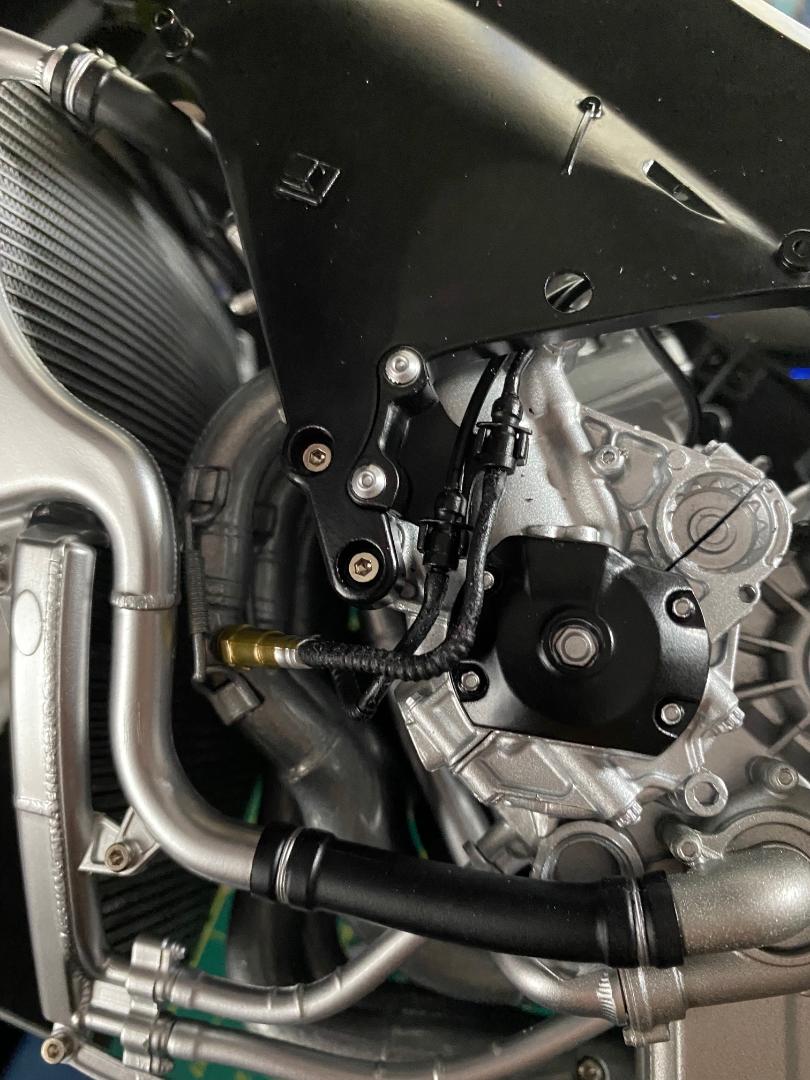
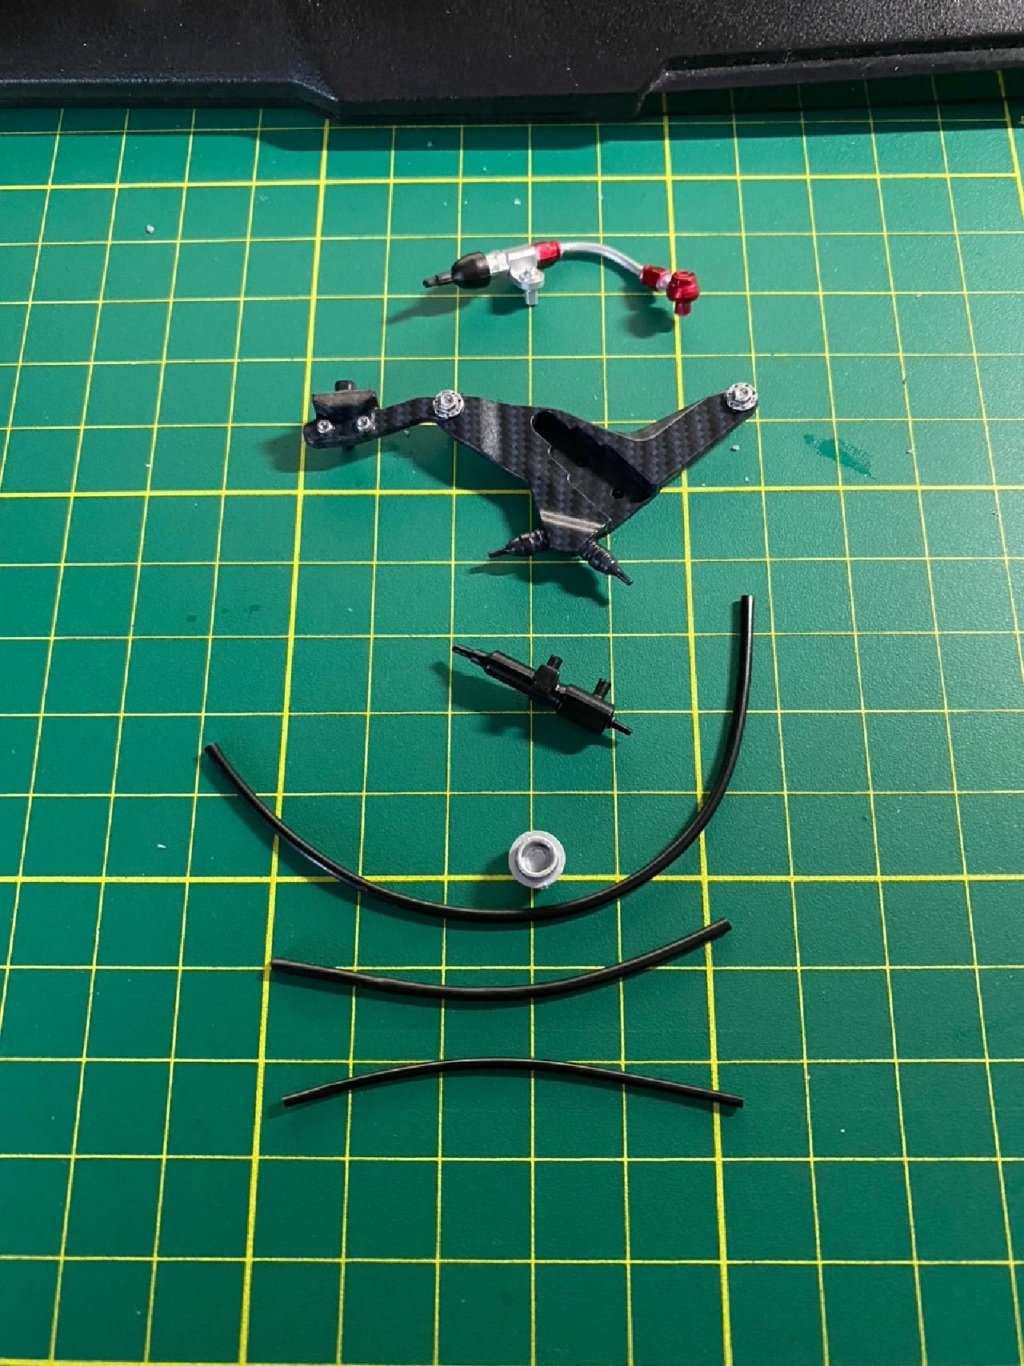
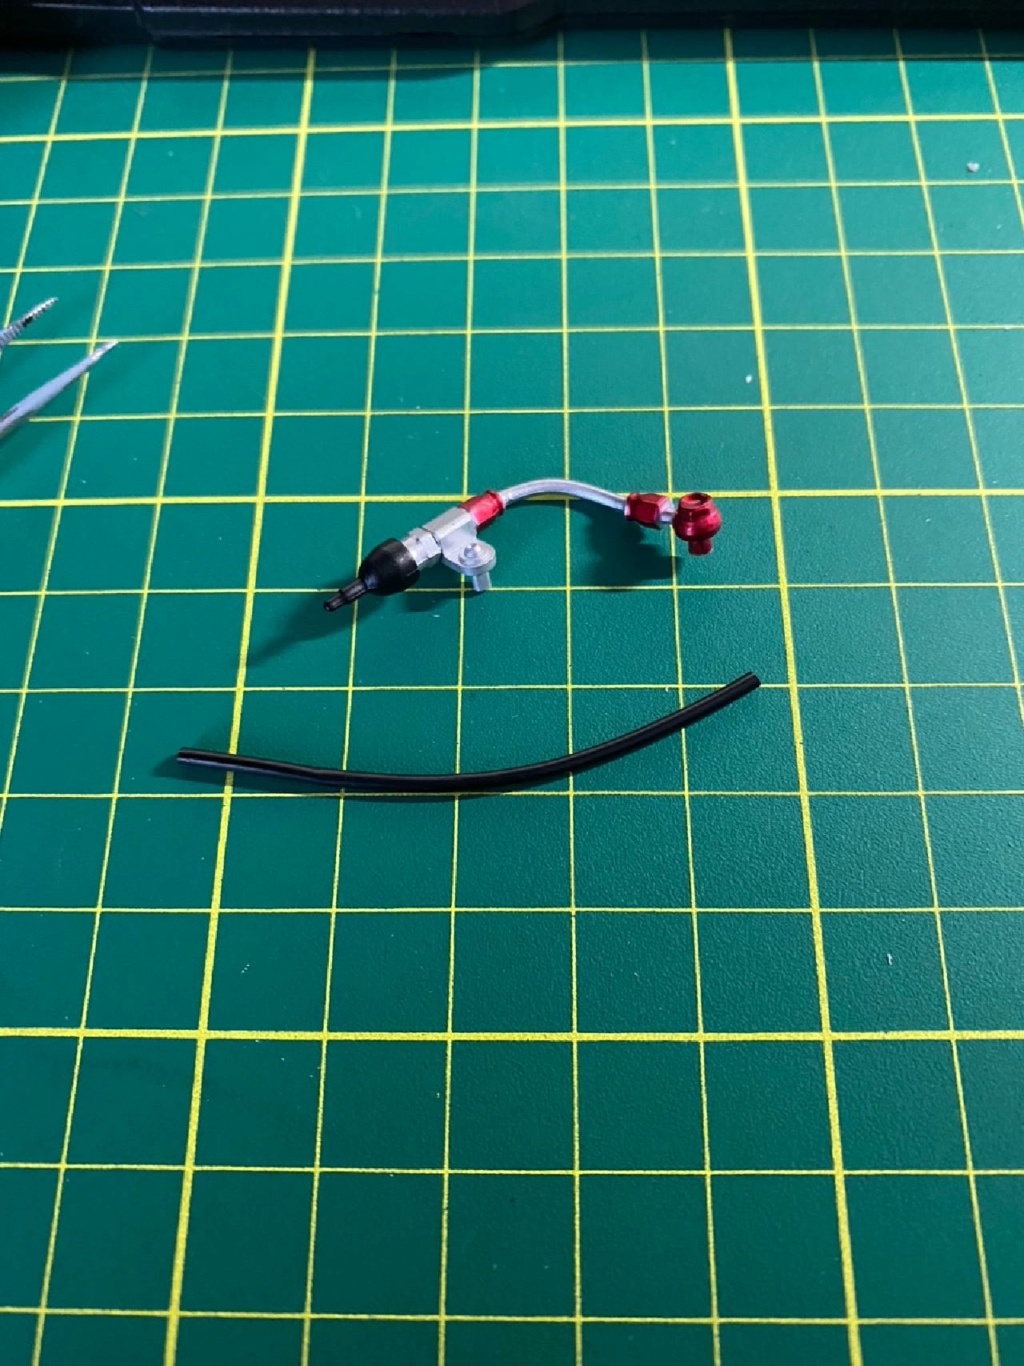
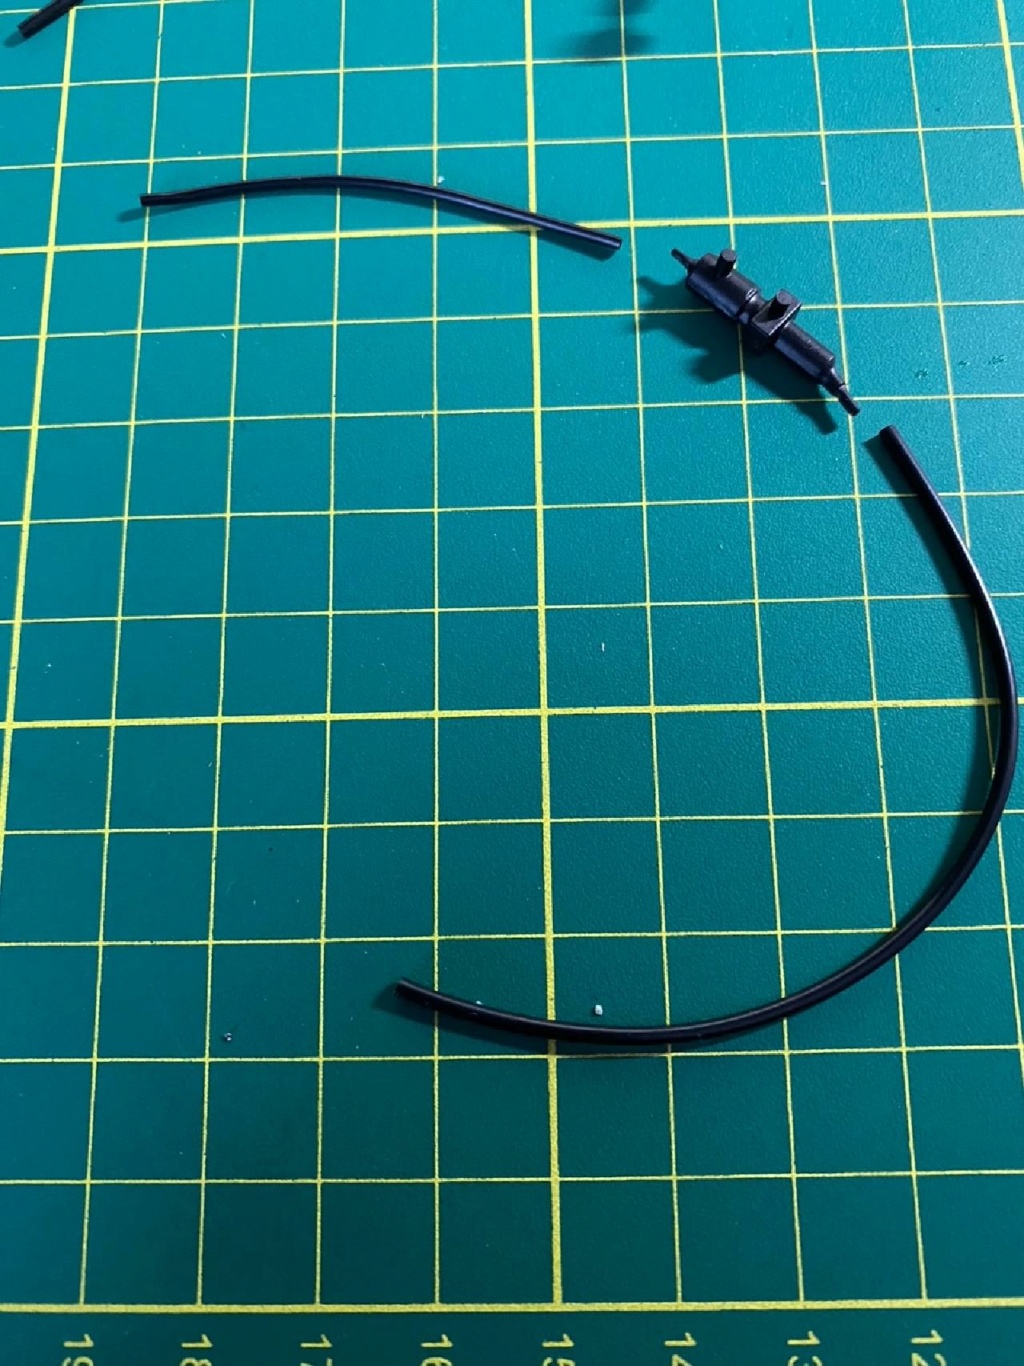
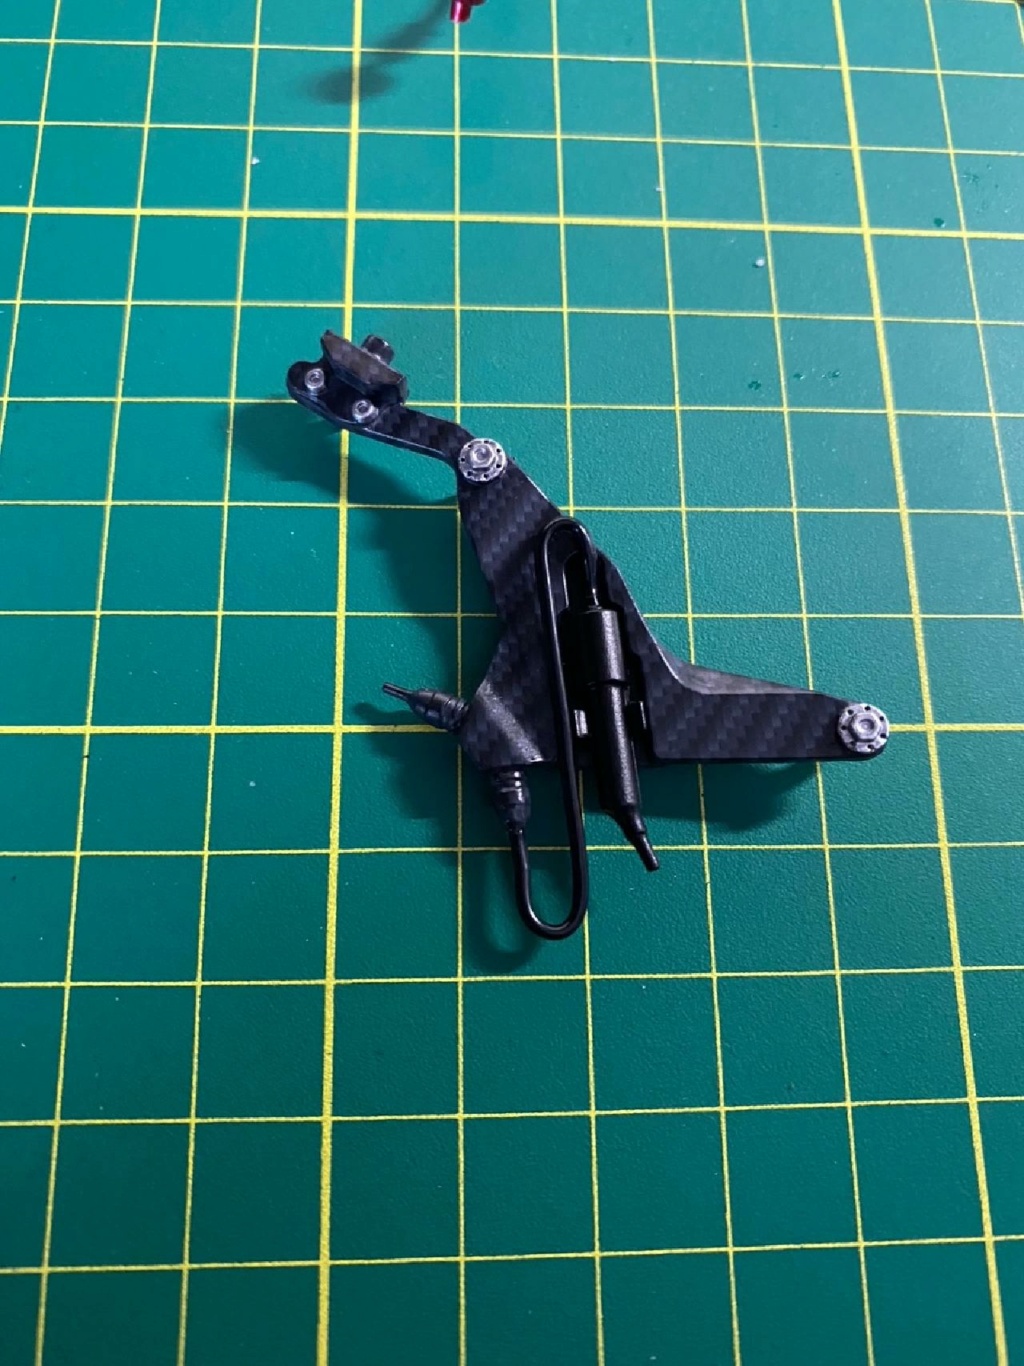
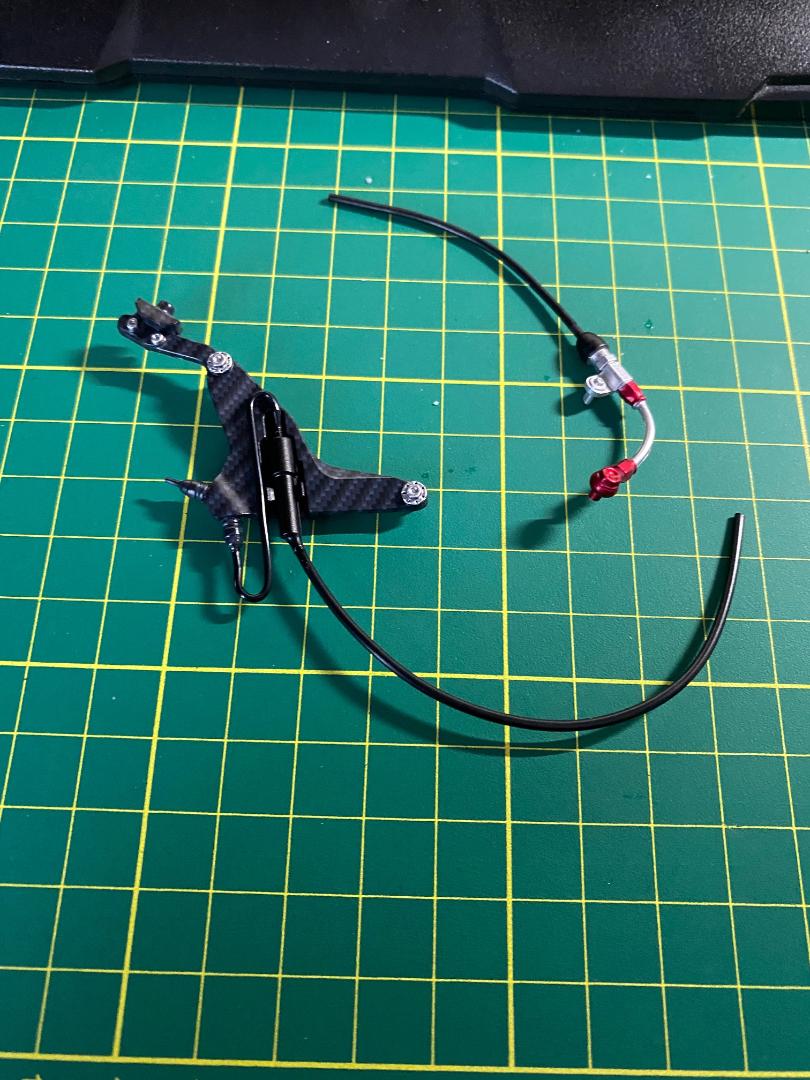
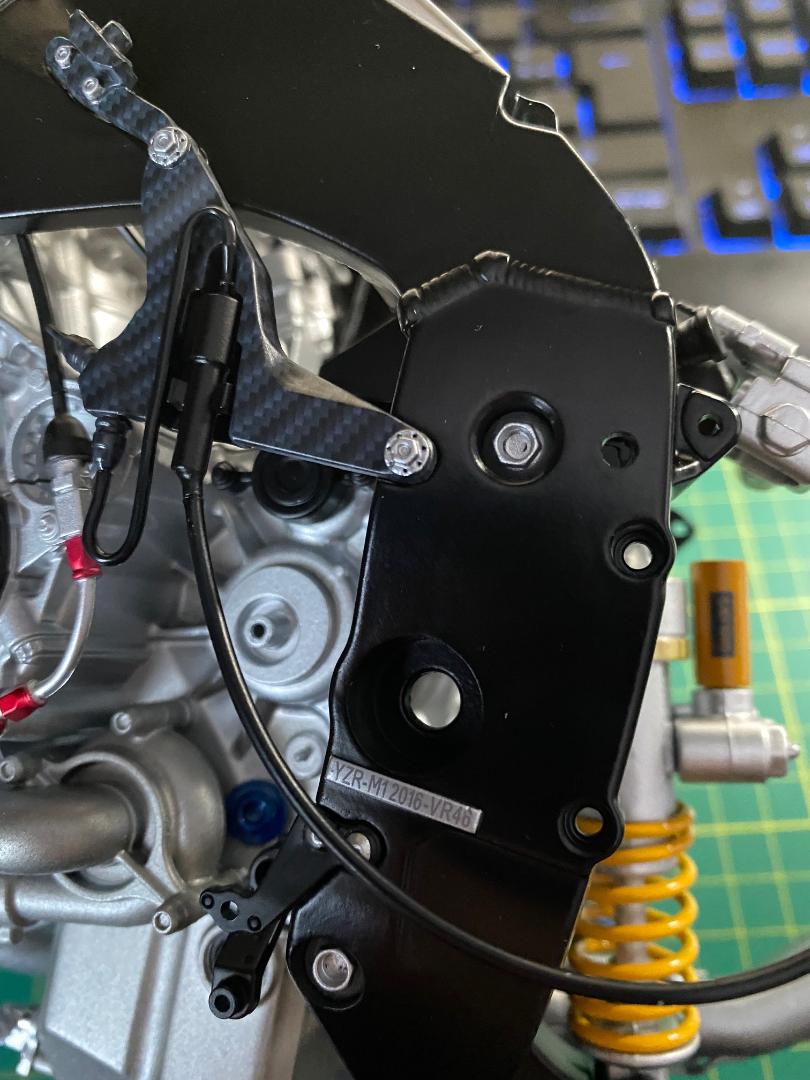
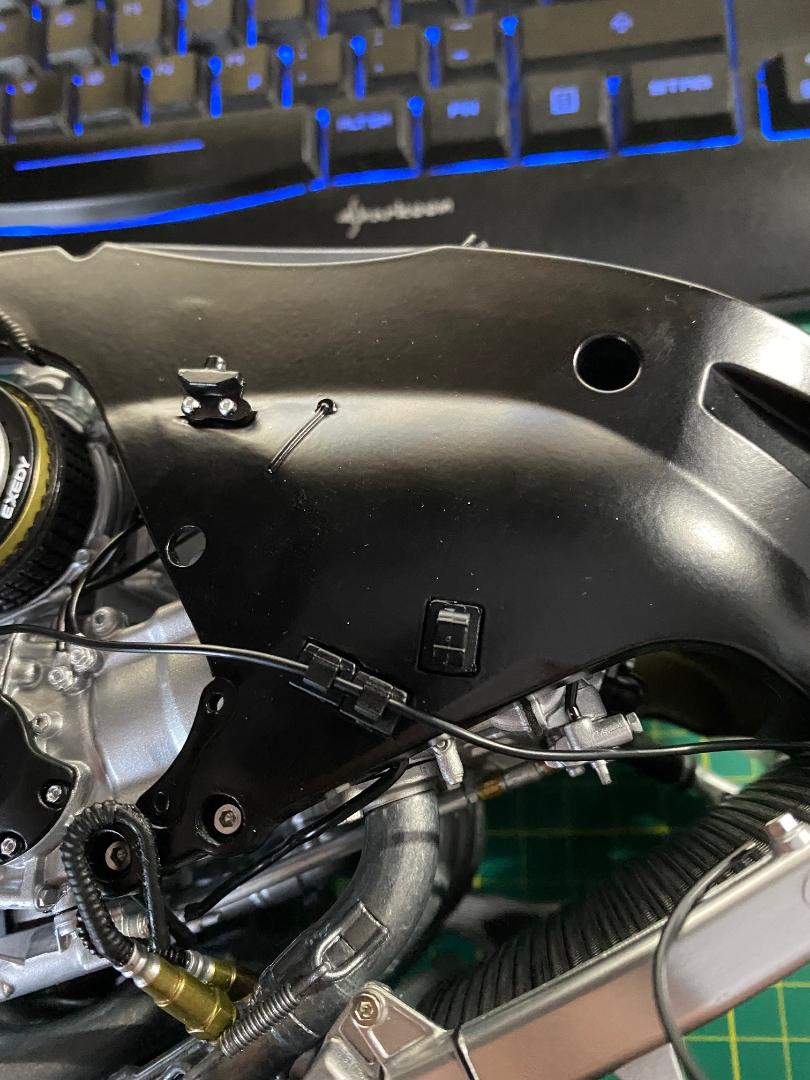
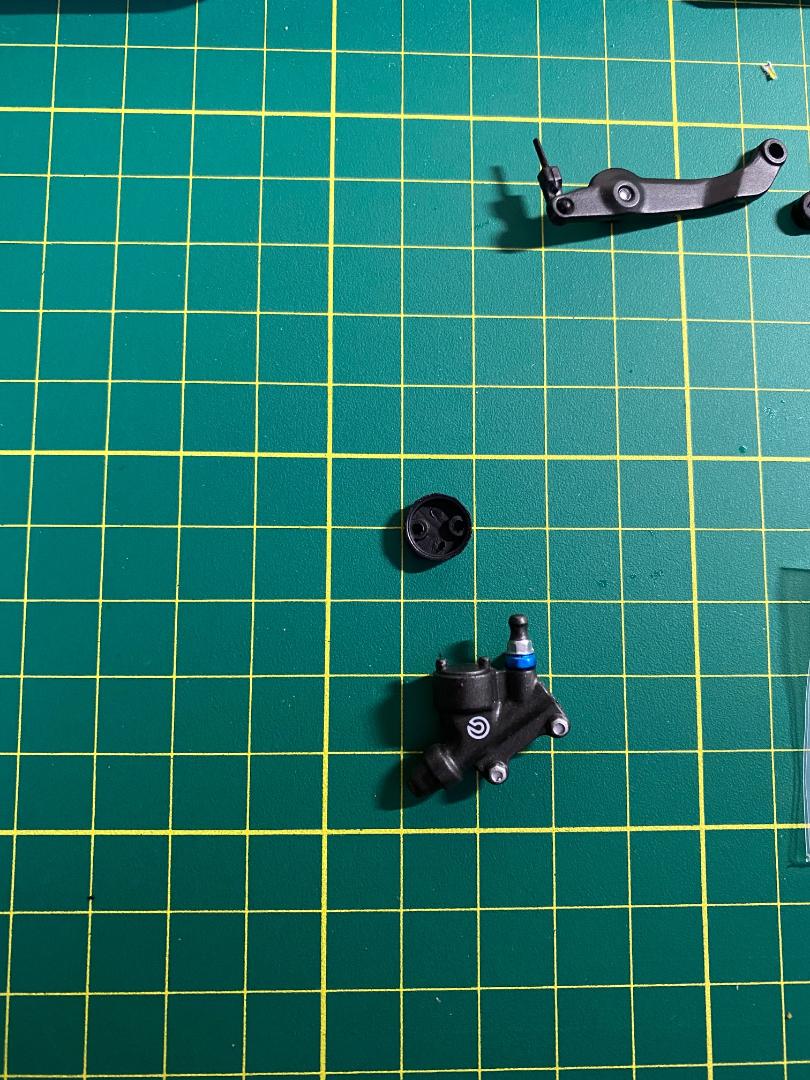
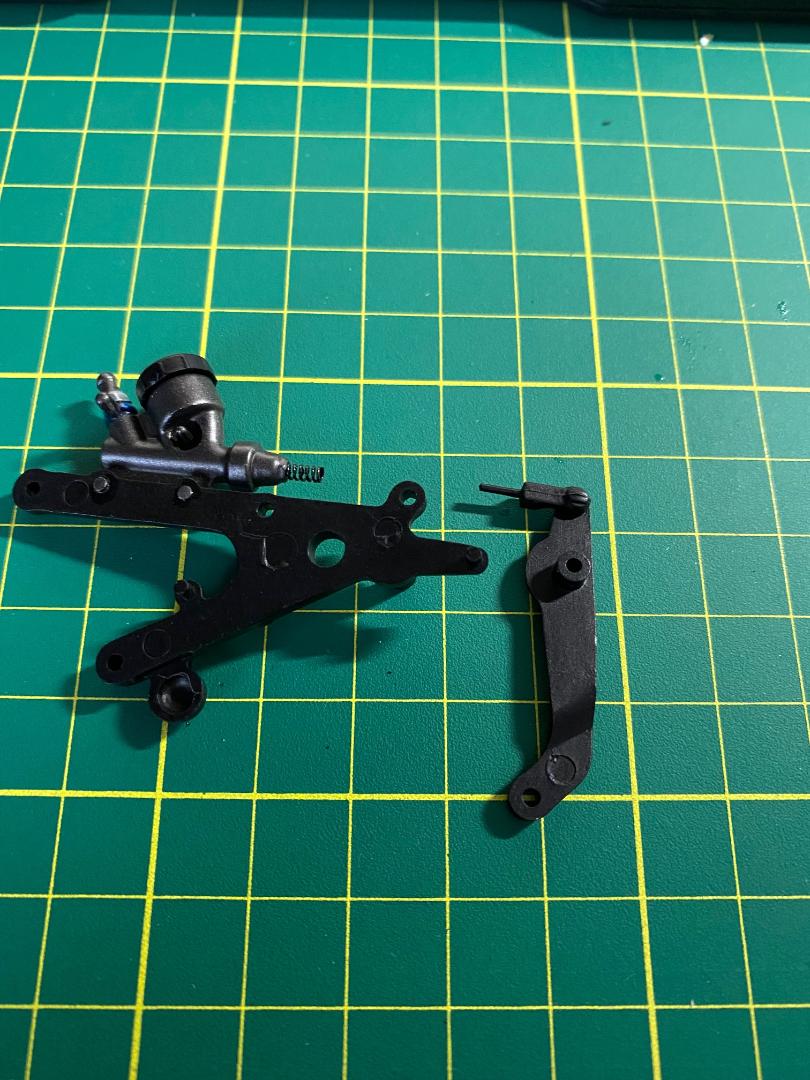
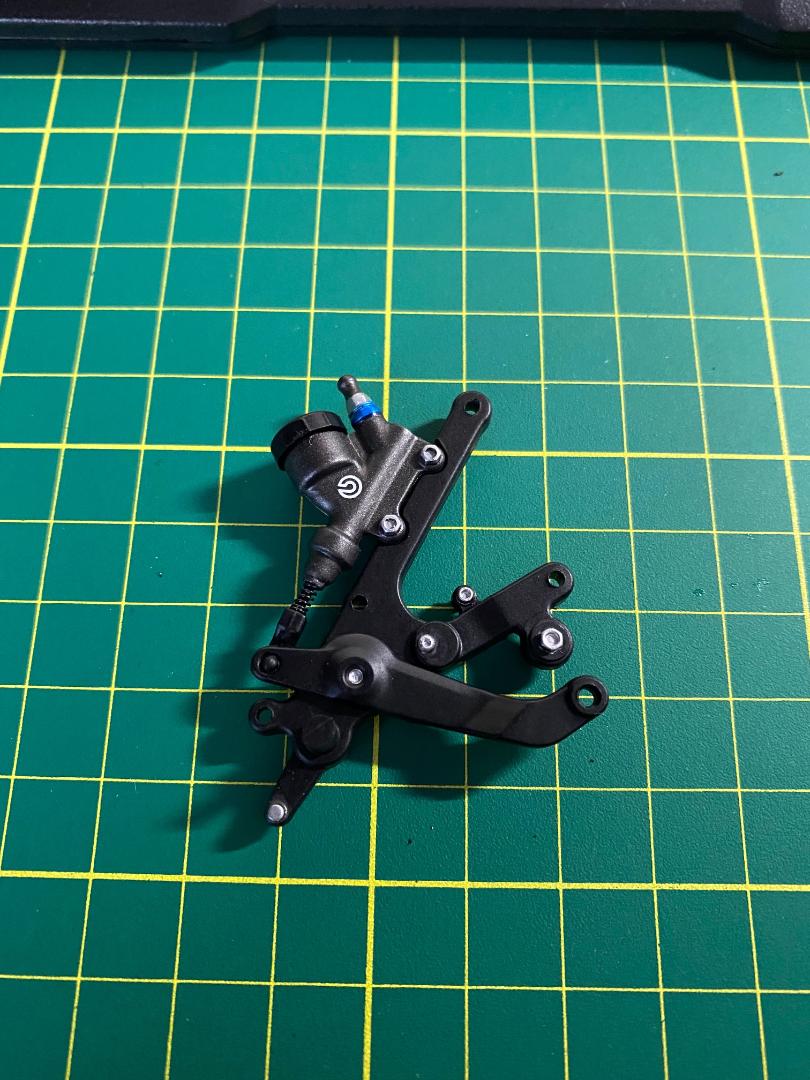
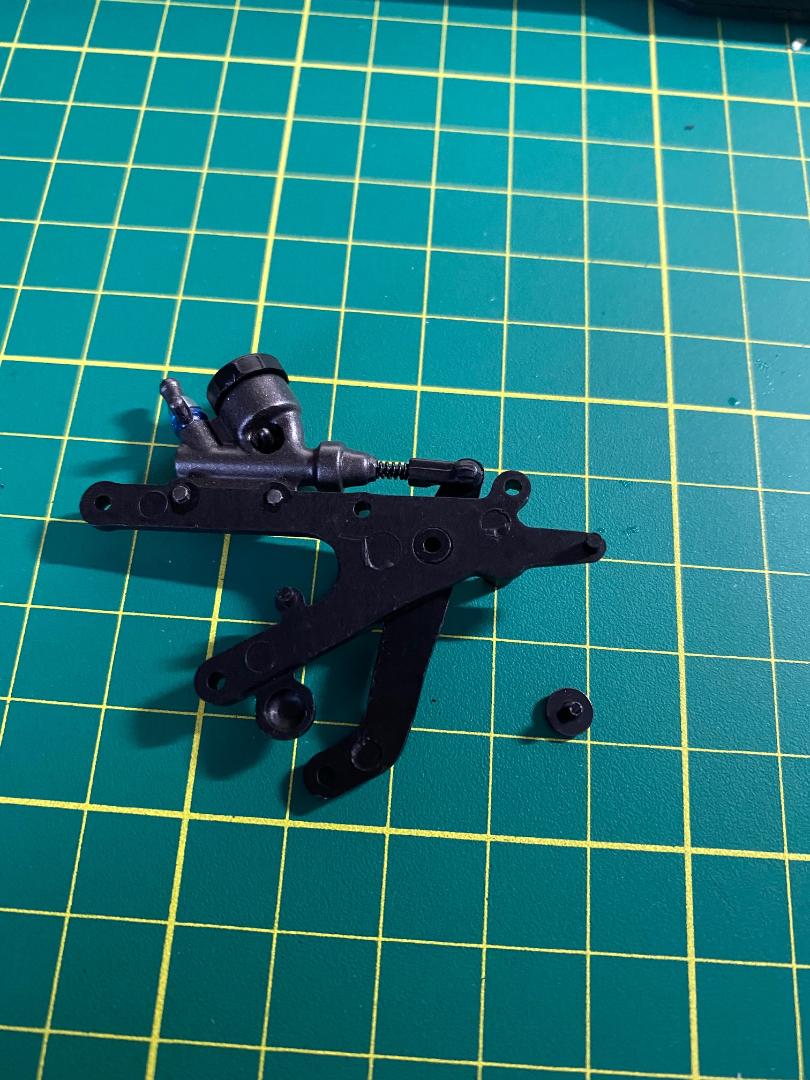
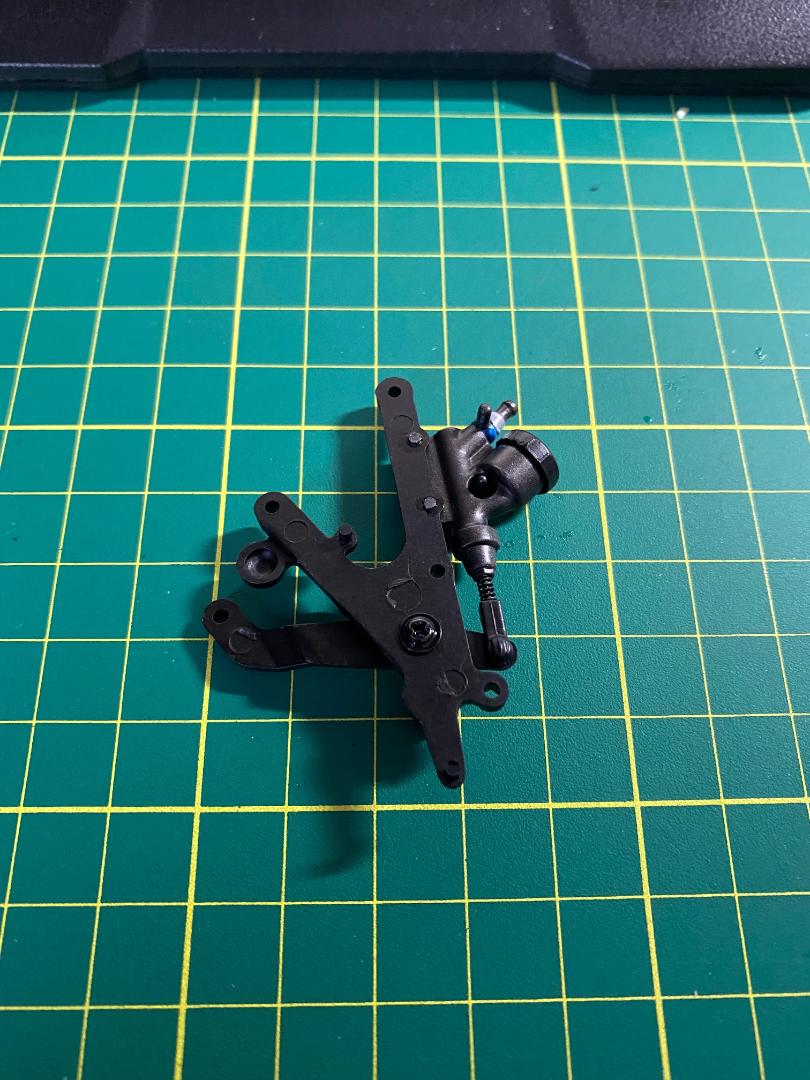
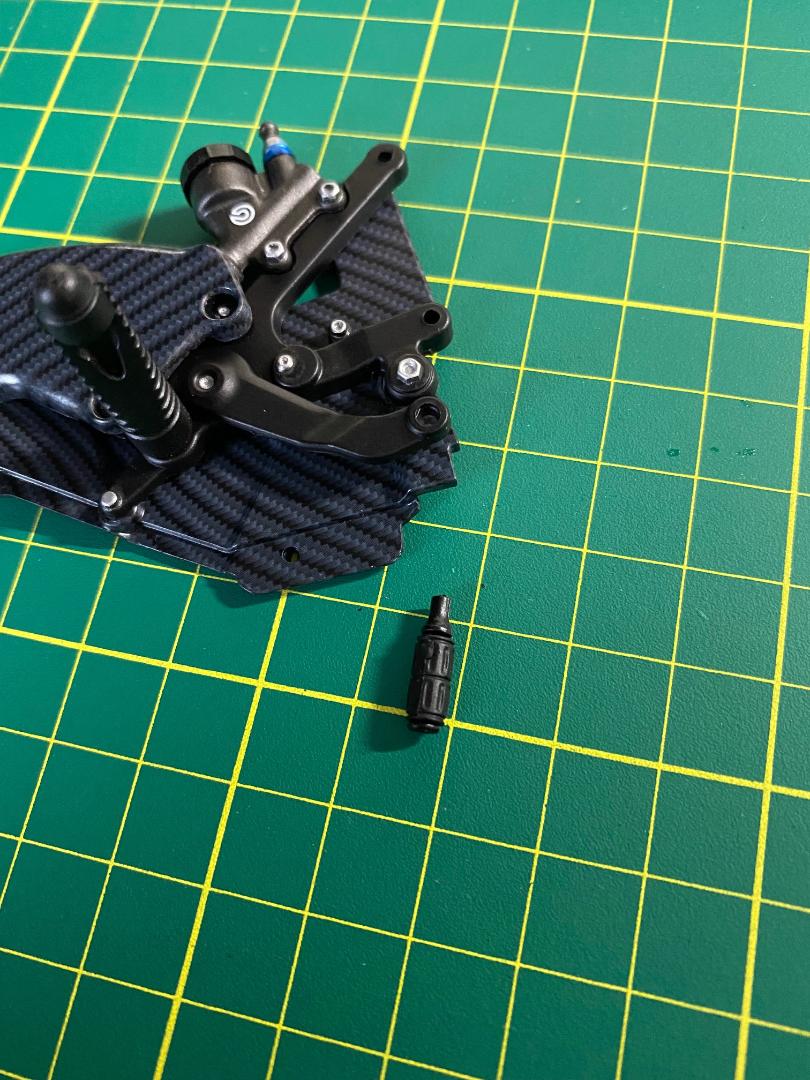
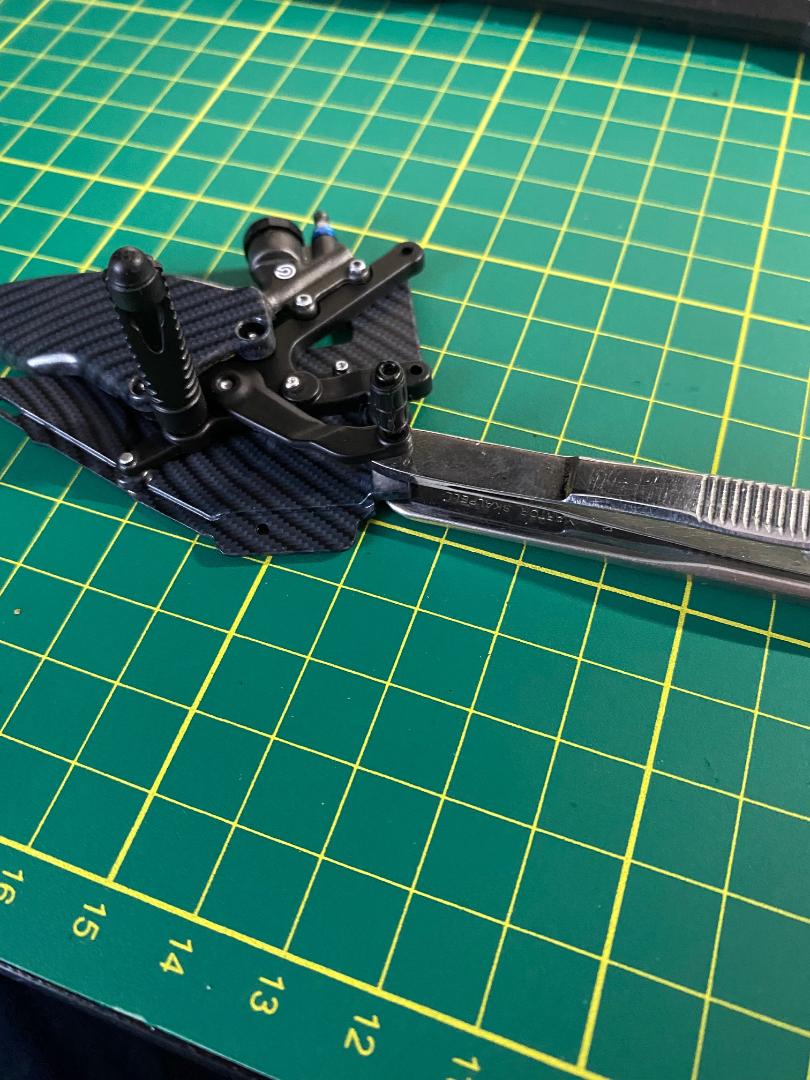
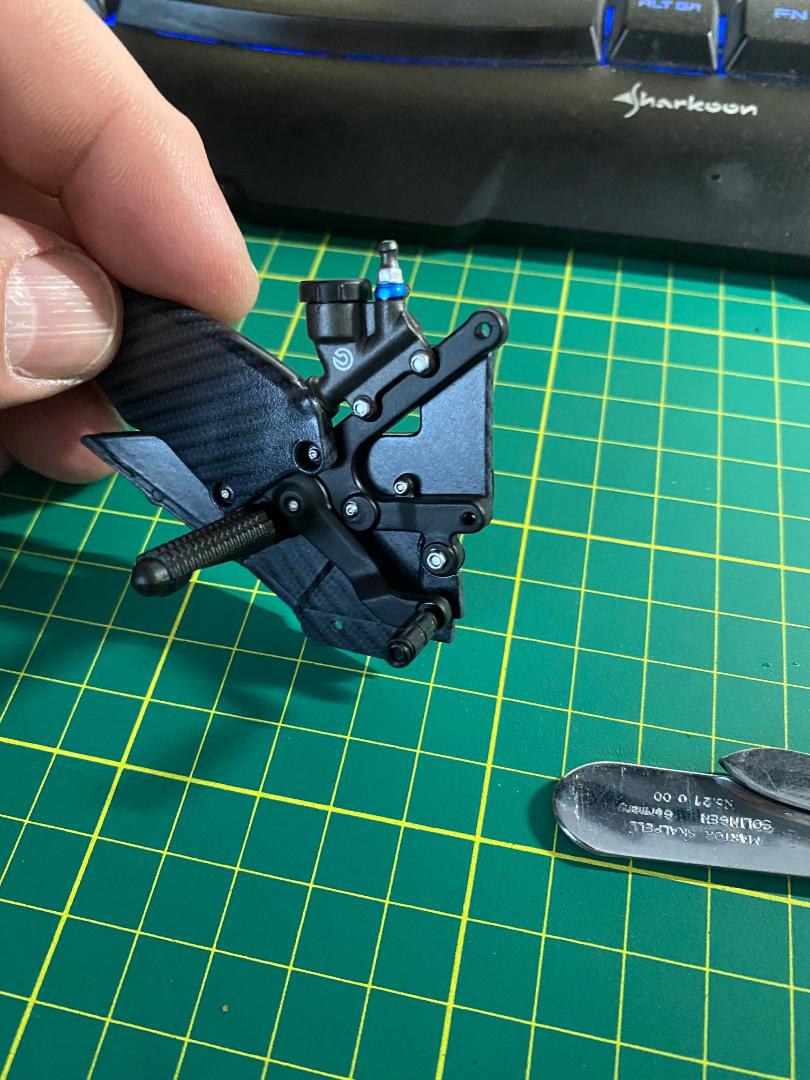
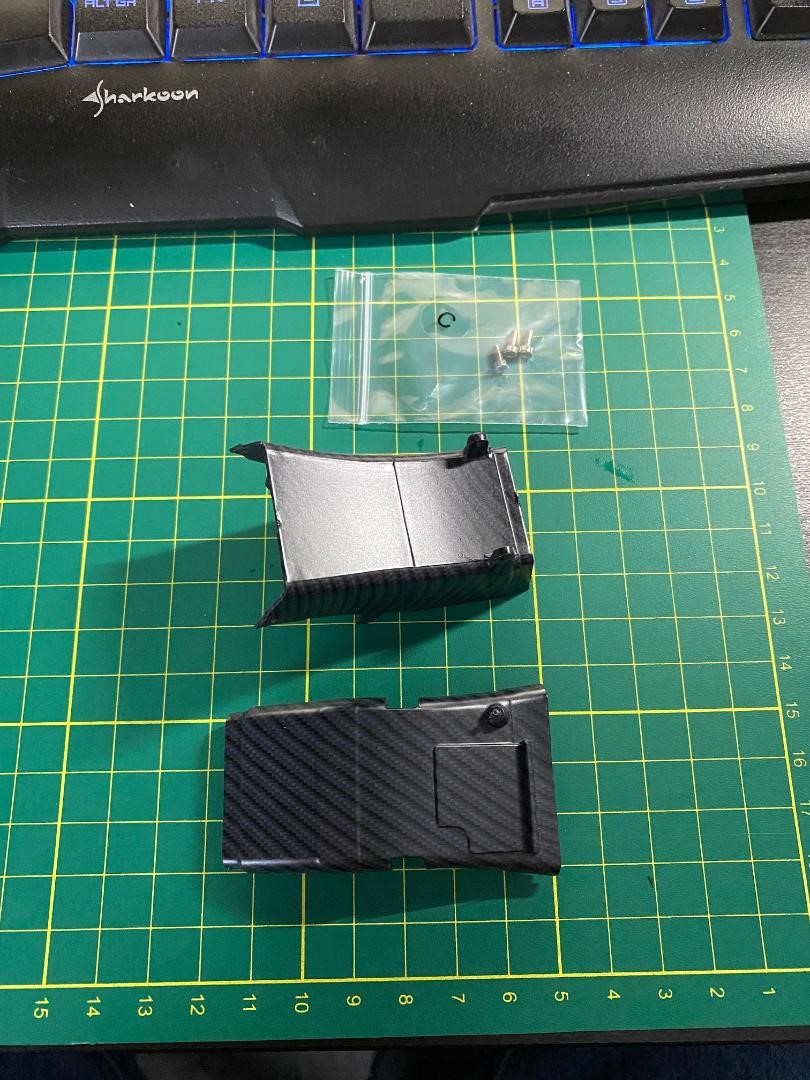
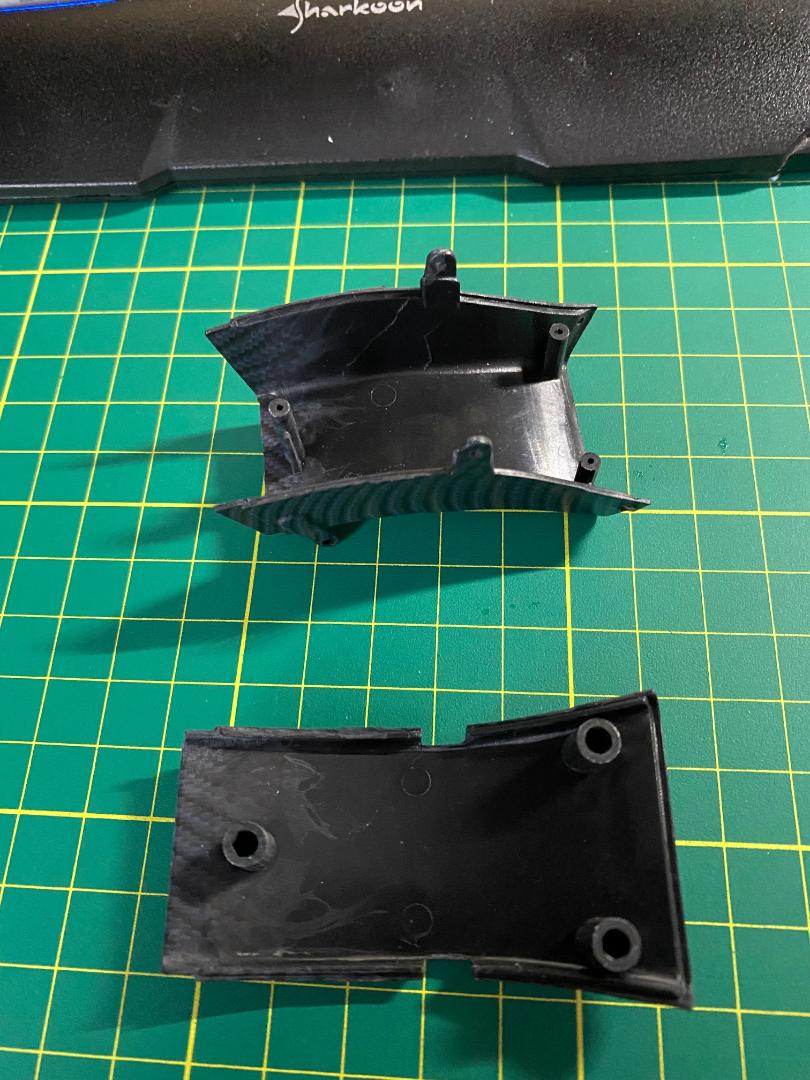
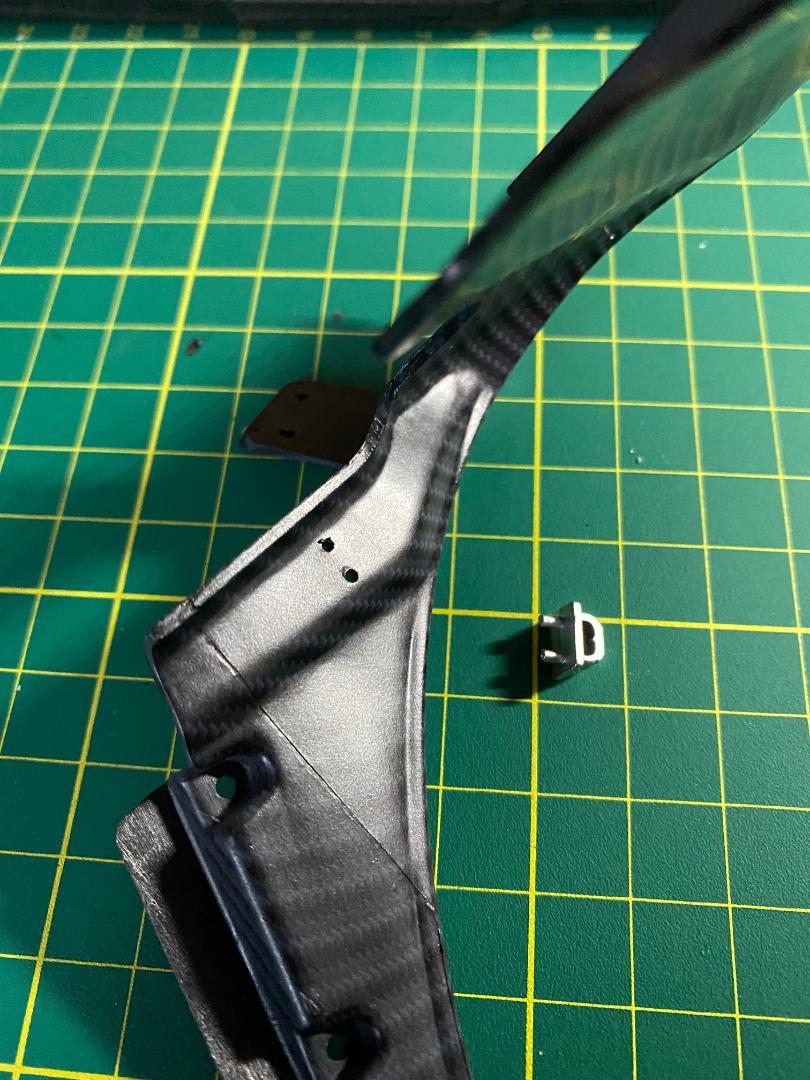
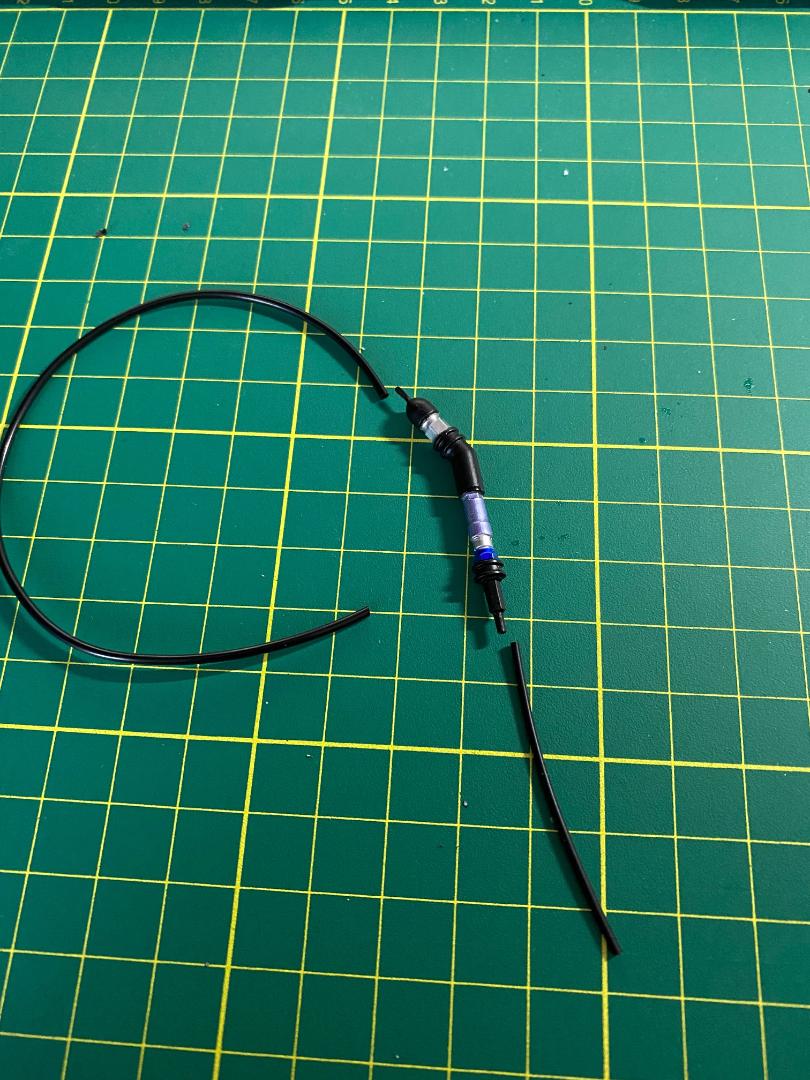
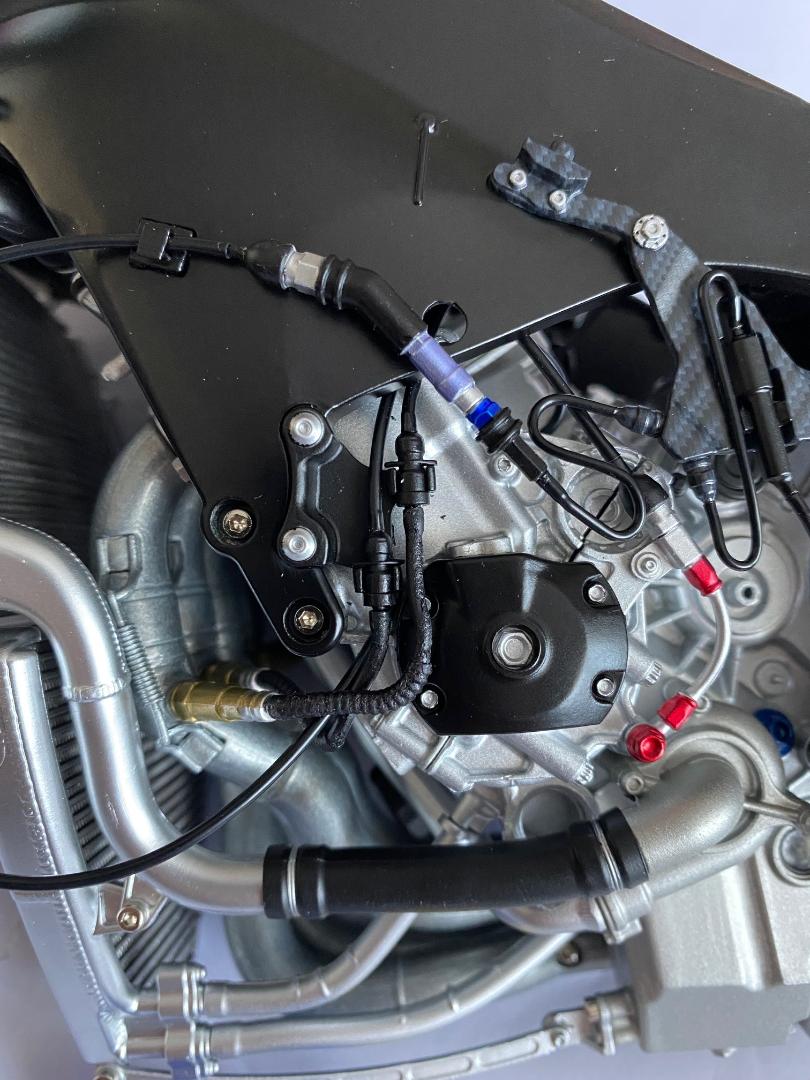
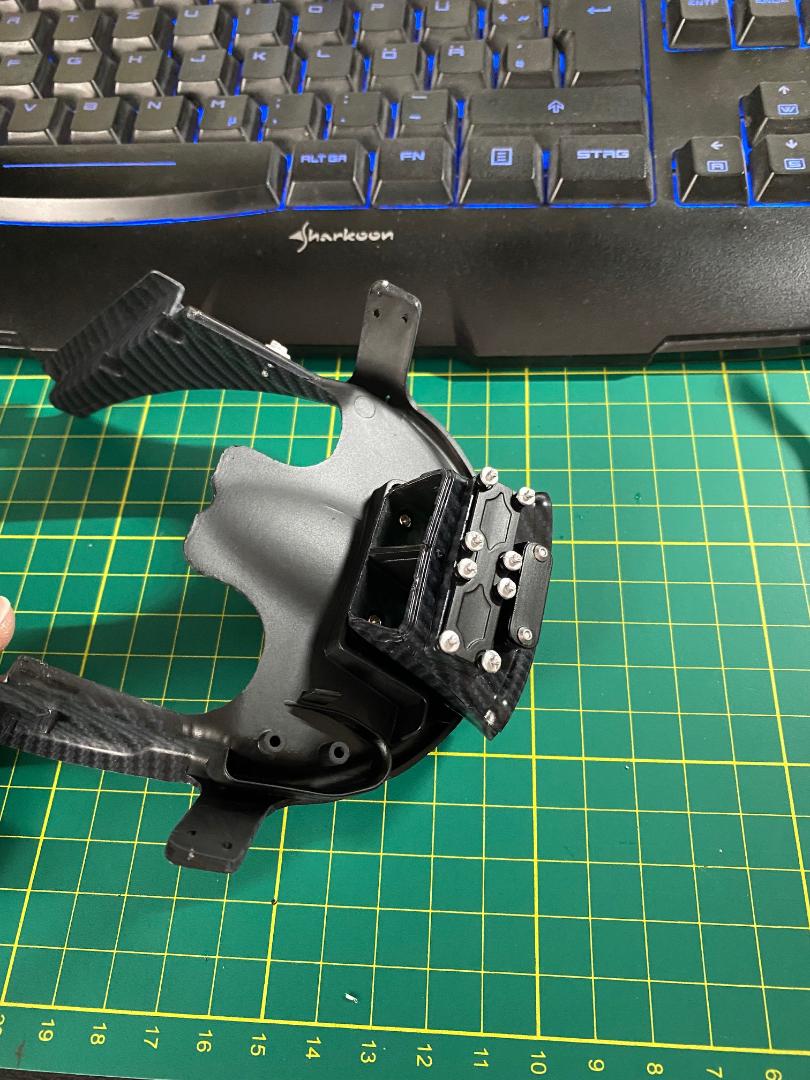
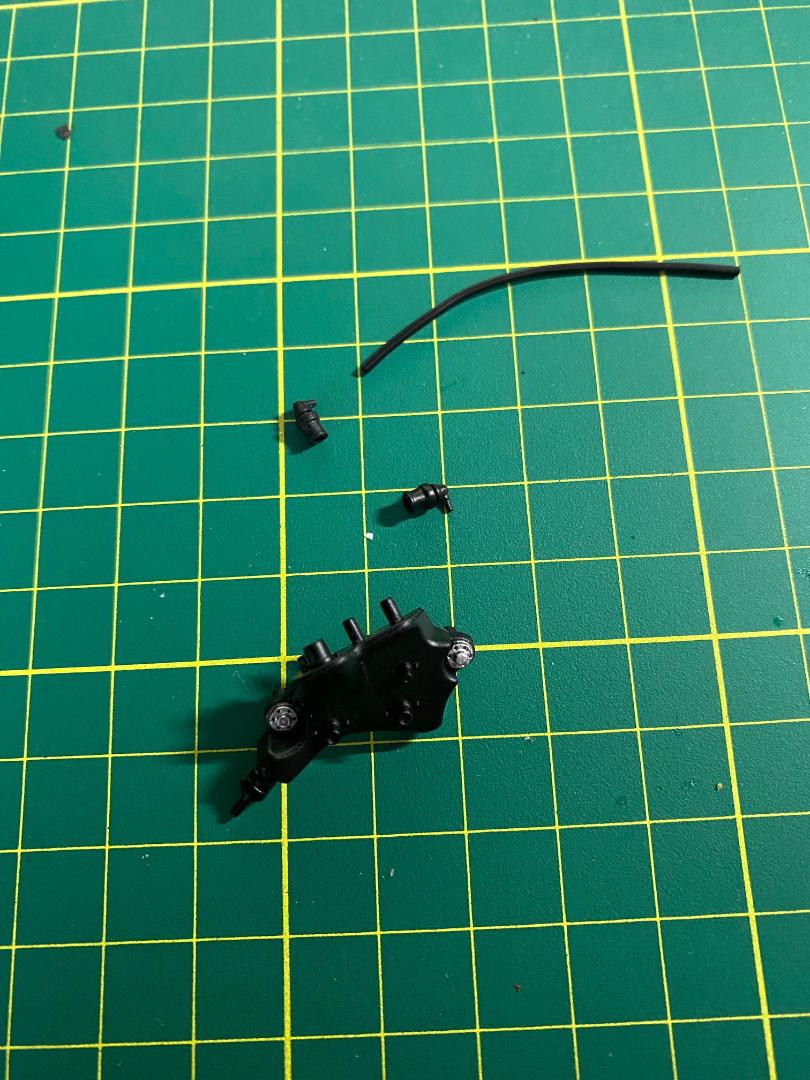
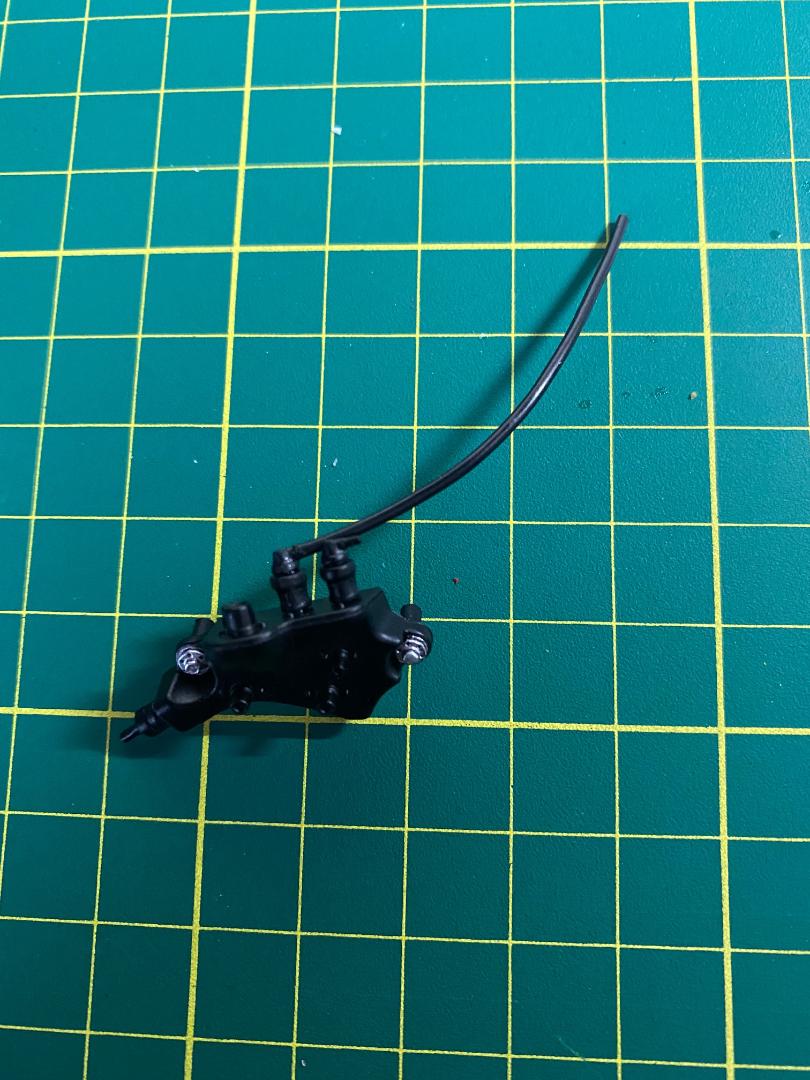
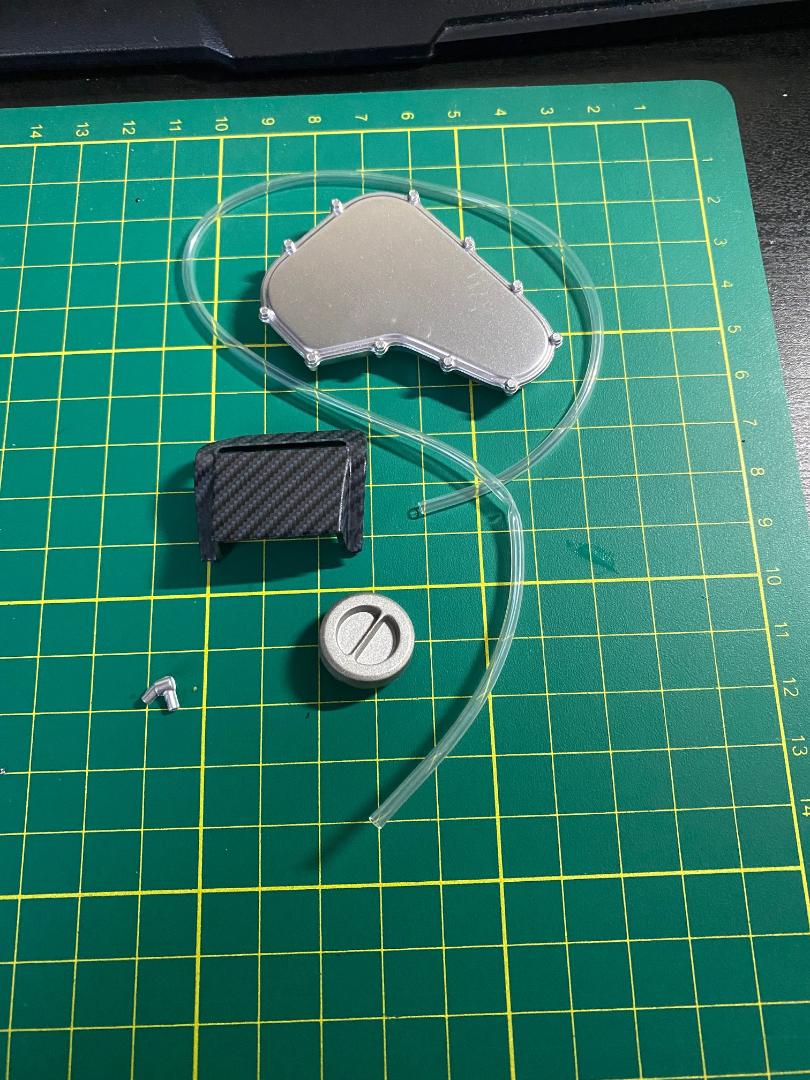
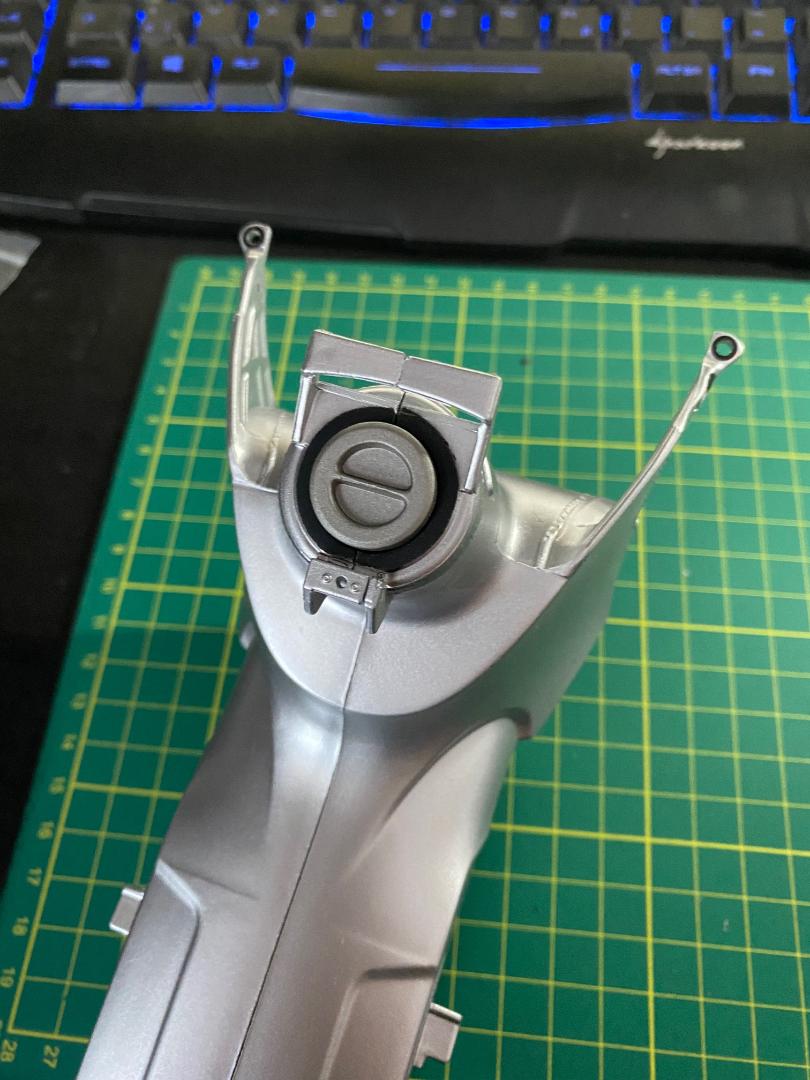
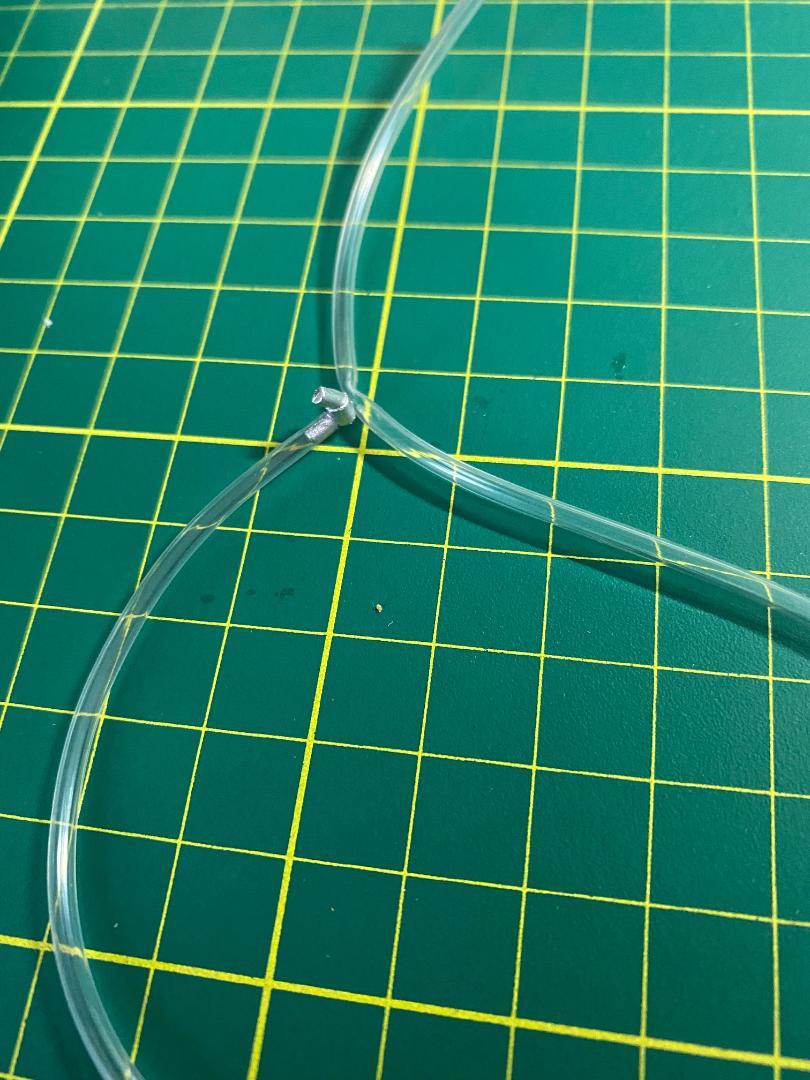
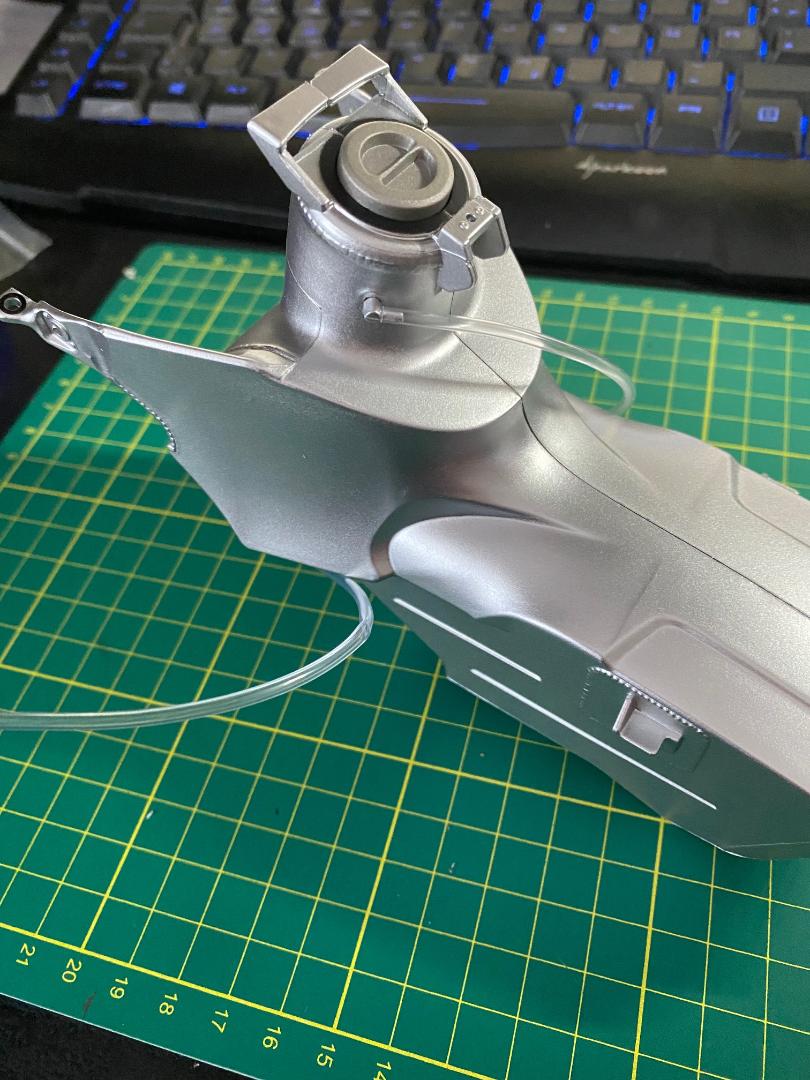
Weiter geht`s mit Bauabschnitt 49, einigen Hydraulikkomponenten. Dabei handelt es sich um eine Halterungsplatte im Carbonlook, drei Kunststoffschläuche, und zwei Adapterelemente. Der mittlere Schlauch muss sehr eng in ein S gebogen werden. Aus diesem Grund habe ich ihn wieder mit einem Stück Wingertsdroht (rheinhessisch für Bindedraht) gefüllt, um Knicke zu verhindern. Das Ganze wird dann auf der linken Seite installiert, wobei das obere Ende der Leitung aus dem silbernen Anschluss neben dem Motor erstmal ins Leere führt. Zu guter letzt wird wieder ein Schraubenloch im Rahmen mit einer Mutterkappe verschlossen.
 " />
" /> " />
" /> " />
" /> " />
" /> " />
" /> " />
" /> " />
" /> " />
" />
Maddin- Schneidmatten-Virtuose
Glufamichel mag diesen Beitrag
Re: Valentino Rossi's Yamaha YZR M1 in 1:4 von DeAgostini
![]() von Maddin Mo 07 März 2022, 15:38
von Maddin Mo 07 März 2022, 15:38
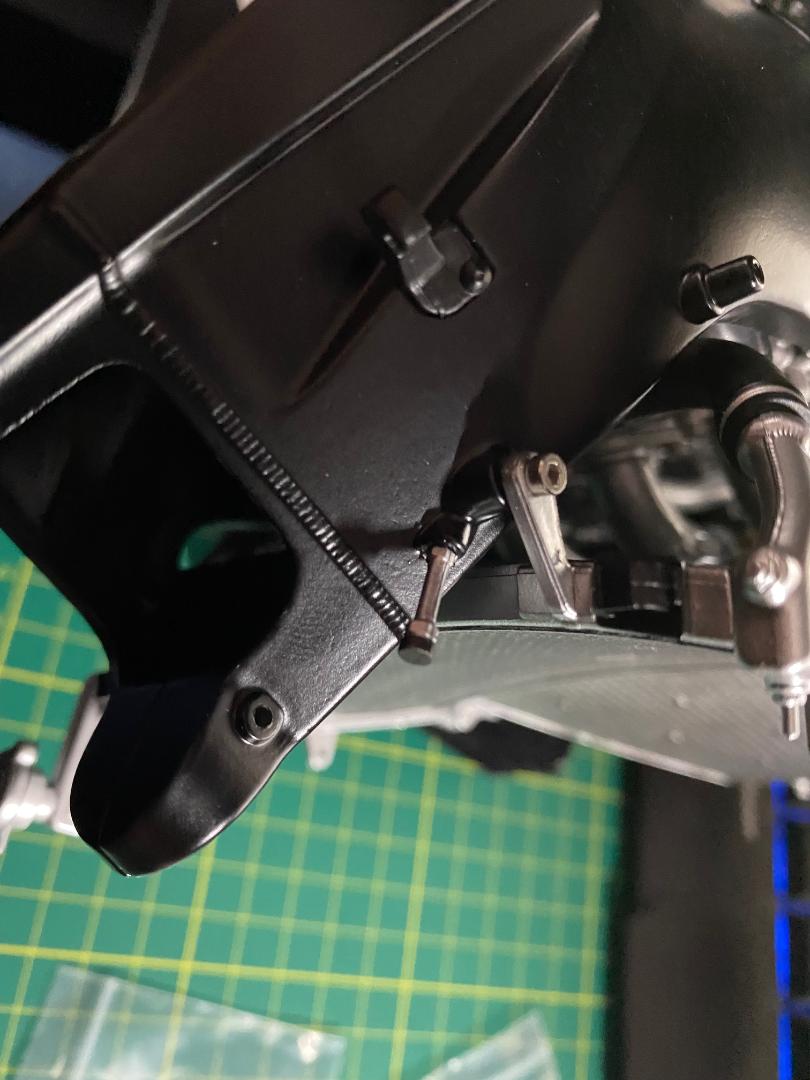
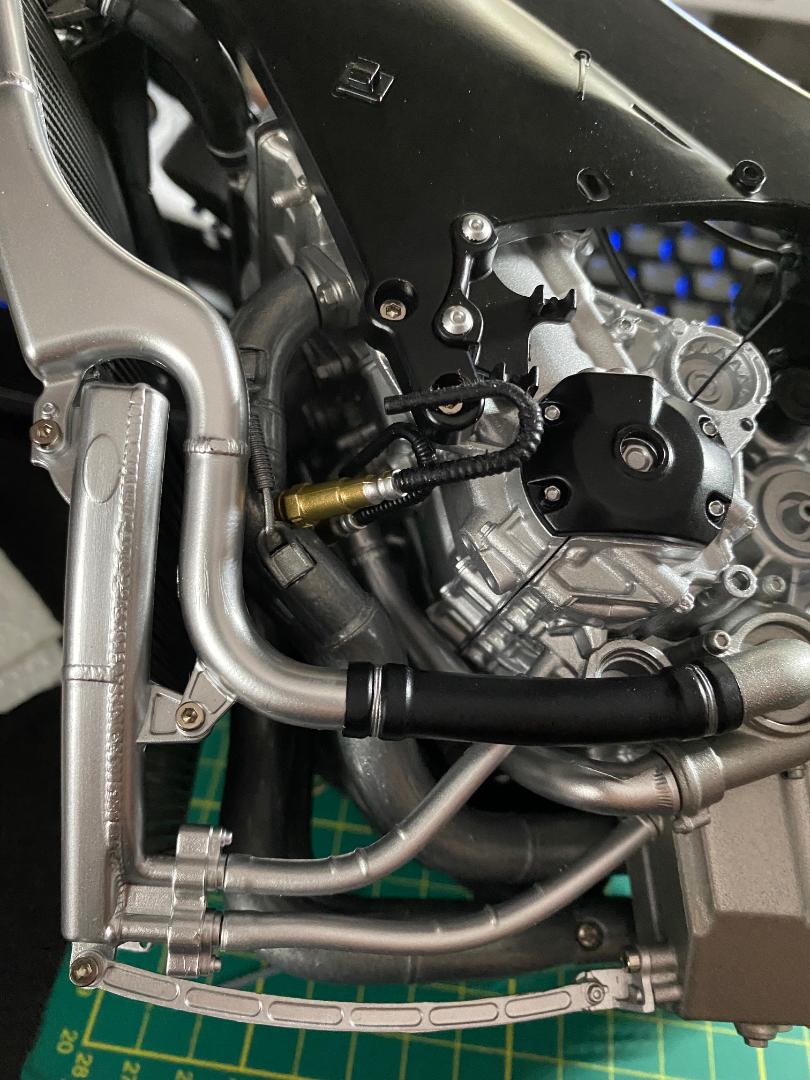
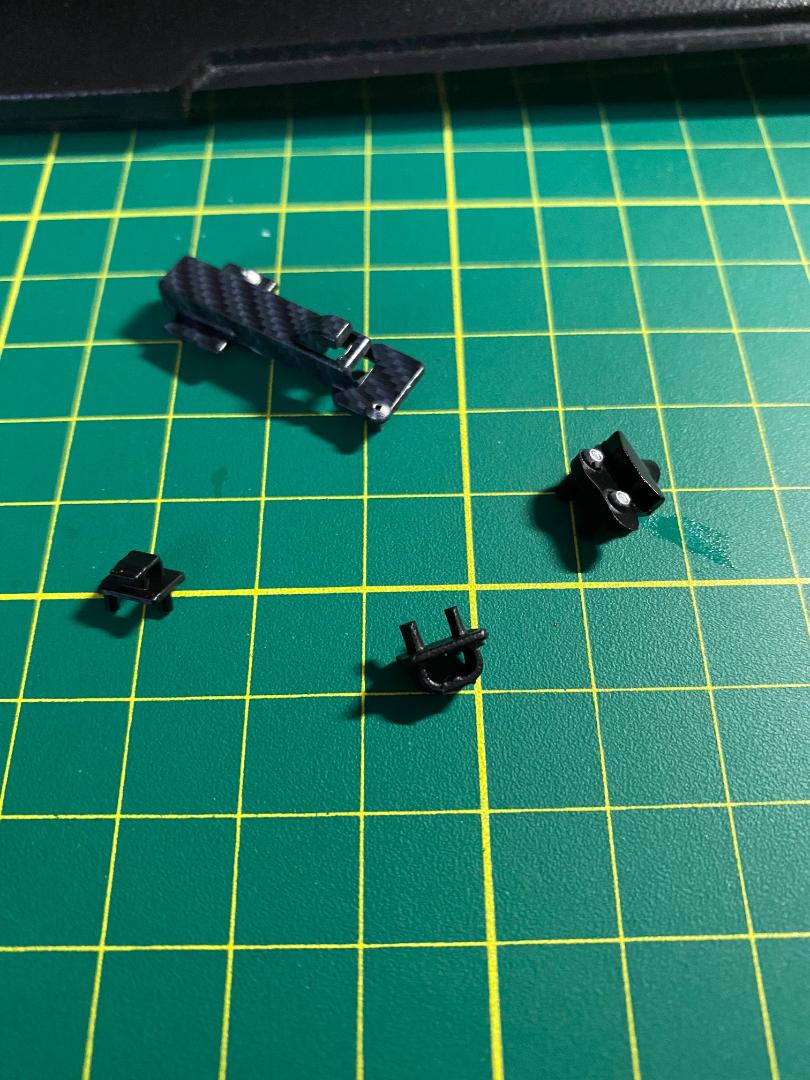
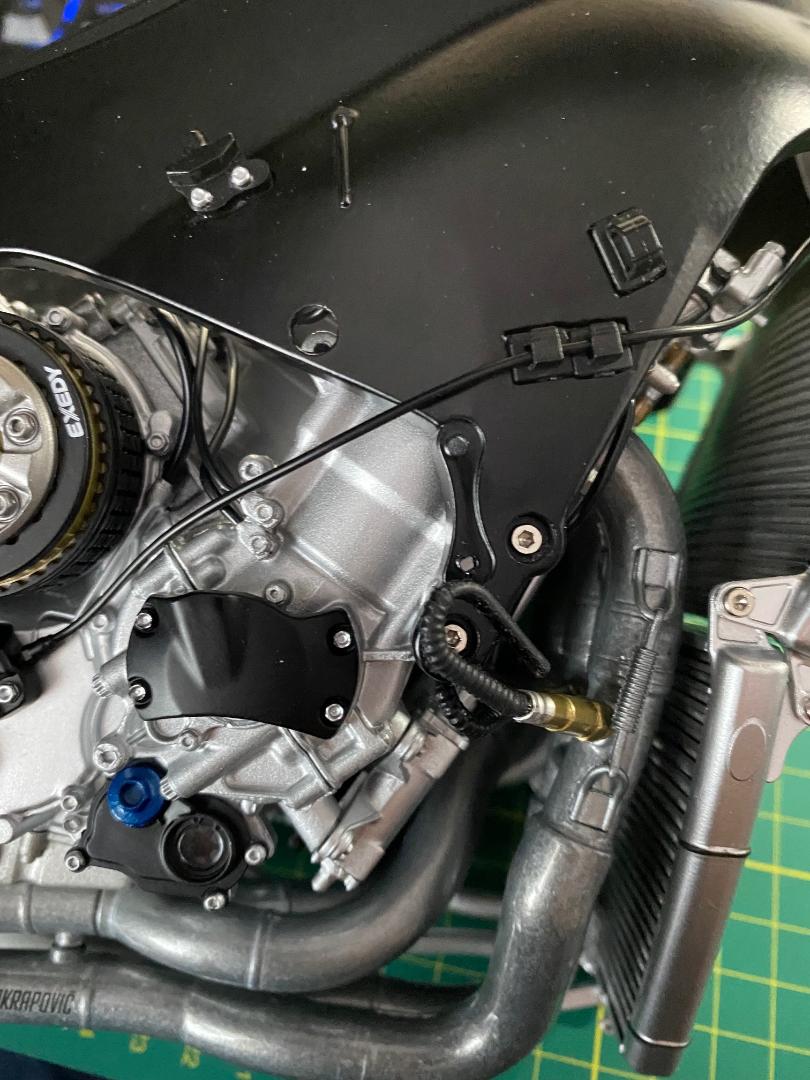
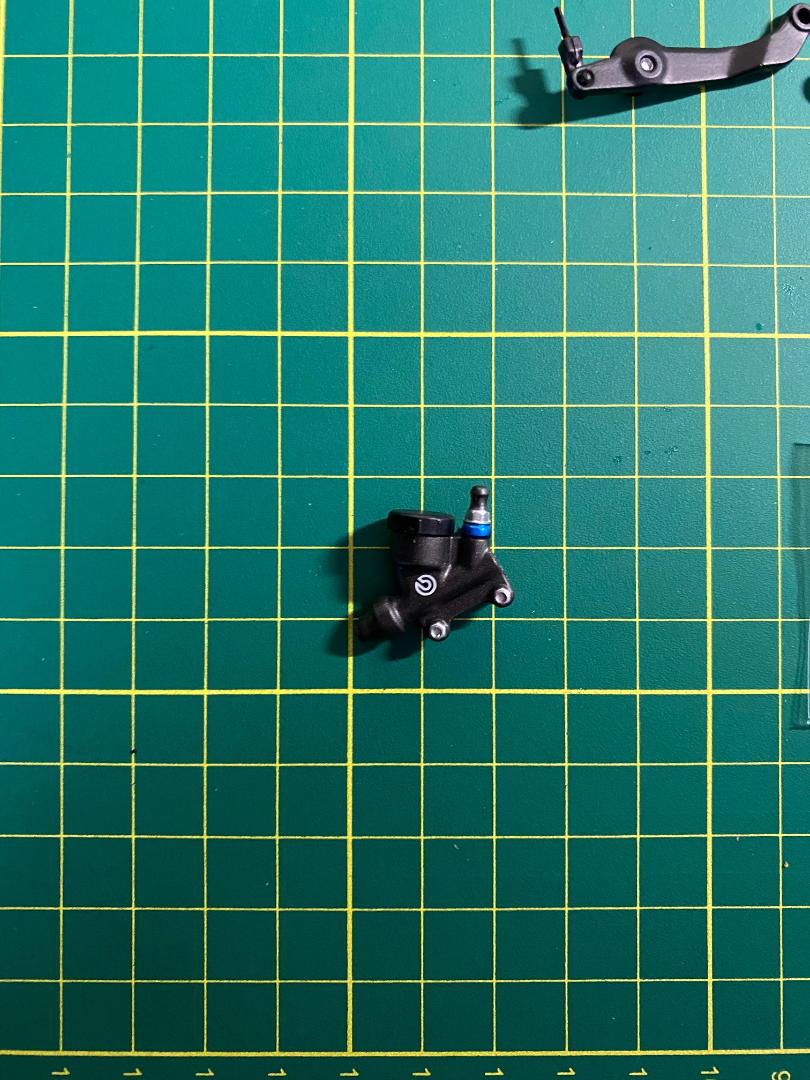
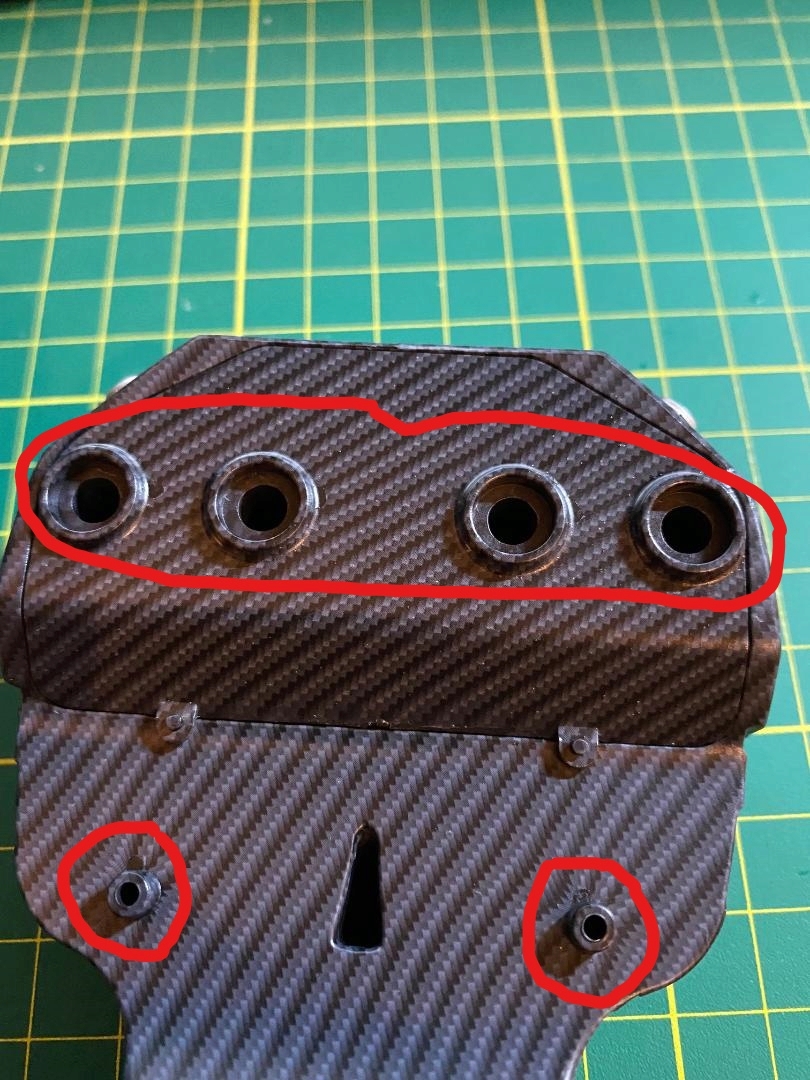
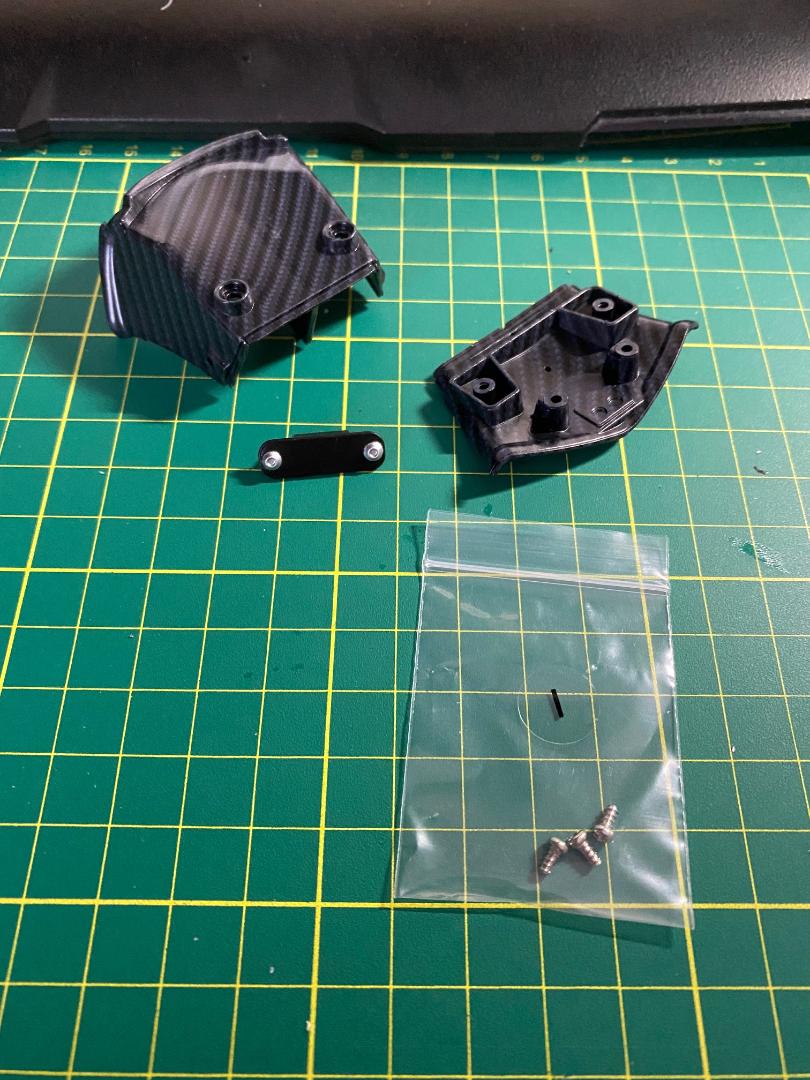
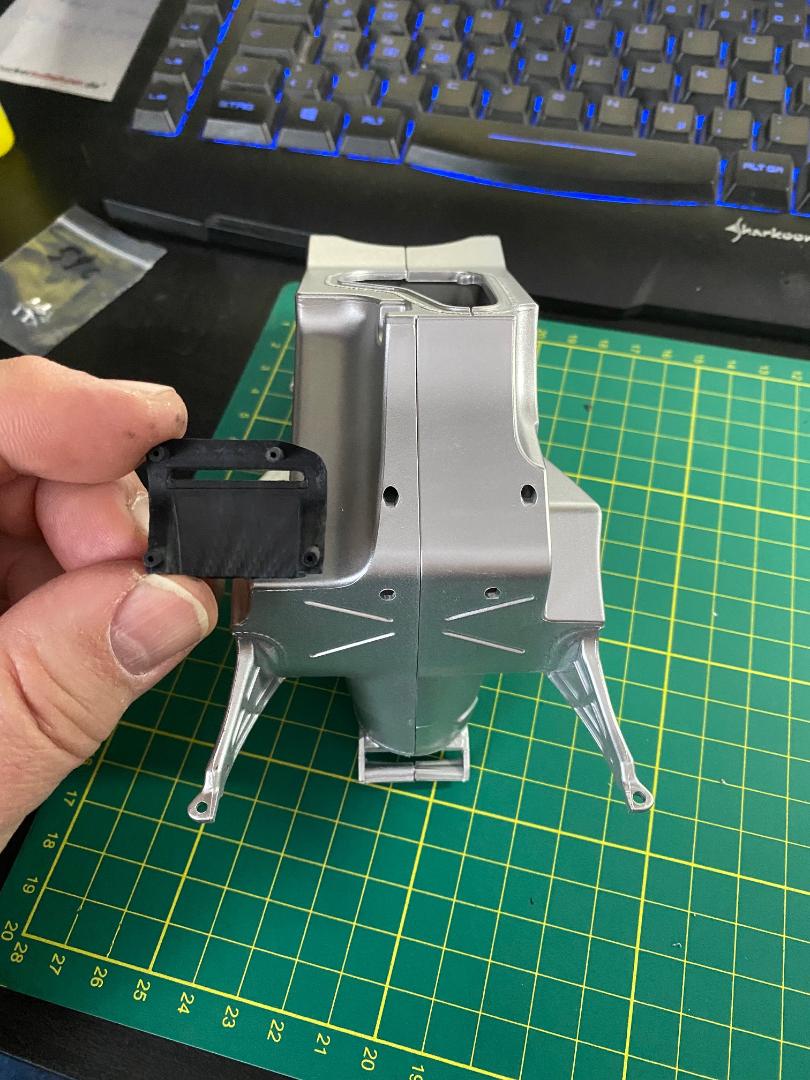
Nächste Runde: Bauschritt 50, eine große Halterung im Carbonlook und ein paar kleinere Halterungen für die rechte Seite des Rahmens.
Da gibt`s nix groß zu erzählen. Strikt nach Bauanleitung mit Sekundenkleber ankleben, aber die lange Kupplungsleitung geht nach vorn hintereinander durch zwei Clips, von Denen der vordere erst in der nächsten Lieferung kommen sollte. Da müsste man dann den Schlauch wieder aus der Halterung aus Bauschritt 50 herausziehen. Oooder man hat, wie ich schon Alles, greift vor und führt den Schlauch gleich durch Beide und klebt sie gleichzeitig fest. Hab ich hier gemacht.
 " />
" /> " />
" /> " />
" /> " />
" />
Maddin- Schneidmatten-Virtuose
doc_raven1000, Glufamichel, ullie46 und rmo mögen diesen Beitrag
Re: Valentino Rossi's Yamaha YZR M1 in 1:4 von DeAgostini
![]() von Maddin Mi 09 März 2022, 16:59
von Maddin Mi 09 März 2022, 16:59
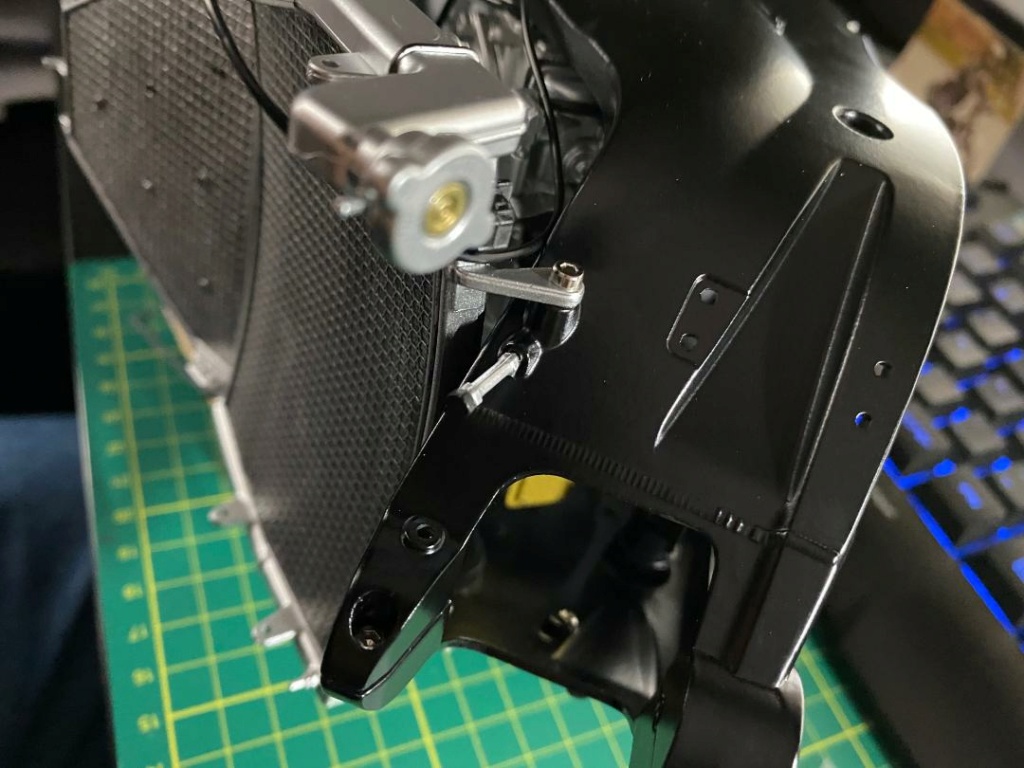
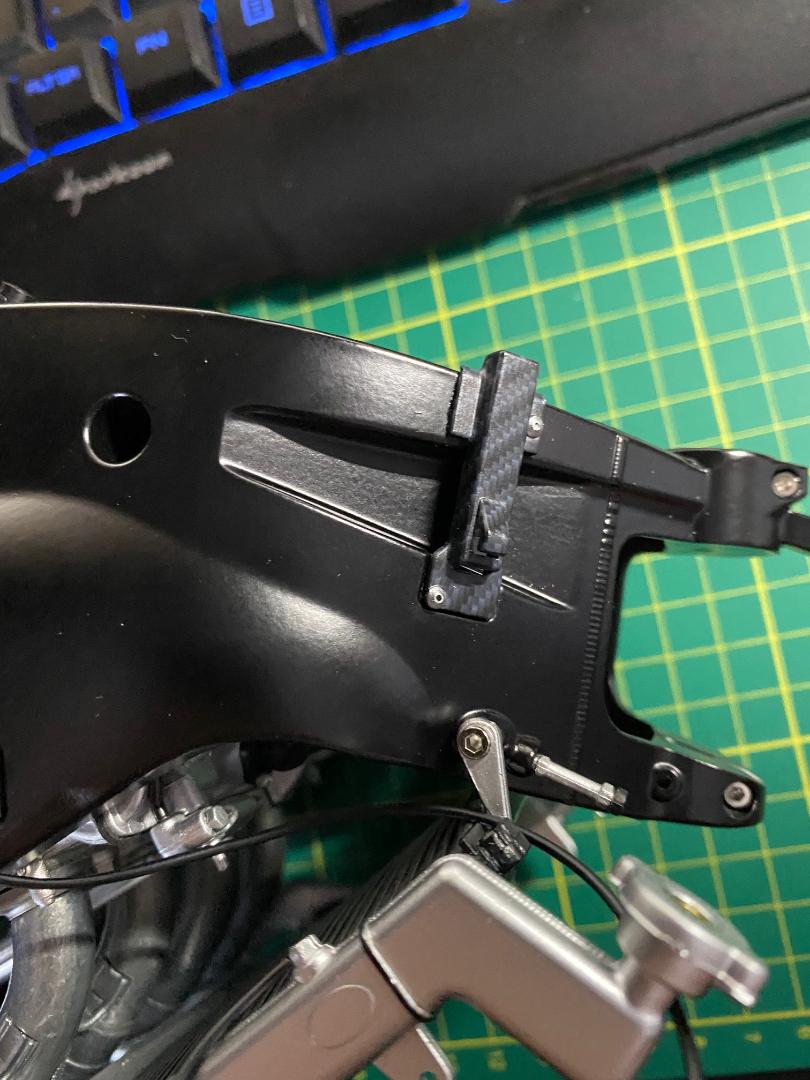
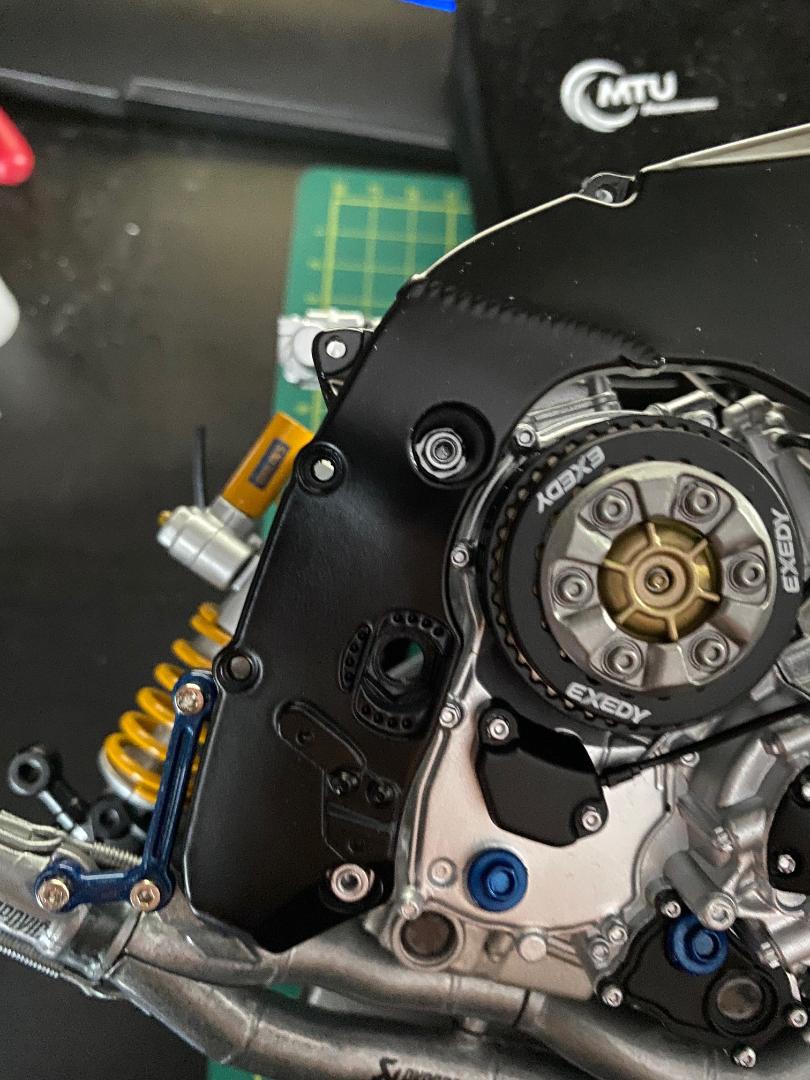
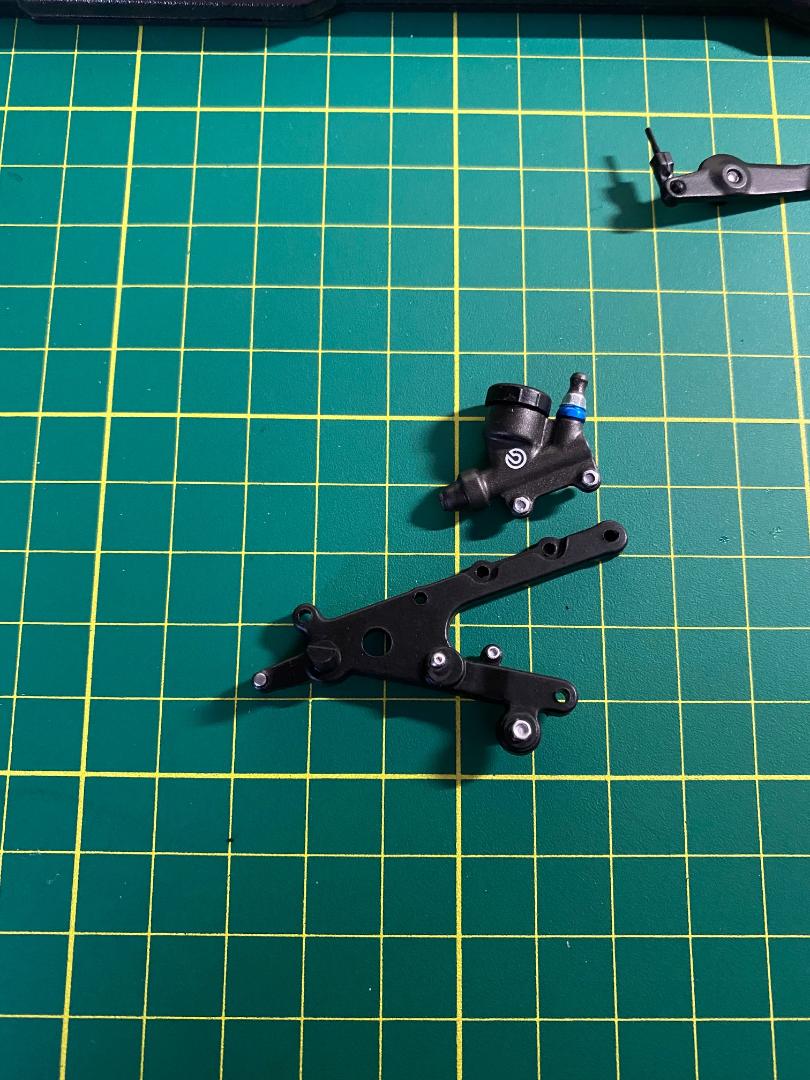
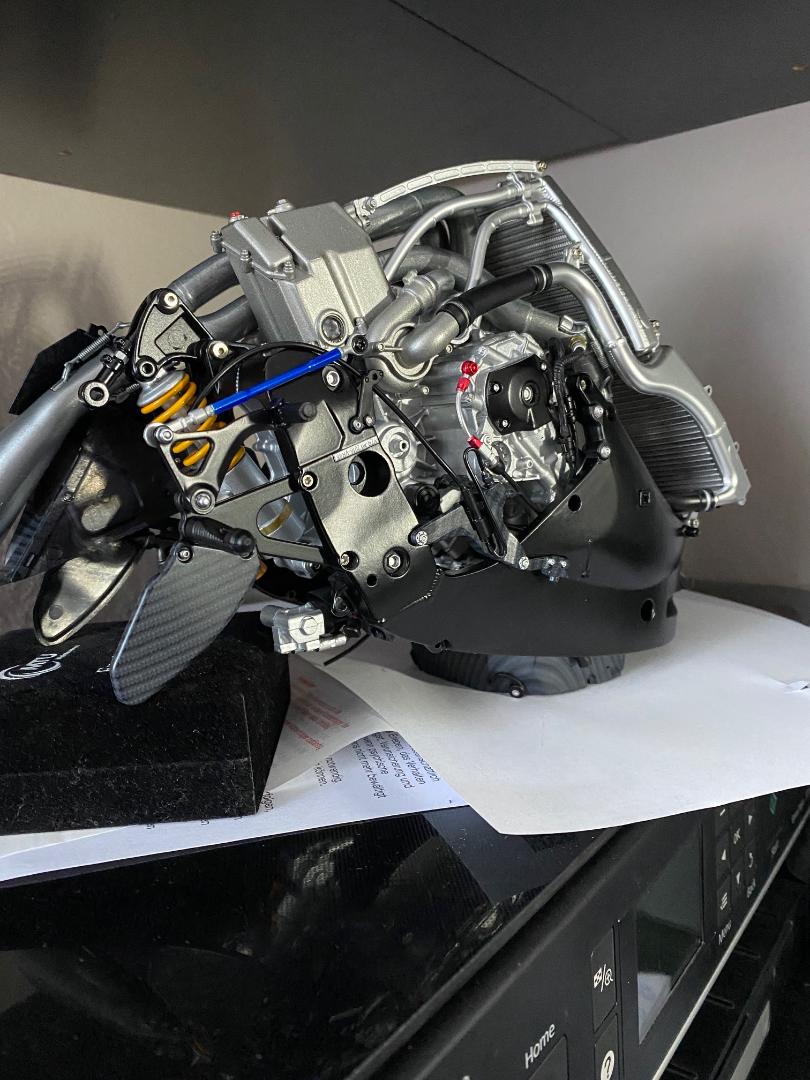
Wieder ist ein Minischritt erledigt: Bauschritt 51 mit der rechten Rahmenhalterung, den Steckverbindern nebst Leitungen zu den rechten beiden Lambdasonden und zwei Mutterattrappen als Kappen für Motorschraubenlöcher. Der Anbau lief genauso einfach, wie auf der linken Seite, nur dass jetzt immer mehr Obacht gegeben werden muss, wie man den Motor/Rahmenklotz ablegt, um nichts zu beschädigen. Es wird mit jedem fragilen Detail immer kniffeliger. Das kann ja was werden...
 " />
" /> " />
" /> " />
" /> " />
" /> " />
" /> " />
" /> " />
" /> " />
" />Danach geht es dann mit den beiden Fußrastenanlagen weiter. Diese werde ich aber wohl erstmal nur montieren und dann so lange weglegen, wie es geht, bevor ich sie anbaue, um sie nicht ständig wieder abzubrechen...
Maddin- Schneidmatten-Virtuose
doc_raven1000 und Glufamichel mögen diesen Beitrag
Re: Valentino Rossi's Yamaha YZR M1 in 1:4 von DeAgostini
![]() von Maddin Do 10 März 2022, 10:27
von Maddin Do 10 März 2022, 10:27
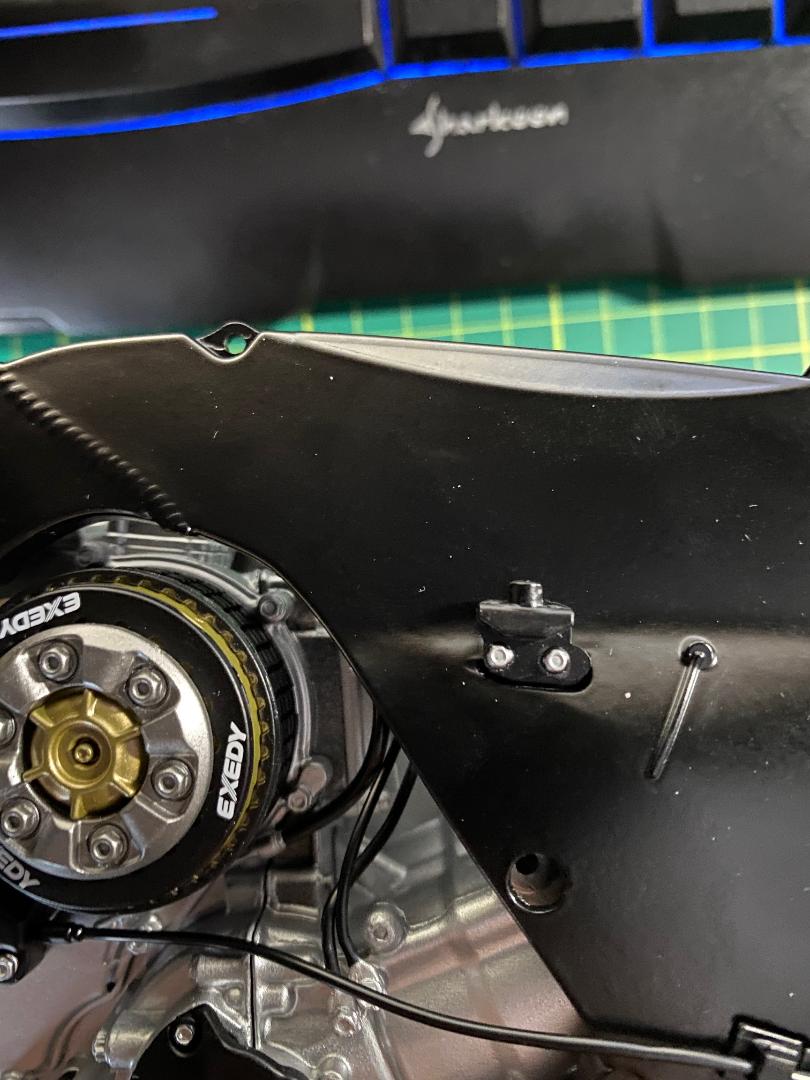
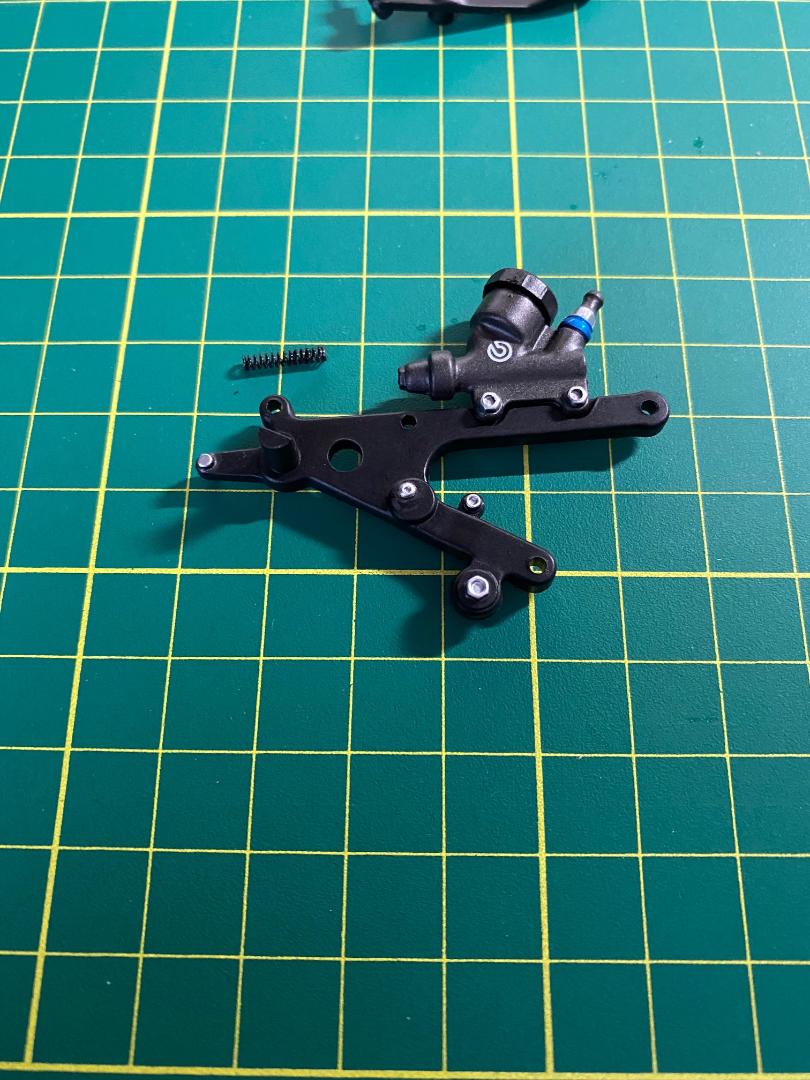
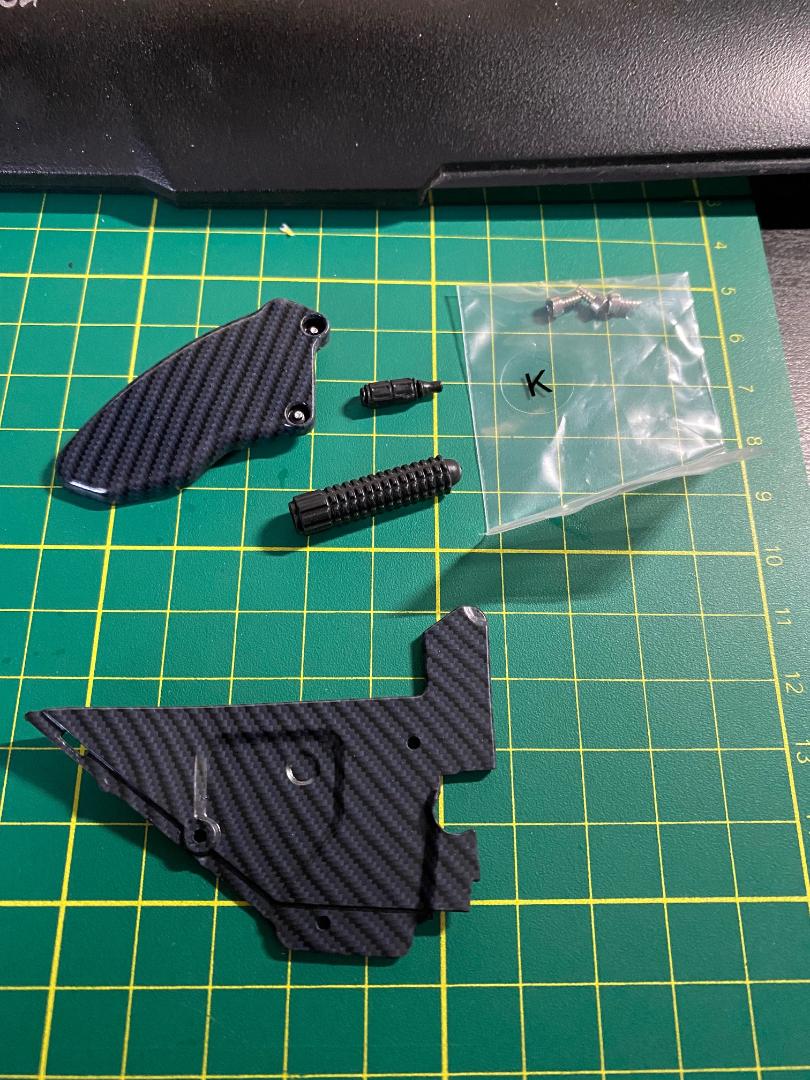
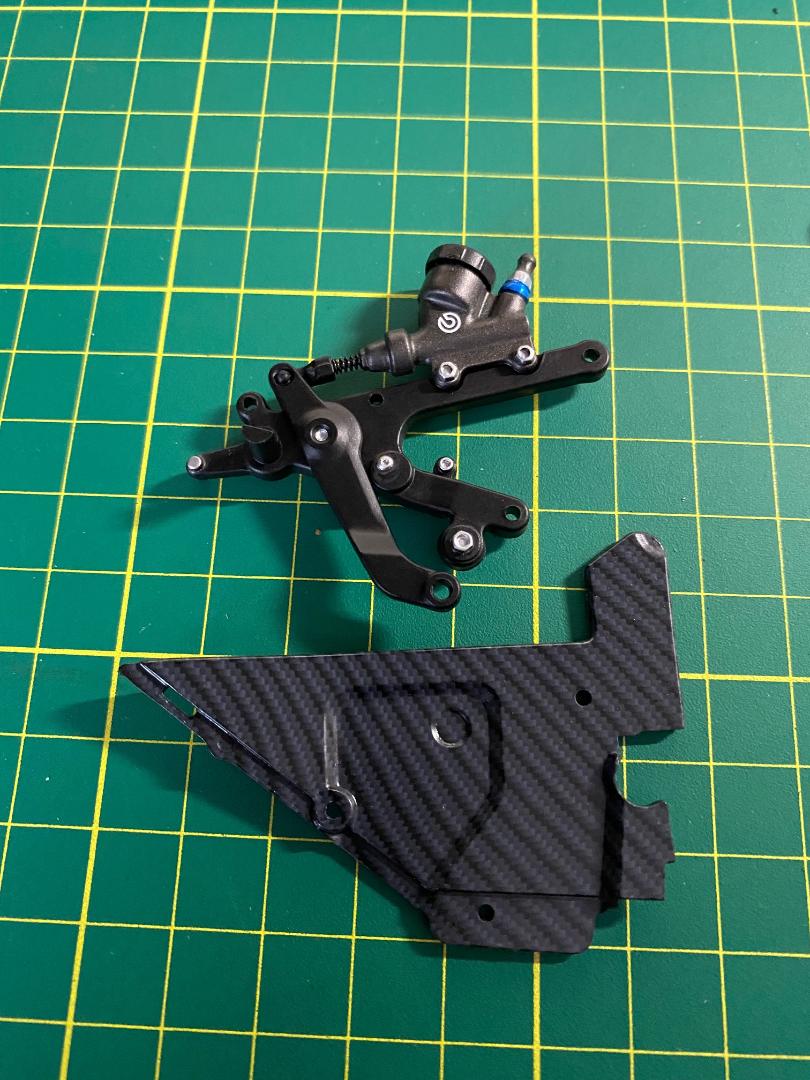
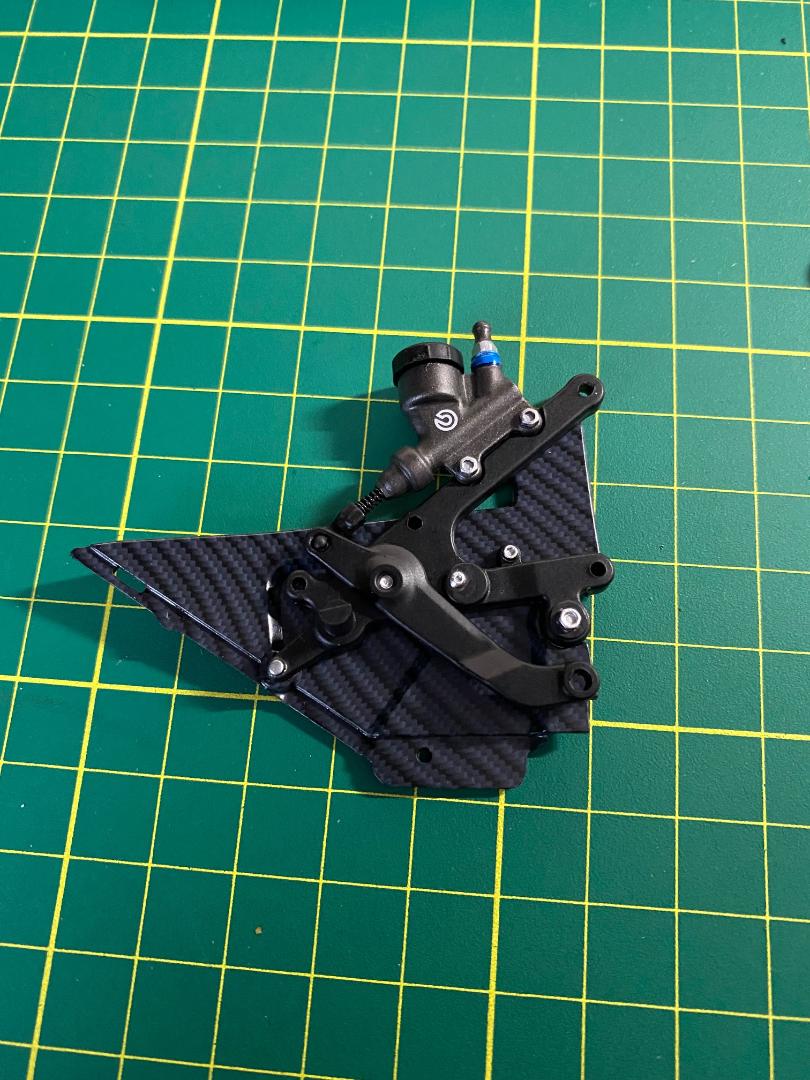
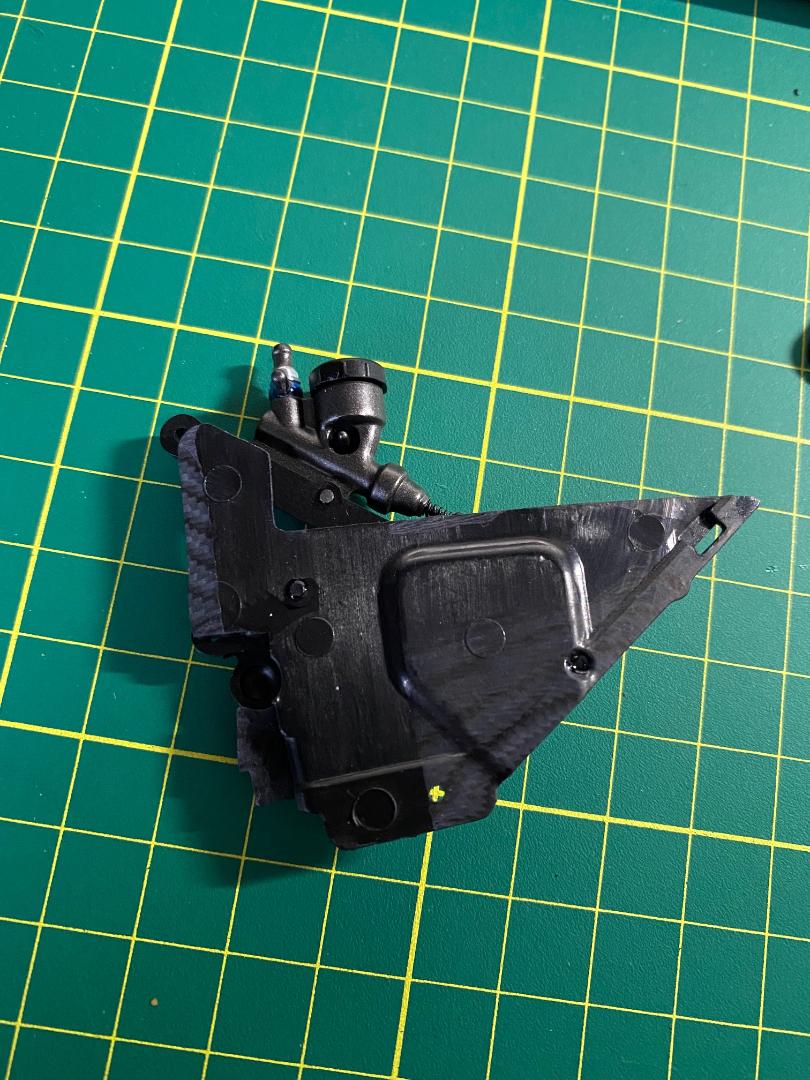
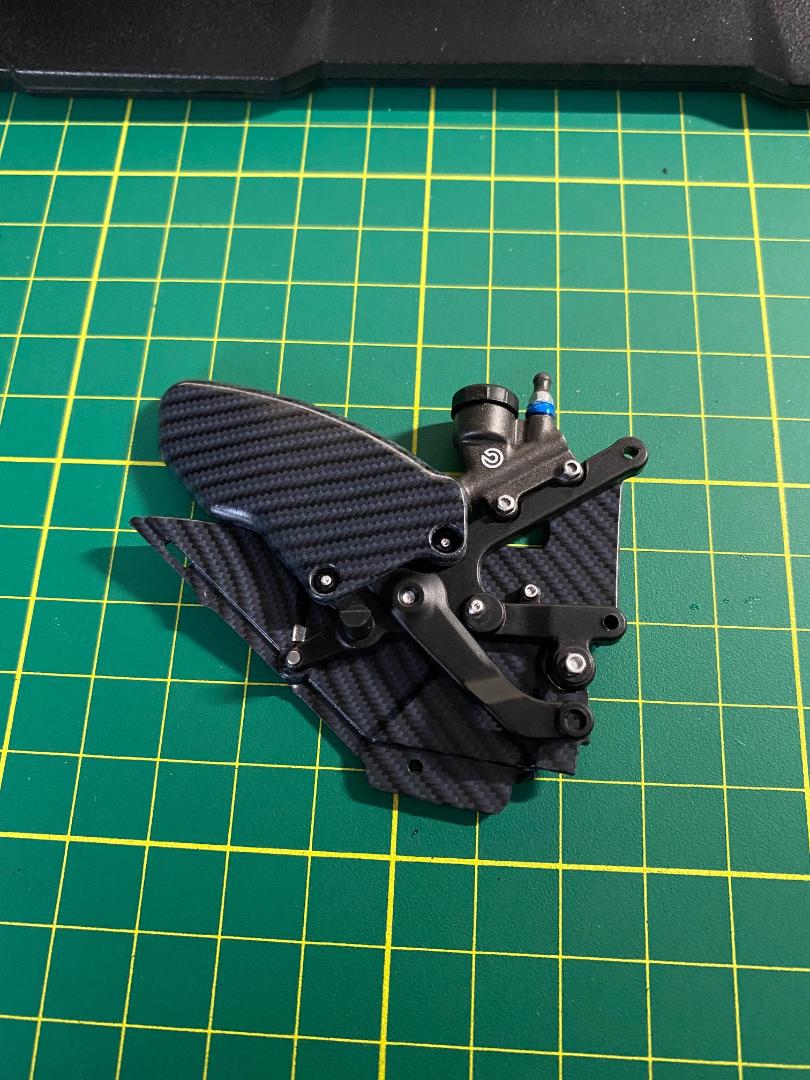
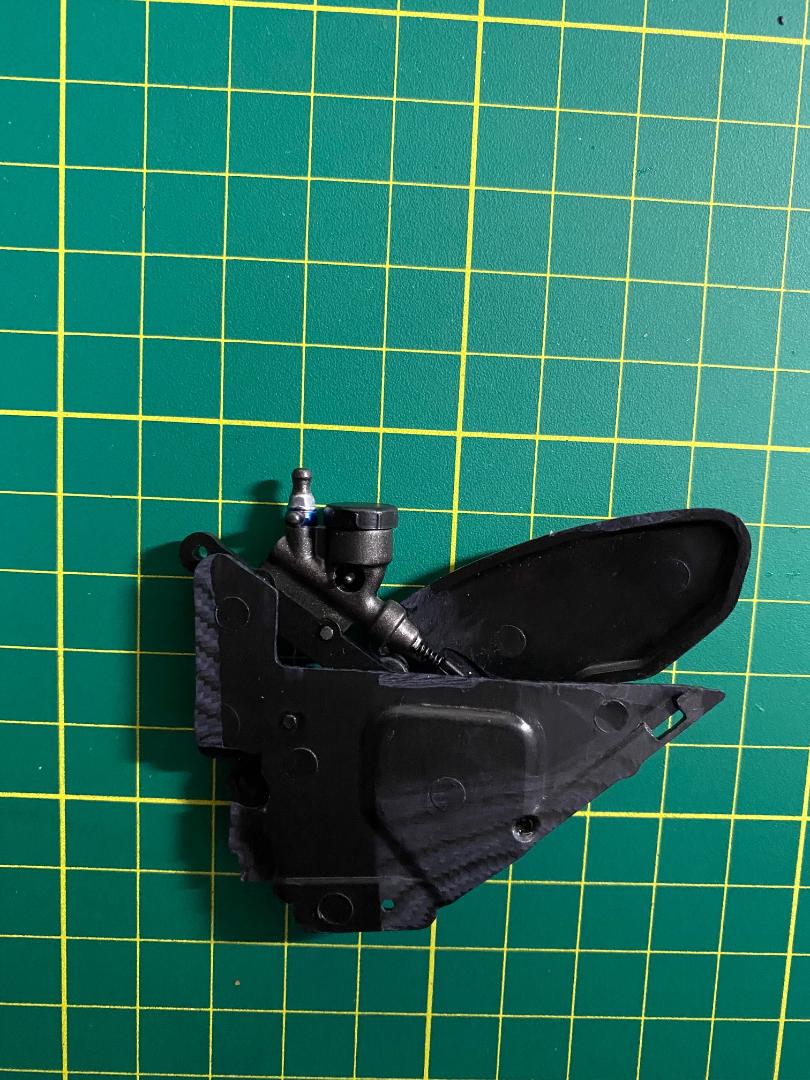
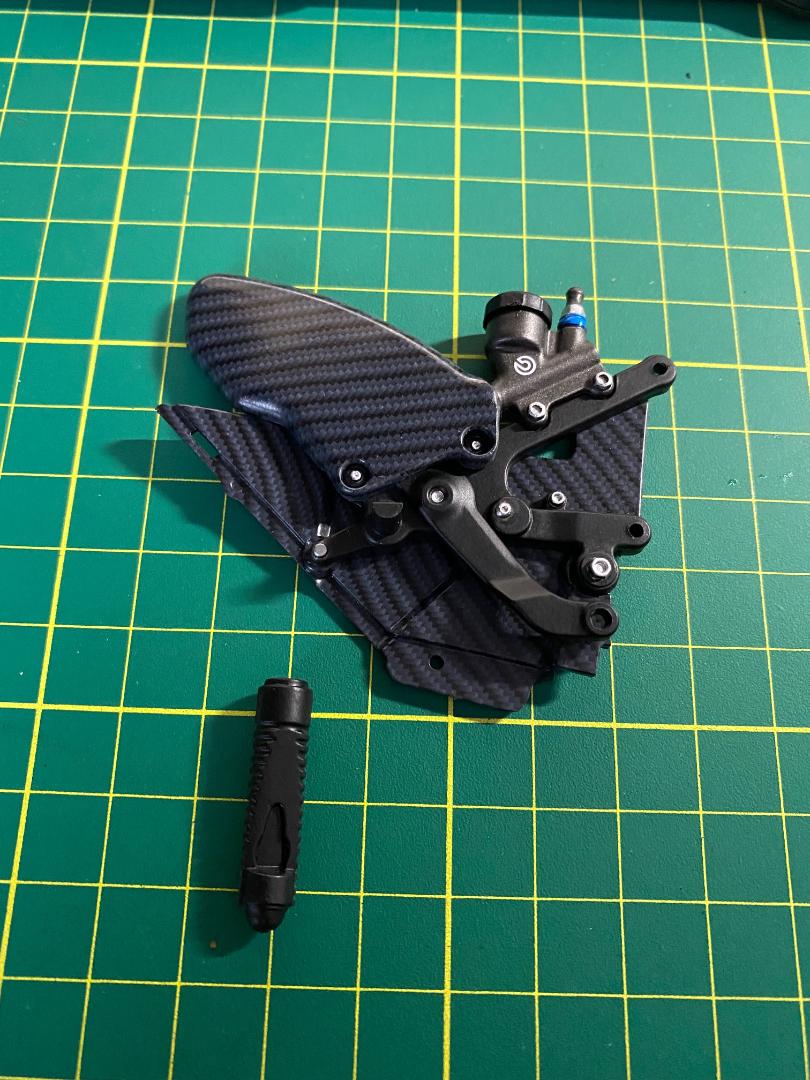
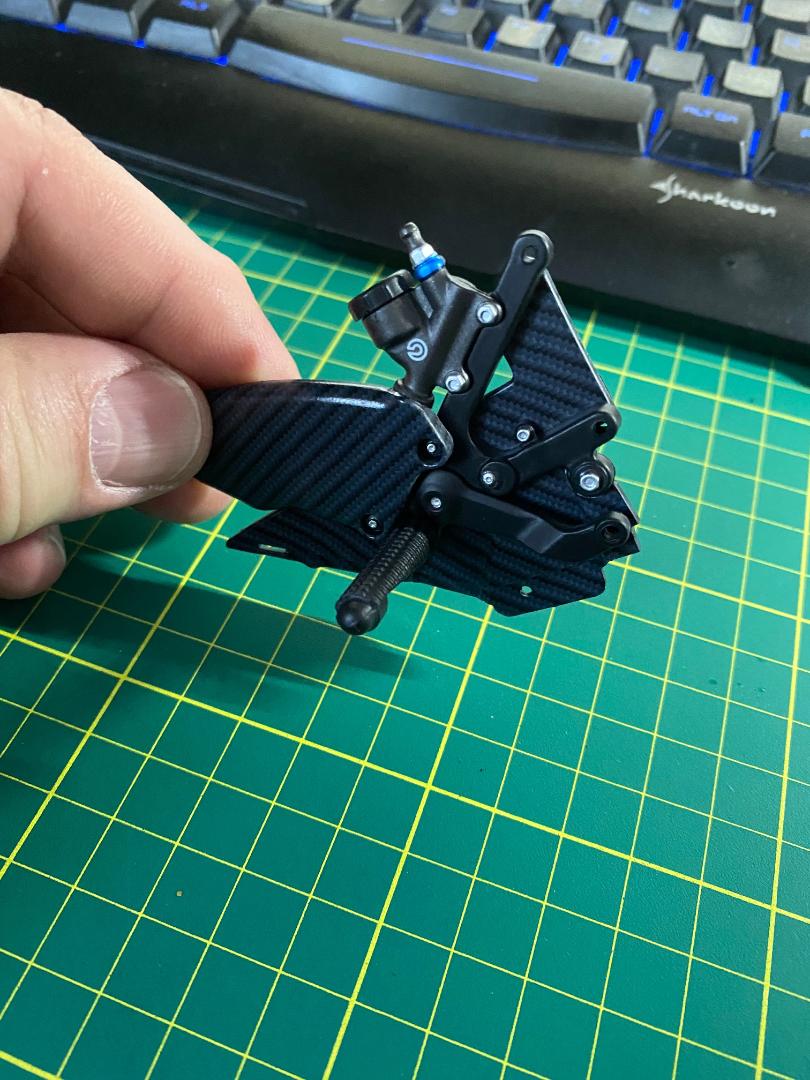
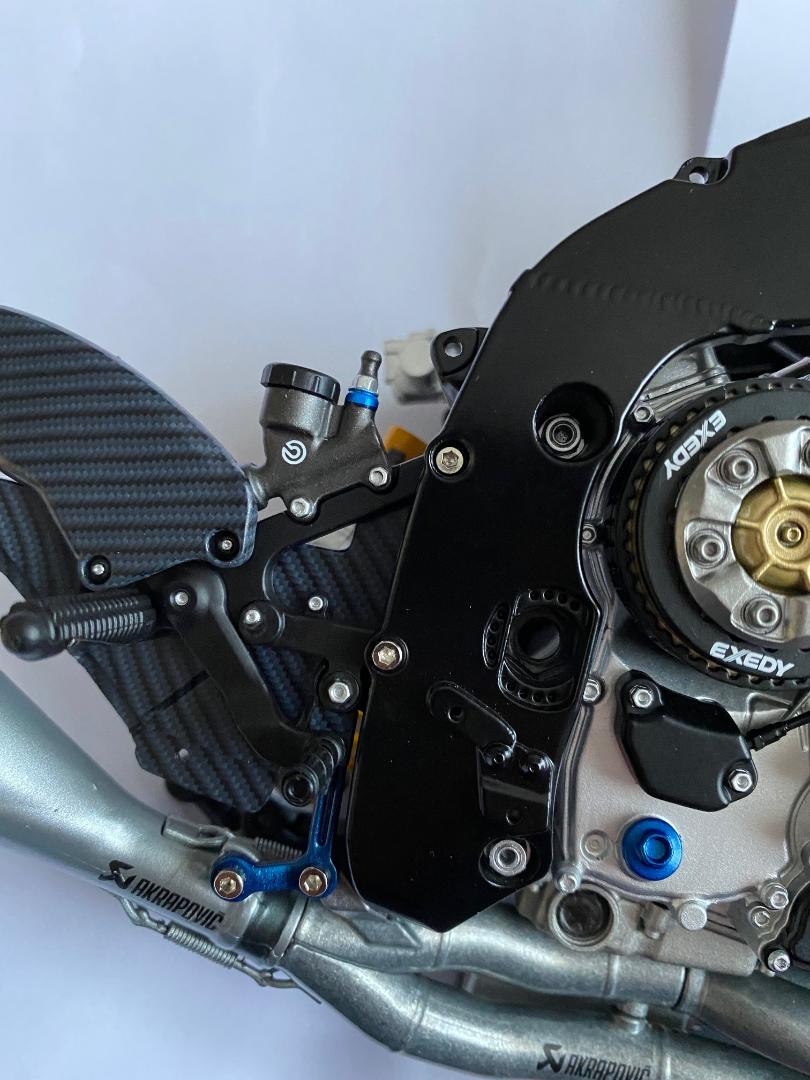
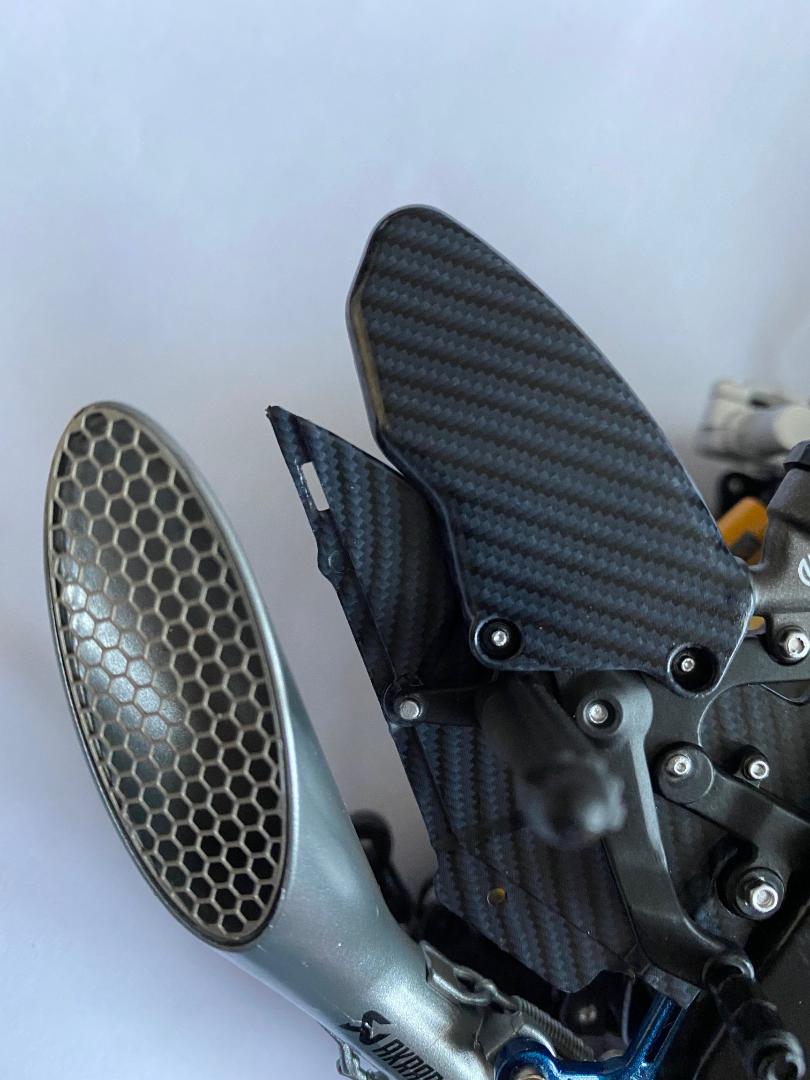
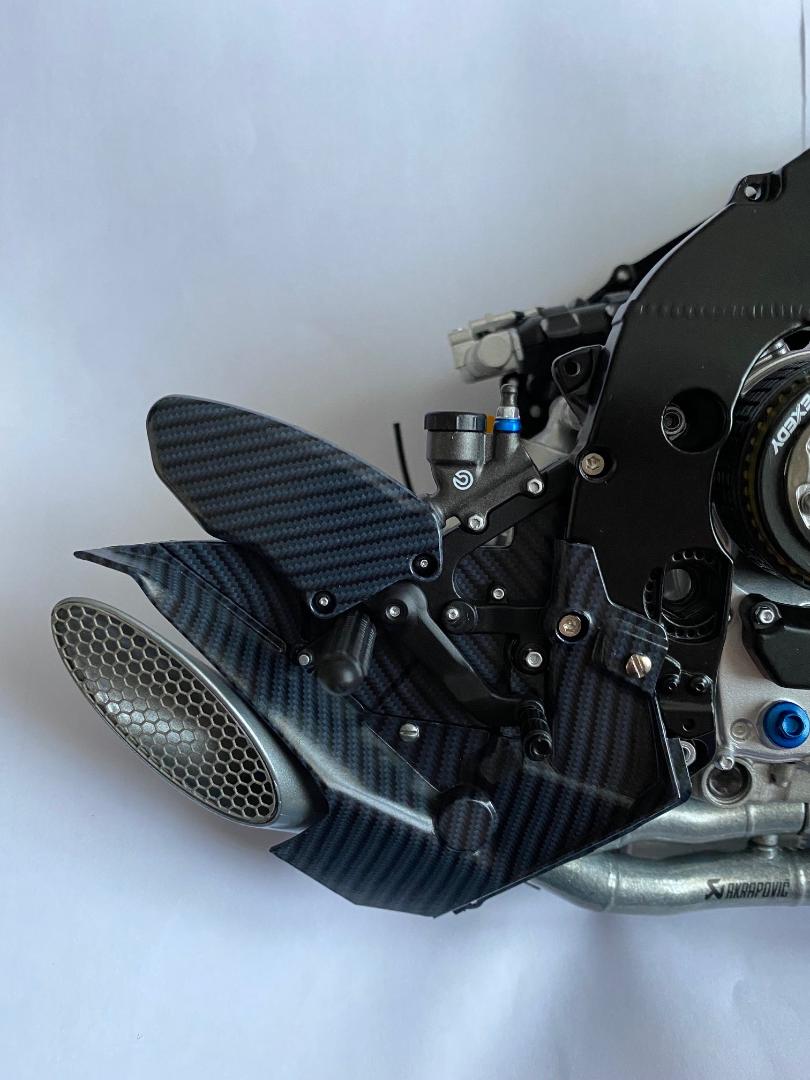
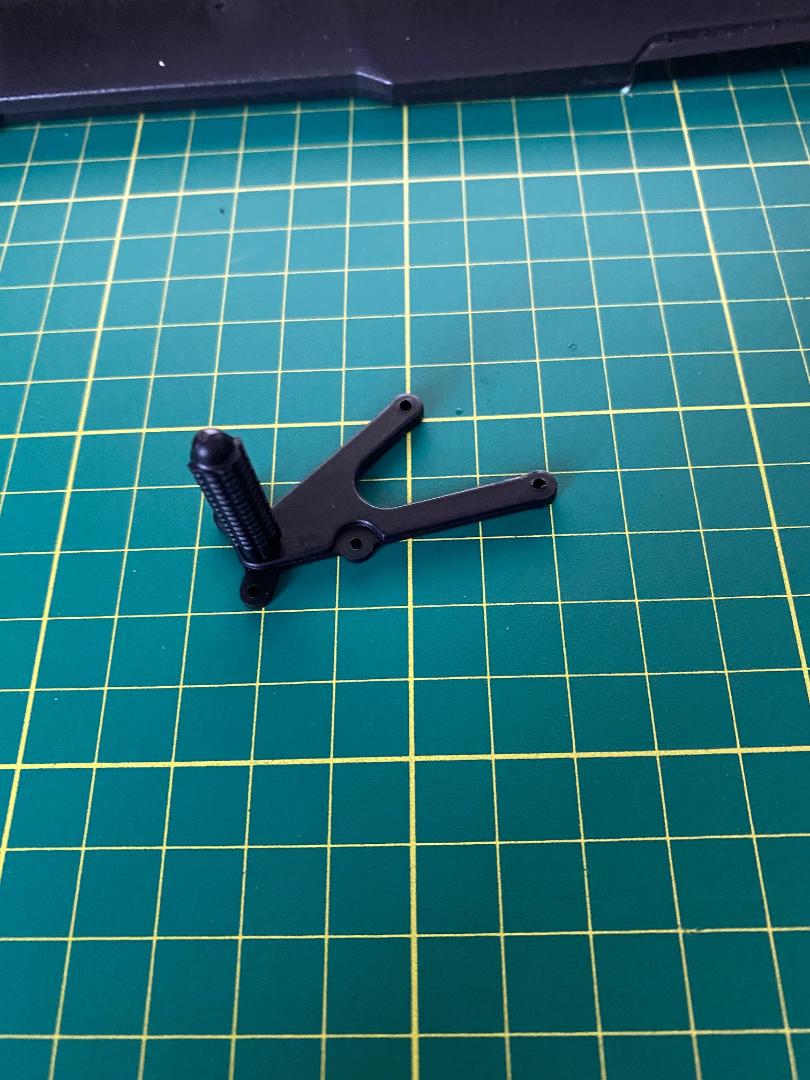
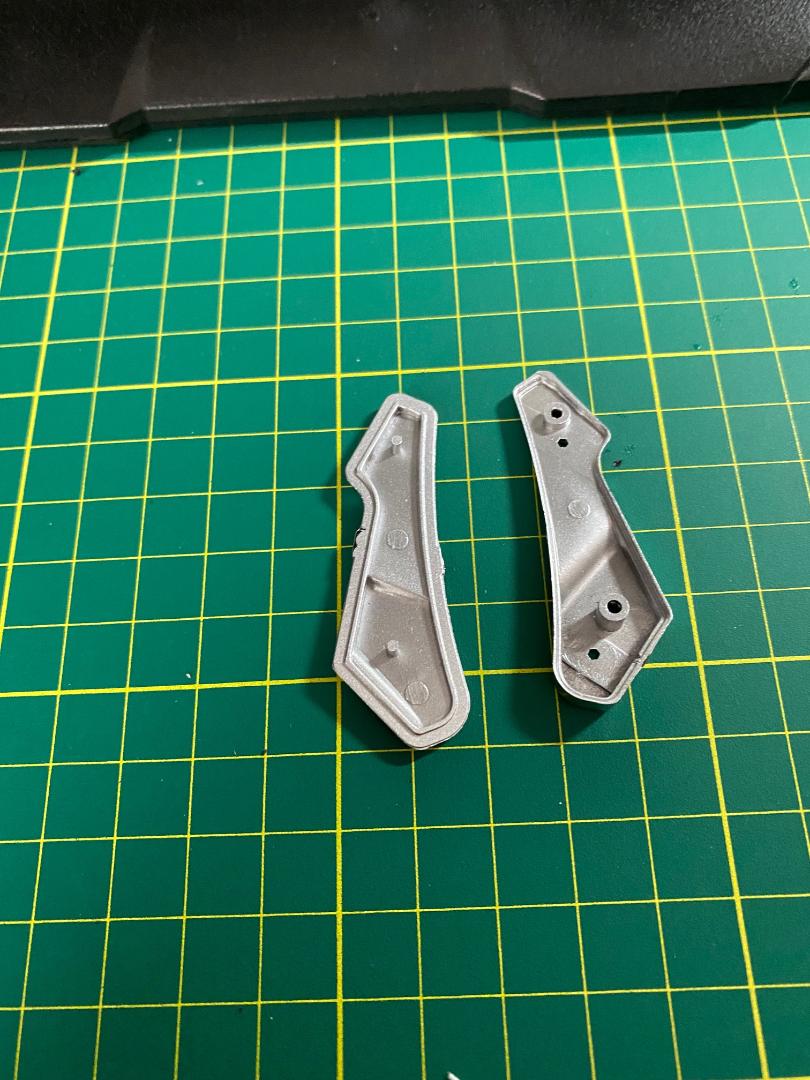
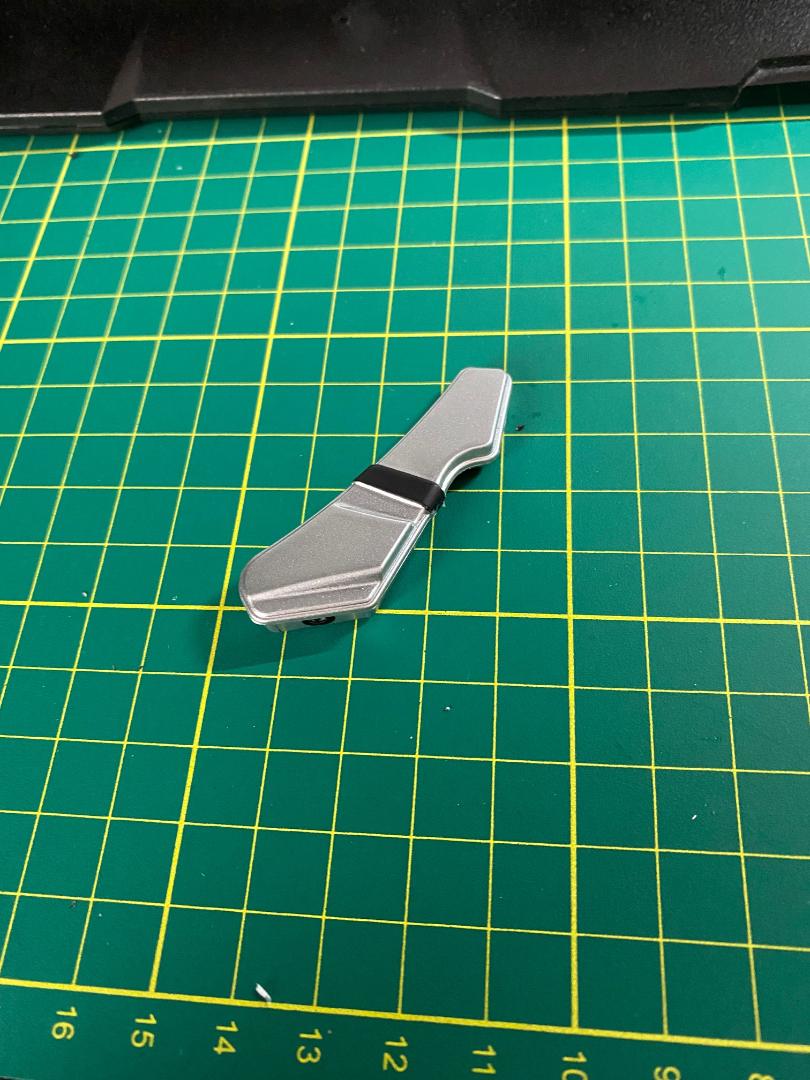
Weiter gehts mit Bauschritt 53, der rechten Fußraste. Die Montage verlief soweit ohne Probleme. Allerdings muss man die Feder des Bremshebels beim Einsetzen immer drehen, damit sich der Aussendurchmesser etwas verringert und sie sich förmlich hineinschraubt. Beim Einsetzen des Bremshebel...pedaldings... musste ich Hebel und Fußrastenplatte unterfüttern, da es recht schwer in das Loch zu drücken ist. Fußraste und Bremshebelpenöpel habe ich nur ohne Kleber eingesetzt. Sie sitzen gut stramm und können dann evtl. bei einem späteren Transport wieder abgenommen werden.
 " />
" /> " />
" /> " />
" /> " />
" /> " />
" /> " />
" /> " />
" /> " />
" /> " />
" /> " />
" /> " />
" /> " />
" /> " />
" /> " />
" /> " />
" />
Maddin- Schneidmatten-Virtuose
Re: Valentino Rossi's Yamaha YZR M1 in 1:4 von DeAgostini
![]() von Maddin Do 10 März 2022, 10:37
von Maddin Do 10 März 2022, 10:37
 " />
" /> " />
" /> " />
" /> " />
" /> " />
" /> " />
" /> " />
" /> " />
" /> " />
" /> " />
" />
Maddin- Schneidmatten-Virtuose
ullie46 und maxl mögen diesen Beitrag
Re: Valentino Rossi's Yamaha YZR M1 in 1:4 von DeAgostini
![]() von maxl Do 10 März 2022, 11:32
von maxl Do 10 März 2022, 11:32
Da stimmt jedes Detail bis hin zur Wabenstruktur des Auspuffgitters. 1:4 ist als Maßstab aber auch eine Hausnummer!
Weiter viel Erfolg beim Zusammenbau wünscht
Michael

maxl- Forenurgestein

Re: Valentino Rossi's Yamaha YZR M1 in 1:4 von DeAgostini
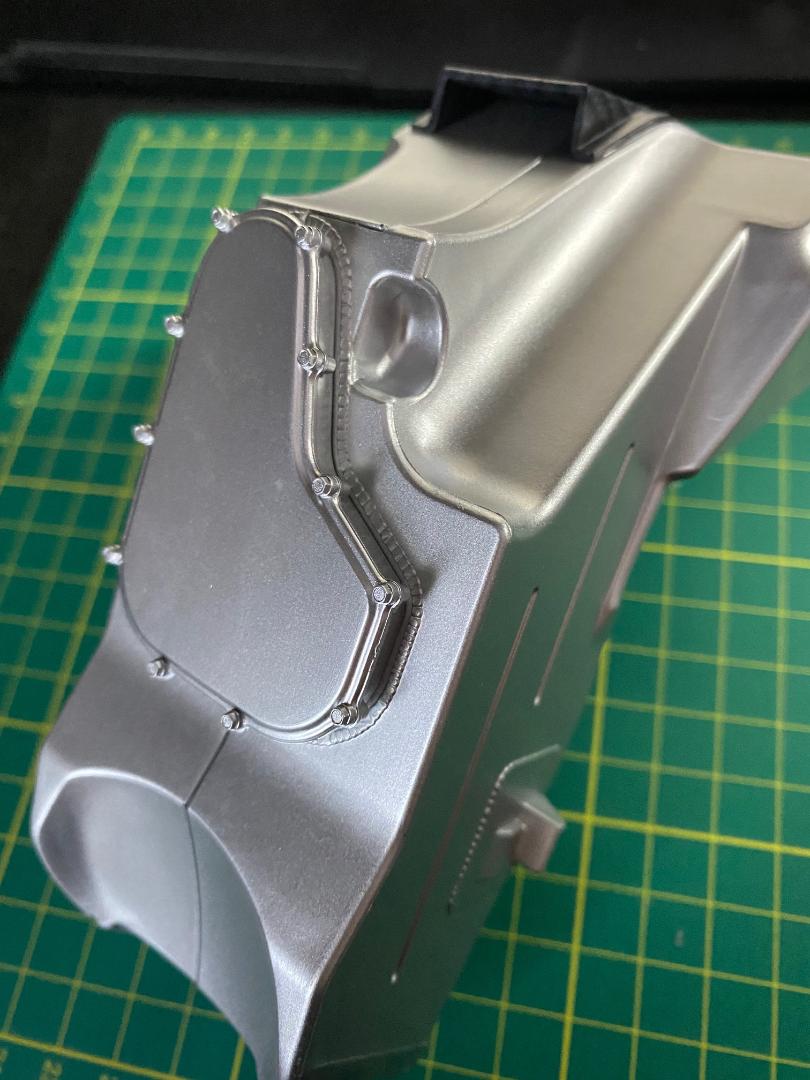
![]() von Maddin Do 10 März 2022, 13:06
von Maddin Do 10 März 2022, 13:06
Ja, da hast Du recht. Es tut mir jetzt schon leid, dass man Vieles davon nachher nicht mehr richtig sehen kann, wenn die Verkleidung drauf ist. Dieses Modell-Abo scheint Eines der Wenigen zu werden, die nachher echt toll sind. Ist ja leider viel zu oft nicht so. Ich drücke mir auch die Daumen, dass es so weiter geht. Die restlichen Teile sehen auf jeden Fall auch vielversprechend aus.
Maddin- Schneidmatten-Virtuose
maxl mag diesen Beitrag
Re: Valentino Rossi's Yamaha YZR M1 in 1:4 von DeAgostini
![]() von Maddin Do 10 März 2022, 13:28
von Maddin Do 10 März 2022, 13:28
 " />
" /> " />
" /> " />
" /> " />
" />
Maddin- Schneidmatten-Virtuose
Re: Valentino Rossi's Yamaha YZR M1 in 1:4 von DeAgostini
![]() von Maddin Do 10 März 2022, 15:25
von Maddin Do 10 März 2022, 15:25
[img]
 [/img]
[img]
 [/img]
[img]
 [/img]
[img]
 [/img]
[img]
 [/img]
[img]
 [/img]
[img]
 [/img]
[img]
 [/img]
[img]
 [/img]
[img]
 [/img]
[img]
 [/img]
So, ab jetzt heißt es "uffjepasst!" beim Jonglieren mit der ziemlich schweren, aber nun nach fast allen Seiten ziemlich empfindlichen Baugruppe...
Maddin- Schneidmatten-Virtuose
maxl, klaus.kl und Thoto mögen diesen Beitrag
Re: Valentino Rossi's Yamaha YZR M1 in 1:4 von DeAgostini
![]() von Maddin Fr 11 März 2022, 10:20
von Maddin Fr 11 März 2022, 10:20
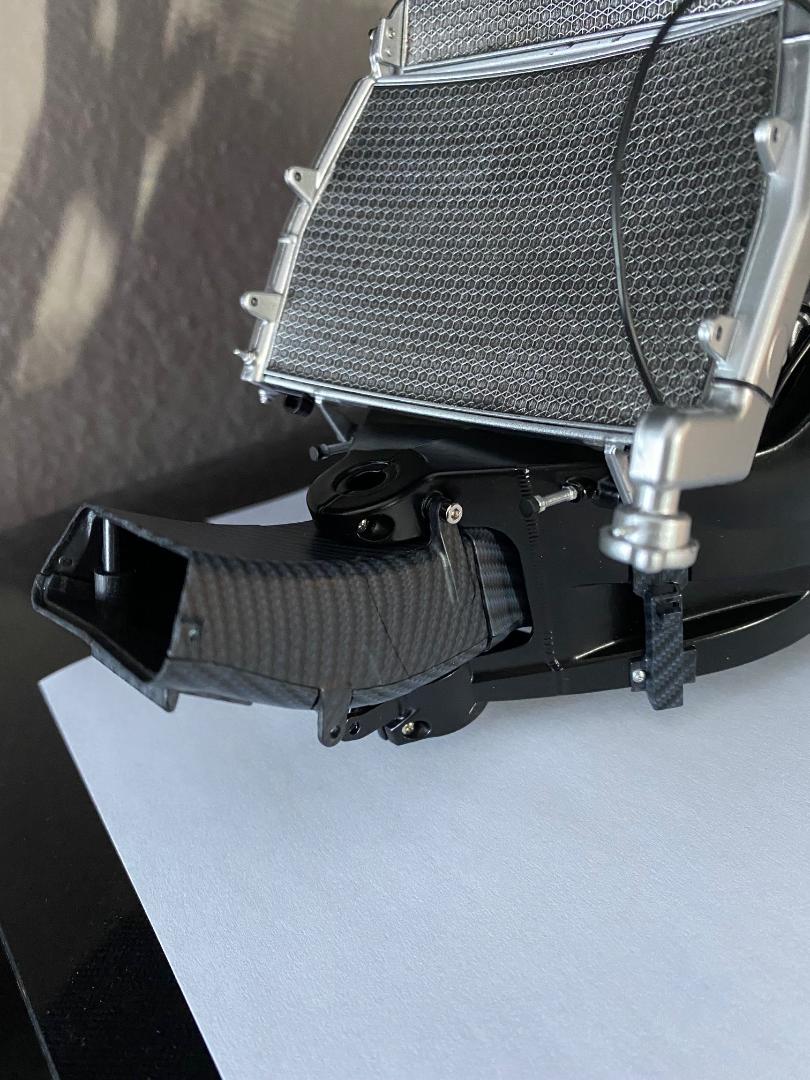
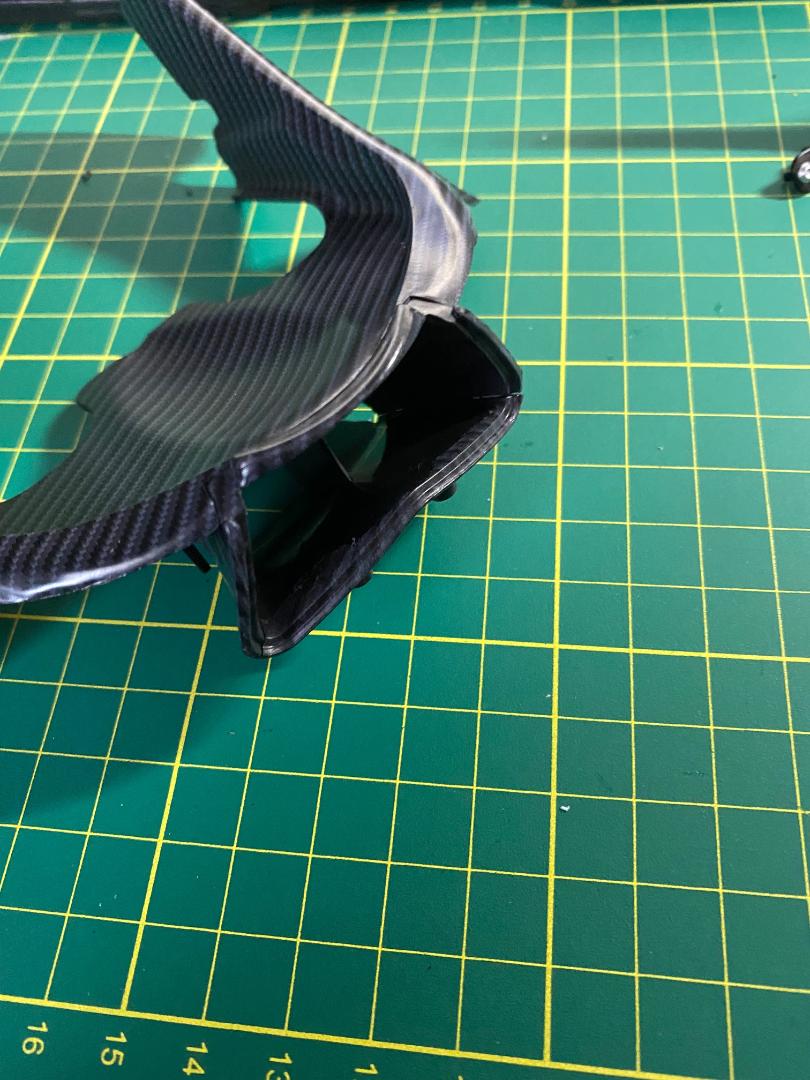
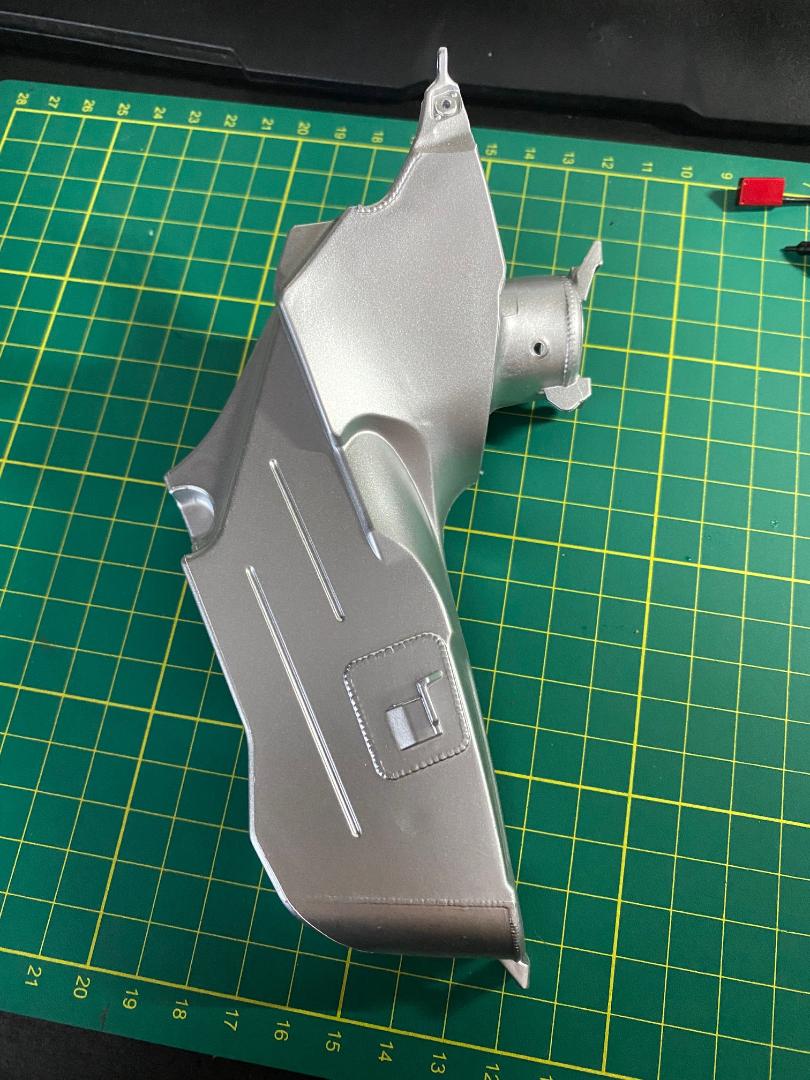
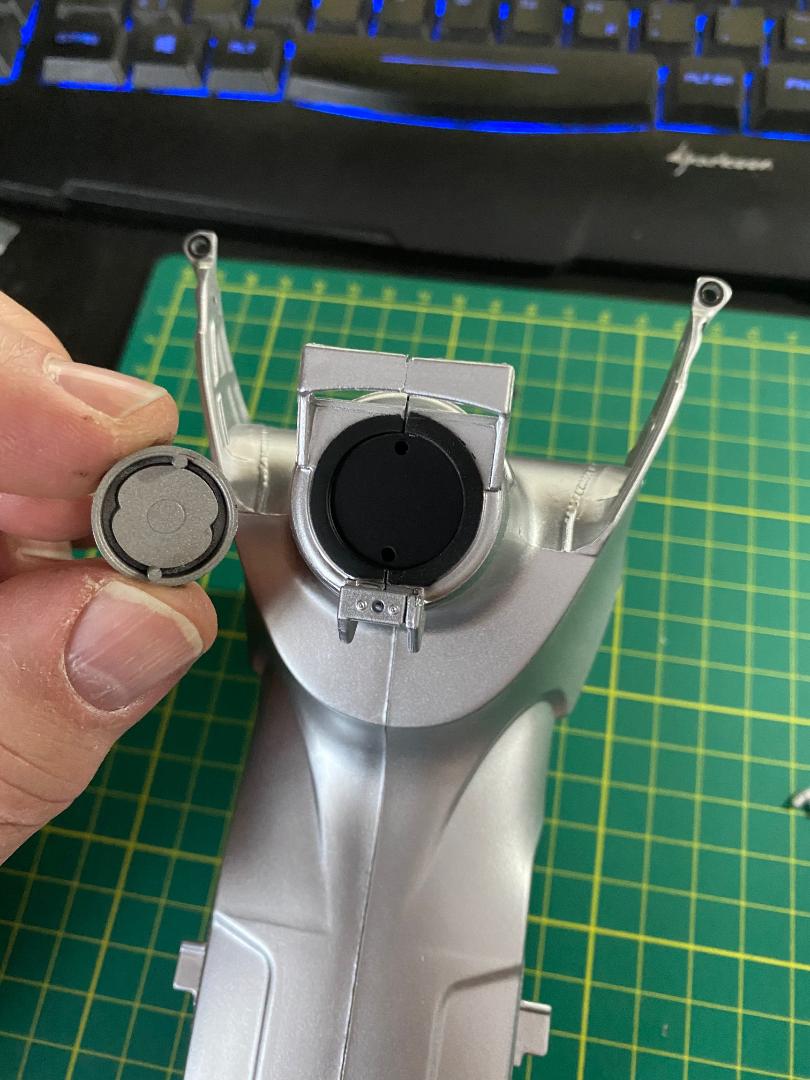
Heute hatte ich das Erste mal richtig Probleme. Es steht der Bauschritt 56 mit dem vorderen Luftkanal an. Die Montage des Luftkanals ist total einfach. Die beiden Hälften werden einfach mit ein paar Tropfen Kleber in den Steckzapfen zusammengesteckt.
 " />
" /> " />
" /> " />
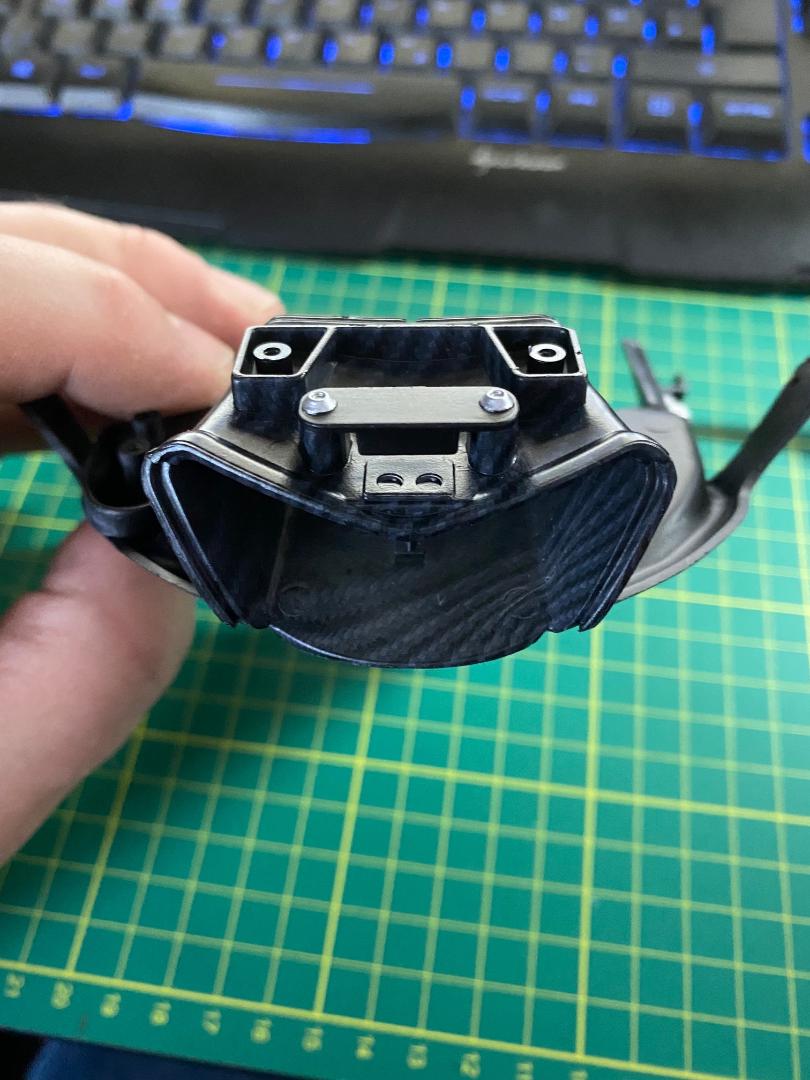
" />Dann wird zuerst die bereits montierte Airbox aufgesetzt und muss dabei erst vorn durch den Lenkkopf geführt und dann sowohl in die vier Ansaugstutzen der Einspritzanlage als auch in zwei runde Aufnahmen im oberen Querbalken des Rahmens (rot markiert) eingerastet werden. Dabei muss sie zwischen den beiden (gelb markierten) Führungen durchpassen.
 " />
" /> " />
" />Das war ja man gar nix! Zuerst klemmte sie sich zwischen den beiden seitlichen Aufnahmen fest. Das konnte ich mit ein weing Schmirgelarbeit schnell lösen. Aber dann musste ich feststellen, dass die vier Ansaugstutzen gut 3mm zu weit hinten stehen und es blieb mir nach viel Gefummel und Probieren nichts anderes übrig, als die zwei Doppelstutzen nochmal vorsichtig von den Einspritzstutzen zu lösen, etwas schräg zu drücken und dann Alles mit etwas Gewalt zusammenzufügen. Jetzt sitzt es irgendwie da, wo es soll und man sieht zum Glück die Passungenauigkeiten nicht, aber ich muss nun nochmal die Platte mit den Ansauglöchern in der Airbox neu verkleben. Sie ist jetzt nicht mehr voll in ihrem Sitz, was mich wurmt, aber es ging einfach nicht anders. Aus diesem Grund liegt der ganze Block jetzt auf dme Kopf und trocknet bis Morgen vor sich hin. Ich habe eine Passprobe mit der Tankattrappe gemacht und zum Glück ist darunter anscheinend genug Platz zur Airbox. Trotzdem echt ärgerlich und ein kleiner Rückschlag für die Begeisterung über dieses Modell. Hoffentlich kommt da nicht noch mehr...
 " />
" /> " />
" />Das Einstecken des Luftkanals von vorn und die Verschraubung mit dem Lenkkopf verliefen dann wieder reibungslos.
 " />
" /> " />
" />Da ich nun das Durchtrocknen der etwas unter Spannung stehenden Airbox abwarten muss war`s das für heute erstmal.
Maddin- Schneidmatten-Virtuose
doc_raven1000, maxl und schumi15 mögen diesen Beitrag
Re: Valentino Rossi's Yamaha YZR M1 in 1:4 von DeAgostini
![]() von Maddin So 13 März 2022, 10:42
von Maddin So 13 März 2022, 10:42
Nun ist der Kleber ordentlich durchgehärtet und so sieht das Ganze nun aus.
 " />
" /> " />
" /> " />
" />Den Airboxdeckel werde ich wohl erstmal wieder abehmen und verstauen. Auf dem Kopf hat sich das Ganze als sehr stabile Lagerung erwiesen und ist zumindest für die nächsten Bauschritte eindeutig die sicherste Montageposition für den Klotz.
Maddin- Schneidmatten-Virtuose
maxl und Thoto mögen diesen Beitrag
Re: Valentino Rossi's Yamaha YZR M1 in 1:4 von DeAgostini
![]() von Maddin Mo 14 März 2022, 11:27
von Maddin Mo 14 März 2022, 11:27
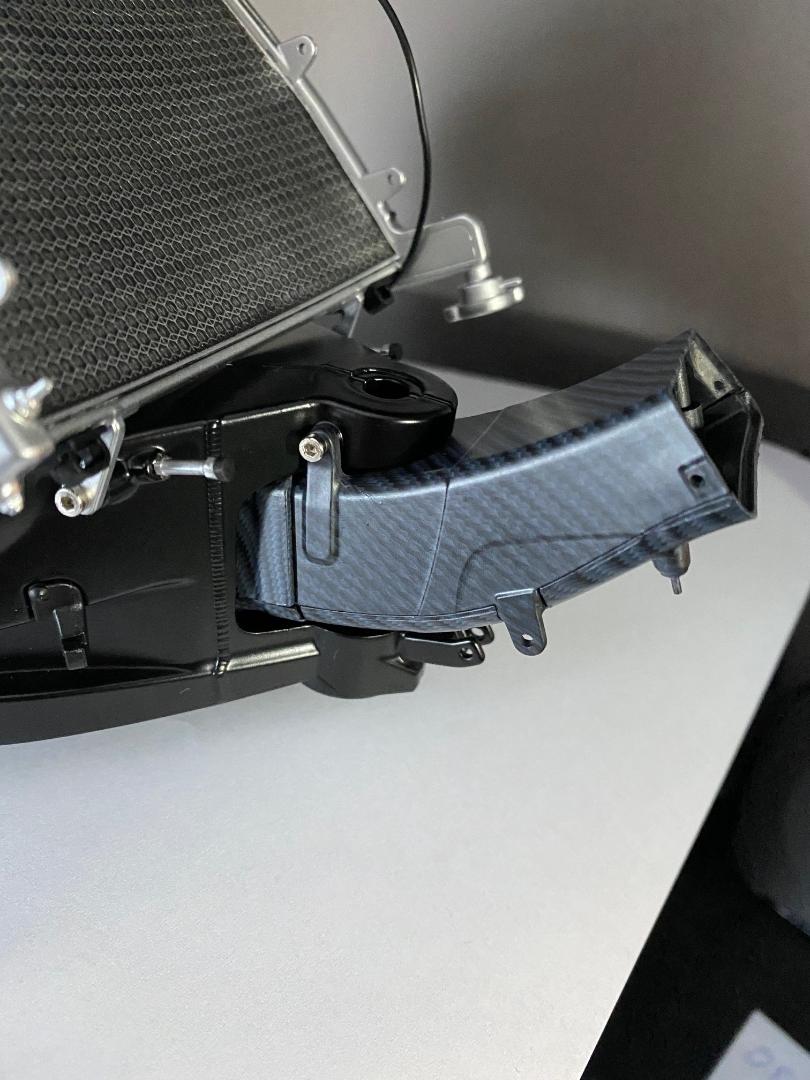
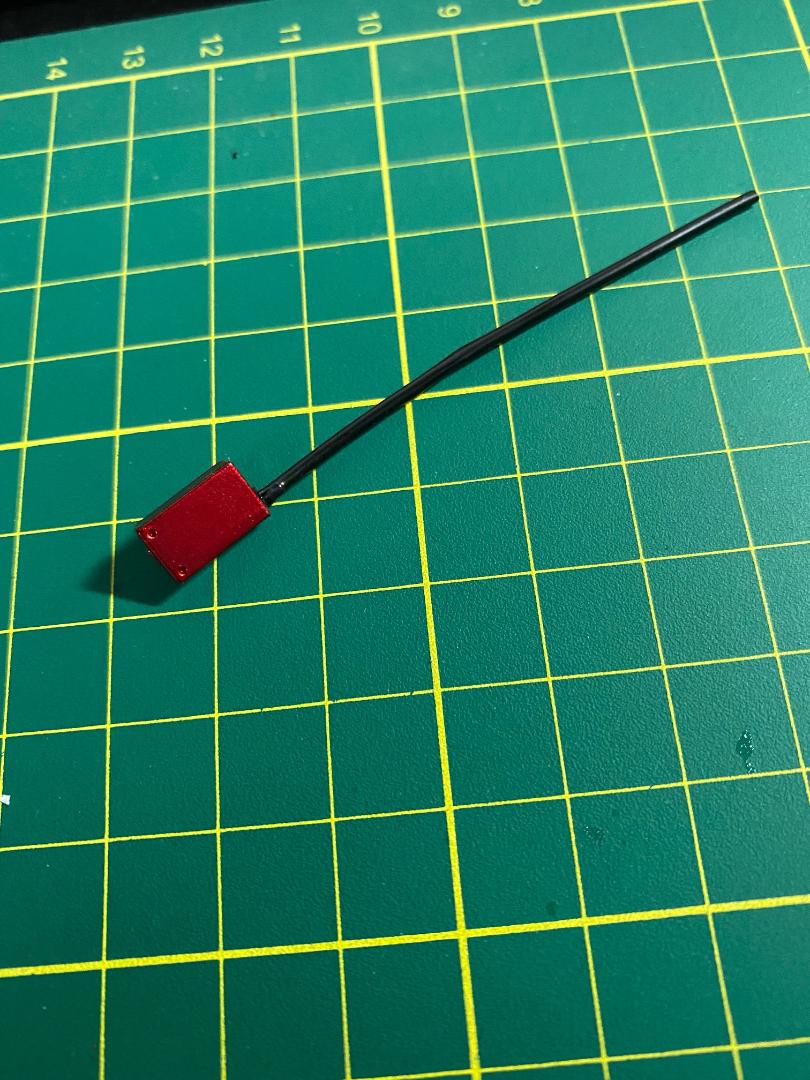
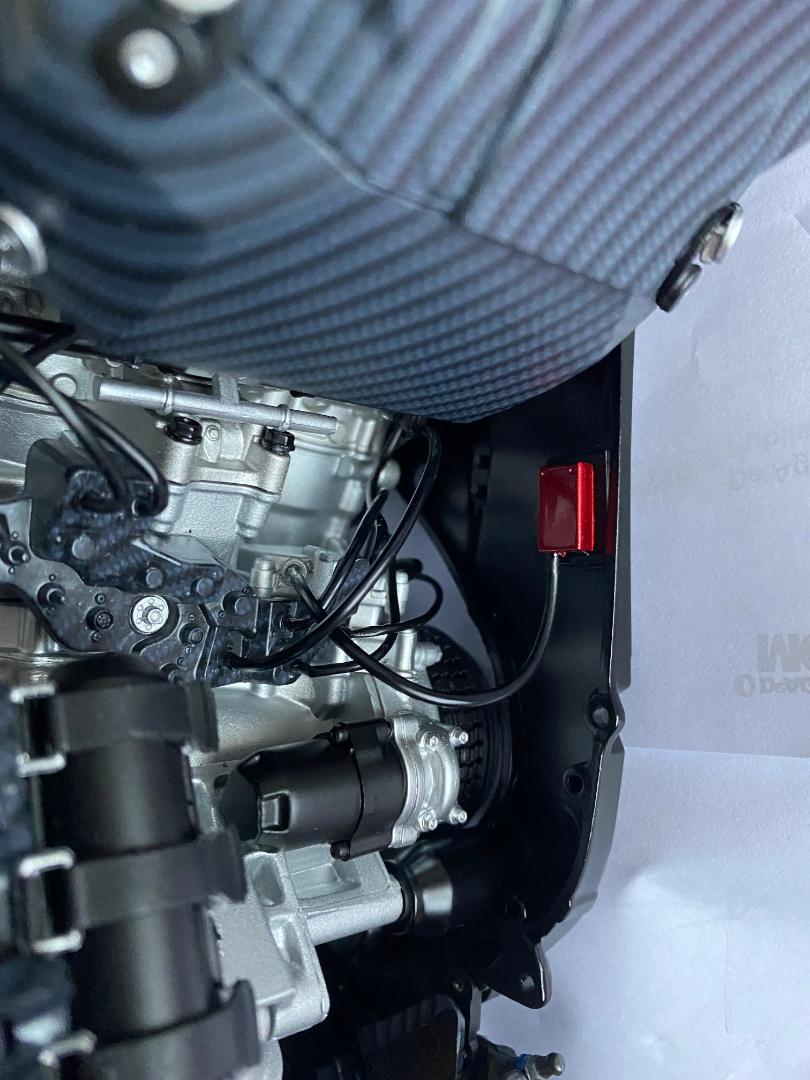
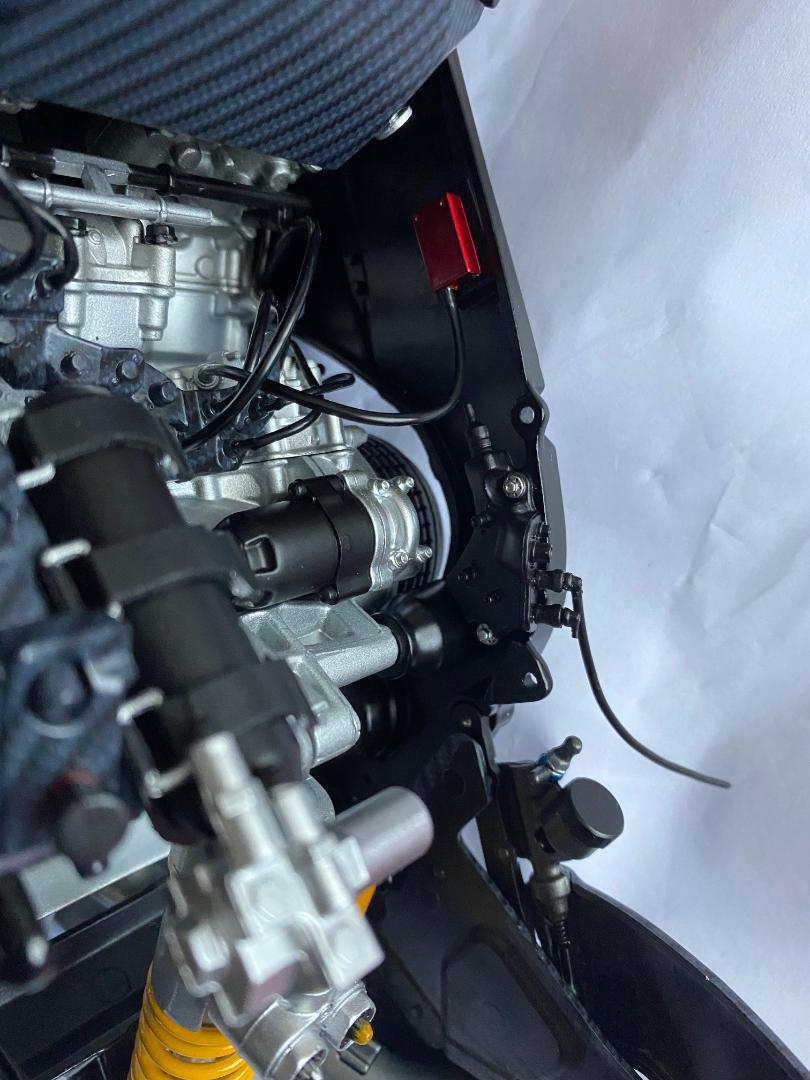
Weiter geht`s mit Bauschritt 57 und 58, dem Unterteil der Frontverkleidung und gleichzeitig Lufteinlaß, sowie einem Steckverbinder mit seinen Zuleitungen.
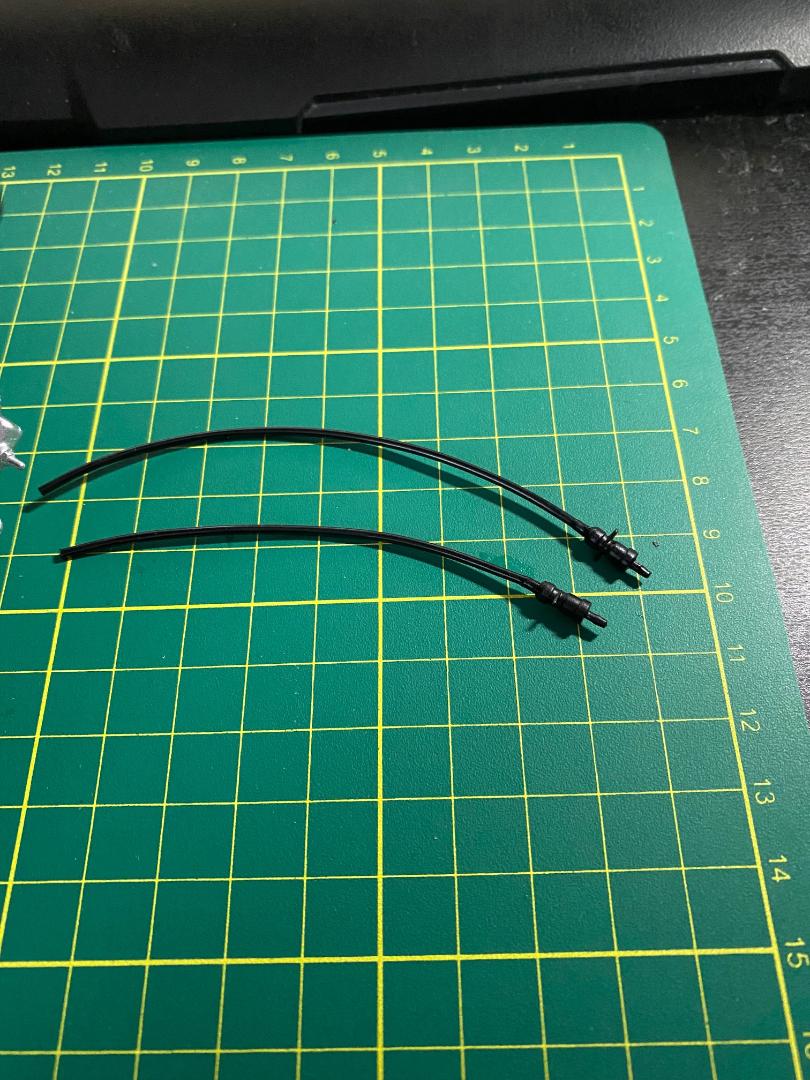
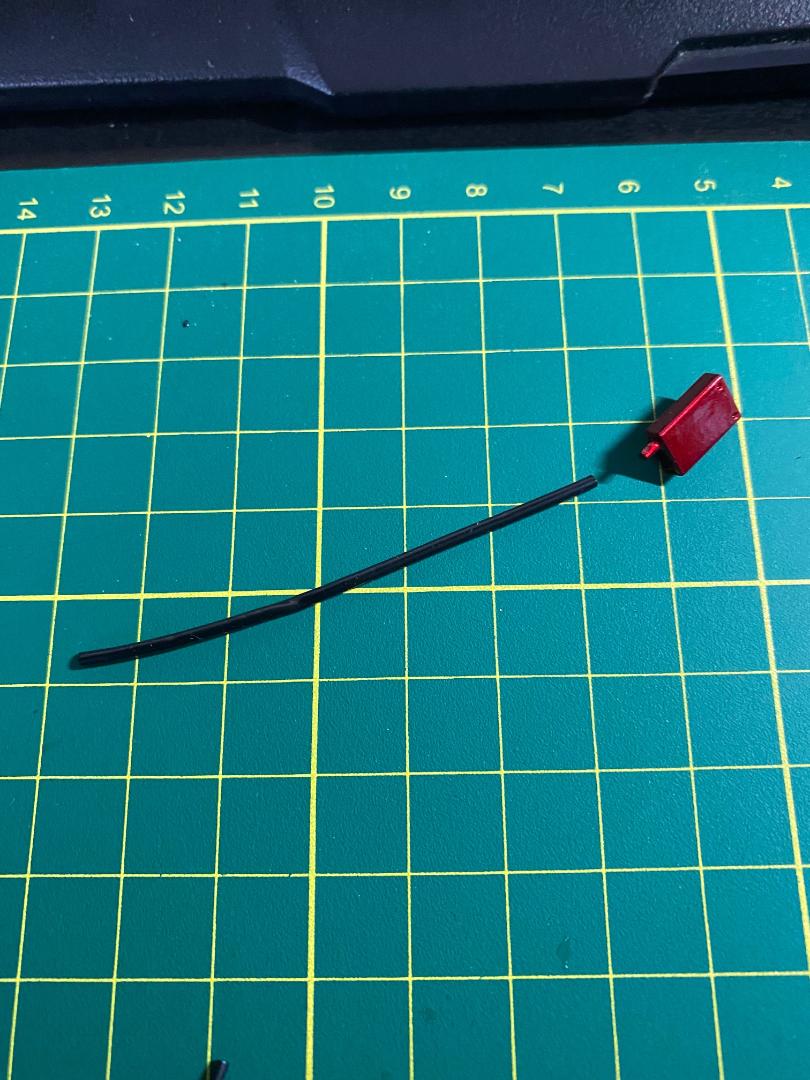
Zuerst wird eine Kabeldurchführung außen angeklebt und die beiden Leitungen an den Steckverbinder geklebt. Da die kurze Leitung eine S-Form bekommt und der Sensor auch noch vorerst ohne Halterung neben derm linken Rahmenteil positioniert wird habe ich sie wieder mit dem Bindedraht gefüllt. So knickt sie in den engen Biegungen nicht und hält die Form von selbst.
Falls ich es noch nicht erwähnt habe: Erst die Leitung an einer Seite mit etwas Kleber aufstecken, dann den Draht vorsichtig bis zum Anschlag hineinschieben und wieder genauso weit hinausziehen, wie der gegenüberliegende Steckstift lang ist. So passt alles und der Schlauch ist komplett mit Draht gefüllt.
Der Lufteinlass bekommt ein mit zwei Schrauben befestigtes Kanal-Unterteil und ein aufgestecktes und verklebtes Oberteil, auf das noch mit einem kleinen Steg nach vorn ausgerichtet eine Halterungaufgeklebt wird.
 " />
" /> " />
" /> " />
" /> " />
" /> " />
" /> " />
" /> " />
" /> " />
" /> " />
" /> " />
" /> " />
" /> " />
" /> " />
" /> " />
" /> " />
" />Ich habe heute übrigens sehr erfeulicherweise die Bestätigung bekommen, dass ich doch die 20% Rabatt auf meinen offensichtlich schon vorher mit 10% rabattierten monatlichen Abopreis von 80,91 Euro erhalte.

Maddin- Schneidmatten-Virtuose
doc_raven1000 und maxl mögen diesen Beitrag
Re: Valentino Rossi's Yamaha YZR M1 in 1:4 von DeAgostini
![]() von Maddin Mo 14 März 2022, 14:17
von Maddin Mo 14 März 2022, 14:17
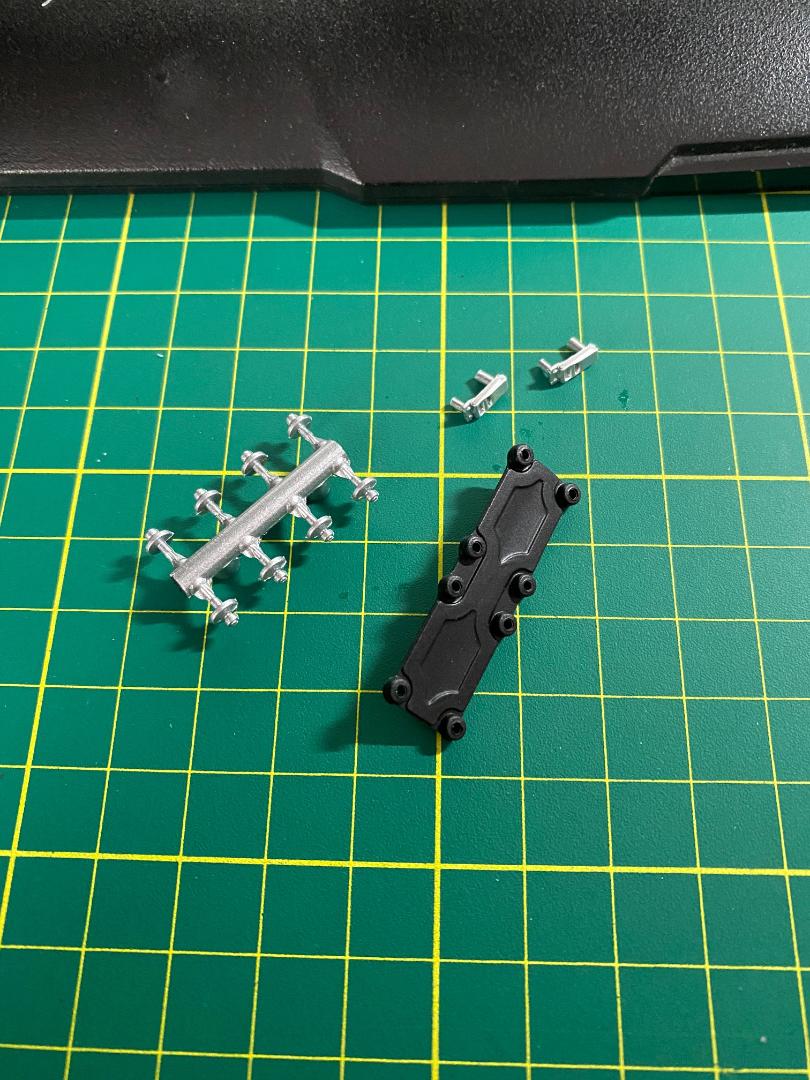
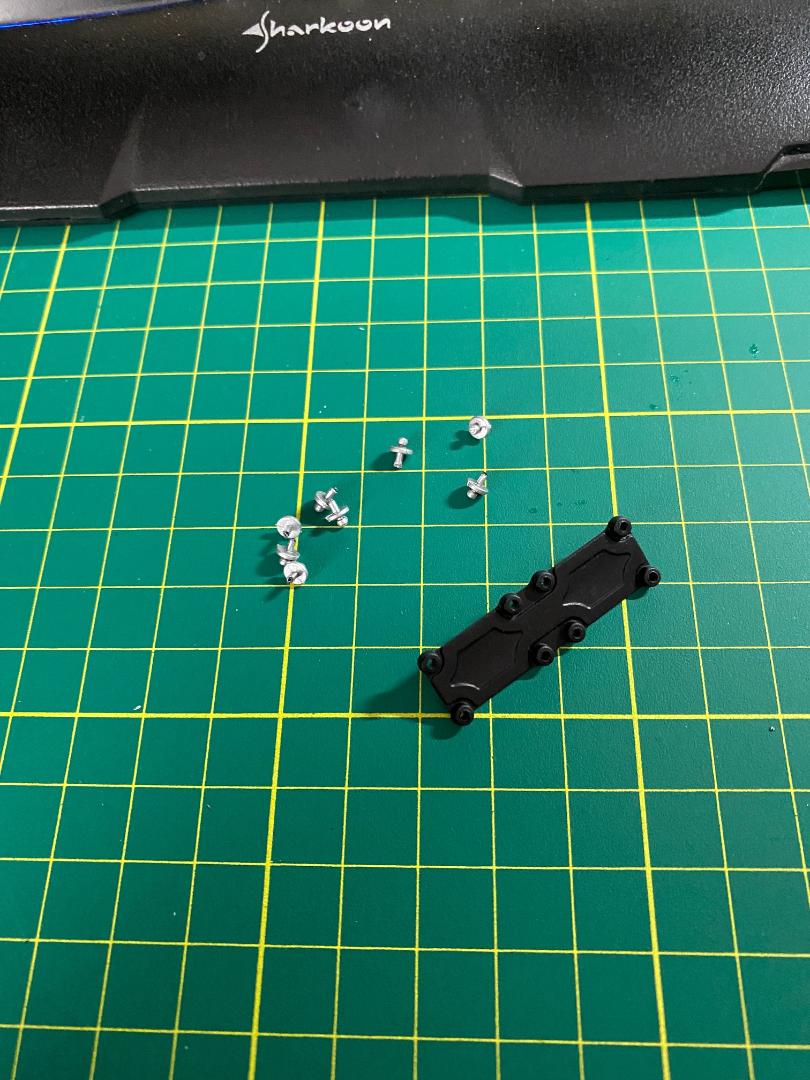
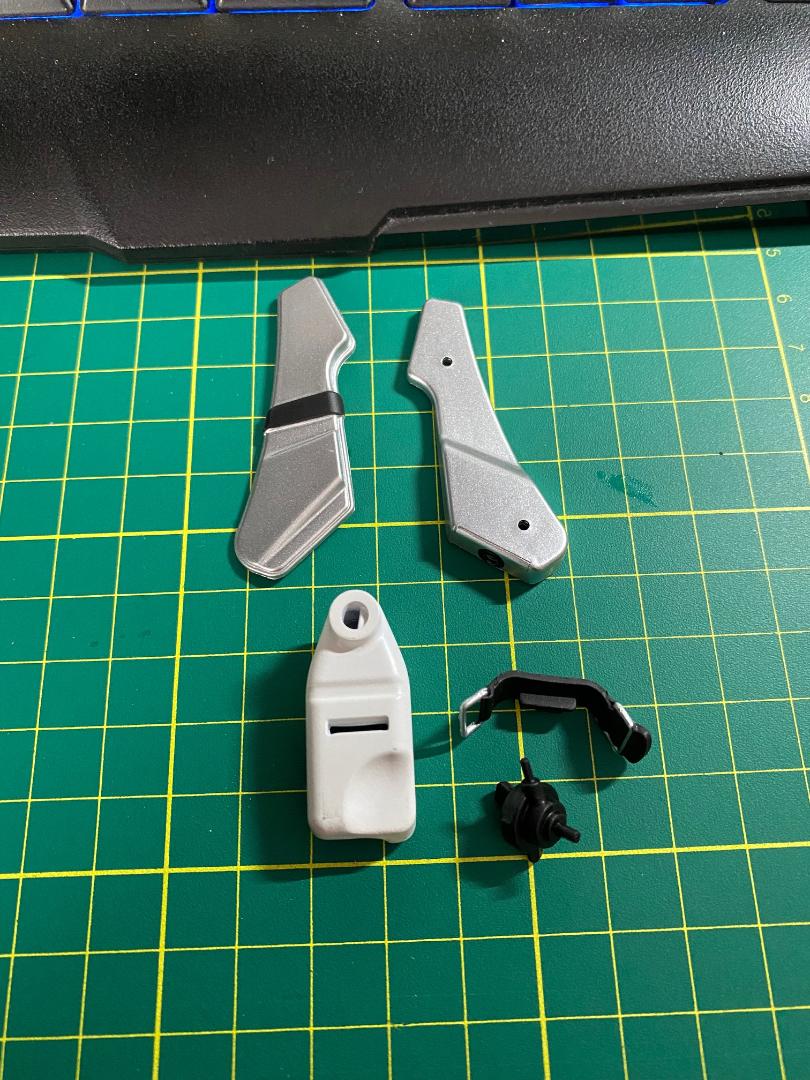
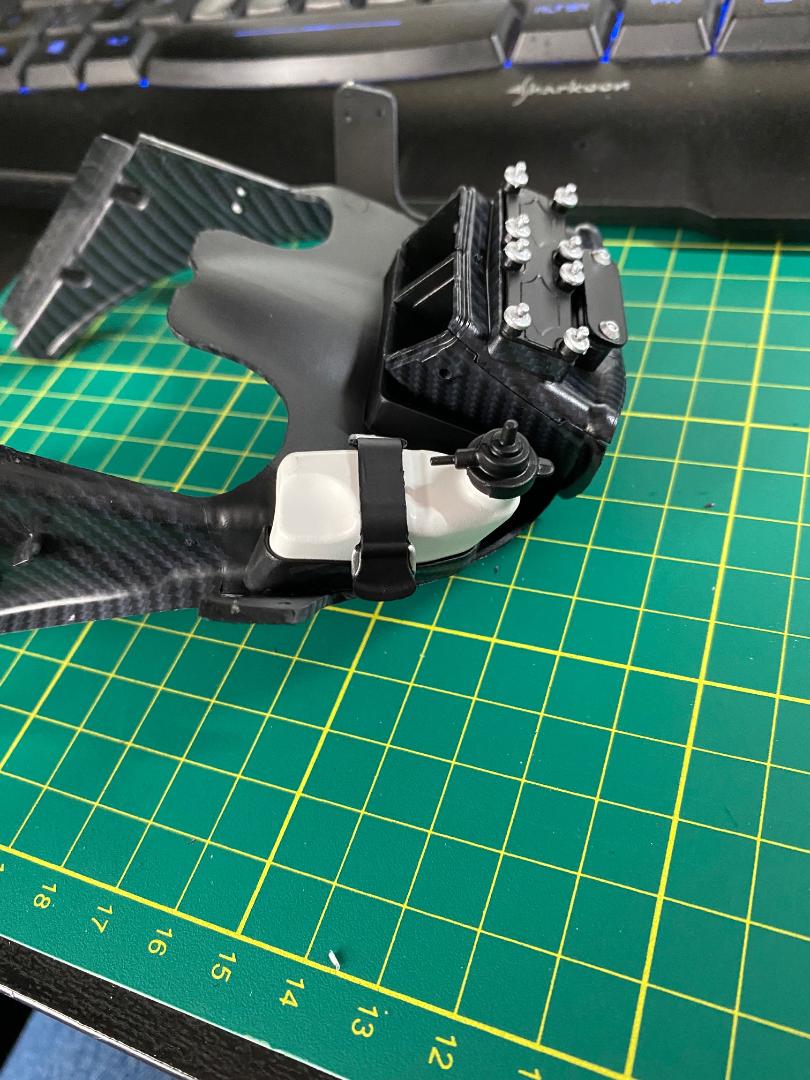
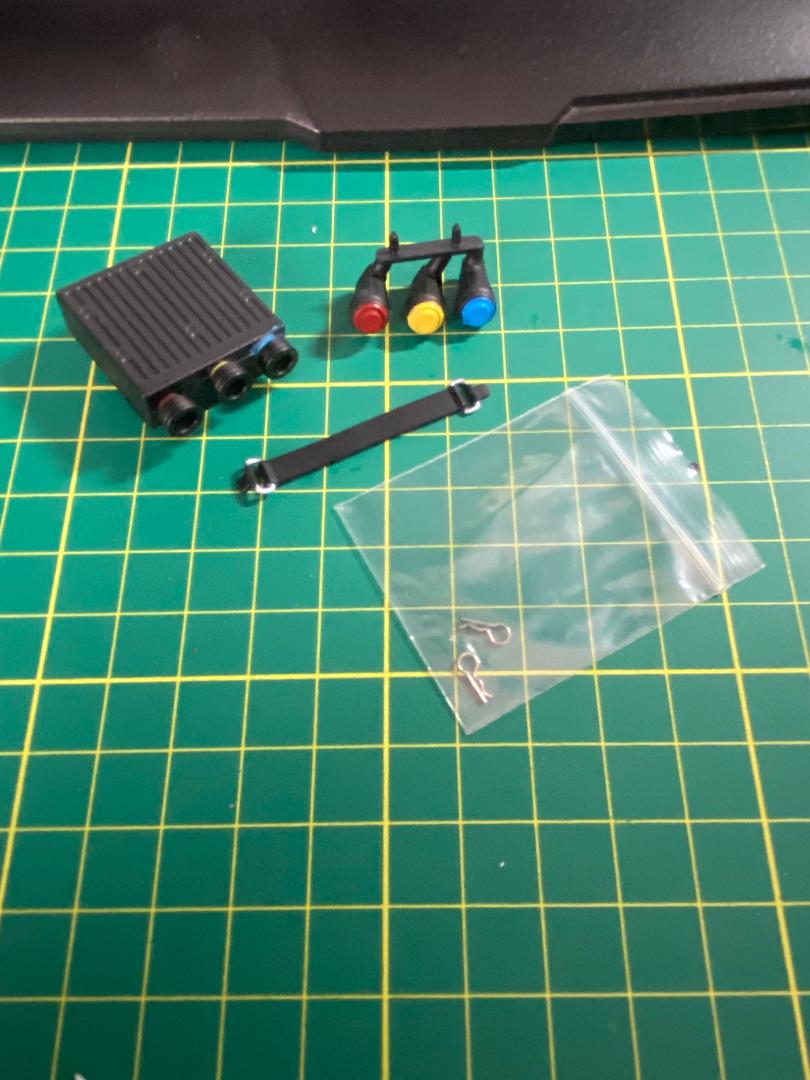
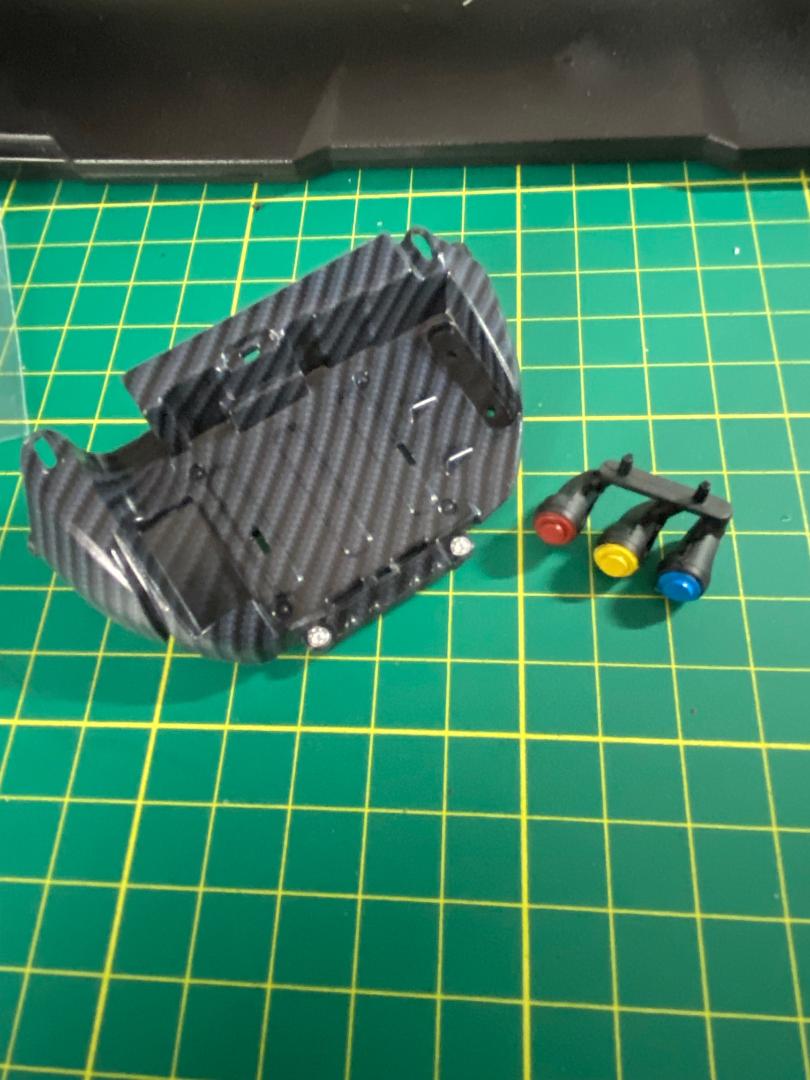
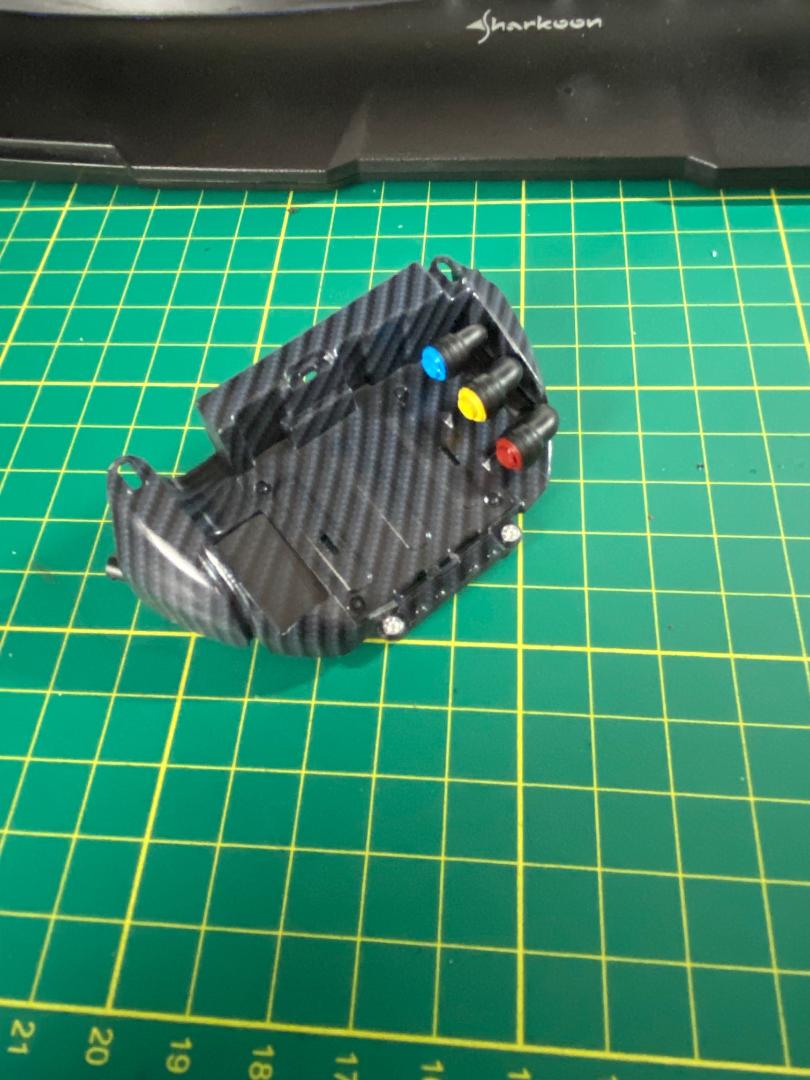
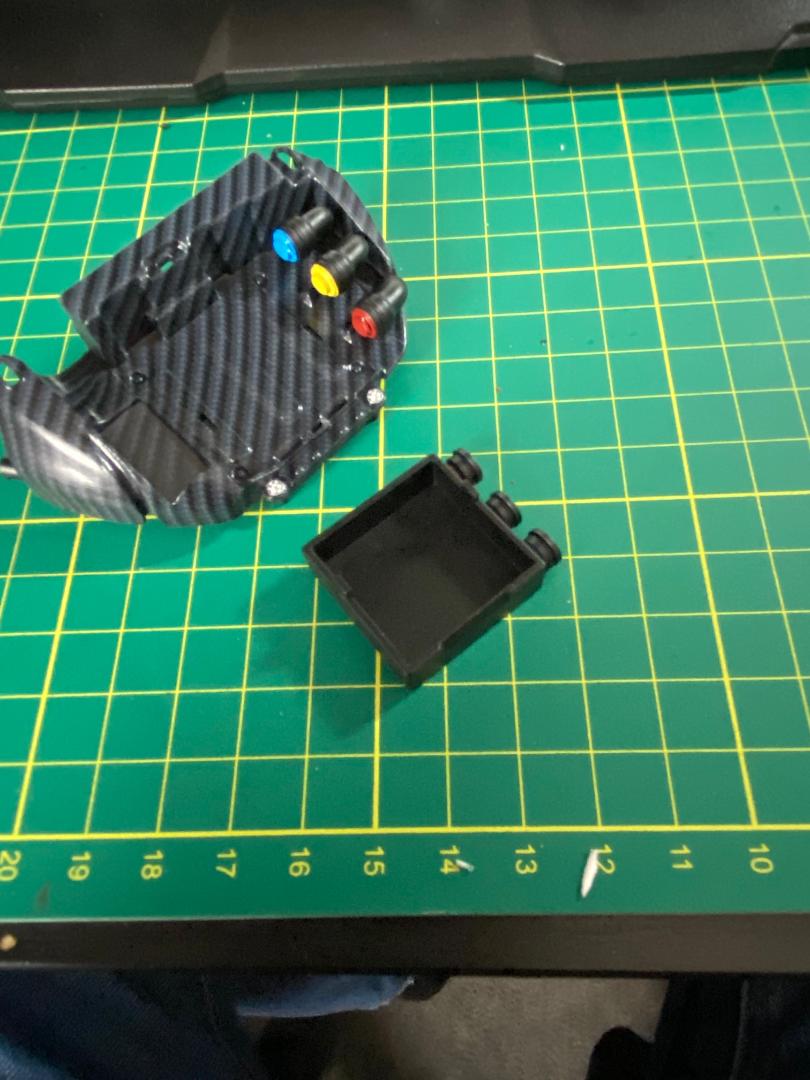
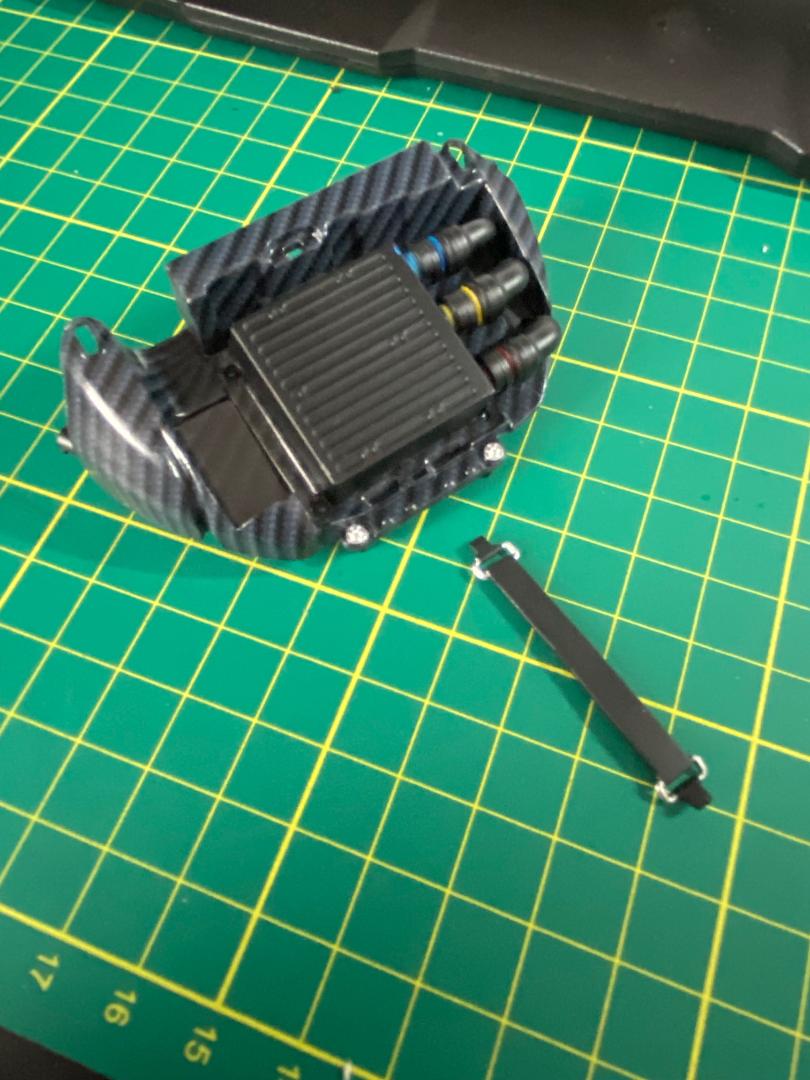
Eine Halterung für den Lufteinlaßkanal, ein weißer Kühlmittel- und ein silberner Ölrückgewinnungstank, sowie die Konsole mit Steuergerät, Kabelanschlüsseln, Halteriemen und zwei echten Metall-Fokkernadeln als Sicherungen.
Der Einbau läuft völlig reibungslos und bedarf eigentlich nur der Bilder. Mein Plan, den Deckel von der Airbox erst einmal wegzulassen ist damit natürlich wieder hinfällig, da die Sicherungsstifte, durch die die Fokkernadeln gesteckt werden von unten durch das Steuergerätpanel gehen und damit ist der Airboxdeckel festgenagelt. Die vier Plastikstifte, die in die Löcher oben im Rahmen gedrückt werden sind sehr stramm und ich werde mich schön hüten, das nochmal abzupulen.
 " />
" /> " />
" /> " />
" /> " />
" /> " />
" /> " />
" /> " />
" /> " />
" /> " />
" /> " />
" /> " />
" /> " />
" />
Maddin- Schneidmatten-Virtuose
doc_raven1000 mag diesen Beitrag
Re: Valentino Rossi's Yamaha YZR M1 in 1:4 von DeAgostini
![]() von Maddin Mo 14 März 2022, 14:22
von Maddin Mo 14 März 2022, 14:22
 " />
" /> " />
" /> " />
" /> " />
" /> " />
" /> " />
" /> " />
" /> " />
" /> " />
" /> " />
" /> " />
" /> " />
" />
Maddin- Schneidmatten-Virtuose
doc_raven1000 mag diesen Beitrag
Re: Valentino Rossi's Yamaha YZR M1 in 1:4 von DeAgostini
![]() von Maddin Mi 16 März 2022, 13:36
von Maddin Mi 16 März 2022, 13:36
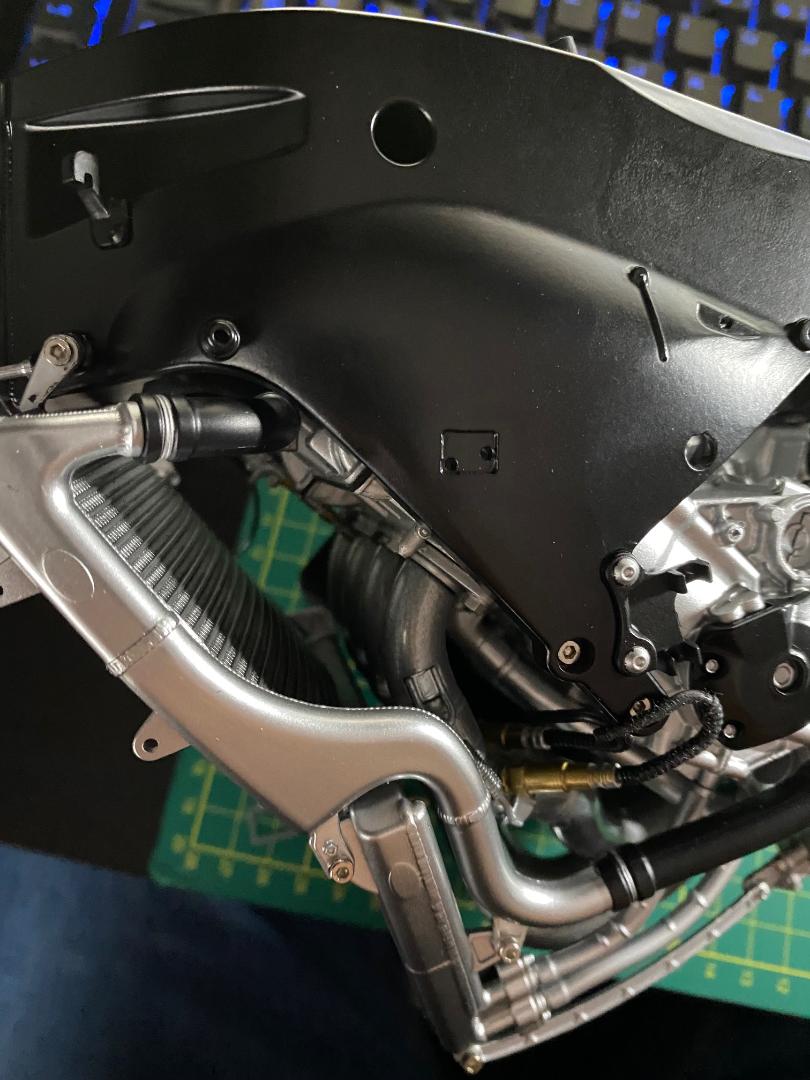
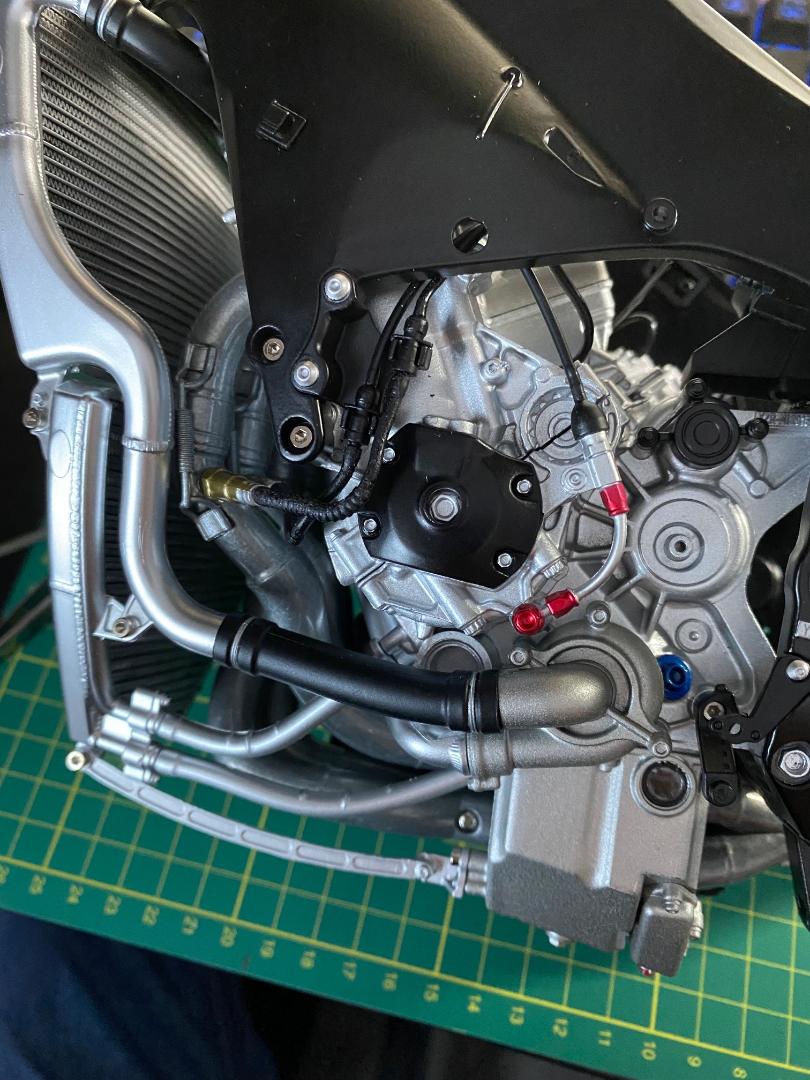
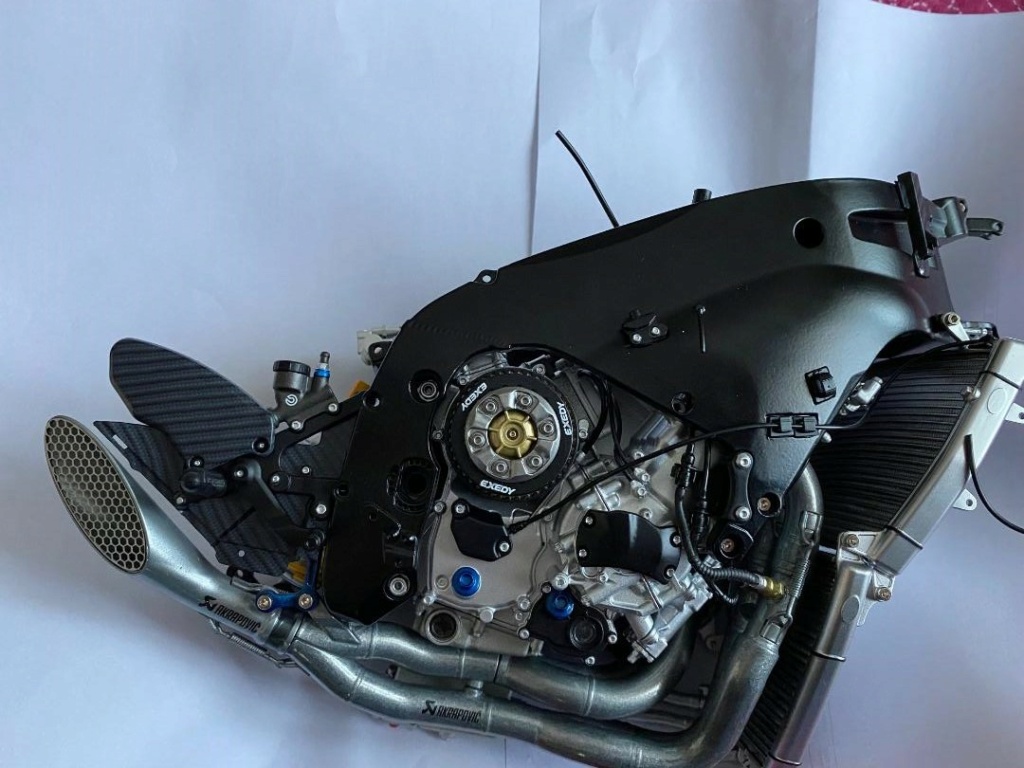
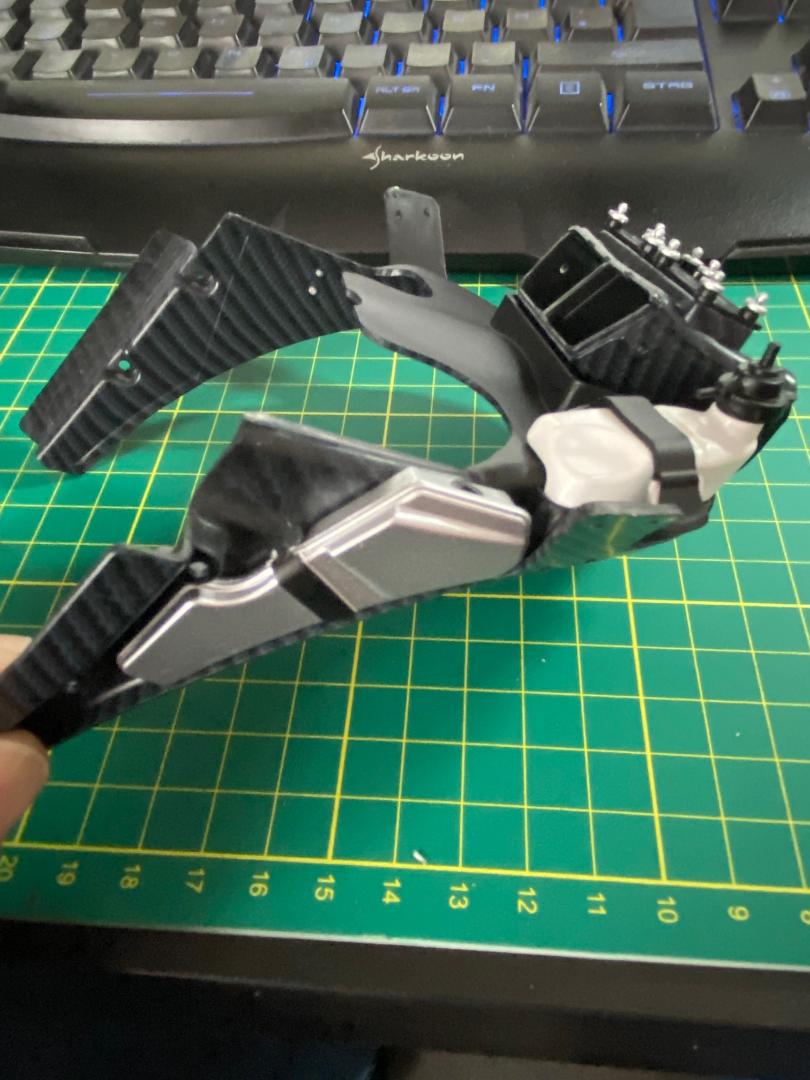
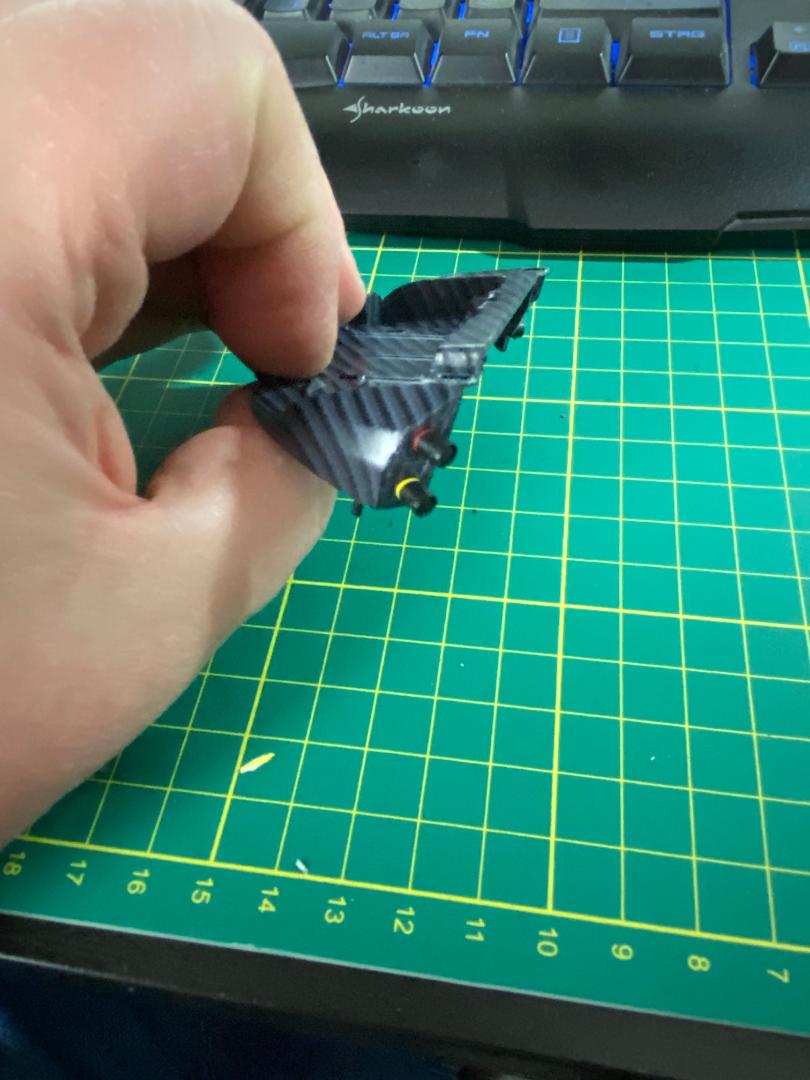
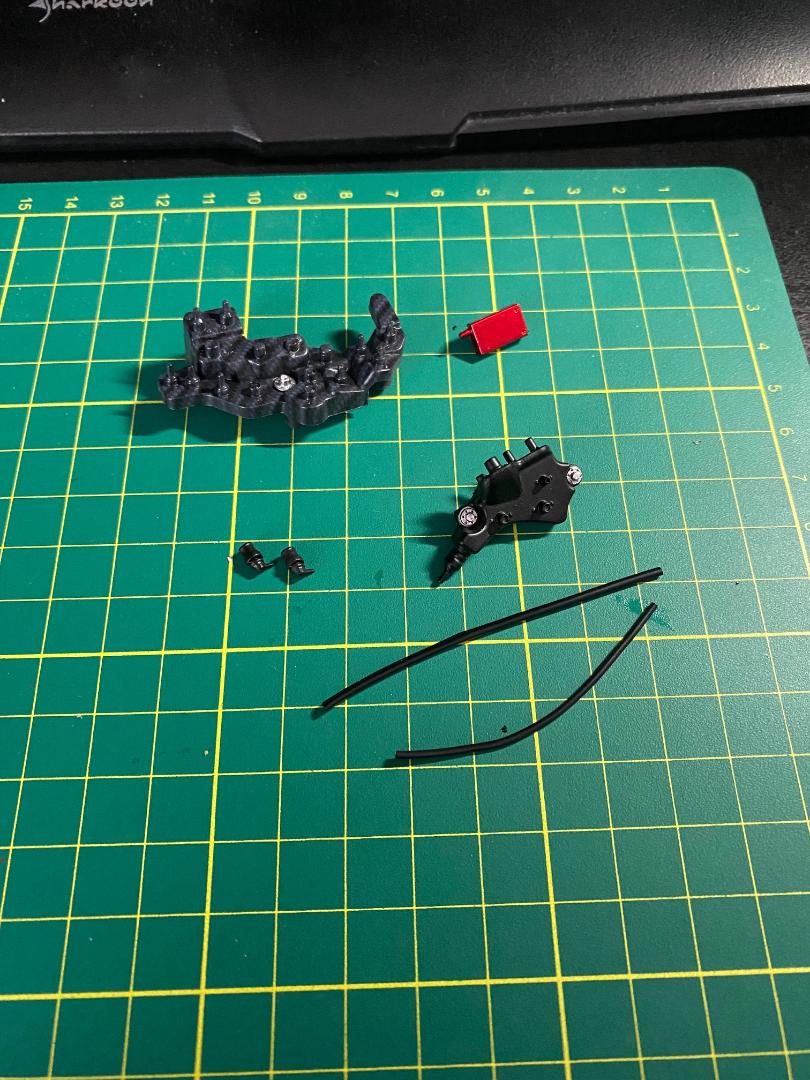
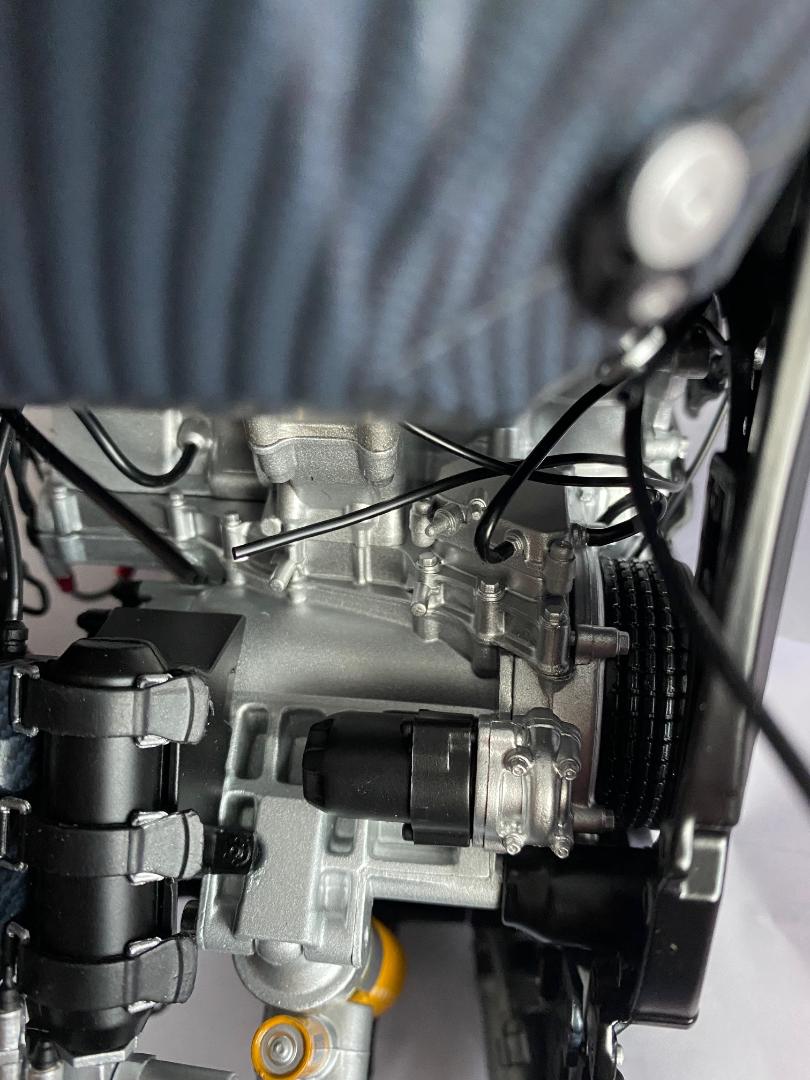
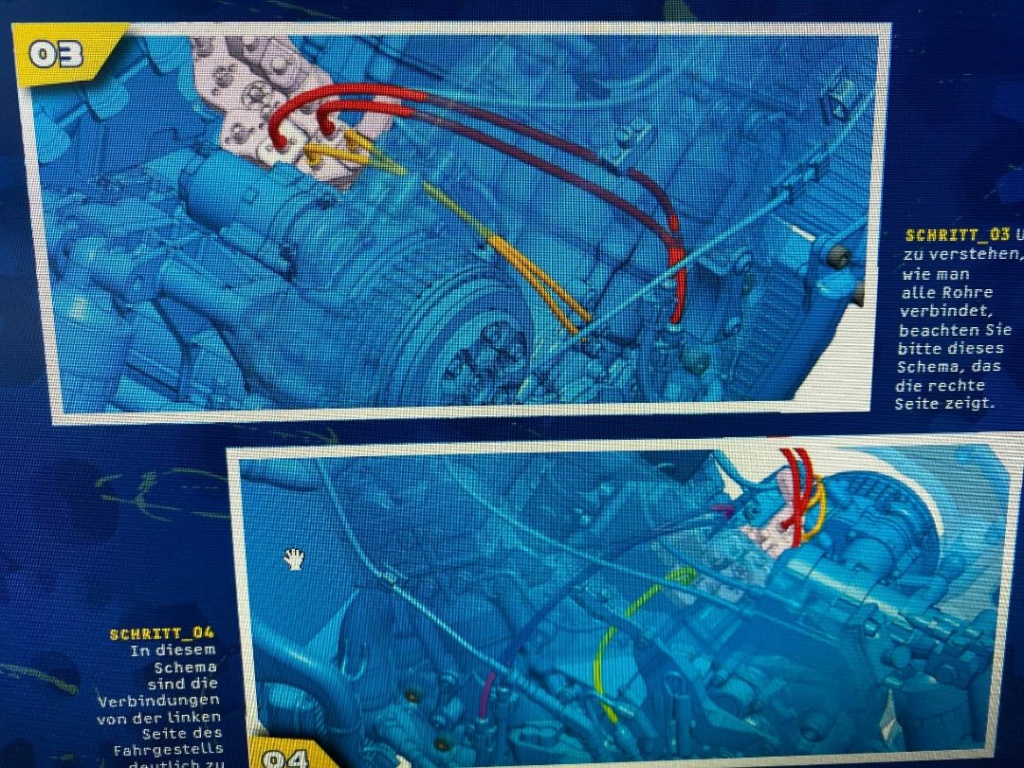
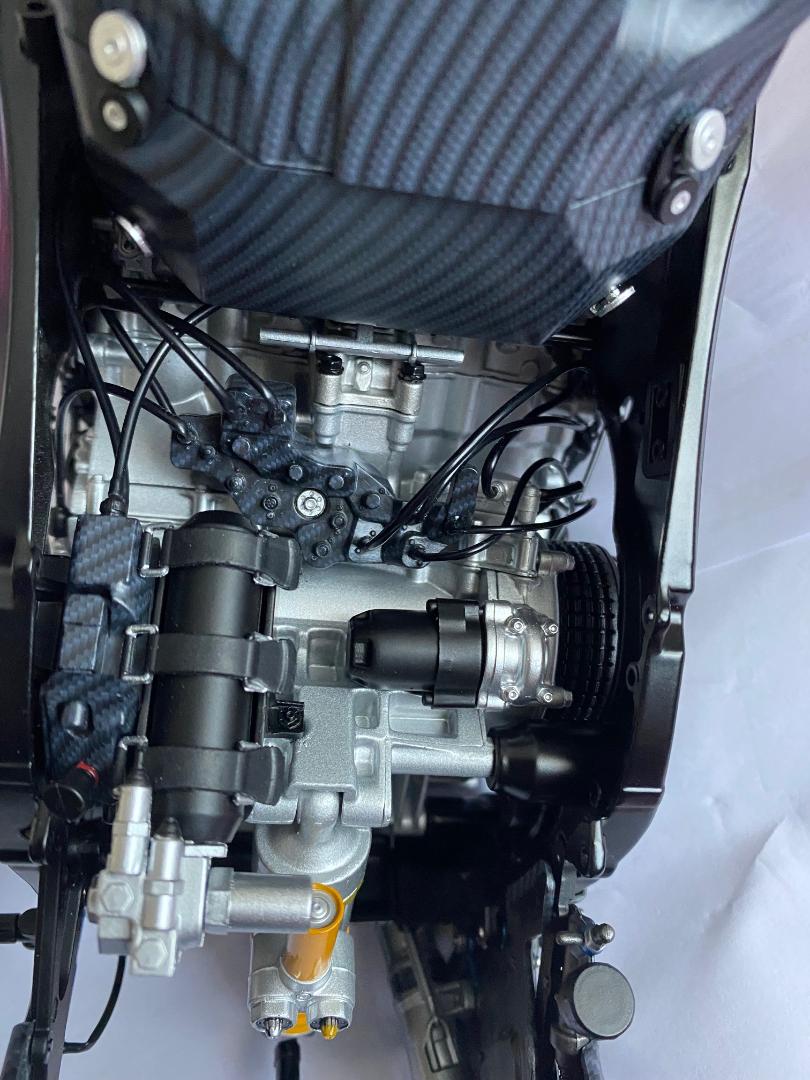
Ein weiteres Update von meiner KRAD-Baustelle: Es wurde eine elektronische Verteilereinheit am Motor angebracht und Leitungen von den Lambdasonden und den Motorseiten drangefummelt, zwei weitere Bauteile am Rahmen rechts innen angebracht und der Tank montiert. Alles Kunststoffteile und ich habe nicht ohne Grund "drangefummelt" geschrieben. Das war ganz schön nervenaufreibend, da erst einmal die Verteilereinheit sozusagen blind auf ihre Stifte gesetzt und verklebt werden musste und dann die doch recht störrischen Schlauche möglichst ohne Quetschstellen und Knicke auf ihre Anschlußstifte gedrückt und geklebt werden mussten. Ich hab dafür mal die Anleitung fotografiert. Hat bis auf eine Leitung auch letztendlich geklappt. Komischerweise habe ich immer noch aus Bauschritt 59 zwei silberne Sicherungshalterungen über und nirgendwo in den restlichen Bauanleitungen deren Verwendung gefunden. Na, egal...
 " />
" /> " />
" /> " />
" /> " />
" /> " />
" /> " />
" /> " />
" /> " />
" /> " />
" /> " />
" /> " />
" />
Maddin- Schneidmatten-Virtuose
Re: Valentino Rossi's Yamaha YZR M1 in 1:4 von DeAgostini
![]() von Maddin Mi 16 März 2022, 13:41
von Maddin Mi 16 März 2022, 13:41
 " />
" /> " />
" /> " />
" /> " />
" /> " />
" /> " />
" /> " />
" /> " />
" /> " />
" /> " />
" /> " />
" /> " />
" /> " />
" />
Maddin- Schneidmatten-Virtuose
doc_raven1000, maxl und Thoto mögen diesen Beitrag
Re: Valentino Rossi's Yamaha YZR M1 in 1:4 von DeAgostini
![]() von Hartmut Mi 16 März 2022, 14:21
von Hartmut Mi 16 März 2022, 14:21


Hartmut- Modellbau-Experte

Re: Valentino Rossi's Yamaha YZR M1 in 1:4 von DeAgostini
![]() von doc_raven1000 Mi 16 März 2022, 18:30
von doc_raven1000 Mi 16 März 2022, 18:30
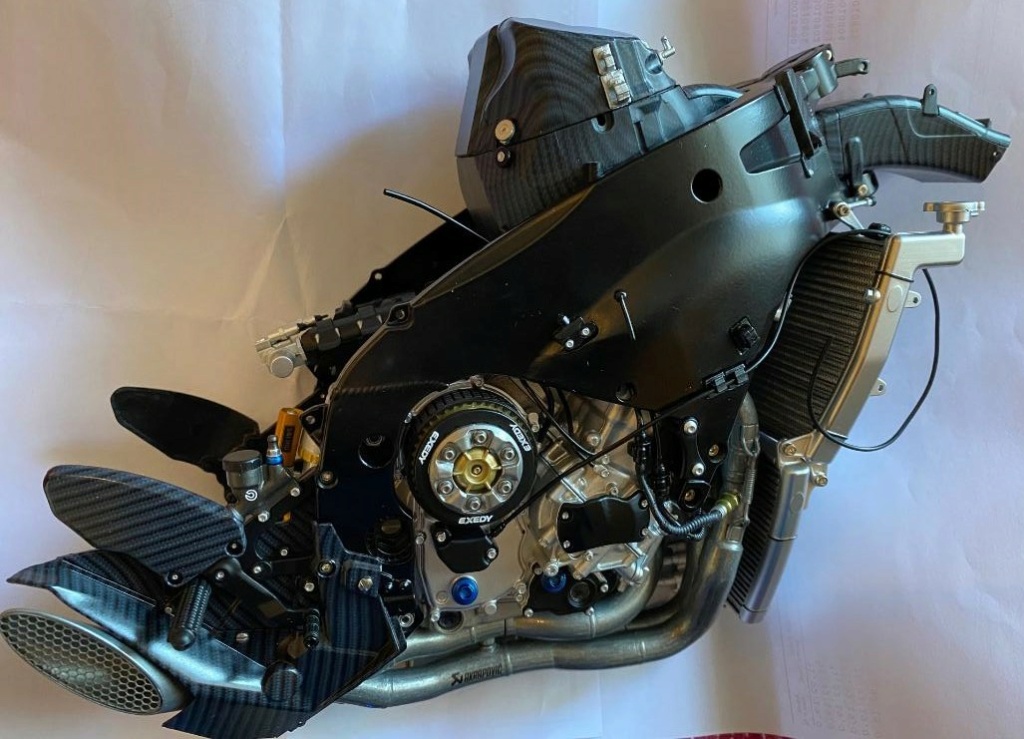
da sieht man wie viel Technik in so einer Rennsemmel steckt


doc_raven1000- Modellbaumeister
Re: Valentino Rossi's Yamaha YZR M1 in 1:4 von DeAgostini
![]() von Gravedigger77 Do 17 März 2022, 11:40
von Gravedigger77 Do 17 März 2022, 11:40
Klasse was du zeigst
Und auf manchen Bildern muss ich wirklich sagen bei nem anderen Hintergrund könnt man
es für ein richtiges Bike halten

Gravedigger77- Kleinteile-Fetischist
Re: Valentino Rossi's Yamaha YZR M1 in 1:4 von DeAgostini
![]() von Maddin Do 17 März 2022, 15:27
von Maddin Do 17 März 2022, 15:27
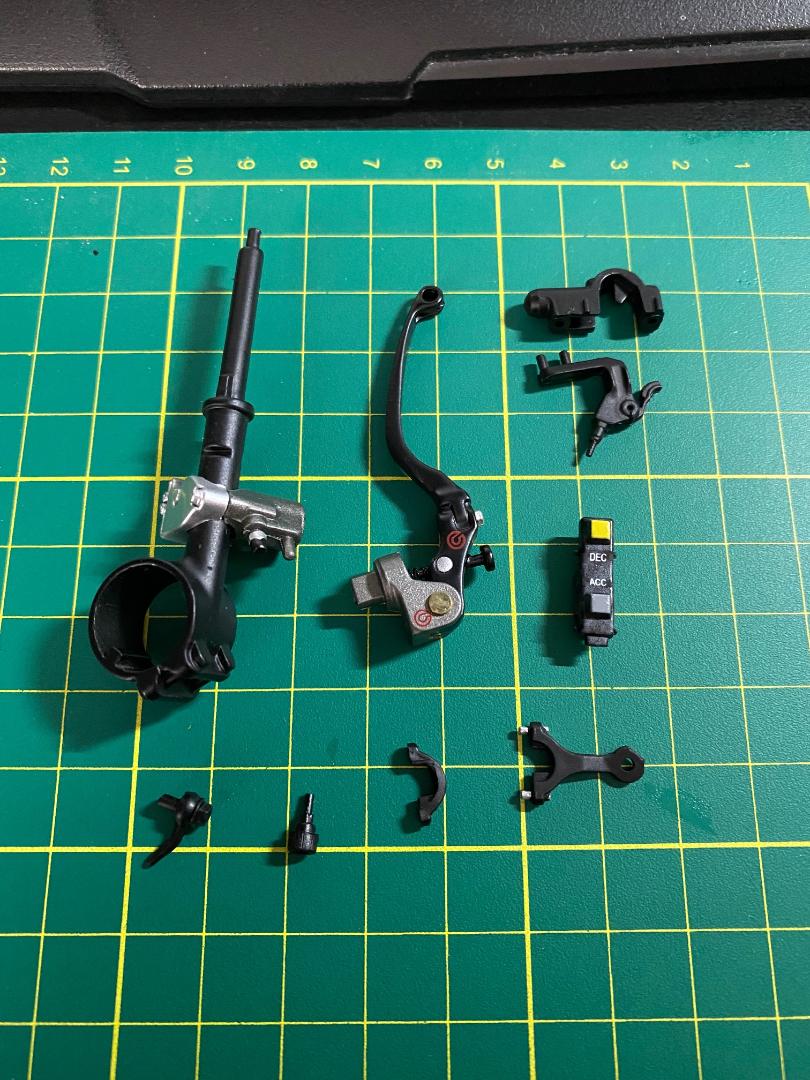
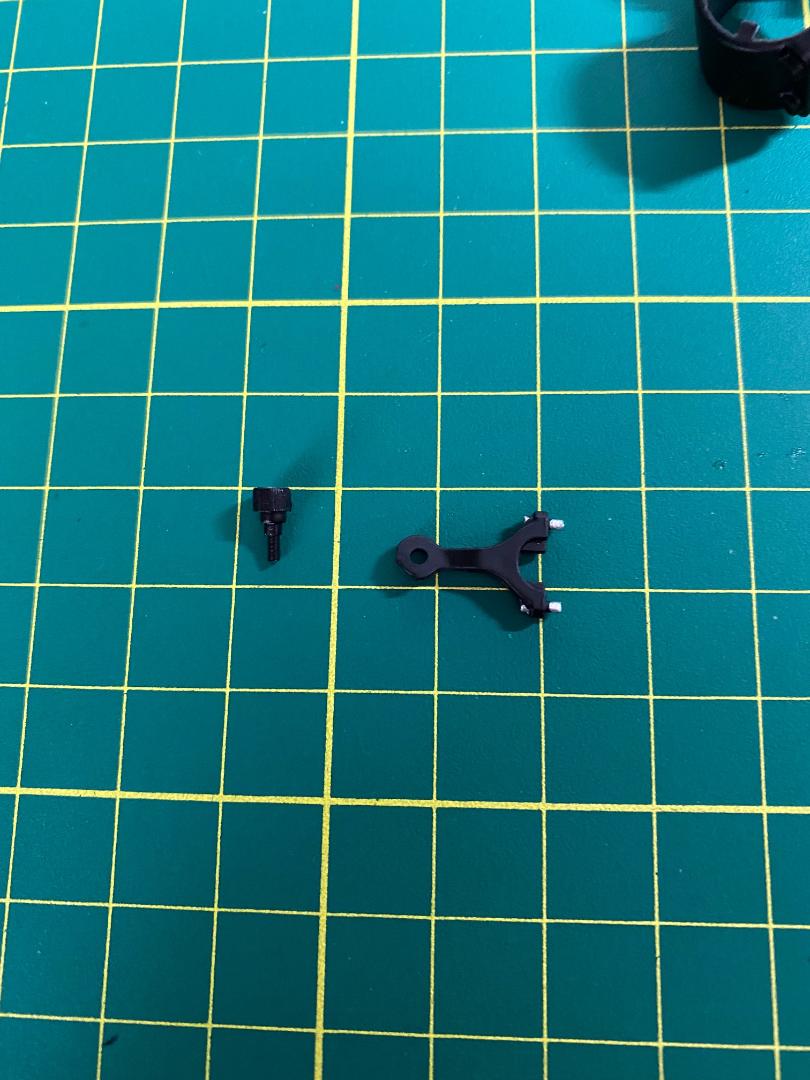
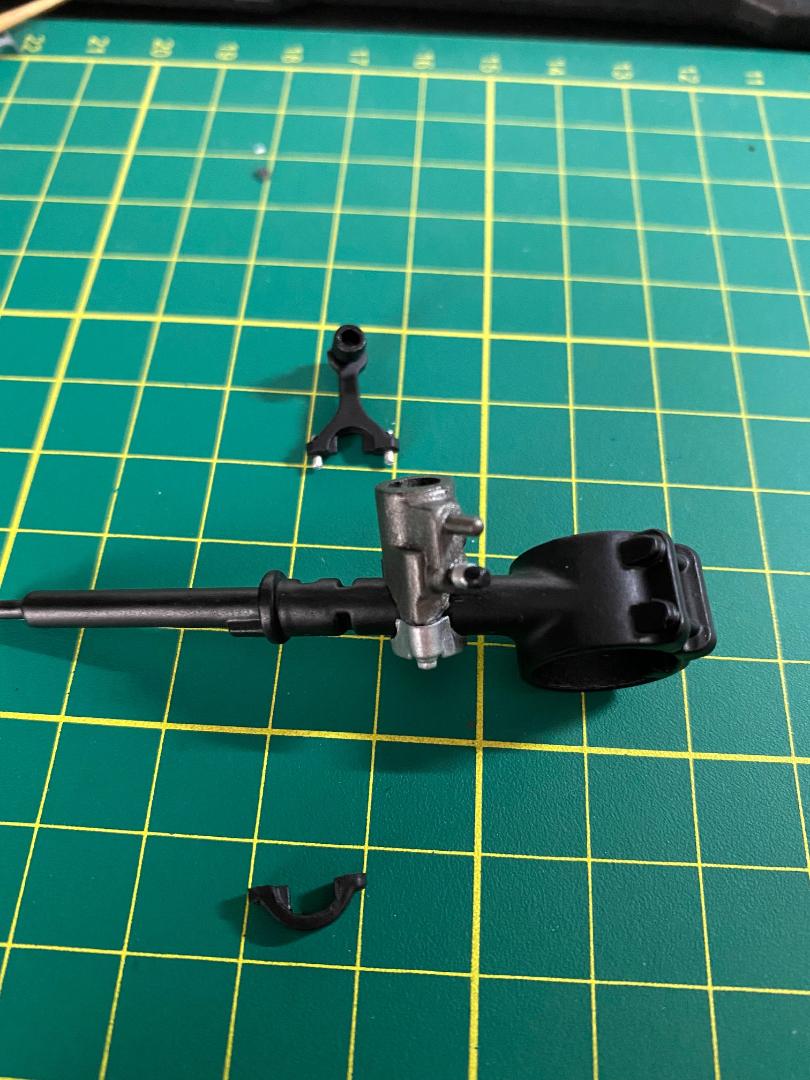
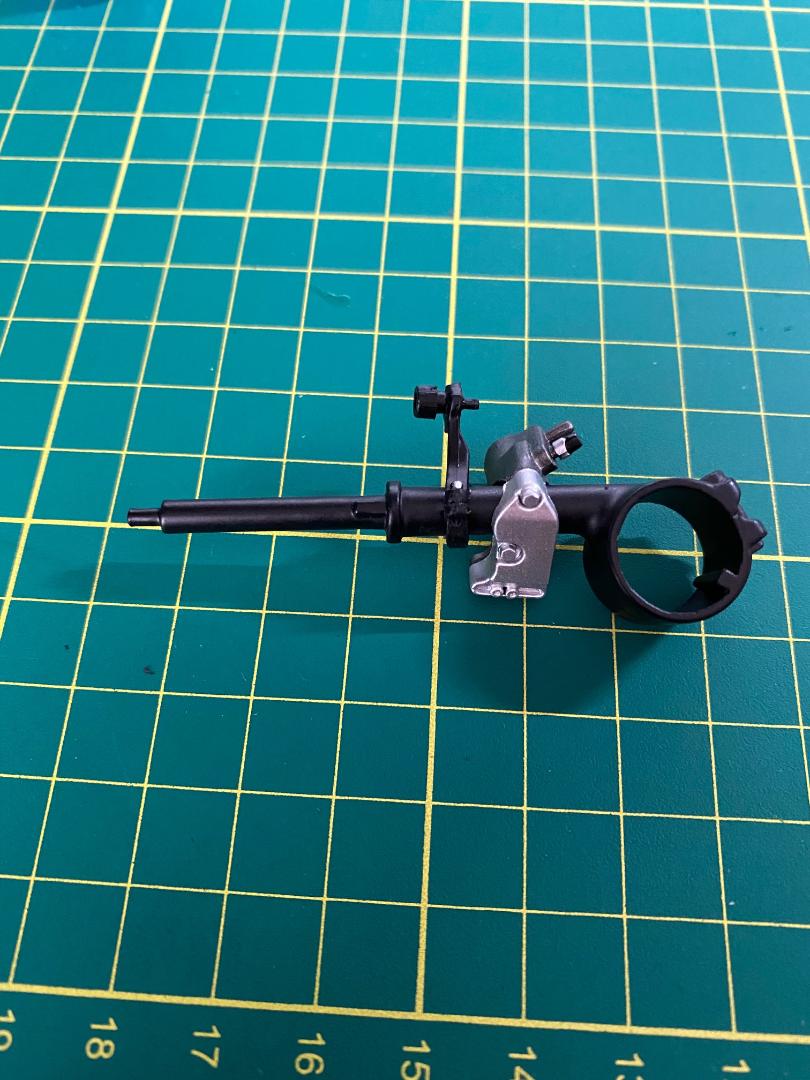
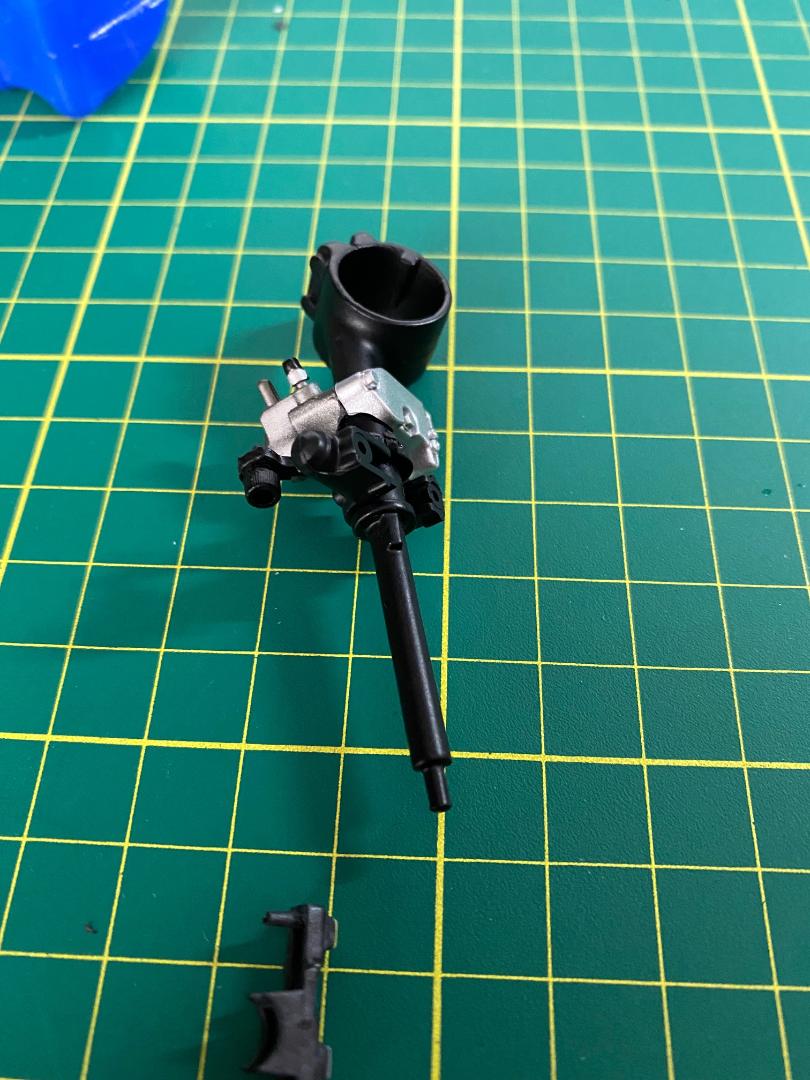
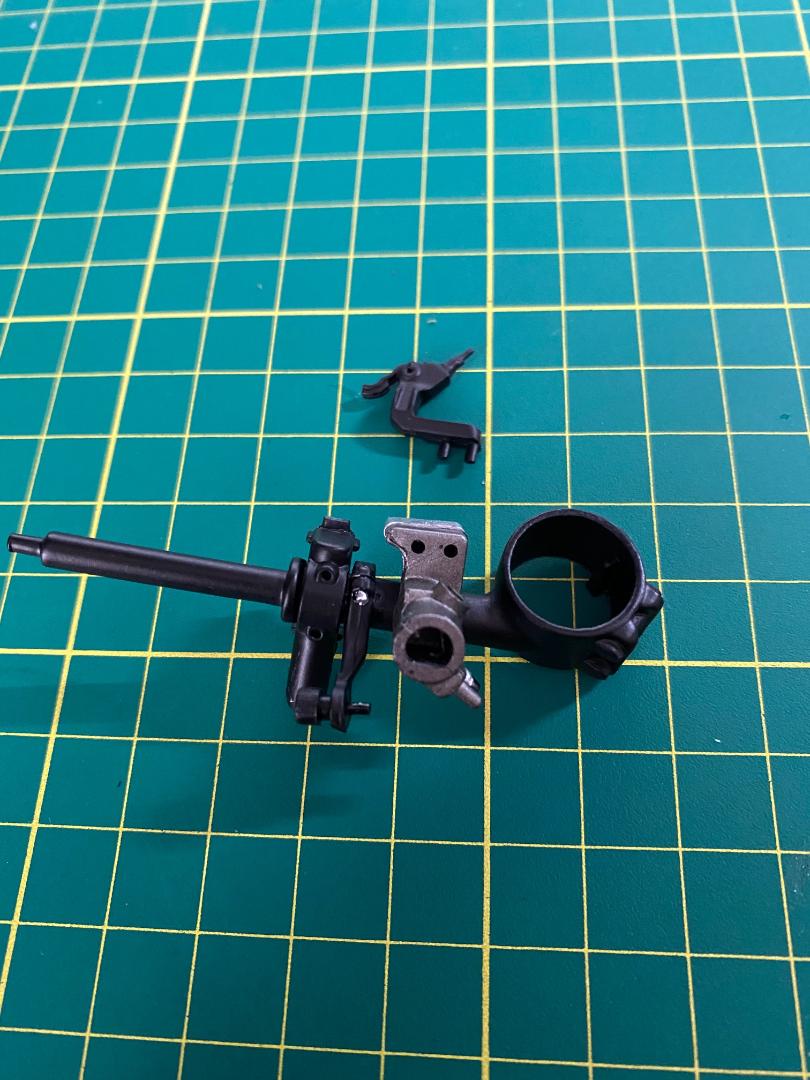
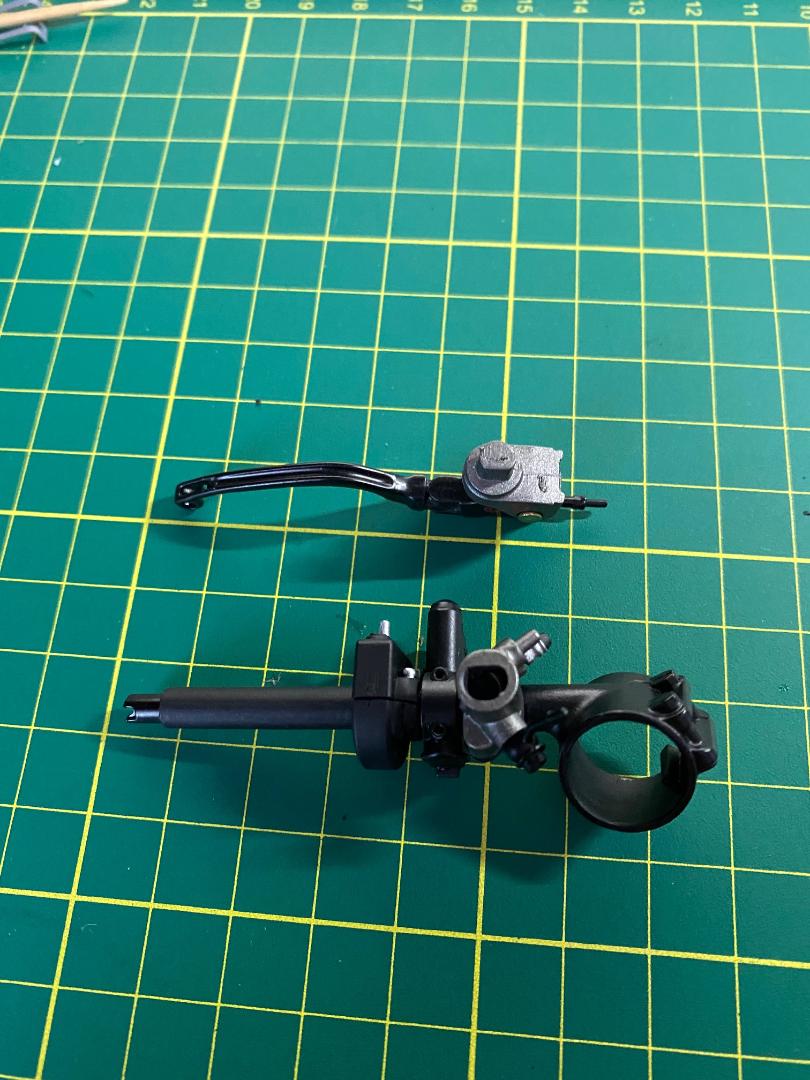
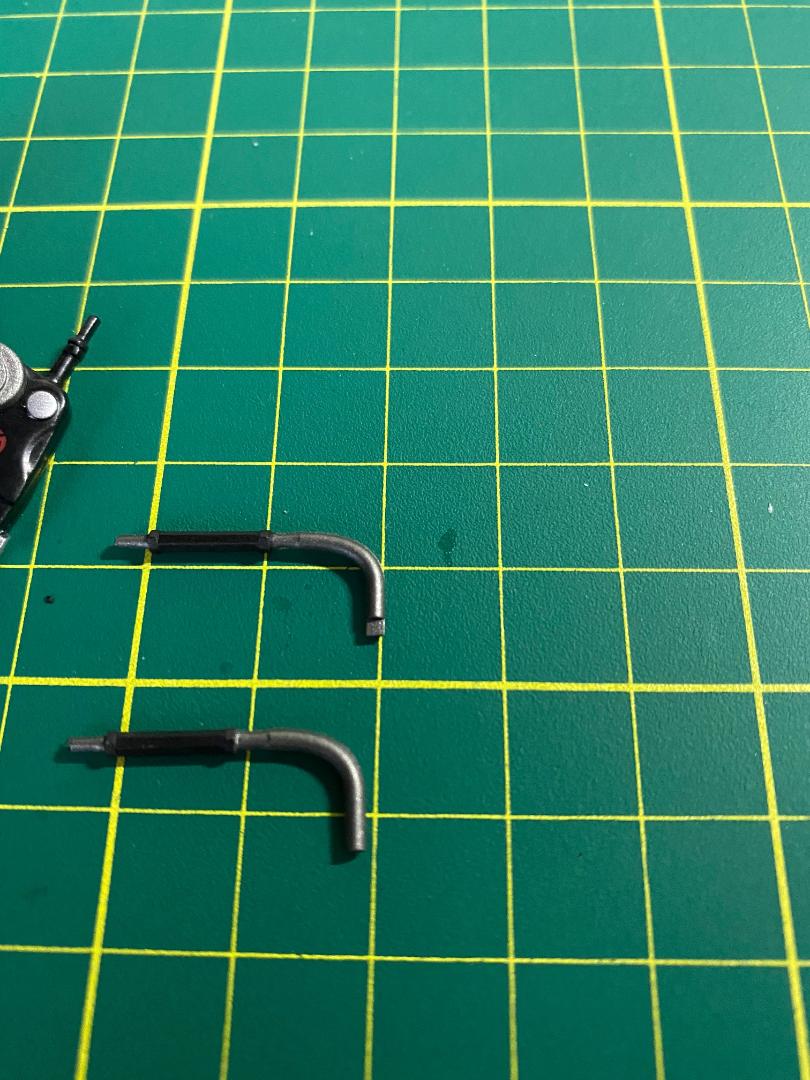
So, nu geht`s aber weiter mit der linken Lenkerhälfte. Hier sind Lenkerstange und Kupplungshebel aus Metall und der Rest aus Kunststoff. Der Zusammenbau strikt nach Vorschrift gestaltet sich recht problemlos. Allerdings mussten hier glatt mal die beiden Halbschalen für die Einstellmutterhalterung Bilder 02-04) innen ausnahmeweise gut engratet werden, um über die Lenkerstange und in ihre Führungen zu passen.
Echt cool: Ich hab erst beim Anbauen des Kupplungsgriffs gemerkt, dass der ja beweglich ist und durch eine Feder wieder äußerst realistisch zurückgedrückt wird, wenn man mal die Kupplung zieht. Diese kleine Baugruppe wurde schon fertig montiert geliefert.
 " />
" /> " />
" /> " />
" /> " />
" /> " />
" /> " />
" /> " />
" /> " />
" /> " />
" /> " />
" /> " />
" /> " />
" /> " />
" />
Maddin- Schneidmatten-Virtuose
John-H., doc_raven1000 und maxl mögen diesen Beitrag
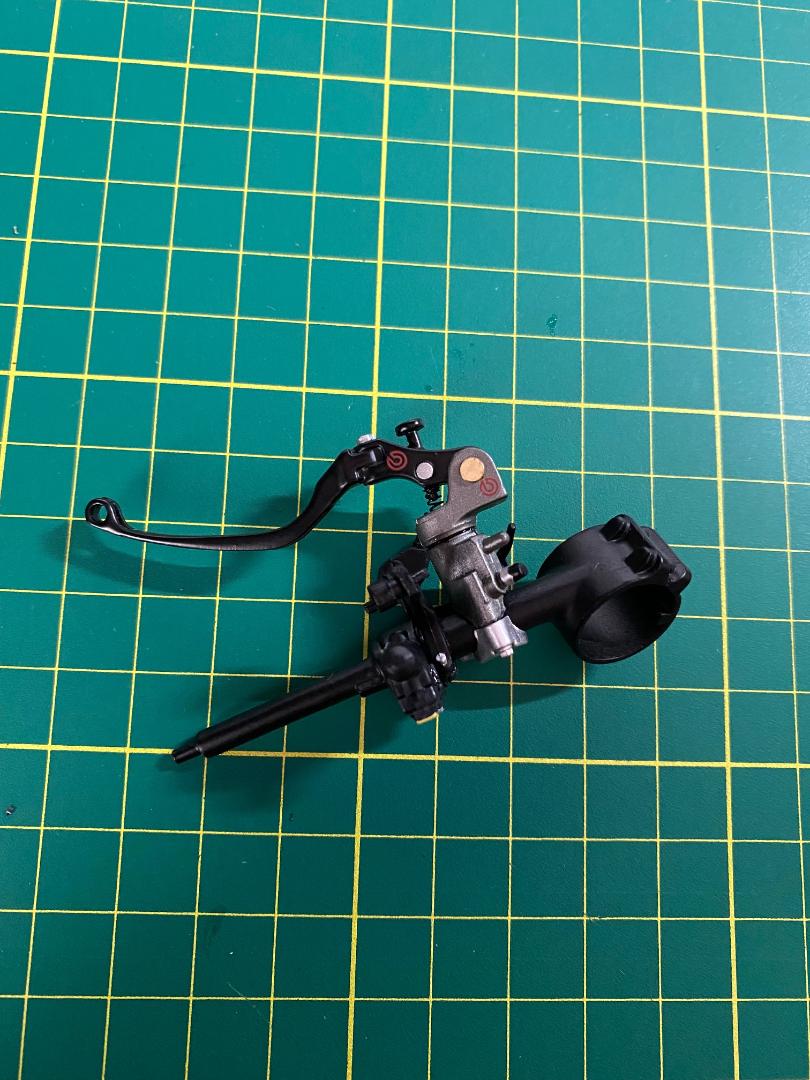
Re: Valentino Rossi's Yamaha YZR M1 in 1:4 von DeAgostini
![]() von Maddin Fr 18 März 2022, 12:28
von Maddin Fr 18 März 2022, 12:28
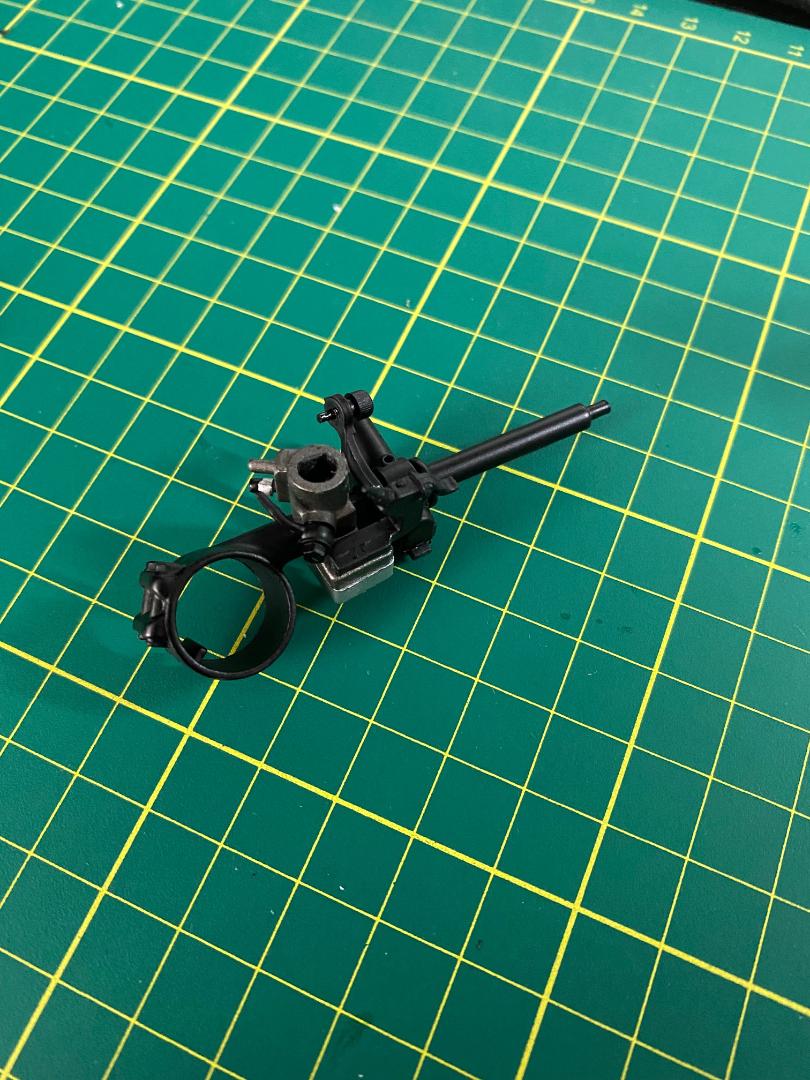
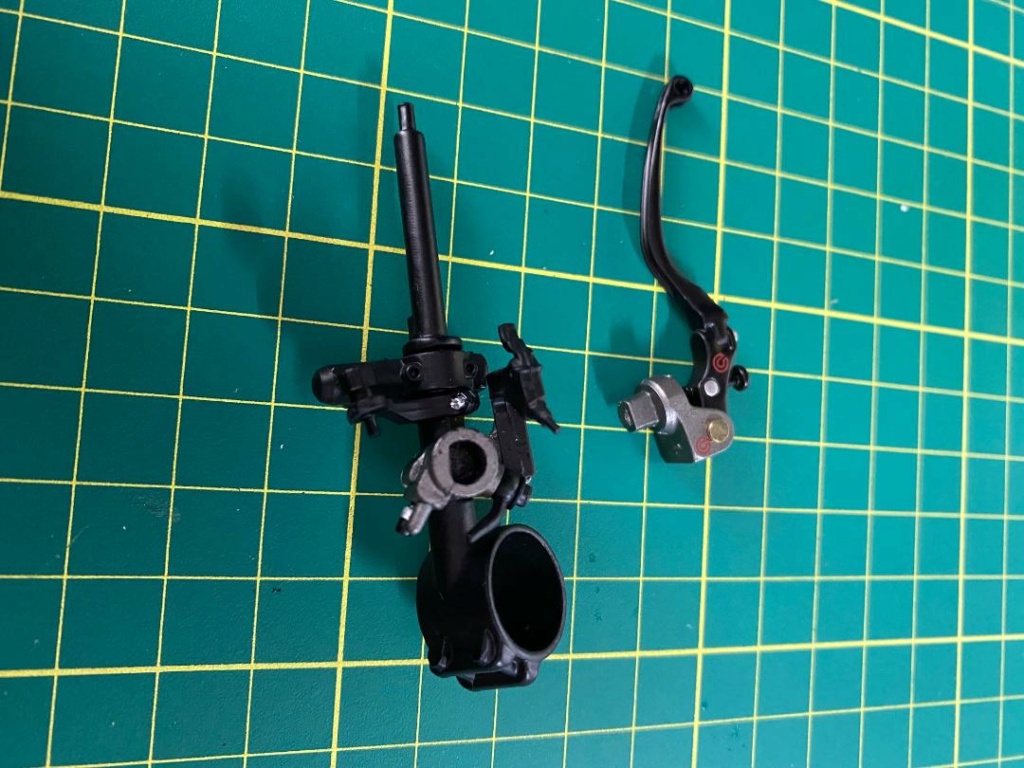
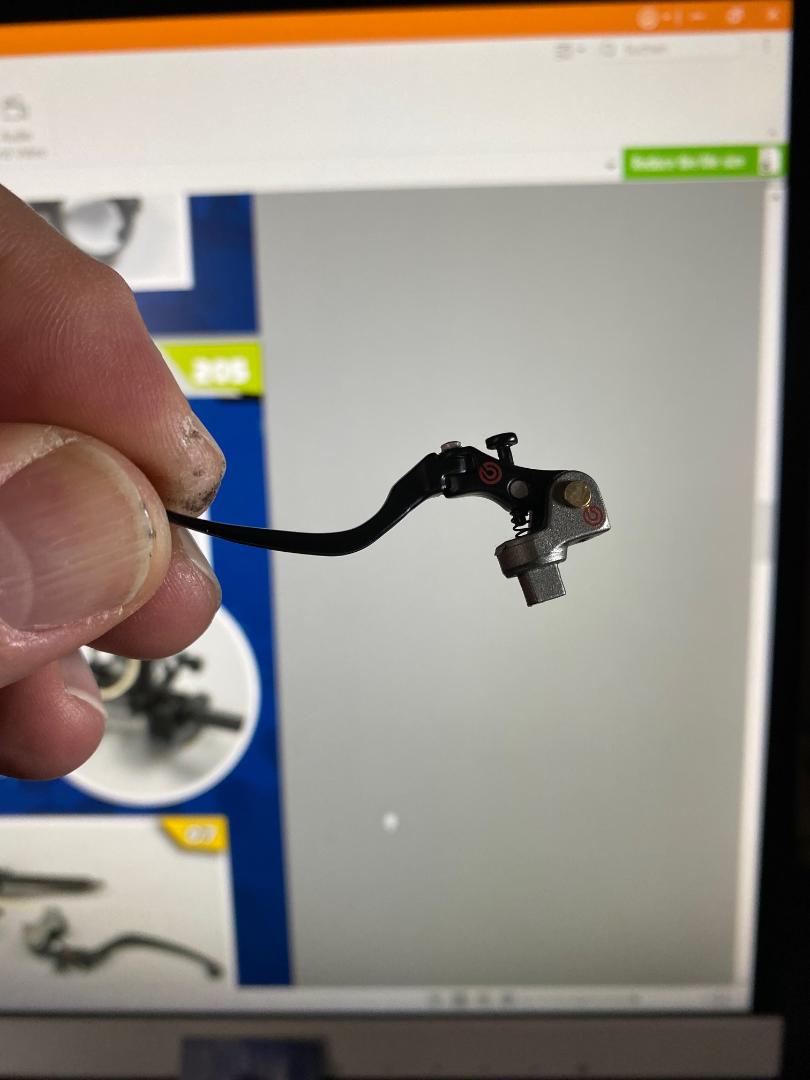
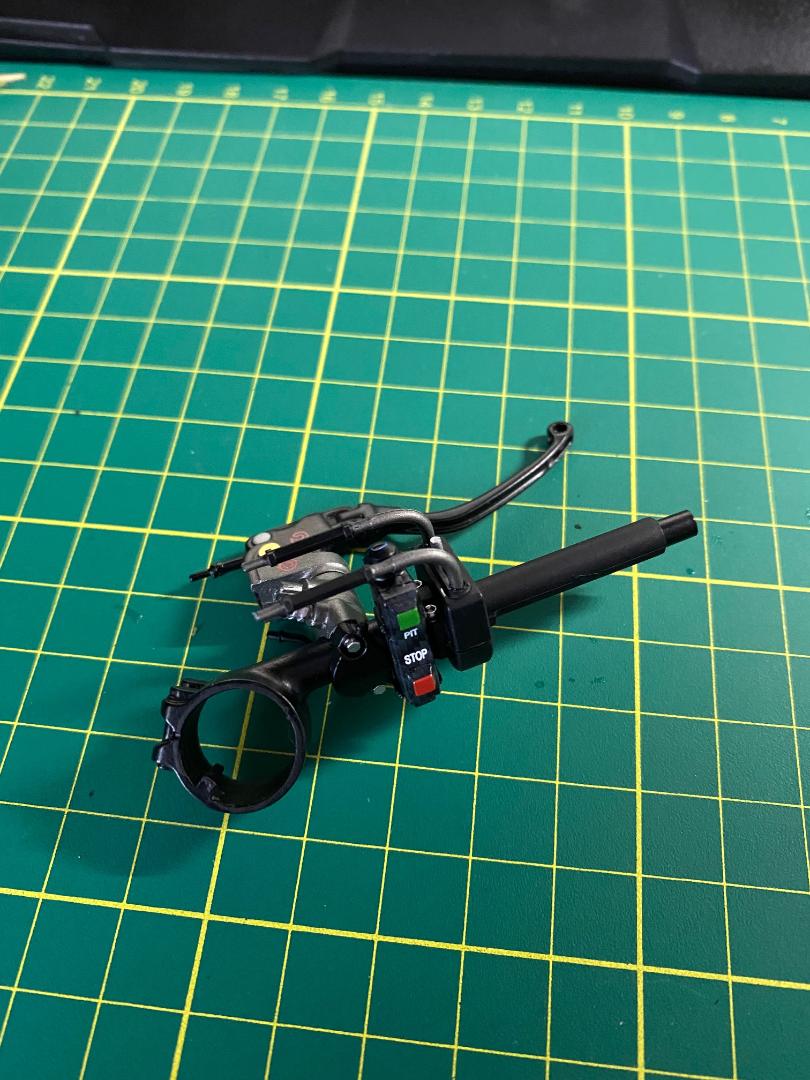
Heute geht`s um den rechten Lenkerstummel. Lenkstange und Bremsgriff sind wieder aus Metall, letzterer wieder federbelastet. Die Montage läuft genauso, wie bei der linken Lenkerhälfte. Die beiden Anschlüsse für die Gaszüge haben auf einer Seite eine Abflachung, mit der sie in ihren Löchern im Griff richtig ausgerichtet montiert werden.
 " />
" /> " />
" /> " />
" /> " />
" /> " />
" /> " />
" /> " />
" /> " />
" /> " />
" /> " />
" />
Maddin- Schneidmatten-Virtuose
John-H. mag diesen Beitrag
Re: Valentino Rossi's Yamaha YZR M1 in 1:4 von DeAgostini
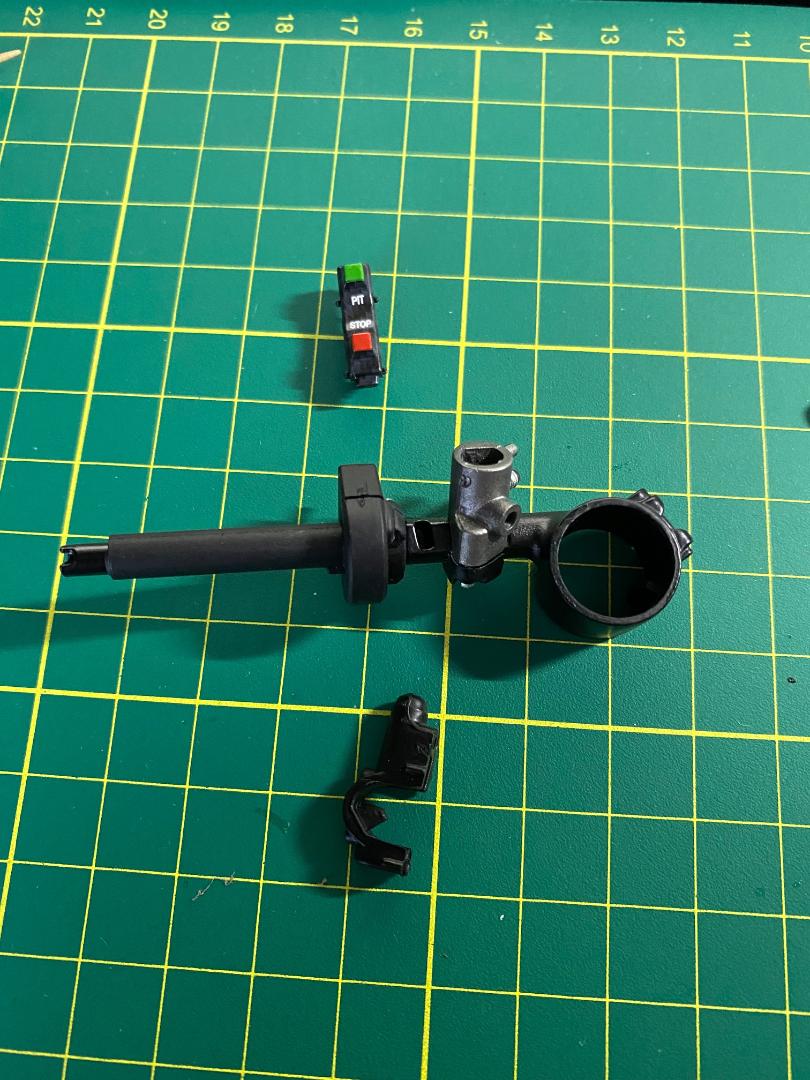
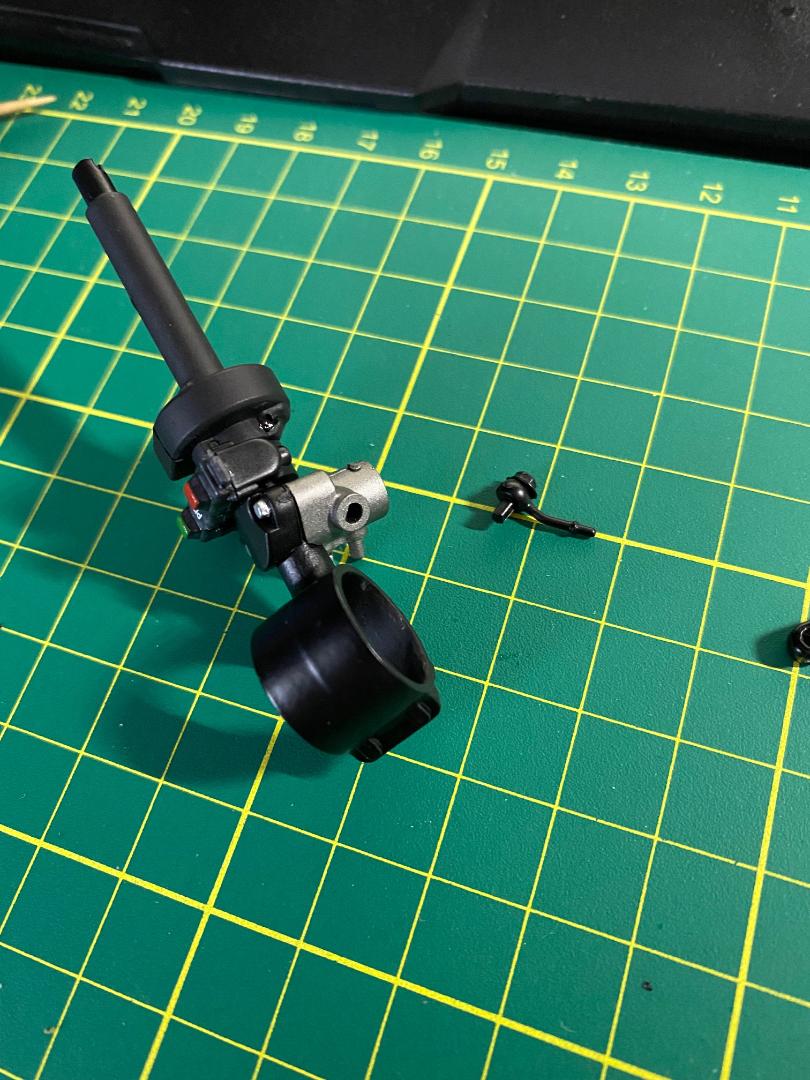
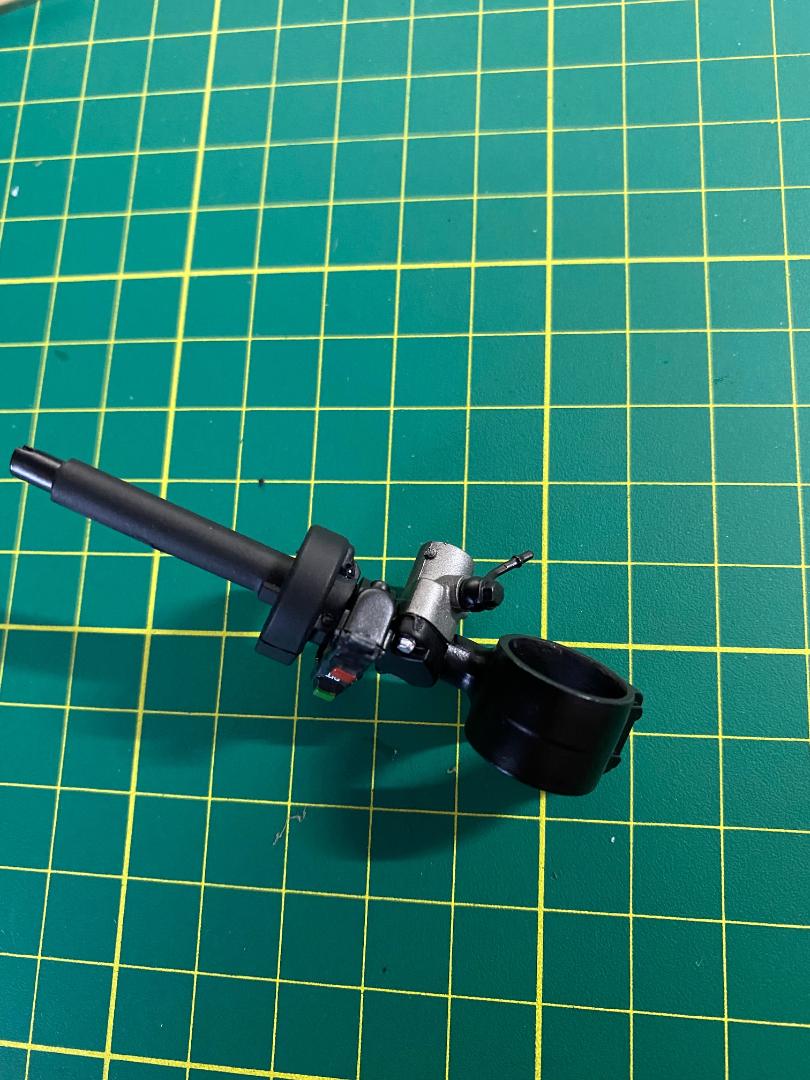
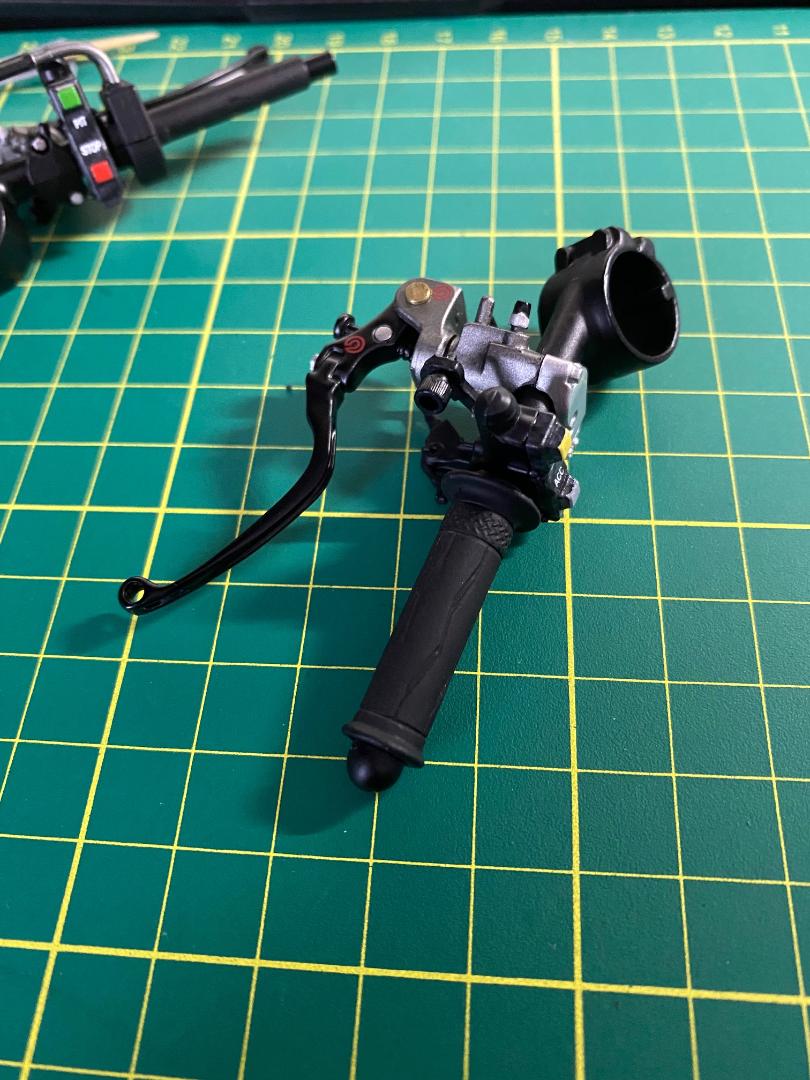
![]() von Maddin Fr 18 März 2022, 12:46
von Maddin Fr 18 März 2022, 12:46
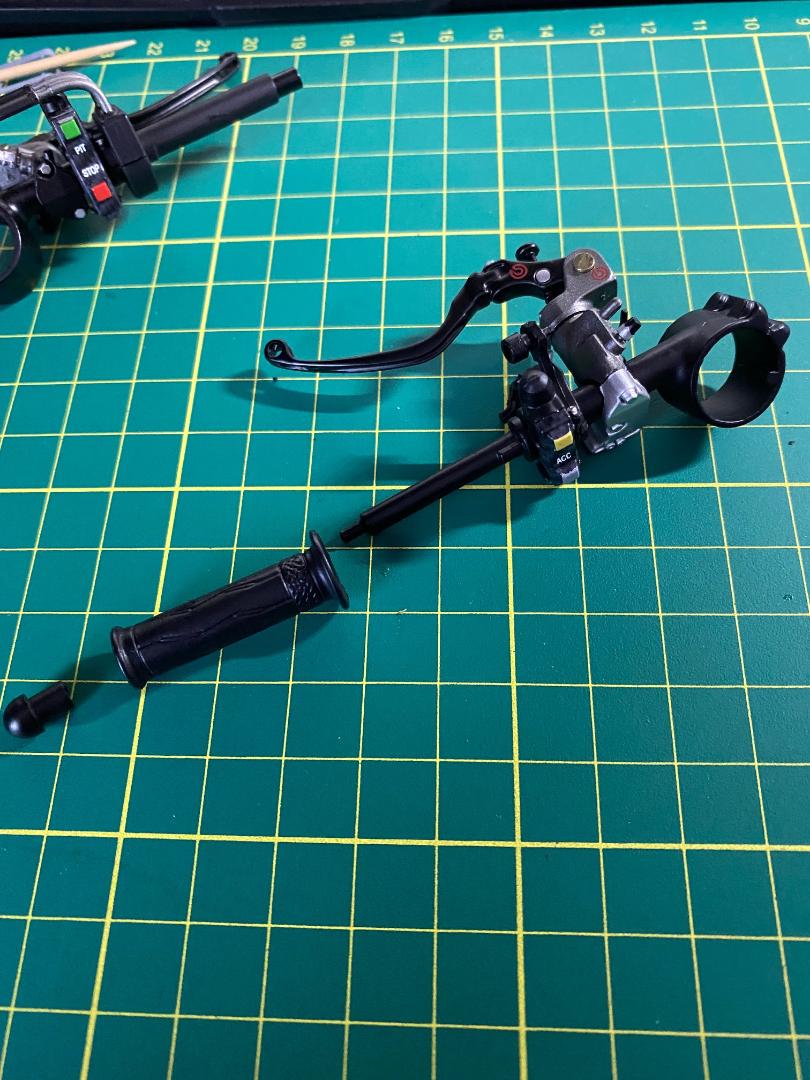
Und jetzt flipp ich richtig aus! Der Gasgriff ist drehbar und schnappt durch eine interne Feder zurück. Ich werd' bekloppt!
Das ist bis jetzt der beste Sammelmodellbausatz, den ich in die Finger bekommen habe.
Aber nun erstmal der Reihe nach. Eigentlich ist bei diesem Bauschritt (69) gar nicht mehr so viel zu tun. Der linke Lenkerstummel bekommt seinen Griff und den Vibrationsdämpfer. Aus hier wieder toll gelöst: Das Griffgummi fühlt sich von aussen so an, ist aber innen stabiler Kunststoff mit einer Nut gegen Verdrehen, die in eine Nase auf dem Lenkerstummel fasst. Das Kunststoff-Vibrationsdämpfergewicht wird einfach, aber sehr fest auf den Metallgrillstummel gedrückt und klemmt so das Griddgummi ein.
Beim rechten Lenkerstummel wird das Griffgummi ebenfalls mit einer Nut gegen das Verdrehen auf dem Gasgriff (ich könnte schon wieder ausflippen...) gesichert, aber das ist gar nicht so einfach. Es geht ziemlich stramm auf den Gasgriff drauf und man muss gut mit Nut und Feder zielen, um zu treffen. Ein Verdrehen auf dem Gasgriff habe ich wegen der internen Feder vermieden, da ich nicht weiß, wie stabil das Ganze ist. Zum Schluss kommt noch ein "Carbon"-Sturzbügel ans Griffende dran. Auch er ist nur in einer Position zu montieren. Hier ist der Steg im Bügel etwas flach ausgeführt, aber wenn man vorsichtig die Inbusschraube anzieht und dabei immer wieder die Position des Bügels überprüft klappt das ganz prima.
 " />
" /> " />
" /> " />
" />Da ich das Ganze nun erstmal über das Wochenende verstaue stecke ich die Lenkerstummel noch nicht auf die Stehrohre der Vorerradgabel auf. Also bis bald an dieser Stelle.
Maddin- Schneidmatten-Virtuose
maxl mag diesen Beitrag
Gesponserte Inhalte
Seite 3 von 5 • 1, 2, 3, 4, 5

 Ähnliche Themen
» YAMAHA YZR M1 inkl. Driver
» Yamaha YZF R1 in 1:12 von Tamiya
» YAMAHA RD 250 LC vom Tamiya 1:12
» Bau einer Yamaha MT-01
Der lustige Modellbauer :: Fahrzeuge :: Etappenbausätze / Partworks / Sammelserien :: Fertige Bauberichte